

Results 8,281 to 8,290 of 11185
 226Likes
LinkBacks (?)
-
12-26-2016, 11:32 AM
-
09-02-2016, 05:39 PM
-
whole garden made with pallets!! Love it!! | Pallets | Pinterest | Pallets, Pallets Garden and Wooden Pallets
Refback This thread03-06-2016, 11:30 AM -
10-20-2015, 05:29 PM
-
06-12-2015, 08:00 PM
-
02-26-2015, 01:58 PM
-
01-05-2015, 04:13 PM
-
12-19-2014, 10:19 AM
-
EMERGENCY: HUGE FEMA PANDEMIC EXERCISE IN USA IN NOVEMBER, INTERNET SHUT DOWN PART OF EXERCISE | Prepare4Survival
Refback This thread12-03-2014, 10:39 PM -
Off Grid World ? Ugly Duckling Shipping Container Home Built by Artist Is a Beautiful Swan on the Inside
Refback This thread11-25-2014, 03:10 PM -
11-17-2014, 10:59 PM
-
11-13-2014, 11:18 AM
-
11-09-2014, 02:54 PM
-
10-28-2014, 11:38 PM
-
10-26-2014, 05:54 AM
-
10-16-2014, 11:28 AM
-
10-03-2014, 01:25 PM
-
10-02-2014, 09:16 PM
-
09-26-2014, 07:00 PM
-
09-26-2014, 01:56 PM
-
09-19-2014, 04:46 PM
-
09-13-2014, 05:49 AM
-
09-05-2014, 01:52 PM
-
09-01-2014, 09:39 AM
-
08-30-2014, 06:29 PM
-
08-10-2014, 06:29 AM
-
08-04-2014, 05:07 PM
-
07-23-2014, 11:14 AM
-
New Evidence on Expiration Dates | Medical Preparedness | Doom and Bloom (TM) | Doom and Bloom (TM)
Refback This thread07-22-2014, 10:10 AM -
07-18-2014, 08:37 PM
-
07-15-2014, 04:57 PM
-
07-11-2014, 01:40 AM
-
04-22-2014, 11:14 AM
-
04-18-2014, 12:57 PM
-
04-18-2014, 10:10 AM
-
04-14-2014, 12:18 AM
-
04-12-2014, 02:28 AM
-
03-02-2014, 11:43 PM
-
12-24-2013, 11:59 PM
-
12-07-2013, 11:04 PM
-
kitchen | Cob
Refback This thread11-25-2013, 03:24 PM -
10-22-2013, 10:25 PM
-
Apple Pie Braid | Sweets
Refback This thread09-26-2013, 07:58 AM -
09-02-2013, 04:44 PM
-
5 Reasons Why You May have to Bug Out Even Though You Don’t Want to | The Apartment Prepper's Blog
Refback This thread08-23-2013, 03:20 PM -
06-27-2013, 06:30 AM
-
06-23-2013, 08:11 PM
-
06-17-2013, 11:21 PM
-
05-24-2013, 05:06 PM
-
To Eat / BASIC LIST / SUGGESTED ITEMS FOR LONG TERM SURVIVAL - Page 275 - ALIPAC
Refback This thread05-01-2013, 03:49 AM
Thread Information
Users Browsing this Thread
There are currently 1 users browsing this thread. (0 members and 1 guests)
 LinkBack URL
 About LinkBacks
-
03-14-2024, 09:57 PM #8281Senior Member


- Join Date
- Aug 2018
- Posts
- 87,911
If you're gonna fight, fight like you're the third monkey on the ramp to Noah's Ark... and brother its starting to rain. Join our efforts to Secure America's Borders and End Illegal Immigration by Joining ALIPAC's E-Mail Alerts network (CLICK HERE)
-
03-14-2024, 10:05 PM #8282Senior Member
- Join Date
- Aug 2018
- Posts
- 87,911
If you're gonna fight, fight like you're the third monkey on the ramp to Noah's Ark... and brother its starting to rain. Join our efforts to Secure America's Borders and End Illegal Immigration by Joining ALIPAC's E-Mail Alerts network (CLICK HERE)
-
03-14-2024, 10:48 PM #8283Senior Member
- Join Date
- Aug 2018
- Posts
- 87,911
9 Hiding Spots In Your House Where Looters Always Look First
Thursday, March 14, 2024 13:36

by NICHOLAS OETKEN
When stockpiling supplies, its vitally important to hide as much of your stockpile as you can.
If the grid goes down, people will become desperate and once ordinary people will turn into thieves, raiders, and looters to the streets to rob and steal what they can to stay alive. Theyll target homes and stores in town first, and once those have been looted and stripped, theyll set their sights on suburban homes next.
You may think you already have it figured out for how you can keep your stockpile a secret and hidden from any thieves or looters who may break in.Unfortunately, thieves and looters can be a bit smarter than you may think. Theyre already taking a major risk by breaking into any home, and they wont want to leave empty-handed in exchange for taking that risk.
Furthermore, many thieves and looters will already be experienced and know exactly where to look in your home for your valuables or stockpiles.
Thats why its critical to be extra creative with where you hide your stockpiles and avoid hiding them in areas where looters are likely to look first.
Here are the nine hiding spots in your house that looters will always look for first:
Attics And Basements
Its common practice for preppers to stockpile their food, water, and other supplies either in the attics or the basements of their homes.The logic for doing so certainly makes sense. This way their stockpiles are out of the way and out of sight of any guests who come to visit. Its important to keep your stockpiles as much of a secret as you can.
Just because your neighbors and regular guests are friendly now doesnt mean that they wont come knocking on your door demanding supplies later.
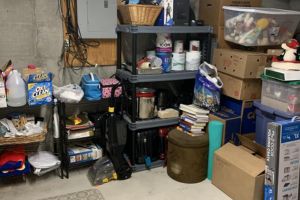
That being said, while stockpiling supplies in your attic or basement may be a good way to keep your preps a secret from your neighbors and guests you have over, its a much poorer way to keep them hidden from burglars and looters who break into your home.
Thats because most burglars are acutely aware that people will often store valuables in their basements and attics, so they are two rooms they will often go to investigate first.
Closet
A closet is perhaps the most obvious hiding spot there is. Looters will look through your entire closet, including the pockets of the clothing in your closet, looking for valuables, guns, or cash.
Its common practice among many people to store their valuables in closets as well. If you have any valuables youre keeping in your own closet at the moment, you would be wise to think about another location for them.
Dressers
Many thieves are acutely aware of the old trick of hiding valuables amongst shirts, socks, and underwear stored in dresser drawers. Thats why a burglar will open your dresses and pull all the clothing you have out looking for anything from cash to watches to jewelry.
Additionally, think twice about having any jewelry boxes on top of your dressers. If you have a jewelry box out in the open and a burglar comes rummaging through your house, its an absolute certainty that the box will disappear with them.
Mattress
 The closet and dresser drawers will likely be the first two locations a burglar looks for in the bedroom. The next location theyll look is under the bed and under the mattress. Just like how its common practice for people to store valuables in their closet, its also common practice to hide valuables under a mattress.
Safes
A safe may seem like the ultimate place for storing precious items such as firearms or jewelry because it offers protection against both thieves and a house fire.
But a safe also makes it incredibly obvious about where your valuables are being hidden. Any small and portable safe can be easily picked up and carried out by a looter.
A heavy safe, such as a safe designed to carry rifles, will offer more protection. Most burglars will try to get in and out of your house as quickly as possible, and attempting to break into a big safe certainly isnt going to help quicken their pace.
That being said, if a burglar happens to be experienced with safe cracking and is determined enough to try and break in, then your safe no matter how large is going to be vulnerable.
Suitcases
This is another old trick: to keep valuables hidden in suitcases. The idea is thieves wont think theres anything inside your suitcases since youre not traveling, but many thieves and burglars will be aware of this old trick just like how theyre aware of the mattress trick as well.
Storage Sheds
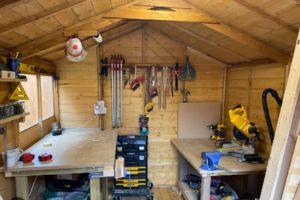 Burglars and looters may not just target the inside of your house; they may target other buildings on the property as well. Besides your garage, they may also break into any storage sheds or shops that you have outside.
Under the Stairs
Many homes have a spare storage space under the stairs. This is a good space to store certain items that you could do without, perhaps, but its not a good place to store your precious valuables.
Vases
Hiding valuables in vases is another classic trick. Most burglars who dont care about their presence in the home being known will just knock over vases and other glass furnishings to break them and see if theres anything inside.
If you were thinking about using any of the above locations as a hiding place for your valuables or supplies, you may want to consider getting a little more creative.
Imagine yourself as a burglar breaking into your home. Move through your home and think about the places where you would look first.
Additionally, and this may sound a bit strange, when going to the homes of your friend or family, imagine yourself as a burglar as well and where you would look in their homes.
Youll likely come up with a few more hiding places that were not included in the above list.
9 Hiding Spots In Your House Where Looters Always Look First | Alternative | Before It's News (beforeitsnews.com)If you're gonna fight, fight like you're the third monkey on the ramp to Noah's Ark... and brother its starting to rain. Join our efforts to Secure America's Borders and End Illegal Immigration by Joining ALIPAC's E-Mail Alerts network (CLICK HERE)
-
03-15-2024, 06:14 AM #8284Senior Member
- Join Date
- Aug 2018
- Posts
- 87,911
Survival foods: 5 simple, easy-to-make recipes for foods that can sustain you in emergencies
03/14/2024 // Olivia Cook // 700 Views
Tags: bannock, biltong, emergency food, goodfood, hardtack, parched corn, pemmican, preparedness, prepper, prepping, survival, survival food, trail biscuit, trench cake

When disaster strikes, it pays to know how to make foods that do not need many ingredients, are very nutritious and can last a long time when properly stored. Here are five recipes for easy-to-make survival foods you should know by heart.Hardtack
Also called hard bread, this tough biscuit is a survival food with a history going back as far as Ancient Rome.
Ingredients:
- 5 cups wheat flour
- 2 quarts water
- 3 teaspoons of salt
Combine all of these ingredients in a large mixing bowl. When the flour, salt and water have formed a dry bread dough, roll it out flat with a rolling pin or pat it out by hand. If the dough still has sticky spots, add more flour.
Make a 12-inch-thick dough sheet, cut it into three-inch squares and poke holes in both sides of each dough square. Bake these squares for 30 minutes per side at 375 F on an ungreased cookie sheet.
Keep your hardtack in a cool, dry and dark place away from pests. Once hardtack has fully dried, it can last for years if stored properly.
Pemmican
Pemmican is a very ancient forerunner to modern survival rations, known as a very weird meatball made of dried meat and rendered fat. It is filled to the brim with calories and its invention its popularity is traditionally credited to Native Americans.
Ingredients:
- 8 ounces of lard
- 8 ounces of packed powdered jerky chopped in a blender
- 8 ounces of dried fruit, ideally berries
Warm the lard in a pot to a temperature below 100 F until it turns into a soft, pasty texture. Keep stirring while it heats up. Stir your other ingredients into the softened fat until they have thoroughly combined with the lard, which usually takes about two minutes of continuous stirring.
If you have the ingredients, feel free to add small amounts of flour or other starch sources for additional carbohydrates. You can even add different spices to add some flavor.
Turn off the heat and, once the mixture is cool enough to touch, scoop it out by hand and compress it into round balls or flat cakes. Be sure to let the pemmican completely cook before you store it.
Traditionally, pemmican would usually be stored in rawhide containers. Instead of this, you can wrap up the pemmican in wax paper and keep it stored in a cool place. If kept relatively cool, pemmican can last for months. However, as the weather warms, it would be wise to eat the pemmican before the fat begins to smell rancid.
Bannock
Sometimes called skillet bread, bannock is a round, flat, unleavened bread that is associated with Scotland and northern England. Although you can adapt a bannock recipe for the oven, it is meant to be cooked in a skillet over a campfire or in a fireplace.
Ingredients:
- 4 cups all-purpose flour
- ½ teaspoon salt
- ½ teaspoon baking soda
- 1 tablespoon sugar
- 1 ¾ cups dried fruit (e.g., cherries)
- 1 teaspoon chopped rosemary
- 1 ½ cups buttermilk or sour milk
Preheat your oven to 300 F.
In a medium-sized bowl, combine all of your dry ingredients except for the dried fruit and rosemary. Thoroughly mix them. Chop your dried fruit and rosemary into very fine pieces and set aside.
Now that you have a bowl full of dry ingredients, make a well in the center for your buttermilk. Add the buttermilk to the well and begin to slowly incorporate flour from the sides this will allow you to control the dough consistency. Do not collapse the sides of the well. You will have leftover flour to coat your table and to use while you knead the dough.
Once the batter becomes stodgy and pasty, you can add your finely chopped dried fruit and rosemary. At this point, you are going to dump the dough out onto a floured surface. Work the dough and add flour until it becomes less sticky and the dried fruit and rosemary are fully incorporated.
At this point, you are ready to begin baking the bannock. Bake the bannock for 20 minutes until it has started to brown a bit. Remove the bannock and allow it to rest and cool. After the bannock has completely cooled, it can be sliced and served or sliced and stored.
The best storage method is to keep it whole until you need it. If you leave it uncovered, it will get very hard in a couple of days. Freezing would be the best way to keep it for a really long time. But if you dont have that option, keep it hard and dry. (Related: 8 survival bread recipes for preppers.)
Biltong
Biltong is a traditional South African food that consists of dried and marinated meat. Whereas jerky is often smoked, biltong is cured with vinegar, salt and spices and then air-dried. Also, you can make biltong from a large variety of meat cuts.
Ingredients:
- 2 kilograms (4.4 pounds) of lean meat
- 2 cups brown sugar
- 3 cups plump sea salt
- 1 teaspoon baking soda
- 2 tablespoons ground black peppercorns
- 100 ml Worcestershire sauce
- 5 cups vinegar
- 4 tablespoons of ground coriander seeds
To prepare the meat, always cut to the length of the grain, never against it. Prepare 1 cm thick slices of meat and then put those slices into the vinegar-Worcestershire sauce mix for half an hour. Store the remaining vinegar in the fridge because it will be used later in the recipe.
Crush all the spices and then mix in the salt, baking soda and sugar. Make sure that all the meat is perfectly coated with this and then layer those slices on a clean plate. Place the thickest slice at the base and the other chucks above it. Sprinkle your remaining spice mixture on top of the upper layer. Refrigerate for at least eight hours.
Take out the refrigerated chunks of meat and then soak them again in the vinegar mix for at least 15 minutes. Remove the meat slices and then rinse out the salt residue from every piece. Squeeze the moisture out of the meat pieces.
You can then dry the biltong in two different ways in the oven or in the traditional way by hanging the strips up on racks in a room with good circulation. Alternatively, the strips can be refrigerated and, if frozen, they can last for up to a year.
Trail biscuit
This is a stick-to-your-ribs food that will help stretch rations or fill bellies. The egg and lard are optional, but if youre not using lard, substitute the baking powder for a couple of teaspoons of baking soda.
Ingredients:
- 3 ½ cups all-purpose flour
- 2 tablespoons baking powder
- 1 egg (optional, if available)
- 1 teaspoon salt
- ½ cup lard (or butter)
- 1 ½ cups milk
Preheat oven to 370 F or stoke your coals so theyre hot enough to cook on.
Combine flour, salt and baking powder (or baking soda) in a bowl, then cut the cold lard (or butter) into the flour mixture until you have pea-sized pieces. Add milk until the dough is barely sticky. Dont overmix or your biscuits will be tough.
Drop about ¼ cup of the batter into a greased pan or Dutch oven. Cook for 20 minutes or so until the biscuits are brown. If using a Dutch oven, put the biscuits in.
There are many, many more survival foods you can make to keep you well-fed with necessary nutrients during survival situations, such as parched corn, trench cake, jerky, dried fruit, beans and rice and peasant's bread. What's important is you are aware of the kinds of foods you can make that can keep you sustained during emergencies.
Our mission is to empower, uplift and defend the lives of every human being across our planet, and we're doing it by building the infrastructure of human freedom. Find out about how we're doing this using cutting-edge AI technology at this link. Support our ongoing efforts by shopping at HealthRangerStore.com, and thank you for your support!
Watch the following video to learn how to make survival chocolate.
This video is from the Cahlen channel on Brighteon.com.
More related stories:
Prepper recipes: How to make pinole, a tasty survival superfood.
How to make matzoh, a survival food from biblical times.
How to make hominy, an ancient survival food.
Sources include:
PreppersWill.com 1
UrbanSurvivalSite.com
PreppersWill.com 2
Survivopedia.com
Brighteon.com
Survival foods: 5 simple, easy-to-make recipes for foods that can sustain you in emergencies NaturalNews.com
If you're gonna fight, fight like you're the third monkey on the ramp to Noah's Ark... and brother its starting to rain. Join our efforts to Secure America's Borders and End Illegal Immigration by Joining ALIPAC's E-Mail Alerts network (CLICK HERE)
-
03-16-2024, 12:13 AM #8285Senior Member
- Join Date
- Aug 2018
- Posts
- 87,911
If you're gonna fight, fight like you're the third monkey on the ramp to Noah's Ark... and brother its starting to rain. Join our efforts to Secure America's Borders and End Illegal Immigration by Joining ALIPAC's E-Mail Alerts network (CLICK HERE)
-
03-16-2024, 12:14 AM #8286Senior Member
- Join Date
- Aug 2018
- Posts
- 87,911
If you're gonna fight, fight like you're the third monkey on the ramp to Noah's Ark... and brother its starting to rain. Join our efforts to Secure America's Borders and End Illegal Immigration by Joining ALIPAC's E-Mail Alerts network (CLICK HERE)
-
03-18-2024, 08:06 AM #8287Senior Member
- Join Date
- Aug 2018
- Posts
- 87,911
Read This Before Buying Survival Food
by FERGUS MASON
March 4, 2024
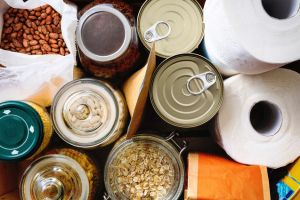
Food is a key part of prepping. Without a stockpile of food to keep you going through at least the initial stages of a crisis, your chances of survival are very low.
Unless youre already completely self-sufficient and not many of us are youll be relying on that stockpile when the SHTF, so it needs to be large enough to keep you going. The question is, what should be in it?
Firstly, the kind of food you want in your survival stockpile depends on exactly what youre planning to survive.
If you live in San Francisco and youre putting together a stash to get you through the aftermath of an earthquake, your needs are very different to someone whos preparing to survive the long-term collapse of civilization. In a crisis, any food is better than nothing but the right food will make a big difference.
Lets look at what you need in different scenarios.
Short Term Survival
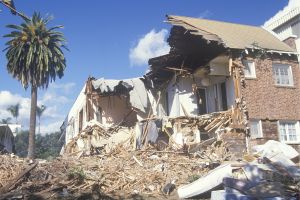 Most residents of Californias earthquake hotspots take the state governments advice and keep an emergency food supply at home, to keep them going for at least three days after a disaster. Personally I think everyone should do that. Even if you already have plenty of food at home its worth keeping a short-term stash in case theres a natural disaster like a storm.
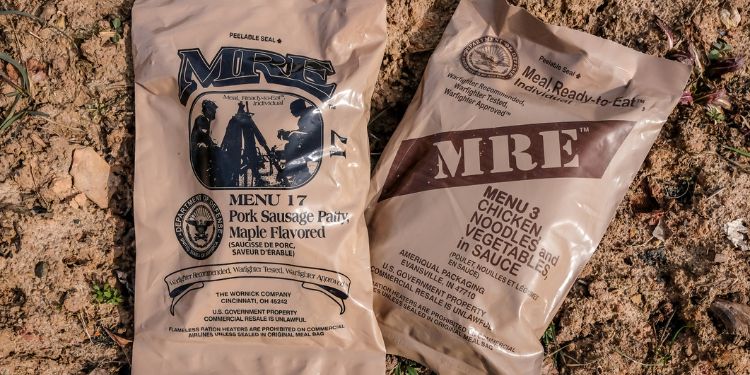
This sort of food supply should focus on food thats energy-dense and doesnt need much in the way of preparation. A storm or earthquake can leave large areas without power or water, so food that can be eaten cold and without rehydration is the best option here.
Military-style MREs are good; they can be eaten cold, straight out the packet, if necessary. They do taste a lot better if you can heat them, but it isnt essential and anyway, you can easily and safely heat them with a flameless ration heater. Theyre also packed with energy, so theyll keep you going for days.
Related: 4 Long-Lasting MREs You Should Make For Your Stockpile
A lot of bulk survival foods arent a good choice here. A bucket of survival food might promise 60 or 120 portions, but they wont be very large portions; in my experience its best to half the number of servings the manufacturers promise, if you want to get anywhere near enough calories. They also need a lot of water, and you really dont want to be eating cold rehydrated food its pretty vile.
Instead of MREs, or as a supplement to them, look at canned foods like chili and stew. These taste better hot, but theyre palatable cold, too, and they dont need any extra water. Pouches of tuna are good too. Add canned fruit, cookies, chocolate and candy. A nutritionist wouldnt be happy, but this isnt a long-term diet; its just meant to give you enough energy to push through the first few days after a disaster.
In this scenario, in an urban area, its not a luxury to have food that doesnt need cooked; its essential. Even if you have a stove to cook on, damaged gas pipes could make it too dangerous to risk any kind of flame. Make sure you have enough food that can be eaten with zero preparation.
Medium Term Survival
 So youre all ready to survive for a few days if you get snowed in or the city falls down around you.
Next, what happens if theres a nuclear war or a serious social breakdown?
Now youre looking at having enough food to survive for weeks or even a few months.
Over this length of time, the sort of stuff in your short-term cache starts to show its limitations. For a start, its expensive. With MREs selling for $15 each and upwards, a three-month supply is a serious amount of money. Over this sort of time period the nutritional weaknesses of MREs and prepared snack foods start to show up.
Were now looking at the classic prepping food supplies. Dried beans, rice and pasta should be the base of what youre stockpiling. That gives you plenty of carbs and adequate protein. Add in cooking oil to supply fats. Canned meat, vegetables and fruit will add fiber, more protein and variety.
Salt and sugar contribute flavor and can also be used as preservatives. Dont forget seasonings so you can produce varied, interesting meals that makes a huge difference to morale. Flour will let you make your own bread and other baked goods. Dont forget tea or coffee to keep you supplied with hot drinks.
Related: I Tried to Eat My Emergency Foods and This Is What Happened
In the medium term water and energy for cooking are less of a problem. Youll still want to minimize how much you use, because theyre not limitless resources, and some survival foods arent naturally economical dried beans, for example. There are ways to cut fuel use, though. For example, presoak beans to reduce cooking time.
Im going to mention dehydrated survival food again. These do better in the medium term than as short-term emergency foods, but Im still wary of them. They taste OK when properly prepared and served hot, but all the same problems of small portions and inadequate caloric content still apply. I wouldnt recommend making these a major part of your stockpile. Stick to dry bulk goods and cans.
Long Term Survival
 If you want to be able to stay fed indefinitely, sooner or later any stockpile is going to run out. There are long-term items that can keep you going for a year or more, until your own crops and livestock take up the slack; dried goods are key here.
Beans and rice will still be the basis of your carbohydrates.
Store as much salt and sugar as you can; producing your own isnt easy, and you want to put that off as long as possible. Your long-term supplies need to prioritize things you cant make easily or at all; basic protein, carbs, fiber and fats are, at some point, going to have to be hunted, foraged or raised.
Buying survival food isnt just about buying as much food as you can and storing it in your shed or basement. You need to tailor your stockpile to suit what you think the danger is but also keep it as flexible as possible.
If you live in a disaster-prone area and want a weeks worth of prepared food, add enough dried and canned goods to last another week if the crisis lasts longer than expected.
If your priority is long-term self-sufficiency, stockpile some MREs or prepared food just in case you have to get through a period of chaos before you can start using your main supplies. Like everything else in prepping, buying the right survival food is all about planning and making the most efficient use of your resources.
Selecting the right survival food is crucial for your preparedness strategy, yet its equally vital to consider sustainable, long-term solutions. Despite a well-stocked pantry, your ultimate resilience lies in getting really good at being self-sufficient, particularly in food production.
For those who are serious about surviving whatever comes their way, I strongly recommend this comprehensive guide. It offers invaluable insights and practical advice for transforming your backyard into a self-sustaining homestead.
Remember, while stockpiling food serves as a temporary fix, learning how to grow your own food ensures you can keep going for the long haul.
You may also like:
 Deadly Mistakes People Made During The Great Depression
People Weed Out This Plant, But Heres What You Should Do Instead (Video)
Blue Barrel Uses You Never Thought Of
7 Assumptions That Can Get You Killed When SHTF
How The Native Americans Used To Hide In Plain Sight
Read This Before Buying Survival Food - Ask a Prepper
If you're gonna fight, fight like you're the third monkey on the ramp to Noah's Ark... and brother its starting to rain. Join our efforts to Secure America's Borders and End Illegal Immigration by Joining ALIPAC's E-Mail Alerts network (CLICK HERE)
-
03-20-2024, 05:24 AM #8288Senior Member
- Join Date
- Aug 2018
- Posts
- 87,911
How to make your own LIQUID SOAP without harmful chemicals
03/19/2024 // Olivia Cook // 880 Views
Tags: chemical-free, DIY, DIY soap, green living, homesteading, how-to, liquid soap, natural ingredients, off grid, preparedness, prepper, prepping, recipes, soap making, survival, tips

Soap is an incredibly useful household item in everyday life. Soaps allow us to keep clean and prevent the spread of harmful bacteria, microbes and germs that make us sick.But have you ever purchased bath soap from big box stores, only to find out they smell weird when you sweat or totally dried your skin after using it? This is because commercial soaps contain fragrances and big soap manufacturers have tried to train us that "clean" has a smell.
The International Fragrance Association (IFRA) lists 3,059 materials that are reported as being used in fragrance compounds and these compounds are often included in store-bought soaps. Some of these have been linked to adverse health effects including cancer, reproductive toxicity, allergies and sensitivities.
Fragrances are considered "trade secrets" so manufacturers are not required to disclose the potentially hundreds of toxic ingredients hiding behind the words "fragrance," "perfume," "essential oil blend," and/or "aroma" found in most personal care products.
That being said, the best reason to use homemade soap is that you control its ingredients. The natural ingredients you choose to incorporate in your soaps can add a healing touch to your daily skin routine.
Homemade soaps are safe and easy to make. They are cost-effective and do not pollute the environment. Additionally, you can customize your homemade soap to your liking.
Make your DIY liquid soap with just 4 ingredients
Author and home blogger Karrie Truman of HappyMoneySaver.com shares her liquid soap recipe that only requires four ingredients.
First, liquid Castile soap is popular among people wanting to live more naturally. It does not contain harsh substances that strip the skin of its natural oils and moisture. EntirelyEco CEO Loni Brown says this quality makes liquid Castile soap a good choice for people with highly sensitive skin and respiratory systems.
Castile soaps are made using coconut, palm kernel or hemp oil, and are also available in solid form. They are readily available from health food stores and online retailers. (Related: Use natural liquid Castile soap for safe and wonderful homemade shampoos.)
Second, distilled water will help dilute the concentrated Castile soap without reducing its effectiveness. The process of distillation purifying water by boiling it and collecting the resulting steam offers the highest removal rate for the widest range of contaminants at 99.9 percent.
Third, essential oils can be added in to customize the liquid soap's scent. Here are some good essential oils to use in your liquid soap that not only provide a natural aroma, but also fight germs.
- Lavender has a delicate, sweet smell with a calming effect
- Eucalyptus is often used to relieve nasal congestion
- Lemon has an invigorating smell that also kills pathogens
- Tea tree is known for its antibacterial properties masked by a fresh, herbaceous scent
Lastly, fractionated coconut oil (FCO) is a natural ingredient used for various household and personal care purposes. It is made by separating the different types of fats in regular coconut oil. The fractionation process renders FCO highly shelf-stable, lasting indefinitely at room temperature compared to only two years for regular coconut oil.
To make your natural liquid soap, simply combine the four ingredients in the amounts below and put in your soap dispenser of choice:
- 1 cup distilled water
- 1/4 cup unscented liquid Castile soap
- 1 tablespoon FCO
- 15 drops essential oil of your choice
It is advisable to use glass bottles to store your DIY liquid body soap because glass in impervious to essentials oil and is the perfect container for keeping DIY products fresh. Glass is also really easy to clean after using oils in the container. You only need to use water and soap to get the residual oils out.
The FCO can be replaced with other carrier oils like olive oil, grapeseed oil, jojoba oil or sweet almond oil. If you prefer your liquid soap unscented, you can choose not to add the 15 drops of essential oil.
Do not use fragrance oils for this DIY liquid soap. Fragrance oils, also called aromatic oils and flavor oils, are often blended synthetic aroma compounds or natural essential oils that are already diluted.
Visit Homesteading.news for more DIY projects you can do at home.
Watch this video that explains how to make your own dish soap and why you should.
This video is from the Natural Cures channel on Brighteon.com.
More related stories:
DIY prepper supplies: How to make non-toxic foaming hand soap.
Top 5 reasons to use goats milk soap.
Cosmetic giants pressure FDA into cracking down on homemade soap artisans while ignoring their own toxic products.
The benefits of using real, natural soap.
Sources include:
Survivopedia.com
SafeCosmetics.org
HappyMoneySaver.com
COZPalace.com
MindBodyGreen.com
Healthline.com
doTERRA.com
Brighteon.com
How to make your own LIQUID SOAP without harmful chemicals NaturalNews.comIf you're gonna fight, fight like you're the third monkey on the ramp to Noah's Ark... and brother its starting to rain. Join our efforts to Secure America's Borders and End Illegal Immigration by Joining ALIPAC's E-Mail Alerts network (CLICK HERE)
-
03-24-2024, 01:42 AM #8289Senior Member
- Join Date
- Aug 2018
- Posts
- 87,911
If you're gonna fight, fight like you're the third monkey on the ramp to Noah's Ark... and brother its starting to rain. Join our efforts to Secure America's Borders and End Illegal Immigration by Joining ALIPAC's E-Mail Alerts network (CLICK HERE)
-
03-27-2024, 07:13 AM #8290Senior Member
- Join Date
- Aug 2018
- Posts
- 87,911
Tina from the Satellite Phone Store answers Mike's questions about emergency comms during
Tina from the Satellite Phone Store answers Mike's questions about emergency comms during apocalyptic scenarios
Video Brighteon
47:06
If you're gonna fight, fight like you're the third monkey on the ramp to Noah's Ark... and brother its starting to rain. Join our efforts to Secure America's Borders and End Illegal Immigration by Joining ALIPAC's E-Mail Alerts network (CLICK HERE)


 Reply With Quote

YOU CANT MAKE THIS UP: Portland Rolls Out PAID Immigration...
01-04-2026, 10:33 AM in illegal immigration News Stories & Reports