Results 8,311 to 8,320 of 11182
LinkBacks (?)
-
12-26-2016, 11:32 AM
-
09-02-2016, 05:39 PM
-
whole garden made with pallets!! Love it!! | Pallets | Pinterest | Pallets, Pallets Garden and Wooden Pallets
Refback This thread03-06-2016, 11:30 AM -
10-20-2015, 05:29 PM
-
06-12-2015, 08:00 PM
-
02-26-2015, 01:58 PM
-
01-05-2015, 04:13 PM
-
12-19-2014, 10:19 AM
-
EMERGENCY: HUGE FEMA PANDEMIC EXERCISE IN USA IN NOVEMBER, INTERNET SHUT DOWN PART OF EXERCISE | Prepare4Survival
Refback This thread12-03-2014, 10:39 PM -
Off Grid World ? Ugly Duckling Shipping Container Home Built by Artist Is a Beautiful Swan on the Inside
Refback This thread11-25-2014, 03:10 PM -
11-17-2014, 10:59 PM
-
11-13-2014, 11:18 AM
-
11-09-2014, 02:54 PM
-
10-28-2014, 11:38 PM
-
10-26-2014, 05:54 AM
-
10-16-2014, 11:28 AM
-
10-03-2014, 01:25 PM
-
10-02-2014, 09:16 PM
-
09-26-2014, 07:00 PM
-
09-26-2014, 01:56 PM
-
09-19-2014, 04:46 PM
-
09-13-2014, 05:49 AM
-
09-05-2014, 01:52 PM
-
09-01-2014, 09:39 AM
-
08-30-2014, 06:29 PM
-
08-10-2014, 06:29 AM
-
08-04-2014, 05:07 PM
-
07-23-2014, 11:14 AM
-
New Evidence on Expiration Dates | Medical Preparedness | Doom and Bloom (TM) | Doom and Bloom (TM)
Refback This thread07-22-2014, 10:10 AM -
07-18-2014, 08:37 PM
-
07-15-2014, 04:57 PM
-
07-11-2014, 01:40 AM
-
04-22-2014, 11:14 AM
-
04-18-2014, 12:57 PM
-
04-18-2014, 10:10 AM
-
04-14-2014, 12:18 AM
-
04-12-2014, 02:28 AM
-
03-02-2014, 11:43 PM
-
12-24-2013, 11:59 PM
-
12-07-2013, 11:04 PM
-
kitchen | Cob
Refback This thread11-25-2013, 03:24 PM -
10-22-2013, 10:25 PM
-
Apple Pie Braid | Sweets
Refback This thread09-26-2013, 07:58 AM -
09-02-2013, 04:44 PM
-
5 Reasons Why You May have to Bug Out Even Though You Don’t Want to | The Apartment Prepper's Blog
Refback This thread08-23-2013, 03:20 PM -
06-27-2013, 06:30 AM
-
06-23-2013, 08:11 PM
-
06-17-2013, 11:21 PM
-
05-24-2013, 05:06 PM
-
To Eat / BASIC LIST / SUGGESTED ITEMS FOR LONG TERM SURVIVAL - Page 275 - ALIPAC
Refback This thread05-01-2013, 03:49 AM
Thread Information
Users Browsing this Thread
There are currently 5 users browsing this thread. (1 members and 4 guests)
-
04-03-2024, 05:00 AM #8311

7 Homemade Weapons That A Prepper Should Have
by FERGUS MASON
January 17, 2022
Surviving a crisis is a lot easier if you’re appropriately armed. With the right weapons, you can protect yourself from attackers and hunt game to improve your diet. In the US we’re lucky; even in the most restrictive states, it’s still possible to buy guns that will cover most survival situations. But what if disaster strikes and you don’t have any guns to hand?
There are ways that can happen – you could be away from home, for example. Sometimes you just have no choice but to go somewhere with no weapons. The problem is, when the world as we know it decides to end it’s no respecter of the choices you’ve had to make. You can find yourself in a survival situation with no weapons, so you need to know what to do about it. Luckily there’s an answer – make some.
There are a lot of weapons you can improvise from everyday objects and materials, if you know how to go about it. Sure, they’re not as effective as a good firearm – but they’re a lot better than nothing, and could make the difference between life and death.
⇒ Learn How To Make Your Property Looter-Proof
Here are some of the most effective homemade weapons every prepper needs to know about:
Spears
 Forget all those sword-swinging movie heroes; before guns took over the battlefield, most soldiers carried a spear. Spears are excellent weapons for a whole bunch of reasons. They’re cheap and simple to make. They give you a long reach and let you keep enemies at a distance – a well-handled spear will beat a knife every time.
With a bit of practice, you can throw spears a reasonable distance They double as walking sticks and carrying poles. They’re a good way to tackle large but slow-moving animals. You can catch fish without getting wet. If you know how to make a spear, you can equip yourself with a reasonably effective weapon almost anywhere.
To make a spear, start with the shaft. You want a solid pole that’s as straight as possible. You can make a small spear from a hardwood broom handle, but ideally you want a shaft at least six feet long and 1.5-2” thick. Straight-grained hardwood is best, but the main thing is it needs to be solid. A good spear has some weight behind it, too.
If necessary, you can simply sharpen the point of the spear then harden the tip in a fire. You can make a sharper and more durable point with a knife (the more symmetrical, the better). Don’t use your primary knife as a spearhead – as well as the obvious risk of it getting lost or damaged, it’s hard to use as a knife when it’s tied to a six-foot pole. Find an old knife; a chef’s knife will work well. Remove the handle, split the end of the pole, fit the knife’s tang into the split then bind it up tightly.
Slingshots
 A slingshot isn’t just a kid’s toy. Well handled and with the right ammunition it’s great for taking small game, and it can deter an unarmed attacker. They might laugh when they see it, but whack a half-inch BB off them and they’ll start taking the danger seriously.
To make a slingshot, find a strong forked branch and cut it down into a Y shape. Find some strong rubber. You’ll see sites that tell you to use the elastic out of your pants. Don’t bother; it’s nowhere near strong enough.
You need something like surgical rubber tubing or an old bicycle inner tube. Cut a pouch from leather – a three-inch section from a belt with do – and punch a hole in each end. Knot a length of rubber through each hole.
Related: 50 Prepper Items To Shop For At The Thrift Store or Yard Sale
Cut a groove round each upper end of the Y on your fork, and tie the rubber tightly to it. Then find some ball bearings, glass marbles or round stones, and start practicing. A slingshot can easily drop a rabbit, or knock birds and squirrels out of trees – and unlike a bow, there’s no risk of nailing your quarry to a branch 50 feet up.
Self Bows
 Bows definitely have their place, though. They’re harder to make than slingshots, but much more powerful – with the right bow you can bring down any animal in North America. In fact there are tribes in Africa that hunt elephants with simple wooden self bows.
A self bow is a bow made from a single piece of wood. To make one, find a straight branch or trunk made from a rough, springy wood like osage orange, Pacific yew or red oak, split it into quarters along the grain, then shape one of the quarters down into a bow.
Use a tiller to gradually bend it further and further as you carve it, so you can check it bends smoothly with no weak or still spots. Then string it with strong cord and you have a powerful, easily maintained weapon.
PVC Bows
 The hardest part of making a good bow is finding a good piece of wood to make it from. If you’re struggling with that, don’t worry – there’s a modern alternative. Just find yourself a five-foot length of PVC pipe and you can make a powerful bow.
You can turn any PVC pipe from about ¾” to 1.5” diameter into a simple bow. What you have to do is mark out a 5” section in the center, then cut away one side of the pipe outside of that section to form the back of the bow.
Just like making a self bow, you can use a tiller to help get the curve right. Then file notches into the ends to take a string, and you have a bow. If you can, wrap the center section in cord or leather to give a better grip. If you have a heat gun you can even make a more sophisticated PVC recurve bow.
Pepper Spray
If you just want something to deter harassment and mugging, pepper spray is ideal – but in a crisis it could be hard to find unless you get to the store early.
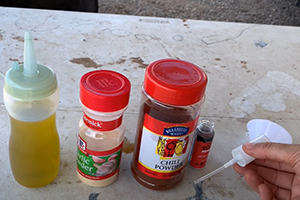
On the other hand, you can easily make your own.
Put 4 tablespoons of ground chili powder in a bowl. Pour in 100ml of rubbing alcohol and leave it for eight hours so the alcohol can soak up the capsaicin from the chili.
Mix in two tablespoons of olive oil to give the mixture more density and help it stick. Then filter it through cheesecloth or a fine wire strainer to remove the particles of chili, and load it into a small spray bottle.
Store it in a cool, dry place.
⇒ What Happens If You Eat Chili Peppers Every Day?
Taser
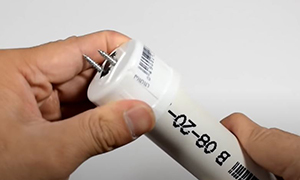 Want a more modern way to scare off attackers?
An electronic stun gun should do the trick! Police-style Taser pistols are expensive, and the ammunition for them can be hard to get, but you can easily build a simple hand-held stun gun.
All you need are two nails, a few cheap and simple electrical components and a plastic project box to fit all the parts in.
Caltrops
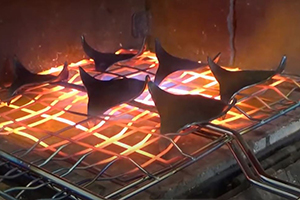 Caltrops were used in the Middle Ages as a sort of anti-cavalry minefield. You can make a caltrop from two metal rods, joined together into a cross and bent so one point is always facing upwards. Sharpen the points and you have a nasty little weapon that will injure any attacker who stands on one and make his friends slow down and go carefully.
If you have basic welding equipment you can easily make caltrops out of large nails. Place two nails so they cross at the centers, then simply weld them together. Bend them with heavy pliers or a vise and hammer so that, however they lie, one point sticks up. Then cut off the nail heads and grind into points.
A bag of caltrops scattered behind you can deter pursuers, or use them to booby-trap parts of your property that can’t be seen from the house. Just remember where you put them!
⇒ DIY Wire Snare and Twitch Snare for Small Animals
There are plenty other improvised weapon designs on the internet, but I wouldn’t want to trust my life to most of them. If you need an improvised weapon you need one that works. Stick to simple, proven designs like the ones here, and they won’t let you down.
Even simpler weapons can be picked up as needed; a solid branch or table leg will make a good club, a baseball bat makes an even better one, and a well-thrown rock will put off many predators of both two- and four-legged varieties.
If you have more time, a spear should be your first priority – it’s the easiest to make – followed by a good bow to give you some range.
Remember that so-called “primitive” weapons are still used every day by people whose whole life is a survival situation. One reason things like the spear and bow have stuck around so long is that they can be relied on to do the job.
You may also like:

How to Keep Your Money Safe for When SHTF
This Homemade Device Can Power Up Your Entire House 7 Days In A Row (Video)
34 Wild Plants Every Prepper Should Know
How To Make A Year-Round Self-Sustaining Garden
7 Homemade Weapons That A Prepper Should Have - Ask a PrepperIf you're gonna fight, fight like you're the third monkey on the ramp to Noah's Ark... and brother its starting to rain. Join our efforts to Secure America's Borders and End Illegal Immigration by Joining ALIPAC's E-Mail Alerts network (CLICK HERE)
-
04-03-2024, 04:28 PM #8312
Bullets, batteries and more: 13 Bartering items to stock up on while preparing for the financial crash
04/02/2024 // Zoey Sky // 2.4K Views
Tags: bartering, bartering supplies, Collapse, disaster, emergency supplies, financial collapse, Gear, offgrid, preparedness, prepper, prepping, prepping tips, SHTF, societal collapse, survival, survival gear, survival stockpile, survival supplies, Survival Tips, survivalist, trade
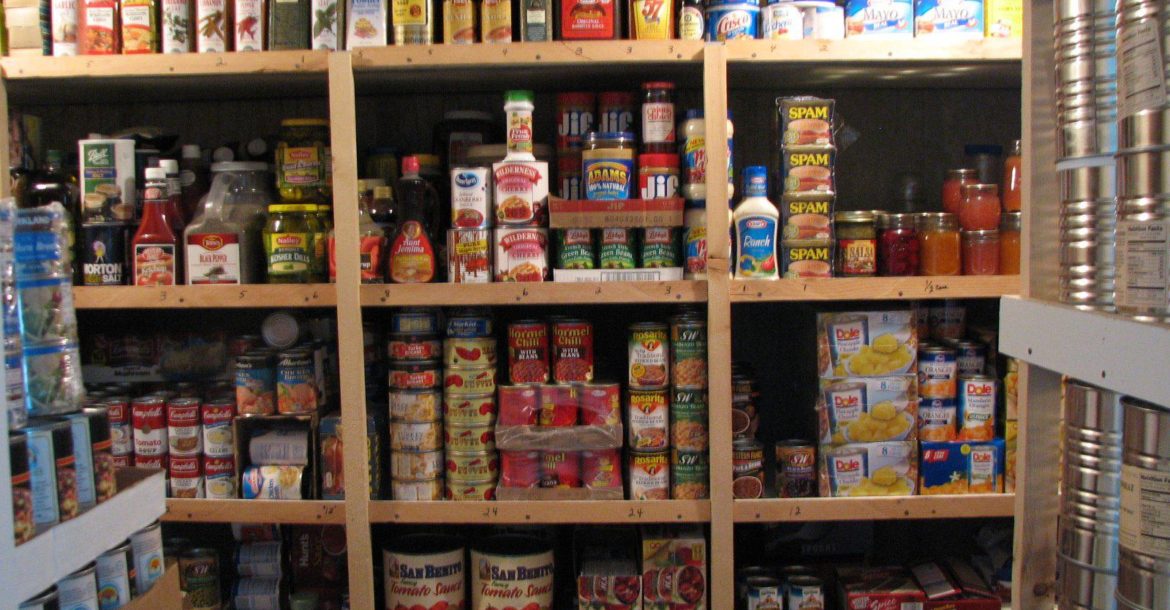
Even though financial systems seem stable at the moment, there's no telling when the next financial crash might happen.Sometimes, a financial crash can cause short-term suffering. However, there have also been times throughout history when financial collapse had worse outcomes. (h/t to AskAPrepper.com)
While humanity has yet to witness a crash that was serious enough to destabilize the government and society in North America, with the fragile nature of financial systems, it is something that may happen soon.
If you ever experience a financial crash that is severe enough to cause country-wide hyperinflation, unemployment and the collapse of the banking sector, you may have to resort to the barter system to acquire the goods and services that your family needs to survive.
If you're worried about a scenario like this, start preparing and stock up on items that you can use for bartering after a financial crash.
Alcohol
There are almost 15 million people who suffer from alcohol use disorder in the United States. And even those who do not have a compulsion to drink alcohol will be likely to trade goods for a bottle of spirits to calm their nerves in times of hardship.
If you don't drink alcohol, having a few bottles of liquor and wine for bartering may still offer some benefits after SHTF.
Ammo
After a severe financial crisis, law enforcement could be overwhelmed and even ineffective. This would cause a true survival situation where crime becomes rampant.
In a wide-scale disaster scenario where the rule of law becomes non-existent, ammo will be as good as, or even more valuable, than money.
Stock up on a surplus of common calibers specifically for bartering. If you're not sure what to get, stock up on ammo for handguns and small game calibers. You might also want to stockpile air gun ammo.
Antibiotics
When you're trying to resume normal life after a severe economic downturn, access to medical care will become limited. Unfortunately, common infections could also pose serious threats.
Having a supply of antibiotics can be a lifesaver for those facing bacterial illnesses and are without access to healthcare services.
Try to stockpile commonly used antibiotics, such as amoxicillin or ciprofloxacin, to meet the needs of your neighbors after SHTF.
Batteries
Once the supply of batteries on store shelves is depleted, non-preppers will be desperate to acquire all the standard sizes of alkaline batteries and power banks to charge their smartphones and other small devices that charge via USB.
If you have a reliable source of off-grid power on your homestead, you can offer to charge devices and battery banks in exchange for other items that you need.
Bottled water
All humans need clean drinking water to survive, but you don't want to risk your safety and stockpile by giving other people access to your stored water supply after a disaster.
Get two or three cases of bottled water so you have items specifically for bartering purposes.
Chocolate and candy
Many people have a sweet tooth. And while sweets aren't an immediate need during an emergency, once the financial system has collapsed, there will still be many people who crave chocolate and candy.
Feminine hygiene products
Women will still need feminine hygiene products after a financial crash.
And even if there is no serious grid-down situation, the cost of feminine hygiene products may still increase, so people will be willing to barter with you.
Flashlights
If a financial crisis is severe enough that people need to resort to the barter system, there's a chance that people will not be able to pay the electric bill or that power will be shut off.
When this happens, people will want to trade with you if you have flashlights.
Try buying packages of several flashlights for less than the price of the included batteries. Products like these are great for bartering because they are cheap and disposable.
Over-the-counter medication
If manufacturing issues can cause supply issues for several months, things might be worse after a financial crisis.
Like antibiotics, many people will need over-the-counter (OTC) medication after a financial crisis or collapse after supply chain disruptions and price increases affect the local supply.
Stock up on these OTC meds so you have a variety of items to trade with:
- Cold and flu medicines
- Diarrhea and constipation medicines and laxatives
- Headache and nausea medicines
- Pain and fever medicines
- Saline solutions
- Skin and allergy medicines
- Sleeping pills
- Wound care medications, like burn cream or antibacterial ointments
Protein bars
Rising food costs may leave non-preppers scrambling for calorie-dense food sources.
Stock up on several cases of protein bars, cereal bars and fruit bars for bartering during a financial crisis. (Related: Emergency food prep: Stock up on manuka honey, a must-have survival food and barter item.)
Radios
After a large-scale financial crash threatens to destabilize the communications grid or forces people to scale back their spending on phone and internet services, you still need to stay in touch with friends and family.
Stock up on radios that operate on the two-meter and 70-centimeter amateur bands. You can also get cheaper shortwave receivers for use as barter items. These items will be popular among those who are desperate for reliable comms.
Tobacco/vape
Like alcohol, there are a lot of people who smoke or vape. After the SHTF and the country dealing with a financial crash, these people will eagerly be trading to get cigarettes or e-cigs.
Stock up on cigarettes and some vape juice so you can trade with them.
Toilet paper and paper towels
During the Wuhan coronavirus (COVID-19) pandemic, the country witnessed demand for one surprising product: Toilet paper.
At the height of the pandemic, toilet paper and other paper products flew off of store shelves. Even if you don't experience a financial crash, you should always have a good supply of these products, with an additional supply for bartering.
The current monetary system started as the barter systems that humans used for the years that pre-dated the invention of the modern currency that humans use today.
And while humans have been trading goods and services for money, if the currency collapses, society will go back to bartering. As a prepper, it's best to stock up on bartering supplies like food, medication and ammo so you can trade for supplies after SHTF.
Go to Health Ranger Store to find more prepping products that can be used for bartering.
Watch the video below to learn more about organic black beans, and why you should have them in your prepper stockpile.
This video is from the Health Ranger Store channel on Brighteon.com.
More related stories:
HRS SOLUTIONS: Stock up on organic non-fat milk powder, a long-lasting source of essential nutrients.
SHTF bartering must-haves: 13 Things that will be in demand after an EMP attack.
Sensible prepper rules to follow when building your emergency stockpile.
Survival beverages that are a must for your pantry.
Sources include:
AskAPrepper.com
PrimalSurvivor.net
Brighteon.com
Bullets, batteries and more: 13 Bartering items to stock up on while preparing for the financial crash – NaturalNews.comIf you're gonna fight, fight like you're the third monkey on the ramp to Noah's Ark... and brother its starting to rain. Join our efforts to Secure America's Borders and End Illegal Immigration by Joining ALIPAC's E-Mail Alerts network (CLICK HERE)
-
04-04-2024, 09:02 PM #8313
Boost your survival kit with essential oils
04/04/2024 // HRS Editors // 850 Views
Tags: alternative medicine, disaster, emergency medicine, emergency stockpile, emergency supplies, essential oils, frankincense, Gear, goodhealth, herbal medicine, Herbs, homesteading, Lavender, natural cures, natural health, natural medicine, Naturopathy, off grid, peppermint, preparedness, prepper, prepping, prepping supplies, remedies, SHTF, survival, survival gear, survival kit, survival medicine

After disaster strikes, you may have trouble buying various supplies because stores will eventually run out of products.
Fortunately, you can stock up on items like essential oils now to ensure that you have access to versatile ingredients with many survival uses. For example, essential oils like eucalyptus, lemon and lavender can be used for cleaning your home or supporting your mood. (h/t to SurvivalSullivan.com)
The survival uses of essential oils
Keep in mind that essential oils are concentrated and in most cases, must be used with a carrier oil or diluted with water, especially if applied to your skin.
Here are some essential oils with many survival uses:
Essential oils for cleaning
In a post-SHTF world, the power might go out and you may lose access to running water. This can often disrupt your regular home cleaning routine.
Essential oils will come in handy when commercial cleaning products are unavailable and you need to ration your limited water supply.
Eucalyptus essential oil can be combined with baking soda and the mixture can be used to clean items like mattresses, stuffed animals and other things that can't be washed normally. The smell of eucalyptus oil in your pantry or stockpile can also help deter pests.
Use lemon essential oil to disinfect. It can also be used to clean and disinfect most surfaces.
Alternatively, you can use orange essential oil to cut through grease and grime. It also leaves everything smelling fresh and clean. Orange essential oil is also an effective deterrent for ants.
If you have thyme essential oil, use it to disinfect cutting boards and clean other areas where you prepare raw meat.
Essential oils for supporting a positive mood
Essential oils can also be used to reduce anxious feelings and support a positive mood. (Related: Here’s why Frankincense Serrata Essential Oil deserves a spot in your survival cache.)
Popular essential oils that can help positively affect your mood include bergamot, jasmine, lavender and Roman chamomile.
Essential oils as insect and pest repellents
Cinnamon oil can be used to deter pests from your home or campsite.
Combine peppermint essential oil water and spray it around your home or campsite to keep away pests such as ants, spiders and even mice.
Tea tree oil can be combined with water in a spray bottle and used to spray your campsite or other shelter area to repel pests.
Where to get organic essential oils
The Health Ranger Store offers a variety of organic essential oils with many survival uses. Organic Eucalyptus Essential Oil has a crisp and distinctive smell. When used for aromatherapy, it can help you clear your mind and improve your focus.
Organic Eucalyptus Essential Oil is also an all-natural way to keep your home or car smelling fresh. Additionally, this essential oil can be used to maintain fresh breath. Just dilute it in water and rinse your mouth for a pleasant, fresh experience.
Often referred to as the "King of Essential Oils," frankincense essential oil is a highly potent and versatile oil that offers many health benefits and uses. Organic Frankincense Serrata Essential Oil from the Health Ranger Store also contains other useful components that possess natural cleansing properties, such as alpha- and beta-pinene, limonene, myrcene and linalool.
These compounds make frankincense serrata essential oil a great addition to homemade natural cleaning solutions as well as a beneficial item in your emergency preparedness or survival kit.
Organic Lemon Essential Oil is a potent, all-natural food-grade oil that is extracted from the peel of the Citrus limon fruit. Its powerful cleansing properties and refreshing aroma make it ideal for use as a non-toxic cleaner or air freshener for your home or car.
Organic Lavender Essential Oil is carefully extracted from the flowers of Lavandula angustifolia through steam distillation. It has a distinct floral scent, marked by sweet herbal nuances and rich green accents.
Use Organic Lavender Essential oil to freshen your home, linens and clothes by placing a few drops of this purified essential oil in your diffuser, wardrobe, or on your mattress. To relieve stress and keep you more grounded and focused, add this fragrant essential oil to your bath water for a luxurious lavender bubble bath.
Peppermint essential oil is extracted by steam distilling the leaves and topmost flowers of the Mentha piperita plant, which is a hybrid species of spearmint and water mint. This versatile oil contains high concentrations of menthol (50 to 60 percent) and menthone (10 to 30 percent), which are known for their invigorating, energizing and cooling properties.
Organic Peppermint Essential Oil can be used topically or for aromatherapy to support your overall health and well-being. You can also use it to keep your breath fresh or to freshen your home naturally.
You can trust that essential oils from the Health Ranger Store are thoroughly lab-tested for glyphosate, heavy metals and microbiology.
Go to EssentialOils.news to learn more about the benefits of using essential oils. You can also visit Health Ranger Store and Brighteon Store for more supplies for your prepping stockpile.
Watch the video below to learn more about the benefits of using Organic Eucalyptus Essential Oil.
This video is from the Health Ranger Store channel on Brighteon.com.
More related stories:
Prepper first aid: 10 Must-haves for your natural medicine first aid kit.
Natural and effective cleaning supplies you can use to safely disinfect your home.
How to make a DIY hand sanitizer using essential oils.
Sources include:
SurvivalSullivan.com
HealthRangerStore.com 1
HealthRangerStore.com 2
HealthRangerStore.com 3
HealthRangerStore.com 4
HealthRangerStore.com 5
HealthRangerStore.com 6
Brighteon.com
Boost your survival kit with essential oils – NaturalNews.com
If you're gonna fight, fight like you're the third monkey on the ramp to Noah's Ark... and brother its starting to rain. Join our efforts to Secure America's Borders and End Illegal Immigration by Joining ALIPAC's E-Mail Alerts network (CLICK HERE)
-
04-06-2024, 07:58 AM #8314
Must-have items for sheltering in the wilderness
04/05/2024 // Olivia Cook // 1.5K Views
Tags: bugout, Combustion, cutting tools, digging tools, emergency medicine, first aid, Gear, lifesaving tools, lighting devices, preparedness, prepper, prepping, purification, survival, survival essentials, survival gear, water filtration, wilderness survival

Here is a short list of items you should have in your survival kit when bugging out or camping in the wilderness. (h/t to CampingSurvival.com)Cutting tools
Choose your survival knives based on tasks they must be able to perform – i.e., building and repair, self-defense, hunting, cooking or wood processing – not just their features. This also applies to axes, multi-tools, saws, shovels and other survival gear.
A good survival knife has to be thin enough to carve well but strong enough to baton with. It also needs to be comfortable in your hand and must have a full-tang blade about four to six inches long. The handle must be ergonomic and made from a material that doesn't get overly slick or slippery when wet and grimy. Learn the difference between "bushcraft" knives and "survival" knives. (Related: Health Ranger Report: High-grade corrosion-resistant knives co-designed with Dawson Knives a popular choice among backpackers and preppers.)
Combustion and lighting devices
These include fire-starting implements that will allow you to build a fire for cooking, drying wet things or keeping yourself warm.
Pack at least two different kinds of fire starters in your survival bag, such as a ferro rod and a lighter or waterproof matches. You'd also need some quick-lighting tinder or kindling (e.g., cotton fabric, dry grass, leaves, sticks, etc.) so you can easily get a proper fire going.
Personal lighting, such as flashlights, headlamps and weather-proof torches, are life-saving utilities for navigation (especially when darkness is constant) and other basic tasks, so don't go cheap on them.
Cover and shelter
This will include items that will help keep your core body temperature to around 98 F, which you can also use as a makeshift cover from the elements (rain, sun, wind, etc.) – a blanket (an emergency blanket, a classic wool blanket and/or a Mylar blanket), a tarp (preferably a 10 by 10 waterproof ripstop nylon tarp with multiple tie-out points) and others.
Garments fall under this category – tops, bottoms, footwear, headgear, etc. Consider – and don't scrimp – on high-quality sturdy footwear that fits you properly and offers good support when you are loaded with a pack and other gear. Get a pair that is optimized for multi-terrain.– serving the purpose of protection against adversities of the environment, such as stability on slippery ground, temperature and wear from rough ground.
Cordage
These are some of the most important resources you carry with you and should never be without – climbing rope, natural or nylon rope, paracord, string, twine, UHMWPE braided cords. There are endless light- and heavy-duty uses for them. (Related: Prepping essentials: 12 Survival uses for a paracord.)
You can also learn how to make natural rope out of various materials, including the fibers of various wildflowers, the inner fibers of agave or yucca or the sinew of large game animals.
Also throw in a couple of cargo or waterproof duct tape rolls, which have more than a hundred practical uses for survival, including first aid applications.
Cotton bandanas and scarves
A cotton bandana, and larger neckerchiefs, are used for decorative and protective purposes. A scarf can be used in many ways – worn as a perennial accessory or to protect the head from overheating and the lungs from dust inhalation in arid regions. Conversely, in cold weather, wearing a scarf can protect your sensitive facial skin tissue and keep your head, neck and chest warm – preventing heat loss.
Bandanas, neckerchiefs and scarves double as great aids for a variety of first aid applications to water filtration and treatment and work well for signaling.
Map and compass
With a topographic map and compass (assuming you know how to read and use them), you can confidently establish your bearings or location and set a course toward safety. Without these, you may wander in circles or head in the wrong direction. These items don't rely on batteries or satellites or have screens that break.
Learn how to use a compass and never get lost again. In case you break your compass, you can learn to create your own with sticks.
Throw in signaling essentials in your survival essentials, such as a whistle, a signal mirror or other reflective materials, etc., and learn ways to signal for help.
Water filtration and purification supplies
You can consider portable filters Life Straw Original (which can filter around 40 gallons of water or about two months' worth of drinking water), Lifestraw Filter Bottles (which will allow you to transport your water) or Life Straw Gravity Filter (a collapsible portable water sack).
For water purification – but without filtration – you need iodine tabs, like the Potable Aqua Plus with neutralizer tabs and/or a portable SteriPen UV wand that doesn't leave any chemical aftertaste.
Don't forget your containers – preferably metal (or stainless steel) that would be ideal containers as your drinking vessels and cookware.
First-aid kit
Customize your first aid and trauma kits to contain provisions for minor and severe injuries and illness – a life-saving resource when access to professional medical help or a hospital is limited.
Visit Survival.news for more stories like this.
Watch the following video about the Wilderness survival kit: 10 Essentials you need.
This video is from the Daily Videos channel on Brighteon.com.
More related stories:
UHMWPE braided cord:: An amazing survival tool when SHTF.
Survival basics: 7 Essential skills for modern preppers.
Prepare for common surviving scenarios by stocking up on these lifesaving tools.
Sources include:
CampingSurvival.com
FreeRangeAmerican.us 1
FreeRangeAmerican.us 2
ModernSurvivalBlog.com
WildernessCollege.com
PrimeSurvivor.com
Survival-Kompass.de
TheBushcraftStore.co.uk
Backpacker.com
Instructables.com
TacticalGear.com
NOLS.edu
Brighteon.com
Must-have items for sheltering in the wilderness – NaturalNews.comIf you're gonna fight, fight like you're the third monkey on the ramp to Noah's Ark... and brother its starting to rain. Join our efforts to Secure America's Borders and End Illegal Immigration by Joining ALIPAC's E-Mail Alerts network (CLICK HERE)
-
04-06-2024, 09:58 AM #8315

Beretta 1301 Tactical Slugfest - Hickok45
BERETTA 1301 TACTICAL SLUGFEST - HICKOK45
Beretta 1301 Tactical Slugfest - Hickok45 (bitchute.com)

 Keep on Preppin'
Speaking Truth to Power!
364 subscribersIf you're gonna fight, fight like you're the third monkey on the ramp to Noah's Ark... and brother its starting to rain. Join our efforts to Secure America's Borders and End Illegal Immigration by Joining ALIPAC's E-Mail Alerts network (CLICK HERE)
-
04-07-2024, 12:18 AM #8316
 35:03NOW PLAYING
SNOW CAMP IN DARK FOREST
101K views
5 days ago
 37:53NOW PLAYING
WARM CARAVAN CAMP WITH A STOVE IN THE SNOW
220K views
12 days ago
 40:16NOW PLAYING
CAMPING FOR 24 HOURS IN A SNOWY FOREST
395K views
2 weeks ago
 43:40NOW PLAYING
OUR CARAVAN FROZE IN THE SNOW CAMP
737K views
3 weeks ago
 41:42NOW PLAYING
RAINY CHRISTMAS CAMP IN DESERTED FOREST
233K views
1 month ago
 34:14NOW PLAYING
WE HEARD SOUNDS AT THE CAMP THAT RUINED OUR PEACE
685K views
1 month ago
 28:42NOW PLAYING
A WOLF CAME TO OUR CAMP ON A RAINY NIGHT
153K views
1 month ago
 32:36NOW PLAYING

FIRST SNOW CAMP OF THE YEAR DEEP IN THE FOREST
2.4M views
1 month ago
 40:08NOW PLAYING
WE WENT TO THE LAKE IN OUR CAMP | WE DROPPED THE DRONE INTO THE WATER
115K views
2 months ago
 43:14NOW PLAYING
FIRST CAMP WITH OUR OVENSTOVE ON THE HILL AT A 1500 METERS ALTITUDE
209K views
2 months ago
 21:16NOW PLAYING
WE WERE ALMOST STRANDED ON THE WAY | We Had the Unimog Repaired
109K views
2 months ago
 35:47NOW PLAYING
WE WATCHED THE SUN eclipse at the camp
80K views
2 months agoIf you're gonna fight, fight like you're the third monkey on the ramp to Noah's Ark... and brother its starting to rain. Join our efforts to Secure America's Borders and End Illegal Immigration by Joining ALIPAC's E-Mail Alerts network (CLICK HERE)
-
04-07-2024, 12:22 AM #8317
Learn to make your own infant formula that’s far healthier than store-bought processed formula
Friday, May 13, 2022 by: Ethan Huff
8,920VIEWS
 (Natural News) The ongoing baby formula shortage has many parents concerned, but there is no need to panic. These simple, easy-to-make recipes will provide your little ones with more nutrition than anything they could ever get from a store-bought powder.
Each of these recipes was lovingly created by the nutrition experts at the Weston A. Price Foundation (WAPF), which is dedicated to teaching people about whole foods made traditionally for optimal health.
The first one contains raw cow’s milk, which unfortunately is not available in every state or area. To see if raw milk is available near you, visit the Real Milk website.
Just to be clear, the following recipe can still be made with pasteurized commercial milk. It will not be as healthy, but it is still better than any store-bought processed formula that you might find.
Raw Milk Baby Formula
Since human breastmilk is naturally richer in whey, lactose, vitamin C, niacin, and long-chain polyunsaturated fatty acids than cow’s milk, as well as leaner in casein (milk protein), WAPF developed this recipe to render the cow’s milk as close as possible in composition to human breastmilk.
The recipe also contains gelatin, which makes the formula easier for babies to digest (this one makes 36 servings).
Ingredients:
• 2 cups whole, raw cow’s milk, preferably from pasture-fed cows
• 1/4 cup homemade liquid whey (Note: Do not use powdered whey or whey from making cheese, which will cause the formula to curdle. Only use homemade whey made from yoghurt, kefir, or separated raw milk – see recipe at WAPF website.)
• 4 tablespoons of lactose (available from Radiant Life, which you can also reach at 888-593-8333)
• 1/4 teaspoon Bifidobacterium infantis
• 1/2 teaspoon unflavored high-vitamin or high-vitamin fermented cod liver oil or 1 teaspoon regular cod liver oil (see WAPF’s recommendations)
• 1/2 teaspoon high-vitamin butter oil (optional)
• 1 teaspoon expeller-pressed sunflower oil
• 1 teaspoon extra virgin olive oil (Note: Always be sure to use the real thing.)
• 2 teaspoons coconut oil
• 2 teaspoons Frontier brand nutritional yeast flakes
• 2 teaspoons gelatin (Collagen hydrolysate is not recommended; see WAPF shopping guide for recommendations.)
• 1-7/8 cups filtered water
• 1/4 teaspoon acerola cherry powder
 Instructions:
• Put 2 cups filtered water into Pyrex measuring pitcher and remove 2 tablespoons (leaving 1-7/8 cups water)
• Pour half of water into pan, place over medium flame
• Add gelatin and lactose to pan, let dissolve stirring occasionally
• Once dissolved, remove from heat and add remaining water to cool mixture
• Stir in coconut oil and optional high-vitamin butter oil, stir until melted
• Place remaining ingredients into blender
• Add water mixture and blend for three seconds
• Place in glass bottles or jars and refrigerate
• Before feeding to baby, warm bottles by placing in hot water or bottle warmer
This same recipe can be made with goat milk as well, but just be aware that goat milk lacks folate and is low in vitamin B12, both of which are vital nutrients for developing infants.
Adding more nutritional yeast to the goat milk formula will help provide extra folate. To compensate for low levels of B12, add 2 teaspoons of organic, raw chicken liver that was frozen for 14 days and finely grated.
Liver-Based Formula
WAPF’s liver-based formula also closely mimics the nutritional profile of mother’s milk. This one absolutely must include coconut oil, which is the only ingredient that provides the special medium-chain saturated fats found in mother’s milk.
Ingredients:
• 3-3/4 cups homemade beef or chicken broth
• 2 ounces organic liver, cut into small pieces
• 5 tablespoons lactose
• 1/4 teaspoon Bifidobacterium infantis
• 1/4 cup homemade liquid whey
• 1 tablespoon coconut oil
• 1/2 teaspoon unflavored high-vitamin or high-vitamin fermented cod liver oil or 1 teaspoon regular cod liver oil
• 1 teaspoon unrefined sunflower oil
• 2 teaspoons extra virgin olive oil
• 1/4 teaspoon acerola cherry powder
Instructions:
• Simmer liver gently in broth until meat is fully cooked
• Liquefy using handheld blender or food processor
• Once liver has cooled, stir in remaining ingredients
• Store in very clean glass or stainless steel container
• To serve, stir formula well and pour 6 to 8 ounces in very clean glass bottle
• Attach clean nipple and set in pan of simmering water until formula is warm but not hot to touch, shake well, and feed to baby (never heat formula in microwave)
Some readers are probably wondering why both of these recipes contain vegetable oils like sunflower and olive oil. The answer is that vegetable oils are very high in linoleic acid, which serves as a precursor for arachidonic acid, which along with DHA is necessary for proper infant development.
At four months, a baby’s first solid food should be an egg-yolk based formula, the recipe for which is available at the WAPF website, along with a simple recipe for fortifying commercial baby formula if you need a simpler shortcut.
The recipe for making your own homemade whey is also provided there along with additional tips for making the recipe process for all baby formulas as simple and organized as possible.
Take some time to peruse the WAPF website as it contains a trove of useful information about nutrition for both babies and adults alike.
“It takes me about 10 minutes now to mix up a batch,” says WAPF chapter leader Sarah Pope about her success in making highly nutritious homemade baby formula quickly and easily, offering the following additional tips:
• Set all tools, ingredients, and recipe on counter
• Measure 2 cups water, remove 2 tbsp
• Put half of water in small saucepan
• Turn dial on stove to 3.5 (low heat)
• Add gelatin and lactose and set coconut oil nearby
• Stir with baking spatula
• In blender, add milk and whey (put back in fridge)
• Add all dry ingredients (put back in cabinet or fridge)
• Then add all oils (except coconut)
• Stir water mixture again
• Take off heat, add coconut oil
• Stir slowly until melted
• Add remaining water and pour into blender
• Blend for three seconds
• Add cream and stir
More healthy home recipes can be found at Superfoods.news.
Sources for this article include:
WestonAPrice.org
NaturalNews.com
NaturalNews.com
Learn to make your own infant formula that’s far healthier than store-bought processed formula – NaturalNews.comLast edited by Airbornesapper07; 04-07-2024 at 11:48 PM.
If you're gonna fight, fight like you're the third monkey on the ramp to Noah's Ark... and brother its starting to rain. Join our efforts to Secure America's Borders and End Illegal Immigration by Joining ALIPAC's E-Mail Alerts network (CLICK HERE)
-
04-07-2024, 12:24 AM #8318
HOW TO MAKE PROBIOTIC GINGER BEER – – A Naturally Fermented Probiotic Drink That is Packed With Health Benefits
Amy S. May 12, 2023 No Commentson HOW TO MAKE PROBIOTIC GINGER BEER – – A Naturally Fermented Probiotic Drink That is Packed With Health Benefits
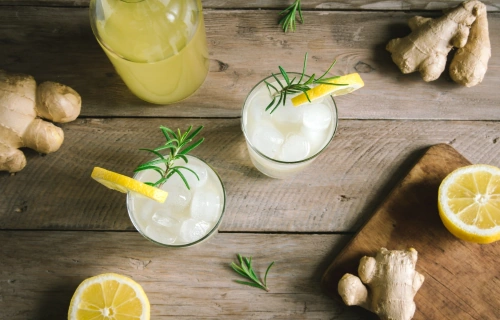
How to Make Probiotic Ginger Beer – a naturally fermented probiotic drink that is packed with health benefits.
This article includes a photo tutorial, information on secondary fermentation, flavoring your ginger beer, and troubleshooting when the process goes awry.
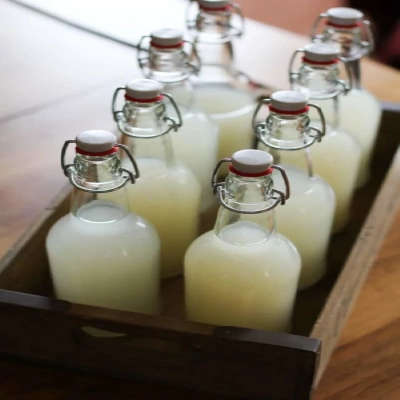
Disclaimer: brewing probiotic beverages at home can be risky. When fermenting probiotc foods and beverages, use caution. Always use sanitized tools and when in doubt, throw it out! If you notice any strange smells or mold, be sure to discard the whole batch.
Many moons ago, I wrote a cookbook called Self Sufficient Backyard. This cookbook is focused entirely on making probiotic-rich beverages such as kombucha, kefir, ginger beer, fermented vegetable juice, and more, at home.
My favorite of all the fermented beverages to make is ginger beer. First and foremost, it is magnificent tasting.
Secondly, it is CHALLENGING.
Perhaps the most challenging and unforgiving of all the fermented drinks.
And for that reason, the most rewarding.
For those of you who have been around this site for a long time, you may remember my easy tutorial on How to Make Ginger Beer.
This is the goof-proof method that works each and every time and does not require much time or attention.
This version of probiotic ginger beer is different. It involves preparing a “ginger bug” (or ginger starter) from scratch.

How does that work?
Probiotics and yeast are naturally occurring everywhere. They are in our fruit and vegetables and are also present in the air. Giving these probiotics and yeast optimal conditions to grow and reproduce results in fermentation.
You’re already familiar with this concept, as it is the same process for creating yogurt, cheese, beer, wine, pickles, prosciutto (and other fermented meats), etc.
Applying this idea to fresh ginger is how we create a ginger starter, which is then used to make ginger beer.
Don’t worry…I’ll go over how to make a ginger starter in excruciating detail later on in this post. First, let’s cover some basics.
WHAT IS GINGER BEER?
Ginger beer is a naturally fizzy beverage with a sweet and spicy bite. Grated ginger is fermented in sugar water and lemon juice, allowing the natural yeasts in ginger to feed and multiply, creating a probiotic beverage.
While ginger beer is a sweet, spicy, delicious beverage all on its own, it is famous for its role in cocktails, particularly the Dark & Stormy cocktail, a mixture of ginger beer and rum, garnished with a slice of lime.
WHAT IS THE DIFFERENCE BETWEEN GINGER BEER AND GINGER ALE?
The phrases, “ginger beer” and “ginger ale” are typically used interchangeably, but there is a difference between the two beverages. Ginger beer is fermented for up to 2 or 3 weeks using a “ginger bug,” where ginger ale is more of a ginger flavored soda.
While there are ginger ale beverages made with real ginger, most ginger ales are simply carbonated water with ginger flavor and sugar. In this sense, ginger ale does not go through the same fermentation process that ginger beer does.
METHODS FOR MAKING GINGER BEER
There are multiple ways to make ginger beer. Here are three of the most common methods:
- Non-probiotic ginger soda/ale: For those who aren’t concerned about the probiotic benefit of fermented ginger beer, you can simply combine ginger simple syrup (made with ginger and sugar) with soda water and achieve a great-tasting homemade beverage. This version contains no probiotics and is basically fancy soda.
- Quick and Easy Ginger Beer with some probiotic benefits: This fast method uses bread yeast for fermentation and requires only two days to complete. For this version, read my blog post on How to Make Ginger Beer. This version is not as probiotic rich, but is still lower in sugar than regular soda.
- Authentic Probiotic Ginger Beer – a health elixir: The authentic method for making fermented ginger beer is outlined in this post. It uses a probiotic-rich “ginger bug” (or ginger starter) which you make yourself at home. Like most things in life, the authentic version takes much longer than the easy version, but also yields great results. This version can take between 2 and 3 weeks to complete.
HEALTH BENEFITS OF GINGER BEER
Fermented ginger beer has a great deal of health benefits and is commonly used to ease upset stomach, nausea or diarrhea.
Ginger is an anti-inflammatory, which can help with migraines, and studies show fresh ginger prevents and fights several types of cancer cells including breast, colon, ovarian, prostate, and lung cancer.
Ginger is also known for cleansing the body of toxic chemicals, easing menstrual cramps, and much more!
The probiotics and yeast that grow during the fermentation process help colonize your gut with good bacteria, which helps boost immunity, fight disease, and promotes overall health.
HOW TO MAKE FERMENTED PROBIOTIC GINGER BEER
Fermented probiotic ginger beer requires a three-step process.
Step 1: Make a “ginger bug” or starter using fresh ginger, water, sugar and lemon juice. This starter is used to brew a batch of ginger beer (Step 2). This can take 1 to 2 weeks to complete (depending on the temperature of your home and how active your culture decides to be).
Step 2: Brew a large batch of ginger beer using the “ginger bug” – you could compare this process to making a batch of sourdough bread dough using sourdough starter. This process takes about 1 to 3 weeks, depending on how active your ginger bug is and how warm your home is.
Step 3: Bottle the ginger beer and allow it to ferment further – Once the beverage becomes effervescent (fizzy/probiotic-rich) we bottle it and allow it to sit for “secondary fermentation” (more on this below). This process takes about 2 to 5 days.
You Will Need:
- 1-quart glass jar or jug
- Cheesecloth
- Stretchy rubber band
- 1-gallon glass jug
- Flip-Cap Bottles
- Fresh ginger
- Organic Cane Sugar
- 2 to 4 Lemons
Ingredients for the “Ginger Bug:”
- 1-inch nub fresh ginger, peeled and grated, plus more for feeding the starter
- 1 tablespoon raw organic sugar, plus more for growing the starter
- 2 cups water
Instructions for the Ginger Bug / Ginger Starter:
Peel and grate a 1-inch nub of fresh ginger (about 1 tablespoon).
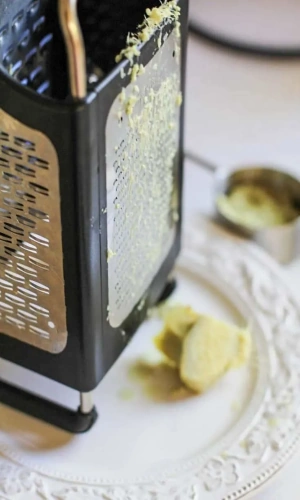
Add the grated ginger, 1 tablespoon of sugar, and two cups of filtered water or spring water (non-chlorinated) to the jar and stir (a 1-quart jar works great).
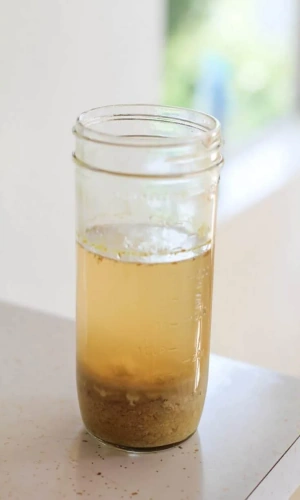
Cover the jar with a cheesecloth or towel. Secure the cloth around the jar with a rubber band. This keeps insects away from the starter.
Allow jar to sit in a warm, dark place for 24 hours. The optimal temperature for preparing the ginger starter and brewing ginger beer is between 70 and 85 degrees.
If your house stays cool, find the warmest spot in your home to place the ginger starter. This process activates the probiotics and yeast that are in the ginger and allows them to begin reproducing.

Feed the colony – Once a day for one week, add one teaspoon of sugar and one teaspoon of grated fresh ginger to the jar and stir well.
This ensures your ginger starter stays fed and grows, similar to sourdough starter. Stir a couple of times per day.
During this process, natural yeasts are released and create a white substance at the bottom of the jar. This is where the probiotics come from.
After about 3 to 5 days (perhaps longer if your house is very cold), the liquid will begin bubbling when you stir it. Once you can see and hear bubbles without touching the jar, your ginger bug is ready to be used. This will usually take 7 to 10 days in a warm (70 to 80 degrees F) house, but longer in a cool house.
To expedite the process, wrap the ginger starter jar in a heat blanket or an insulated blanket to keep it warm. If after 7 days, your ginger bug is still not bubbling, continue adding a teaspoon of sugar and ginger until it does. Have patience, friend!
In some cases, folks have gotten bubbles within only a few days of beginning their starter. While this is unusual, it is a sign the starter is ready! As soon as you see the bubbles rushing from the bottom to the top, you’re ready to go.
Use the liquid from ginger starter to make ginger beer (instructions below).
You can continue adding water, ginger, and sugar to the starter and to use it for multiple batches of ginger beer. In this sense, you can treat your ginger starter the same way one would treat sourdough starter and keep it alive.
Note: If you ever see mold floating on top of the starter liquid, discard the starter and make a new one.
Ingredients for the Ginger Beer:
- 1 cup ginger starter (see above)
- 1 scant gallon of filtered spring or well water
- 1 1/4 cups organic cane sugar
- 1/2 cup fresh lemon juice
- 1/3 cup fresh ginger, grated
Instructions for 1 Gallon of Probiotic Ginger Beer:
Fill a gallon-sized jug most of the way up with spring or well water (do not use water from the tap unless your house runs on a well). This water should be room temperature or slightly warmer (aim for 70 to 80 degrees).
Add one cup the the ginger starter, along with 1 1/4 cups of sugar, 1/2 cup of lemon juice, and 1/3 cup of grated ginger. Stir very well.
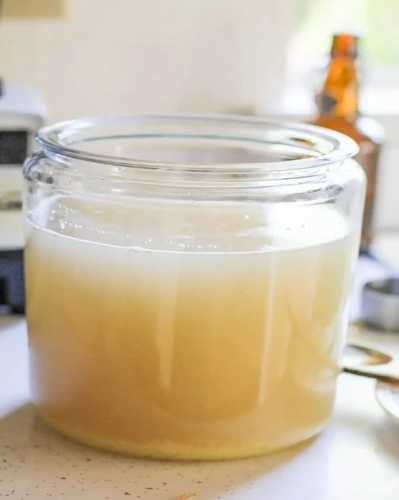
Cover the jug with a cheesecloth or towel bound by a rubber band and put it in a warm, dark place at room temperature for 8 to 10 days. Mine takes 8 days, even in a very warm (80⁰F +) house.
Taste-test the mixture periodically to see if more sugar needs to be added (the natural probiotics will eat the sugar so if the beverage ever loses all of its sweetness, add a little more sugar (no more than 2 tablespoons at a time), but be careful to not overload the probiotics, as they can die when given too much sugar.
Stir the mixture once or twice a day. You will notice a white substance forming around the ginger at the bottom of the jug.
This is the natural yeasts coming out of the ginger – it’s a good sign! There will also be large bubbles that form on the surface of the liquid.
The ginger beer is ready when the substance becomes bubbly when stirred (similar to when you’re making the ginger starter).
Once the ginger beer is ready, give it a taste test. If it doesn’t taste sweet, add additional sugar and ginger because once you bottle the brew, it goes through secondary fermentation and the probiotics continue to need to eat sugar.
At this point, your options are to either bottle the ginger beer as-is or flavor it prior to bottling it. See information on Secondary Fermentation and flavoring options below.
Pour the liquid (including the ginger pulp) into sealable bottles and set them in a dark room for 2 to 4 days. This process makes the ginger beer very fizzy.
The warmer the room, the faster the beverage gets fizzy, so open a bottle every day or so to check the fizz and level of sweetness.
Both the fizz and sweetness is up to your taste but be very careful to not allow the bottles to sit for too long because they most definitely will explode.
Place bottles in the refrigerator to calm the fermentation process. Note that the ginger beer will continue to ferment in the refrigerator, so try to consume the beverage within a few days after secondary fermentation is complete for best results.
Leaving it in the refrigerator for longer than a week will result in a “drier”, less sweet ginger beer.
You can now brew another batch of ginger beer using the ginger starter you have been feeding. Because your ginger starter is now more mature, it will take a little less time to brew your second batch.
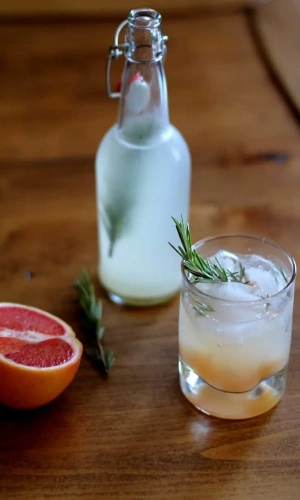
SECONDARY FERMENTATION
Once ginger beer is finished with its primary fermentation, you may add additional sugar and/or ingredients (see “Flavoring Ginger Beer” section below) to flavor it and allow it to go through a secondary fermentation.
The purpose of secondary fermentation is threefold: To achieve a fizzy beverage (it will get just as fizzy, if not fizzier than soda!), to make the drink even more probiotic-rich, and to give it delicious flavor.
FLAVORING GINGER BEER
Ginger beer is perhaps the easiest probiotic drinks to flavor because just about any type of fruit and/or herb goes wonderfully with ginger.
The fact that there is already a great deal of sweet and spicy flavor in ginger beer provides a wonderful canvas for incorporating other sweet, sour, tart or creamy flavors.
In this way, the added ingredients are typically what one tastes first when drinking the ginger beer, with the spicy ginger coming through at the finish.
You have a few options for adding ingredients for secondary fermentation. You can add fresh fruit juice, a homemade simple syrup infused with any flavor you like, or a fruit/herb sauce (similar concept to simple syrup).
If you’re adding fruit juice, simply add 1/4 cup to each glass bottle before filling them the rest of the way up with ginger beer. Secure the lids tightly and allow them to sit for 2 days. Immediately transfer to the refrigerator to slow the fermentation process.
Getting creative with fruit and herb combinations is brilliant when it comes to this drink and you are virtually guaranteed to end up with a delicious probiotic drink!
To make flavor ginger beer, choose your fresh fruit and/or fresh herbs. Combine 2 cups of fresh fruit with ½ cup cane sugar and 1/3 cup water in a saucepan (Note: if you’re adding fresh herbs, do so here as well). Bring to a full boil and cook until the fruit has softened. Allow mixture to cool completely. Once cool, divide it between the bottles you are using to bottle the ginger beer.
Fill the bottles the rest of the way up with ginger beer, seal tightly, and allow bottles to sit at room temperature for 2 days to undergo secondary fermentation. Transfer the bottles of ginger beer to the refrigerator and chill.

Here are some of my favorite flavor combinations for ginger beer:
- Blackberry Sage (2 cups blackberries, 1/2 cup sugar, 1/3 cup fresh sage, packed)
- Grapefruit Rosemary (1 cup fresh grapefruit juice, 2/3 cup sugar, 3 sprigs rosemary)
- Coconut Basil (1 can full-fat coconut milk, 1/2 cup sugar, 1/2 cup fresh basil, packed)
- Blood Orange (1 cup fresh blood orange juice, 1/2 cup sugar)
- Raspberry Mint (2 cups fresh raspberries, 1/2 cup sugar, 1/2 cup fresh mint)
SHELF LIFE OF GINGER BEER
When properly sealed in bottles, plain ginger beer can last for up to one month in the refrigerator. For best results, drink within 2 weeks of brewing.
When ingredients such as fruit, are added to ginger beer, consume within 1 week for best results and keep in the refrigerator for up to 2 weeks. While ginger beer can last even longer than this, it is best to err on the safe side when it comes to probiotics.
A NOTE OF CAUTION
As is always the case with probiotic beverage, be cautious when opening a bottle after secondary fermentation as pressure builds and the drink will be fizzy. Never point a bottle at your face (or at any other person) while opening, and never hand a bottle to a child to open.
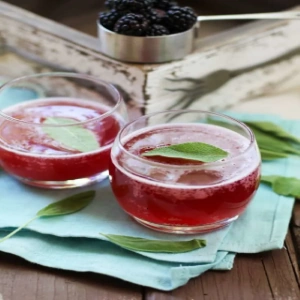
TROUBLESHOOTING
If it seems like either your ginger starter or ginger beer is taking a long time to come to life (get bubbly), don’t worry. This is likely the result of the temperature of your home, and it may just take some extra time.
As mentioned previously, if you want to expedite the process, wrap the jar in a heating pad and set it to a low temperature to keep the starter warm.
On the flipside, in rare cases, a ginger starter may be ready after only a few days. As long as bubbles are flowing from the bottom to the top, that is a sign the starter is rich in probiotics and is ready to be put to use.
Like many probiotic beverages, ginger beer is one of those that seems to be doing nothing for quite some time and then all of a sudden, it’s working.
At the end of secondary fermentation, if your ginger beer too dry (not sweet and very fizzy), this is because the yeast consumed all of the sugar that was in the bottle, leaving very little sweetness for you.
Some people prefer drier ginger beer, but if you prefer it to be on the sweet side, simply make sure you add additional sugar (either cane sugar, fruit, or juice) prior to bottling your next batch.
Did you pop open a bottle of ginger beer after 3 days of secondary fermentation and it wasn’t fizzy and it still tasted sweet? If this is the case, your ginger beer still contains residual sugar that needs to get eaten up by the probiotics. This is okay!
Simply leave the remaining bottles (if any) at room temperature to continue secondary fermentation. Because there was plenty of sugar in the beverage prior to bottling, it will simply take an additional day or two for the probiotics to consume the sugar and for the beverage to become fizzy.
How to Prevent Flat Ginger Beer:
To prevent flat ginger beer, be sure there are small bubbles that rise from the bottom to the top of the liquid prior to bottling it for secondary fermentation, as this is a sign of probiotic activity. Keep in mind that even if your ginger beer does not get fizzy, it is still full of probiotics and is great for you!
Wondering if Your Batch is Bad?
If at any point you find mold on the surface of your ginger beer while it is brewing, throw the whole batch out, even if it is only a tiny bit of mold. Ginger beer is easy to re-make (especially since you already have your ginger starter ready to go), and it is not worth sacrificing quality and health even if it is frustrating to have a failed batch.
Books can be your best pre-collapse investment.
Carnivore’s Bible (is a wellknown meat processor providing custom meat processing services locally andacross the state of Montana and more. Whether your needs are for domestic meator wild game meat processing)
The Lost Book of Remedies PDF ( contains a series of medicinal andherbal recipes to make home made remedies from medicinal plants and herbs.Chromic diseases and maladies can be overcome by taking the remediesoutlined in this book. The writer claims that his grandfather was taughtherbalism and healing whilst in active service during world war twoand that he has treated many soldiers with his home made cures. )
Easy Cellar(Info about building and managing your root cellar, plus printable plans. The book on building and using root cellars – The Complete Root Cellar Book.)
The Lost Ways (Learn the long forgotten secrets that helped our forefathers survive famines,wars,economic crisis and anything else life threw at them)
LOST WAYS 2 ( Wordof the day: Prepare! And do it the old fashion way, like our fore-fathers did it and succeed longbefore us,because what lies ahead of us will require all the help we can get. Watch this video and learn the 3 skills that ensured our ancestors survival in hard times offamine and war.)
HOW TO MAKE PROBIOTIC GINGER BEER - – A Naturally Fermented Probiotic Drink That is Packed With Health Benefits - PrepperFortressIf you're gonna fight, fight like you're the third monkey on the ramp to Noah's Ark... and brother its starting to rain. Join our efforts to Secure America's Borders and End Illegal Immigration by Joining ALIPAC's E-Mail Alerts network (CLICK HERE)
-
04-07-2024, 02:06 AM #8319
The Top Medicinal Herbs for the Garden: How to Grow & Use Healing Plants
Amy S. May 24, 2023 No Commentson The Top Medicinal Herbs for the Garden: How to Grow & Use Healing Plants
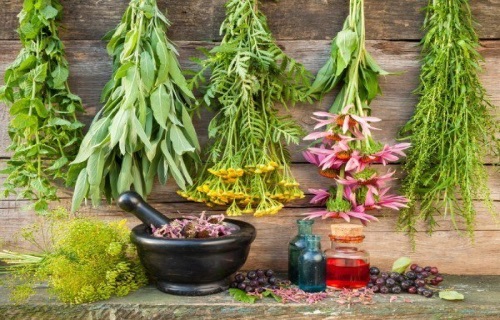
In an ideal world, we would each have inherited the ability to conjure a personal list of essential garden herbs, tailored to our particular climate and health concerns. As it is, many of us are re-learning the traditional art of the apothecary garden—a place where beauty, medicine, and bees reign supreme.
My hope is that the information below inspires you, as a jumping board of sorts, to create your own unique dream herb garden. I chose each plant based on its ease of cultivation and medicinal usefulness and versatility. But bear in mind, there are many more herbs out there to choose from!
Thinking of starting a medicinal herb garden? Growing medicinal garden plants allows you to harvest homegrown remedies right outside your door. Here are more than 45 medicinal plants to consider growing in your garden this season.
While many of us grow medicinal plants without even realizing it, some folks grow gardens filled with medicinal herbs they use to stock homegrown apothecaries.
HOW TO CHOOSE PLANTS FOR YOUR MEDICINAL HERB GARDEN
With so many wonderful medicinal plants to choose from, how do you pick what to grow? I’d advise starting with plants you think you’ll actually use. So if you’re a fan of tulsi, chamomile, or lemon balm tea, those are good places to start.
Plants for the home medicinal garden :
Calendula – Gorgeous flowers excellent for many uses
Tulsi – Great for tea, fresh or dried
Chamomile – Great as a tea fresh or dried, wonderful nervine, aid upset stomach, calm upset children
Mint (in pots) – Helps some formulas work a bit better, tastes good in tea, great for drying, great for sun tea infusions
California Poppy – Best tinctured fresh and so easy to grow from seed. A family favorite for tea
Spilanthes – Fabulous antiviral, antibacterial, antimicrobial. Fun for kids to grow and taste. I use it a lot and it’s very easy to grow
Lemon Balm – Great taste and so relaxing. Best to tincture when fresh as opposed to dry, so grow it yourself to be able to do that
American Skullcap – Great nervine which, along with California poppy and lemon balm, is best when tinctured fresh
Sage – So useful for so many things: Hot flashes, seasoning food, make an herbal honey that works great as a cough syrup
Solomon’s Seal – Great for all things musculoskeletal as well as digestion
Yarrow (white) – Good for bruising, stopping bleeding, pain relief, one of my most used with grandkids
Lavender – Great for a lovely tea, massage lotion, add to baked goods, digestion. A favorite for many.
- Medicinal Garden
- With your seeds kit, you’ll also receive a FREE Medicinal Guide that shows you how to turn these 10 plants into tinctures, ointments, salves, poultices, decoctions, infusions, essential oils —all in minute detail so you can follow our guide even if you’ve never made an herbal medicine in your life.

It can be difficult to keep up with harvesting and processing all the medicinal herbs in the garden, so don’t go overboard when you’re first starting out or you’ll likely find it’s too much.
Note which medicinal plants are perennial in your growing zone, or are suited to conditions like part shade. Then also consider which might be especially useful remedies for you to have on hand, like plantain and violet (good herbs for cough, among many other uses).
Or perhaps you’d like to choose some herbs known for stress-relieving properties or herbs for sleep, including lemon balm, chamomile, valerian, and California poppy. Or plan to stock your apothecary with immune-boosting herbs like elderberry and echinacea.
USING MEDICINAL GARDEN HERBS SAFELY
Please note that when using medicinal herbs, you need to research their cautions and contraindications. Many herbs can affect the way prescription medications are absorbed by the body or are not recommended for certain health conditions. Look up this information and discuss any herbs you’re considering with your physician before consuming.
Little research has been done on the safety of medicinal plants during pregnancy, so proceed with caution and check with your doctor before using herbs in pregnancy.
WHERE TO GET PLANTS FOR THE MEDICINAL GARDEN
Many of these plants are perennial herbs, which means they can often be obtained as divisions from other gardeners, though you want to be sure the garden you’re getting it from isn’t one of the unlucky hosts of the dreaded jumping worm, an invasive you want to learn to recognize. Here’s what to know about identifying and dealing with Asian jumping worms.
If you want to avoid the possibility of contaminated soil, you can either grow these plants from seeds, or root them from cuttings. Here’s what to know about propagating plants from cuttings.
High Mowing Seeds, Botanical Interests, and True Leaf Market carry seeds for many of the medicinal herbs listed below. Seeds Now has a medicinal herb garden starter pack worth checking out.
The most expensive, but the quickest and easiest way to get your medicinal herbs, is as plant starts from a nursery. You’re less likely to find the more unusual medicinal plants at your local garden center, though, and you may need to purchase seeds for those.
WHAT TO GROW IN A MEDICINAL HERB GARDEN
Below you’ll find suggestions for some of the more common plants you might consider adding to your medicinal herb garden, as well as many useful wild plants that are often dismissed as weeds. Last, I’ll include a list of some of the less common plants you can add to your medicinal herb garden if you want to expand your homegrown herbal apothecary.
PERENNIAL HERBS TO GROW IN THE MEDICINAL GARDEN
Elderberry
Elderberry is on the shortlist for must-have herbs for the medicinal herb garden if you have the space. An elderberry plant will provide you with not one, but two medicinal (and delicious!) crops, elderberries and elderflowers. Here’s what to know about growing elderberry and elderberry varieties to consider for your growing conditions, including some compact cultivars for smaller-space gardens. If you live in a very cold or very warm climate, be sure to choose an elderberry suited to your growing zone.
Elderberry is best known for its immune-stimulating properties, but it’s also considered useful for arthritis and many other ailments, and as an all-around anti-inflammatory. Elderflower is often used for soothing skin and as a fever reducer, wonderful in elderflower tea or as a tincture.
Here are research-backed recipes for homemade elderberry syrup and elderberry tea. You’ll find loads more delicious recipes for elderflower and elderberry in my book, Everything Elderberry.

Lemon Balm
One of most herbalists’ favorite medicinal plants, lemon balm is delicious and a soothing de-stresser. Wonderful both fresh and dried in tea, lemon balm can also be tinctured.
A tough perennial, lemon balm is easy to grow from plant divisions or cuttings, so you can see if you can get plants free from another gardener. You can also grow it from seed.
Lemon balm can be a bit invasive in warmer climates, so harvest often if you don’t want it seeding the rest of your yard.
Here’s more on uses for lemon balm.
Peppermint
A go-to remedy for headaches and upset tummies, peppermint is also a delicious herb to keep on hand even if you don’t use it medicinally.
A notoriously aggressive plant, peppermint should grow somewhere you don’t mind it spreading. You can also grow it in a container to help keep it in check.
Lavender
The soothing scent of lavender has been studied for its beneficial impact on sleep quality. One especially lovely way to enjoy lavender is to grow your own and dry buds on the stem to keep in a vase by your bedside. They’re also delicious steeped with other sleep-promoting herbs in a relaxing bedtime tea.
Lavender needs full sun and well-draining soil. Lavender may have more concentrated essential oils when grown in poorer soils.
Thyme (Zones 2 to 10)
Besides being a delicious culinary herb, thyme has antimicrobial properties and is often recommended for treating coughs and respiratory infections.
Upright thyme is easier to harvest than creeping thyme, but creeping thyme spreads nicely as a groundcover, helping to reduce the need for mulch in garden beds. Thyme also makes a deliciously scented and beautiful grass alternative if you’re looking to replace some of your lawn.
Here are loads more ground cover herbs to consider. You can grow thyme beneath your taller plants as a living mulch. It’s often recommended as an elderberry companion plant.
Thyme is easy to propagate from divisions or cuttings, and once you have some, you can divide it to expand your thyme patch.
If you live in a cold climate, be sure to find a thyme suited to your growing zone, as not all can survive extremely cold winters.
Echinacea
Echinacea is well known as an herb for supporting immune function and fighting infection, and it’s a wonderfully drought-tolerant, pollinator-friendly plant to include in the medicinal herb garden.
Echinacea purpurea is considered easier to grow, and the whole plant may be used medicinally. Flowers, stems, leaves, and roots may be tinctured for use both internally and externally.
Echinacea prefers full sun but isn’t fussy about soil. A deep-rooted plant, it’s a good choice for areas that get less water.
Rosemary
Rich in antioxidants, rosemary is prized for its beneficial effects on pain and cognition. If your medicinal herb garden grows in zones 7 to 10, you may be able to grow this delicious herb all year round. If you live in a cooler climate, you can pot up your rosemary and grow it indoors, though it can be challenging to keep it happy in the winter.

Rosemary prefers full sun and high humidity and soil with good drainage.
Hyssop
Hyssop teas or syrup are often used to help with coughs, congestion, and fever. The leaves can be applied topically to alleviate pain and bruises.
Hyssop is yet another member of the mint family, but unlike many mints is not an aggressive spreader. Hyssop prefers full sun and makes a beautiful addition to the medicinal herb garden.
Note that anise hyssop (Agastache foeniculum) is a related, but different plant from hyssop (Hyssopus officinalis). Anise hyssop was used in similar ways by Native Americans.
Bee Balm / Bergamot
Bee balm’s other name, bergamot, comes from the plant’s delicious scent, which smells a lot like the fruit bergamot that gives Earl Grey tea its flavor. But these bergamots aren’t related, and many bee balm leaves taste a lot like oregano (not what you want in your tea).
Drying bee balm may improve its flavor for tea, and some people use the flower.
Bee balm has antimicrobial properties and is considered helpful for promoting digestion and alleviating bloating. An antispasmodic, it’s also used for menstrual cramps and coughs. Here’s more on using bee balm from The Herbal Academy.
Yet another member of the mint family, bergamot is also prone to spreading, making it a good candidate for sharing with others (or getting some from a neighbor). It’s relatively easy to pull, though.
Catnip
Most people don’t think of catnip as an herb for humans, but it’s useful for promoting sleep and a natural bug repellent. I put the catnip growing in my garden in my evening tea blend along with my fresh lemon balm, yarrow, and violets.
Catnip is an exceptionally hardy perennial, often one of the earliest herbs to green up in spring. Catnip self-sows readily, so cut the flowers before they seed if you don’t want it popping up in other parts of your yard.
A lot of people confuse catnip with catmint, a lovely garden plant that’s generally not used medicinally. Here’s what to know about catnip vs catmint.
Meadowsweet
High in salicylic acid (the active ingredient in aspirin), meadowsweet is anti-inflammatory, and a go-to for pain relief and digestive issues. In Backyard Medicine, Julie Bruton-Seal and Matthew Seal recommend a tea made with dried meadowsweet before meals for digestive issues or 1-3 cups daily for arthritis and rheumatic pains.
Meadowsweet prefers full sun but can tolerate some shade. A generally unfussy plant, meadowsweet doesn’t need a lot of special treatment and will thrive in average soils with consistent moisture. Meadowsweet clumps may be propagated by division every few years.
ANNUAL HERBS TO GROW IN THE MEDICINAL GARDEN
Chamomile
Chamomile is a go-to for tea that promotes relaxation and sleep. In the aster family, chamomile may bother those with ragweed allergies.
Chamomile’s tiny seeds may take up to three weeks to germinate, so plant them where you’ll remember to water them. Chamomile self-sows readily, so you may find volunteers in other parts of your garden..
German chamomile is generally preferred for herbal uses, though perennial Roman chamomile is also an option.
Tulsi
Tulsi, also known as holy basil, is considered an especially vaulable adaptogenic herb, which means it’s thought to help the body manage stress while providing numerous other benefits.
Tulsi is most commonly consumed as a tea, either on its own or combined with other herbs. Tulsi may can also be used as a spice on salads or cooked dishes.
You can grow tulsi as a perennial if you live in zone 10 or warmer, otherwise we grow tulsi as an annual. You can also bring tulsi indoors for winter.
Calendula
Calendula’s plentiful flowers make it a beautiful addition to the garden as well as a valuable ingredient in soothing homemade skincare.
Calendula flowers are also edible. You can add them to tea, or dry them and add the petals to wintertime cooking, where herbalists recommend them for symptoms of SAD. Here’s more on calendula from the Herbal Academy.
Calendula grows easily in poor soils and will self-seed if you don’t harvest all its plentiful flowers.
California Poppy
Beautiful California poppy is a go-to for those in need of more restful sleep. An antispasmodic and nervine, California poppy can help soothe tension and anxiety. Here’s more on uses for California poppy from the Herbal Academy.
Easily grown from seed, California poppy prefers full sun and can tolerate a wide range of soil conditions.
Borage
Borage’s tasty leaves make a refreshing addition to seltzer or homemade sun tea. It’s a cooling herb that is often used for coughs and fevers, as well as an anti-inflammatory.
Borage is a vigorous self-seeder, so once you plant it, you’ll find it popping up in your yard each season. It can tolerate partial shade and poor soils, and bees love it as well.
Here’s more on growing and using borage.
OTHER HERBS TO CONSIDER PLANTING IN THE MEDICINE GARDEN
There are many more plants to choose from when you’re choosing medicinal herbs, and I will try to add descriptions as I find the time. Here are some other herbs to look into as you expand your medicinal herb garden:
American skullcap
Arnica
Betony
Black cohosh
Comfrey
Elecampane
Feverfew
Garlic
Ginseng
Goldenrod
Goldenseal
Horehound
Marshmallow
Motherwort
Oregon grape
Passionflower
Red raspberry leaf
Sage
Solomon’s seal
Spilanthes
St. John’s Wort
Sweet Woodruff
Valerian
Wild ginger
Wild yam

WILD PLANTS FOR THE MEDICINE GARDEN
In addition to the cultivated plants above, some medicinal herbs are commonly considered weeds, though those in the know use them for all manner of things. Here are some of the valuable medicinal plants you might already have growing in your medicinal herb garden:
Dandelion
Wild violet
Yarrow
Cleavers
Wood Sorrel
Nettle
Chickweed
Jewelweed
Plantain
Lady’s Thumb
Creeping Charlie (aka ground ivy; learn about creeping Charlie look alikes you may also find)
That should give you plenty of herbs to choose from for your medicinal garden. Enjoy experimenting with a few new medicinal plants each season to discover new favorites you can add to your rotation.
Now that you’ve got all these wonderful medicinal herbs growing, learn what you need to know about preserving herbs so you can enjoy them all year round.
Want to learn more about using medicinal plants? Check out these fantastic herbal medicine books or the many fascinating herbal courses offered by The Herbal Academy. Here’s a list of the courses they’re currently enrolling.
What herbs do you like to grow in your medicinal herb garden?
Pin to save this info on what to plant in a medicinal herb garden!

Do you know about the gift of nature to save the life of people from various health problems and make them feel secure by curing significant issues? How to live healthy in this world without having chronic diseases or illness or any other health issues which may hurt you physically and mentally? Due to dense population, people are trying to demolish the forest, garden areas to create shelter, so they forced to destroy the nature’s gift such as natural ingredients, secret medicinal herbs and more which are grown in wild forest, mountains and other places. When you read this review entirely, sure you will get chance to know about secrets medicinal ingredients, herbs and more used by our ancestor to get back the lost health without losing your life. Claude Davis was highlighted all the stuff in the form of the e-bookThe Home Doctor filled with a list of natural ingredients and remedies that you can quickly grow in the backyard or at free space to include it in your routine diet or external usage to get well soon.
Books can be your best pre-collapse investment.
Carnivore’s Bible (is a wellknown meat processor providing custom meat processing services locally andacross the state of Montana and more. Whether your needs are for domestic meator wild game meat processing)
The Lost Book of Remedies PDF ( contains a series of medicinal andherbal recipes to make home made remedies from medicinal plants and herbs.Chromic diseases and maladies can be overcome by taking the remediesoutlined in this book. The writer claims that his grandfather was taughtherbalism and healing whilst in active service during world war twoand that he has treated many soldiers with his home made cures. )
Easy Cellar(Info about building and managing your root cellar, plus printable plans. The book on building and using root cellars – The Complete Root Cellar Book.)
The Lost Ways (Learn the long forgotten secrets that helped our forefathers survive famines,wars,economic crisis and anything else life threw at them)
LOST WAYS 2 ( Wordof the day: Prepare! And do it the old fashion way, like our fore-fathers did it and succeed longbefore us,because what lies ahead of us will require all the help we can get. Watch this video and learn the 3 skills that ensured our ancestors survival in hard times offamine and war.)
The Top Medicinal Herbs for the Garden: How to Grow & Use Healing Plants - PrepperFortressIf you're gonna fight, fight like you're the third monkey on the ramp to Noah's Ark... and brother its starting to rain. Join our efforts to Secure America's Borders and End Illegal Immigration by Joining ALIPAC's E-Mail Alerts network (CLICK HERE)
-
04-07-2024, 02:08 AM #8320
Native Americans Plants Use To Cure Everything – Miracle Plant That Cures Cancer, Hepatitis, Liver, Kidneys
Amy S. May 28, 2023 4 Commentson Native Americans Plants Use To Cure Everything – Miracle Plant That Cures Cancer, Hepatitis, Liver, Kidneys

The Cherokee is a Native American tribe that is indigenous to the Southeastern United States. They believe that the Creator has given them a gift of understanding and preserving medicinal herbs. The Cherokee trust the healing and preventative properties of nature’s pharmacy. Because many plants become scarce throughout history, the Cherokee promote proper gathering techniques. The old ones have taught them that if you are gathering, you should only pick every third plant you find. This ensures that enough specimens still remain and will continue to propagate. Here are some of the medicinal plants that were commonly used and foraged for by the Cherokee tribe.
However, the following plants were used by this tribe in the treatment of almost every single illness and health condition. However, before we explain their properties, we must warn you that they can be quite strong and dangerous if not used properly.
Keep in mind that the Cherokee healers were experienced as they had centuries of practice. Furthermore, it is of high importance to understand their value as powerful natural medications, so you should be gentle when scavenging them.
These are the natural plants that provide amazing health benefits:

Blackberry.
Cherokee used blackberry for treating almost everything, including an upset stomach, strengthening the immune system, cancer prevention, improving digestion, and better heart functioning. By making a tea of its root, this tribe healed swelling of joints and tissues. And if you make a decoction from its roots, thus sweetened with maple syrup or honey, you will get great syrup for treating cough. Chewing the blackberry leaves can soothe bleeding gums.
Blackberries an amazingly nutritious because they are rich in vitamins A, C, B6, E, K, riboflavin, thiamine, folate, and minerals such as iron, calcium, magnesium, potassium, zinc, and phosphorous.
To the Cherokee, the blackberry is the longest known remedy to an upset stomach, however this herb can be used for just about anything. Using a strong tea from the root of blackberry helps to reduce swelling of tissue and joints. A decoction from the roots, sweetened with honey or maple syrup, makes a great cough syrup. Even chewing on the leaves of blackberry can sooth bleeding gums.

Some other health benefits of blackberry fruit include
•better digestion
•strengthened immune system
•healthy functioning of the heart
•prevention of cancer
•relief from endothelial dysfunction
Herbs and other naturalremediescan be as effective as traditional treatments, often without the same negative side effects,” says Roberta Lee, MD, medical director of the Continuum Center for Health and Healing at Beth Israel Medical Center in New York City.Here are 10 super healersyou’ll want to add to the all-natural section of your medicine cabinet—and even to your favorite recipes. Folding one or two of them into your cooking every day can yield big benefits.
These tasty berries are also incredibly nutritious. Vitamins provided by blackberries include vitamin A, vitamin B6, vitamin C, vitamin E, vitamin K, thiamine, riboflavin, niacin, and folate. Blackberries also have an incredible mineral wealth of calcium, iron, magnesium, phosphorous, potassium, and zinc. They are also a good source of dietary fiber and essential amino acids.
Hummingbird Blossom (Buck Brush)
Cherokee used this plant for the healing of fibroid tumors, cysts, mouth/throat problems, and inflammation. In addition, they mainly used hummingbird blossom in order to stimulate kidney function, but it was also used in the treatment of enlarged lymph nodes, hemorrhoids, inflamed tonsils, enlarged spleens, and menstrual bleeding. In order to get all healing benefits of this plant, they put the flowers and the leaves in boiling water for 5 minutes, and then drink the tea while it’s still hot.
Hummingbird blossom has been used by the Cherokee for treatment of cysts, fibroid tumors, inflammation, and mouth/throat problems. Present day research has concluded that this herb is also great for treating high blood pressure and lymphatic blockages.
The Cherokee mainly use hummingbird blossom as a diuretic to stimulate kidney function, h
•inflamed tonsils
•enlarged lymph nodes
•enlarged spleens
•hemorrhoids
•menstrual bleeding.
To get all of the benefits from hummingbird blossom, the Cherokee would steep the leave and flowers in a boiling water for about five minutes then drink the tea while it is still warm.
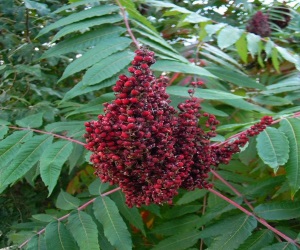
Qua lo ga (Sumac)
Every single part of this herb can be used for medicinal purposes! Sumac bark can be made into a mild decoction that can be taken to soothe diarrhea. The decoction from the bark can also be gargled to help with a sore throat. Ripe berries can make a pleasant beverage that is rich in vitamin C. The tea from the leaves of sumac can reduce fevers. You can even crush the leaves into an ointment to help relieve a poison ivy rash. A study published in Iranian Journal of Pharmaceutical Research reported that sumac, if added to daily diet, can help lower cholesterol levels.
Each part of this plant might be used for medicinal purposes in the treatment of diarrhea, sore throat, and fevers (by making a decoction from the bark). In addition, if you want to get rid of poison ivy rash, you need to crush the leaves into an ointment.

RELATED : Wild lettuce is used for whooping cough, asthma, urinary tract problems, cough, trouble sleeping (insomnia), restlessness, excitability in children, painful menstrual periods, excessive sex drive in women (nymphomania), muscular or joint pains, poor circulation, swollen genitals in men (priapism), and as an opium substitute in cough preparations.

Cattail.
The Cherokee tribe considered this plant as a preventative medicine and they used it as a digestible food for recovery from each illness. Almost each part of the plant (except its seed heads) can be used for medicinal purposes. Its root can be prepared like potatoes, mashed or boiled for treating sores and burns. The seed down from its flowers is used for diaper rash in babies in the treatment of skin irritation.
Greenbriar (Pull Out a Sticker).The leaves and stems of this plant are rich in numerous minerals and vitamins while its roots are high in starch and they can be used like potatoes. Although its root has a strange and harsh taste, it’s rich in calories. Cherokee used this plant as mild diuretic and a blood purifier in the treatment of urinary infections. Its leaves might be put in a tea to heal arthritis! Its berries might be eaten as jam or raw.
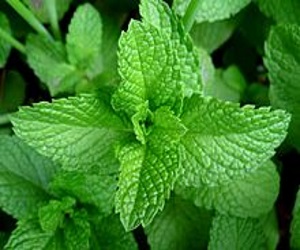
Mint.
Being a very popular herb, mint is commonly used in tea because of its numerous antioxidant properties. It possesses phosphorus, magnesium, potassium, vitamins C,A, calcium, and fiber! The Cherokee used the leaves of this plant crushed as cold compresses, or made into ointments, or even added in the bath to calm down and itchy skin. Moreover, they used a mixture of leaves and stems in order to reduce high blood pressure.
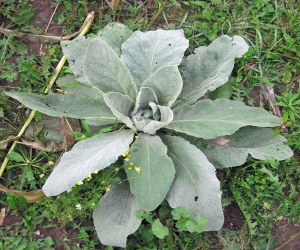
Mullein.
This herb soothes chest congestion and asthma. If you inhale the smoke from burning mullein leaves and roots, it will calm your lungs. This plant is exceptionally useful in soothing the mucous membranes. Due to its anti-inflammatory features, it calms the irritated and painful tissue and joint. Mullein flowers are used to prepare tea that contains a lot of mild sedative effects.
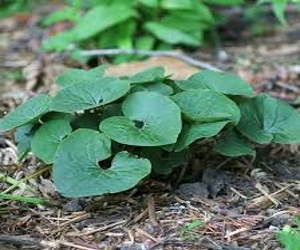
Big Stretch (Wild Ginger).
A tea made of the root of this plant was used by Cherokee in order to improve digestion, intestinal gas, colic, and upset stomach. A stronger tea from its root can even remove lungs secretion. You might use rootstocks from this plant instead of regular ginger and its flowers for flavoring your favorite recipe.
Jiddu Unigisdi (Wild Rose).
The fruit of this plant is high in vitamin C and is a great healing remedy for flu and cold. The Cherokee made a tea out of wild rose hips in order to stimulate kidney and bladder function. You can even try to make a decoction from its root to treat diarrhea.

Squirrel Tail (Yarrow).
Being known best for its blood-clotting features, the leaves of this plant (fresh or crushed) might be put to open wounds in order to prevent excess bleeding. The juice of this plant, when mixed with spring water, might stop intestinal illnesses and internal stomach bleeding. Its leaves can be used for tea in order to help in proper digestion and stimulate abdominal functions.

Kawi Iyusdi (Yellow Dock).
The Cherokee used this herb in their cuisines because it’s quite similar to spinach. But, it possesses a lot more minerals and vitamins because of its long roots gathers nutrients from deep underground.

Dandelion
Even though considered a weed, dandelion root has a long history of therapeutic use. In fact, this extremely beneficial plant has the ability to treat allergies, lower cholesterol levels, stimulate the production of bile, and detoxify the liver. It also has diuretic properties and it is especially beneficial for pregnant and menopausal women.
The best time to harvest dandelion root is in the spring, especially in the beginning of April. Make sure you pick it from places which are less polluted, such as areas away from the town and the road.
The best part about dandelion is that all parts of it have medicinal properties. For instance, the leaves are abundant in vitamins and can be used in a salad, along with potatoes and eggs. The stem relieves stomach issues, stimulates the gallbladder function, regulates the metabolism, and purifies the blood. Moreover, the stem can be used to treat diabetes while the milk from the stem can be used to remove warts.
Ultimately, people use dandelion flowers to prepare homemade dandelion syrup which purifies the blood, relieves a cough, and improves digestion.
DANDELION SYRUP RECIPE
Get 400 yellow dandelion flowers and pour 3 liters of water over them. Then, cut 4 oranges and 4 lemons into slices and add them to the mixture. Leave the mixture for 24 hours.
After 24 hours, strain the mixture and pour the liquid into a pot. Add 2 cups of sugar into the pot and cook for about half an hour.
Once the mixture boils and gets thick enough, remove from heat and transfer the syrup into sterilized jars. Use the dandelion syrup to treat cold, cough, or bronchitis.
HEALTH BENEFITS AND CANCER-FIGHTING PROPERTIES OF DANDELION ROOT
Dandelion has been long used and appreciated for its medicinal properties. Today, the modern medicine confirms its health benefits and suggests that it is even capable of curing cancer. Keep watching to learn more about preparing and storing roots for future use.
You need to peel, cut, and dry the dandelion roots on a fresh air. Let them dry for about two weeks or until they become brittle under the fingers. Once dried, put them into a jar and store in a dark and cool place.
Dandelion root has the ability to clean the kidneys, liver, lymph and gallbladder, which makes it effective at treating gallstones, constipation, hepatitis, acne, edema, and rheumatism. Moreover, it is very beneficial for women, especially for prevention and treatment of issues related to breastfeeding as well as cysts, tumors, and cancer.
HOW TO PREPARE DANDELION TEA?
Pick some leaves, dry, chop and mince them well. Store the mixture in a jar and keep for future use. To prepare the tea, you need to add half a teaspoon of the mixture into a glass of water. As simple as that!
Another option is to mix 60 grams of a fresh mixture and 30 grams of dried dandelion root. Put this mixture into a pan along with 2.5 ounces of water with a pinch of salt. Bring the boil, cover the pan, and simmer for about 20 minutes. Strain the liquid afterward and consume three cups daily.
- Medicinal Garden
- With your seeds kit, you’ll also receive a FREE Medicinal Guide that shows you how to turn these 10 plants into tinctures, ointments, salves, poultices, decoctions, infusions, essential oils —all in minute detail so you can follow our guide even if you’ve never made an herbal medicine in your life.

Books can be your best pre-collapse investment.
Carnivore’s Bible (is a wellknown meat processor providing custom meat processing services locally andacross the state of Montana and more. Whether your needs are for domestic meator wild game meat processing)
The Lost Book of Remedies PDF ( contains a series of medicinal andherbal recipes to make home made remedies from medicinal plants and herbs.Chromic diseases and maladies can be overcome by taking the remediesoutlined in this book. The writer claims that his grandfather was taughtherbalism and healing whilst in active service during world war twoand that he has treated many soldiers with his home made cures. )
Easy Cellar(Info about building and managing your root cellar, plus printable plans. The book on building and using root cellars – The Complete Root Cellar Book.)
The Lost Ways (Learn the long forgotten secrets that helped our forefathers survive famines,wars,economic crisis and anything else life threw at them)
LOST WAYS 2 ( Wordof the day: Prepare! And do it the old fashion way, like our fore-fathers did it and succeed longbefore us,because what lies ahead of us will require all the help we can get. Watch this video and learn the 3 skills that ensured our ancestors survival in hard times offamine and war.)
Native Americans Plants Use To Cure Everything - Miracle Plant That Cures Cancer, Hepatitis, Liver, Kidneys - PrepperFortressIf you're gonna fight, fight like you're the third monkey on the ramp to Noah's Ark... and brother its starting to rain. Join our efforts to Secure America's Borders and End Illegal Immigration by Joining ALIPAC's E-Mail Alerts network (CLICK HERE)


 226Likes
 LinkBack URL
 About LinkBacks


 Reply With Quote


Swalwell threatens to revoke driver's licenses of masked ICE...
01-02-2026, 10:34 PM in General Discussion