

Results 2,501 to 2,510 of 11827
 226Likes
LinkBacks (?)
-
12-26-2016, 11:32 AM
-
09-02-2016, 05:39 PM
-
whole garden made with pallets!! Love it!! | Pallets | Pinterest | Pallets, Pallets Garden and Wooden Pallets
Refback This thread03-06-2016, 11:30 AM -
10-20-2015, 05:29 PM
-
06-12-2015, 08:00 PM
-
02-26-2015, 01:58 PM
-
01-05-2015, 04:13 PM
-
12-19-2014, 10:19 AM
-
EMERGENCY: HUGE FEMA PANDEMIC EXERCISE IN USA IN NOVEMBER, INTERNET SHUT DOWN PART OF EXERCISE | Prepare4Survival
Refback This thread12-03-2014, 10:39 PM -
Off Grid World ? Ugly Duckling Shipping Container Home Built by Artist Is a Beautiful Swan on the Inside
Refback This thread11-25-2014, 03:10 PM -
11-17-2014, 10:59 PM
-
11-13-2014, 11:18 AM
-
11-09-2014, 02:54 PM
-
10-28-2014, 11:38 PM
-
10-26-2014, 05:54 AM
-
10-16-2014, 11:28 AM
-
10-03-2014, 01:25 PM
-
10-02-2014, 09:16 PM
-
09-26-2014, 07:00 PM
-
09-26-2014, 01:56 PM
-
09-19-2014, 04:46 PM
-
09-13-2014, 05:49 AM
-
09-05-2014, 01:52 PM
-
09-01-2014, 09:39 AM
-
08-30-2014, 06:29 PM
-
08-10-2014, 06:29 AM
-
08-04-2014, 05:07 PM
-
07-23-2014, 11:14 AM
-
New Evidence on Expiration Dates | Medical Preparedness | Doom and Bloom (TM) | Doom and Bloom (TM)
Refback This thread07-22-2014, 10:10 AM -
07-18-2014, 08:37 PM
-
07-15-2014, 04:57 PM
-
07-11-2014, 01:40 AM
-
04-22-2014, 11:14 AM
-
04-18-2014, 12:57 PM
-
04-18-2014, 10:10 AM
-
04-14-2014, 12:18 AM
-
04-12-2014, 02:28 AM
-
03-02-2014, 11:43 PM
-
12-24-2013, 11:59 PM
-
12-07-2013, 11:04 PM
-
kitchen | Cob
Refback This thread11-25-2013, 03:24 PM -
10-22-2013, 10:25 PM
-
Apple Pie Braid | Sweets
Refback This thread09-26-2013, 07:58 AM -
09-02-2013, 04:44 PM
-
5 Reasons Why You May have to Bug Out Even Though You Don’t Want to | The Apartment Prepper's Blog
Refback This thread08-23-2013, 03:20 PM -
06-27-2013, 06:30 AM
-
06-23-2013, 08:11 PM
-
06-17-2013, 11:21 PM
-
05-24-2013, 05:06 PM
-
To Eat / BASIC LIST / SUGGESTED ITEMS FOR LONG TERM SURVIVAL - Page 275 - ALIPAC
Refback This thread05-01-2013, 03:49 AM
Thread Information
Users Browsing this Thread
There are currently 1 users browsing this thread. (0 members and 1 guests)
 LinkBack URL
 About LinkBacks
-
10-13-2012, 03:22 PM #2501Senior Member


- Join Date
- May 2007
- Location
- South West Florida (Behind friendly lines but still in Occupied Territory)
- Posts
- 117,087

 The Homestead Survival
Fall is in the Air~Cookmee Apple Fritters
http://homesteadsurvival.blogspot.com/2012/10/fall-is-in-aircookmee-apple-fritters.htmlJoin our efforts to Secure America's Borders and End Illegal Immigration by Joining ALIPAC's E-Mail Alerts network (CLICK HERE)
-
10-13-2012, 03:35 PM #2502Senior Member
- Join Date
- May 2007
- Location
- South West Florida (Behind friendly lines but still in Occupied Territory)
- Posts
- 117,087
Thursday, October 11, 2012
Green Tomato Recipes. Chutney, chow chow and mock orange jelly - Use Em Up
Continued Below
Last edited by AirborneSapper7; 10-13-2012 at 03:38 PM.
Join our efforts to Secure America's Borders and End Illegal Immigration by Joining ALIPAC's E-Mail Alerts network (CLICK HERE)
-
10-13-2012, 03:36 PM #2503Senior Member
- Join Date
- May 2007
- Location
- South West Florida (Behind friendly lines but still in Occupied Territory)
- Posts
- 117,087
Continued Below
Join our efforts to Secure America's Borders and End Illegal Immigration by Joining ALIPAC's E-Mail Alerts network (CLICK HERE)
-
10-13-2012, 03:37 PM #2504Senior Member
- Join Date
- May 2007
- Location
- South West Florida (Behind friendly lines but still in Occupied Territory)
- Posts
- 117,087
Join our efforts to Secure America's Borders and End Illegal Immigration by Joining ALIPAC's E-Mail Alerts network (CLICK HERE)
-
10-13-2012, 04:00 PM #2505Senior Member
- Join Date
- May 2007
- Location
- South West Florida (Behind friendly lines but still in Occupied Territory)
- Posts
- 117,087
Slow Cooker Caramel Sauce
Apples, apples, apples everywhere!
Written on October 9, 2011 by Admin in Canning
I have been quiet for a couple of reasons. 1) I have been back in the hospital for quite awhile. Now I have a stomach tube to eat I don’t like it but if that is the what I need to keep on going. That is what I’ll get used to.
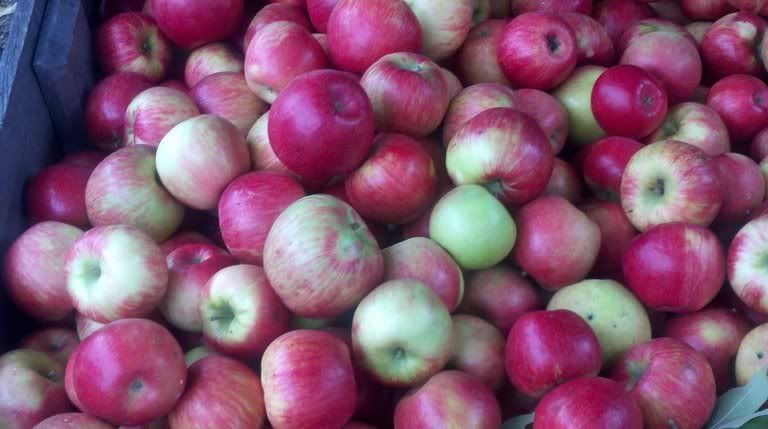
The peak of apple harvest season is here. While I am no where near able to do as much as I would like I am trying to preserve some apples.
Today I made a slow cooker caramel sauce. It was a TOTAL hit!
1/2 cup butter
1/2 cup light corn syrup
1 cup brown sugar
1 can sweetened condensed milk
Put all ingredients together and stir. Set to low heat. Let cook for at least a couple of hours, stir often.
We tried a new apfelkuchen for Oktoberfest but it was a flop. Monday I am going to make a good old apple crisp. I for one LOVE the crispy, crunchy top! (I can have a nibble here and there but no eating for me. This is for my family.)
If my health and family help holds out I will can some apple pie filling tomorrow. I might even try some pickled carrots since I got a large bunch of carrots of on sale
Apples, apples, apples everywhere! | Prudent Pantry
Join our efforts to Secure America's Borders and End Illegal Immigration by Joining ALIPAC's E-Mail Alerts network (CLICK HERE)
-
10-13-2012, 04:18 PM #2506Senior Member
- Join Date
- May 2007
- Location
- South West Florida (Behind friendly lines but still in Occupied Territory)
- Posts
- 117,087
For large quantity food dehydration try this homemade gem from the past
By Rev. J.D. Hooker
The thing I like the most about Backwoods Home is that, unlike a lot of other magazines, the articles are written by folks who are actually doing the things they write about. Folks like Massad Ayoob, Don Fallick, and Dynah Geissal have already learned their stuff by trial and error, which can save the rest of us the time, troubles, and expenses of initial experimentation. It’s good to fool around with new ideas, but we can use other folks’ experience as proven starting points, and then adapt our own ideas and improvements into their concepts. As an example of building on someone else’s experience, let me tell you how I ended up building the perfect large-quantity food dehydrator.Since our garden, fruit trees, strawberry patches, etc., have always produced abundantly for us, we’ve worked at developing the skills to preserve this abundance from one harvest to the next. Canning and freezing only go so far, so for a couple of years we fooled around with various types of dehydrators. The relatively inexpensive Ronco brand electric dehydrator we purchased at an area gun show works great for small quantities, and we find it very useful for that.

1. Dry-stack block to make three walls. Rest the barrel on a bed of stones. Set 4x4s in the corners and sheet steel on top.
However, solar dehydrators turned out to be an entirely different story. I can tell you from experience that unless you’re living somewhere like one of our southwestern deserts, where you can depend on plenty of hot, dry weather for lengthy periods, solar dryers (whether purchased or owner-built) just aren’t dependable enough for real backwoods-type use. As a result, I fooled around with several other ideas, but none of them worked out to our satisfaction.
I might have given up on the idea entirely had it not been for the intervention of an elderly friend whose family has owned and operated an apple orchard for several generations. Not only did this gentleman show me more than I’d ever thought of knowing about apple varieties (best choices for eating, baking, sweet and hard cider, applejack, etc.), but he also showed me what was left of the big wood-fired fruit dryers that his father and grandfather had used in the days before electric refrigeration, large commercial canneries, and such. While he explained how they were used, we looked them over. Remembering from his early youth, he also told me how his family, and other large commercial growers, would dry many tons of fruit every year. Demand always outran what they were able to supply.
Though the dryers on his property had pretty much fallen apart from years of decay and neglect, some simple measurements showed me that, when up and running, each one would have been easily capable of holding 30 bushels of produce. He assured me that regardless of the weather conditions, 24 hours was the maximum drying time, even for the juiciest fruit.

2. Install supports for trays.
Although 30 bushels seemed much more than we’d ever need to dry in one shot, it was easy to see how such a simple wood-fueled dehydrator could be built in practically any size. There was a heat source at the bottom with interchangeable drying trays arranged over it, with eave vents and a sort of cupola vent on the roof (kind of like what you see on many older barns) to allow the rising warmed air to carry away the moisture from the drying fruit. I later learned that on cool nights, you can watch the vapor escape from these vents. After tossing this idea around for a while, and fiddling with some figures to come up with a size more
appropriate for our own use, I built a scaled-down version of those commercial dryers. Now, about 15 years later, it’s still serving our family’s needs perfectly. This simple design is so readily adaptable that you can include your own modifications to adapt it to your needs. So, while I’m going to detail the design that I used, remember that you can change practically any of the details and techniques to suit your own requirements and resources.
 3. Cover three sides with plywood, hinged for access.
First of all, since I’d already located a reliable source for free, empty 55-gallon steel drums, I decided to build a simple barrel stove for the heat source. Laying the drum on the ground, I stacked extra-wide (16") foundation blocks around three sides of the drum, fashioning three un-mortared walls, two blocks taller than the drum. Next, I filled in the area between these block walls with ordinary field stones to the level of the top of the first row of blocks, so as to keep the stove up off the ground.
I dropped 4x4 timbers into the hollows of the corner blocks and fashioned a wooden framework to hold the drying trays. On three sides of the dehydrator, I used half-inch CDX plywood to close them off completely. However, each piece is hinged at the bottom, being held shut by hook-and-eye fasteners at the tops, to allow for easy access for cleaning after each use. On the fourth side, I left openings similar to those of a chest of drawers for inserting and removing the drying trays.
I built the trays from 1x3s and the lids from 1x2s. I used hardware cloth for the tray bottoms and metal window screen to cover the tops, which are fastened to the trays with hinges. I also used metal window screen to cover the eave and cupola vents to further prevent any possibility of insect damage. I used painted canvas for the roofing material (as covered in the May/June 1996 issue of BHM).
 4. Leave openings in the fourth side for inserting and removing trays.
Note: Since this will be used for food processing and there is heat involved, you should not use pressure-treated lumber and avoid lead-based paint.
I used a hammer and cold chisel to cut an eight-inch-diameter hole in one end of the drum for fitting a stovepipe, and I cut a square access door in the opposite end. I used cheap hinges and sheet metal screws to reattach the square of metal removed from the door opening, along with a simple hook-and-eye to hold this door shut. This works just as well as the door provided with a purchased barrel stove kit; it just doesn’t look quite so pretty. Adding a damper in the stove pipe, and being able to remove or reinsert either or both of the original barrel plugs, allows for heat control.
The most expensive part of this whole setup (and it didn’t cost that much), was a piece of 1/8" steel cut to rest on the inside two inches of the top of the block wall. This creates a much more even distribution of heat, and the extra width of the block wall keeps the heat just far enough from the wooden outer walls.
 5. Install roof, vents, and stovepipe.
In use, you’ll need to rotate the trays every couple hours or so. Just remove the top tray, setting it aside for a moment, and raise each of the remaining trays one position. Then take the tray you’d removed from the top, and reinsert it in the lowest position. It’s also necessary to keep a low fire going inside the stove during the entire drying process. During the day, we work in shifts, adding dry corn cobs and keeping the draft regulated as required. Then towards bedtime, we load the stove up with large, unsplit, only-partially-dried logs (remember, this is out-of-doors, not inside your living room, so a chimney fire isn’t a major problem) and damper the stove almost all the way down. At least two or three times during the night, one of us will get up to go out and reshuffle the drying trays.
Usually we begin the drying process early in the morning. That way, by the time we’re up and about the next morning, the dehydration process is normally completed.
Generally, we use dehydrated fruits and vegetables in one of two ways. There are plenty of other methods for using dried foods, but these two are our family favorites. The first method is simply to reconstitute the dried food by soaking it in water overnight, then using it in exactly the same manner as frozen food, in any recipe. This tastes a little better than using frozen fruit or vegetables, but otherwise you can’t really tell the difference. The other method we like is to run the thoroughly dried food through our hand-cranked grain mill, producing pumpkin, potato, and other specialty flours, as well as apple, tomato, carrot, onion, and other “powders,” which are terrific cooking aids.Remember, you can vary the size, construction techniques, materials, and so forth to customize this design to fit your own circumstances. For example, you could build a really large masonry firebox, or use a smaller 30- or 15-gallon drum, or even an inverted washtub, for the heat source. You could substitute dowels, laths, or sticks for the trays, if you’ll only be making jerky, drying fish, and such. Or you could make any number of other customizations. So whatever your food storage needs might be, a similar wood-fueled dehydrator could prove just as perfect for you as ours has for us. Who knows, you might even find that there’s a market in your area for some of your delicious dried fruit.
 6. Hinge lids to trays.
For large quantity food dehydration try this homemade gem from the past by Rev. J.D. Hooker Issue #41
Join our efforts to Secure America's Borders and End Illegal Immigration by Joining ALIPAC's E-Mail Alerts network (CLICK HERE)
-
10-13-2012, 04:21 PM #2507Senior Member
- Join Date
- May 2007
- Location
- South West Florida (Behind friendly lines but still in Occupied Territory)
- Posts
- 117,087

The Homestead Survival
Cast Iron Skillet Brownies...
http://homesteadsurvival.blogspot.com/2012/10/cast-iron-skillet-browniesrecipe.htmlJoin our efforts to Secure America's Borders and End Illegal Immigration by Joining ALIPAC's E-Mail Alerts network (CLICK HERE)
-
10-13-2012, 04:23 PM #2508Senior Member
- Join Date
- May 2007
- Location
- South West Florida (Behind friendly lines but still in Occupied Territory)
- Posts
- 117,087
Thursday, October 11, 2012
Ultimate Emergency Food - Urban Survival
The Homestead Survival: Ultimate Emergency Food - Urban Survival
Victorio VKP1013 4-Tray Kitchen Seed Sprouter
Sprouting Seed Super Sampler- Organic- 2.5 Lbs of 10 Different Delicious Sprout Seeds: Alfalfa, Mung Bean, Broccoli, Green Lentil, Clover, Buckwheat, Radish, Bean Salad & MoreJoin our efforts to Secure America's Borders and End Illegal Immigration by Joining ALIPAC's E-Mail Alerts network (CLICK HERE)
-
10-13-2012, 04:26 PM #2509Senior Member
- Join Date
- May 2007
- Location
- South West Florida (Behind friendly lines but still in Occupied Territory)
- Posts
- 117,087

The Homestead Survival
Awesome repurpose of a rocking horse
http://homesteadsurvival.blogspot.com/2012/10/awesome-repurpose-of-rocking-horse.htmlJoin our efforts to Secure America's Borders and End Illegal Immigration by Joining ALIPAC's E-Mail Alerts network (CLICK HERE)
-
10-13-2012, 04:29 PM #2510Senior Member
- Join Date
- May 2007
- Location
- South West Florida (Behind friendly lines but still in Occupied Territory)
- Posts
- 117,087
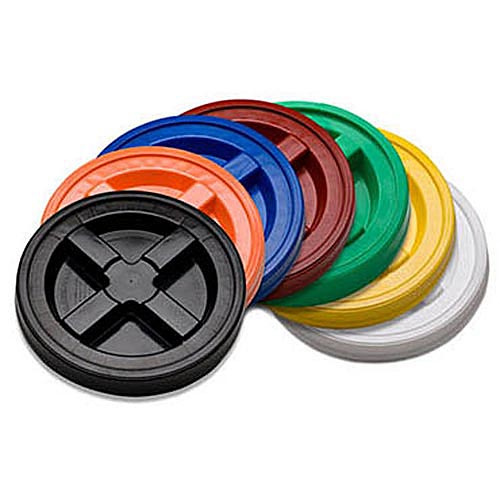
What are Gamma Seal Lids and How to Install Them
Oct 092012
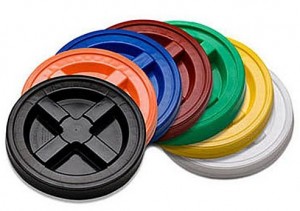 Gamma seal lids are super handy plastic lids built for 12 inch buckets which includes most standard size 3.5, 5, 6, and 7 gallon buckets. The gamma lids have an outer ring that seals onto your bucket and an inner lid that screws into the outer ring. Both pieces have a rubber gasket, so there is a seal between the bucket and the outer ring, and between the ring and the inner lid.
The gamma seal lid is built for easy access to your food stored in buckets because you can open and re-seal the bucket much easier than prying open a lid and snapping it back on each time. They are extremely sturdy and continue to perform well even with a lot of use. I have had buckets of product that I get into frequently with a regular pry-off style lid on them and quite commonly would not even snap the lid back on the bucket when I was done so I didn’t have to pry it off two days later when I wanted in that bucket again. Which completely negates the whole idea of food storage in a bucket–it’s not keeping your food very fresh and there’s a definite possibility that you could at least get insect problems because your bucket lid isn’t on tight. But my buckets with gamma seal lids on them don’t have that problem. They are so easy to get into and seal back up they always get re-closed tight after I get into them.
And if you’re really organized, you can use the variety of available colors to color code your food storage buckets! Either by food group or particular product–all the reds are wheat, all the blues are dairy, etc. That would be awesome. I think I want to get lids for all my buckets now . . .
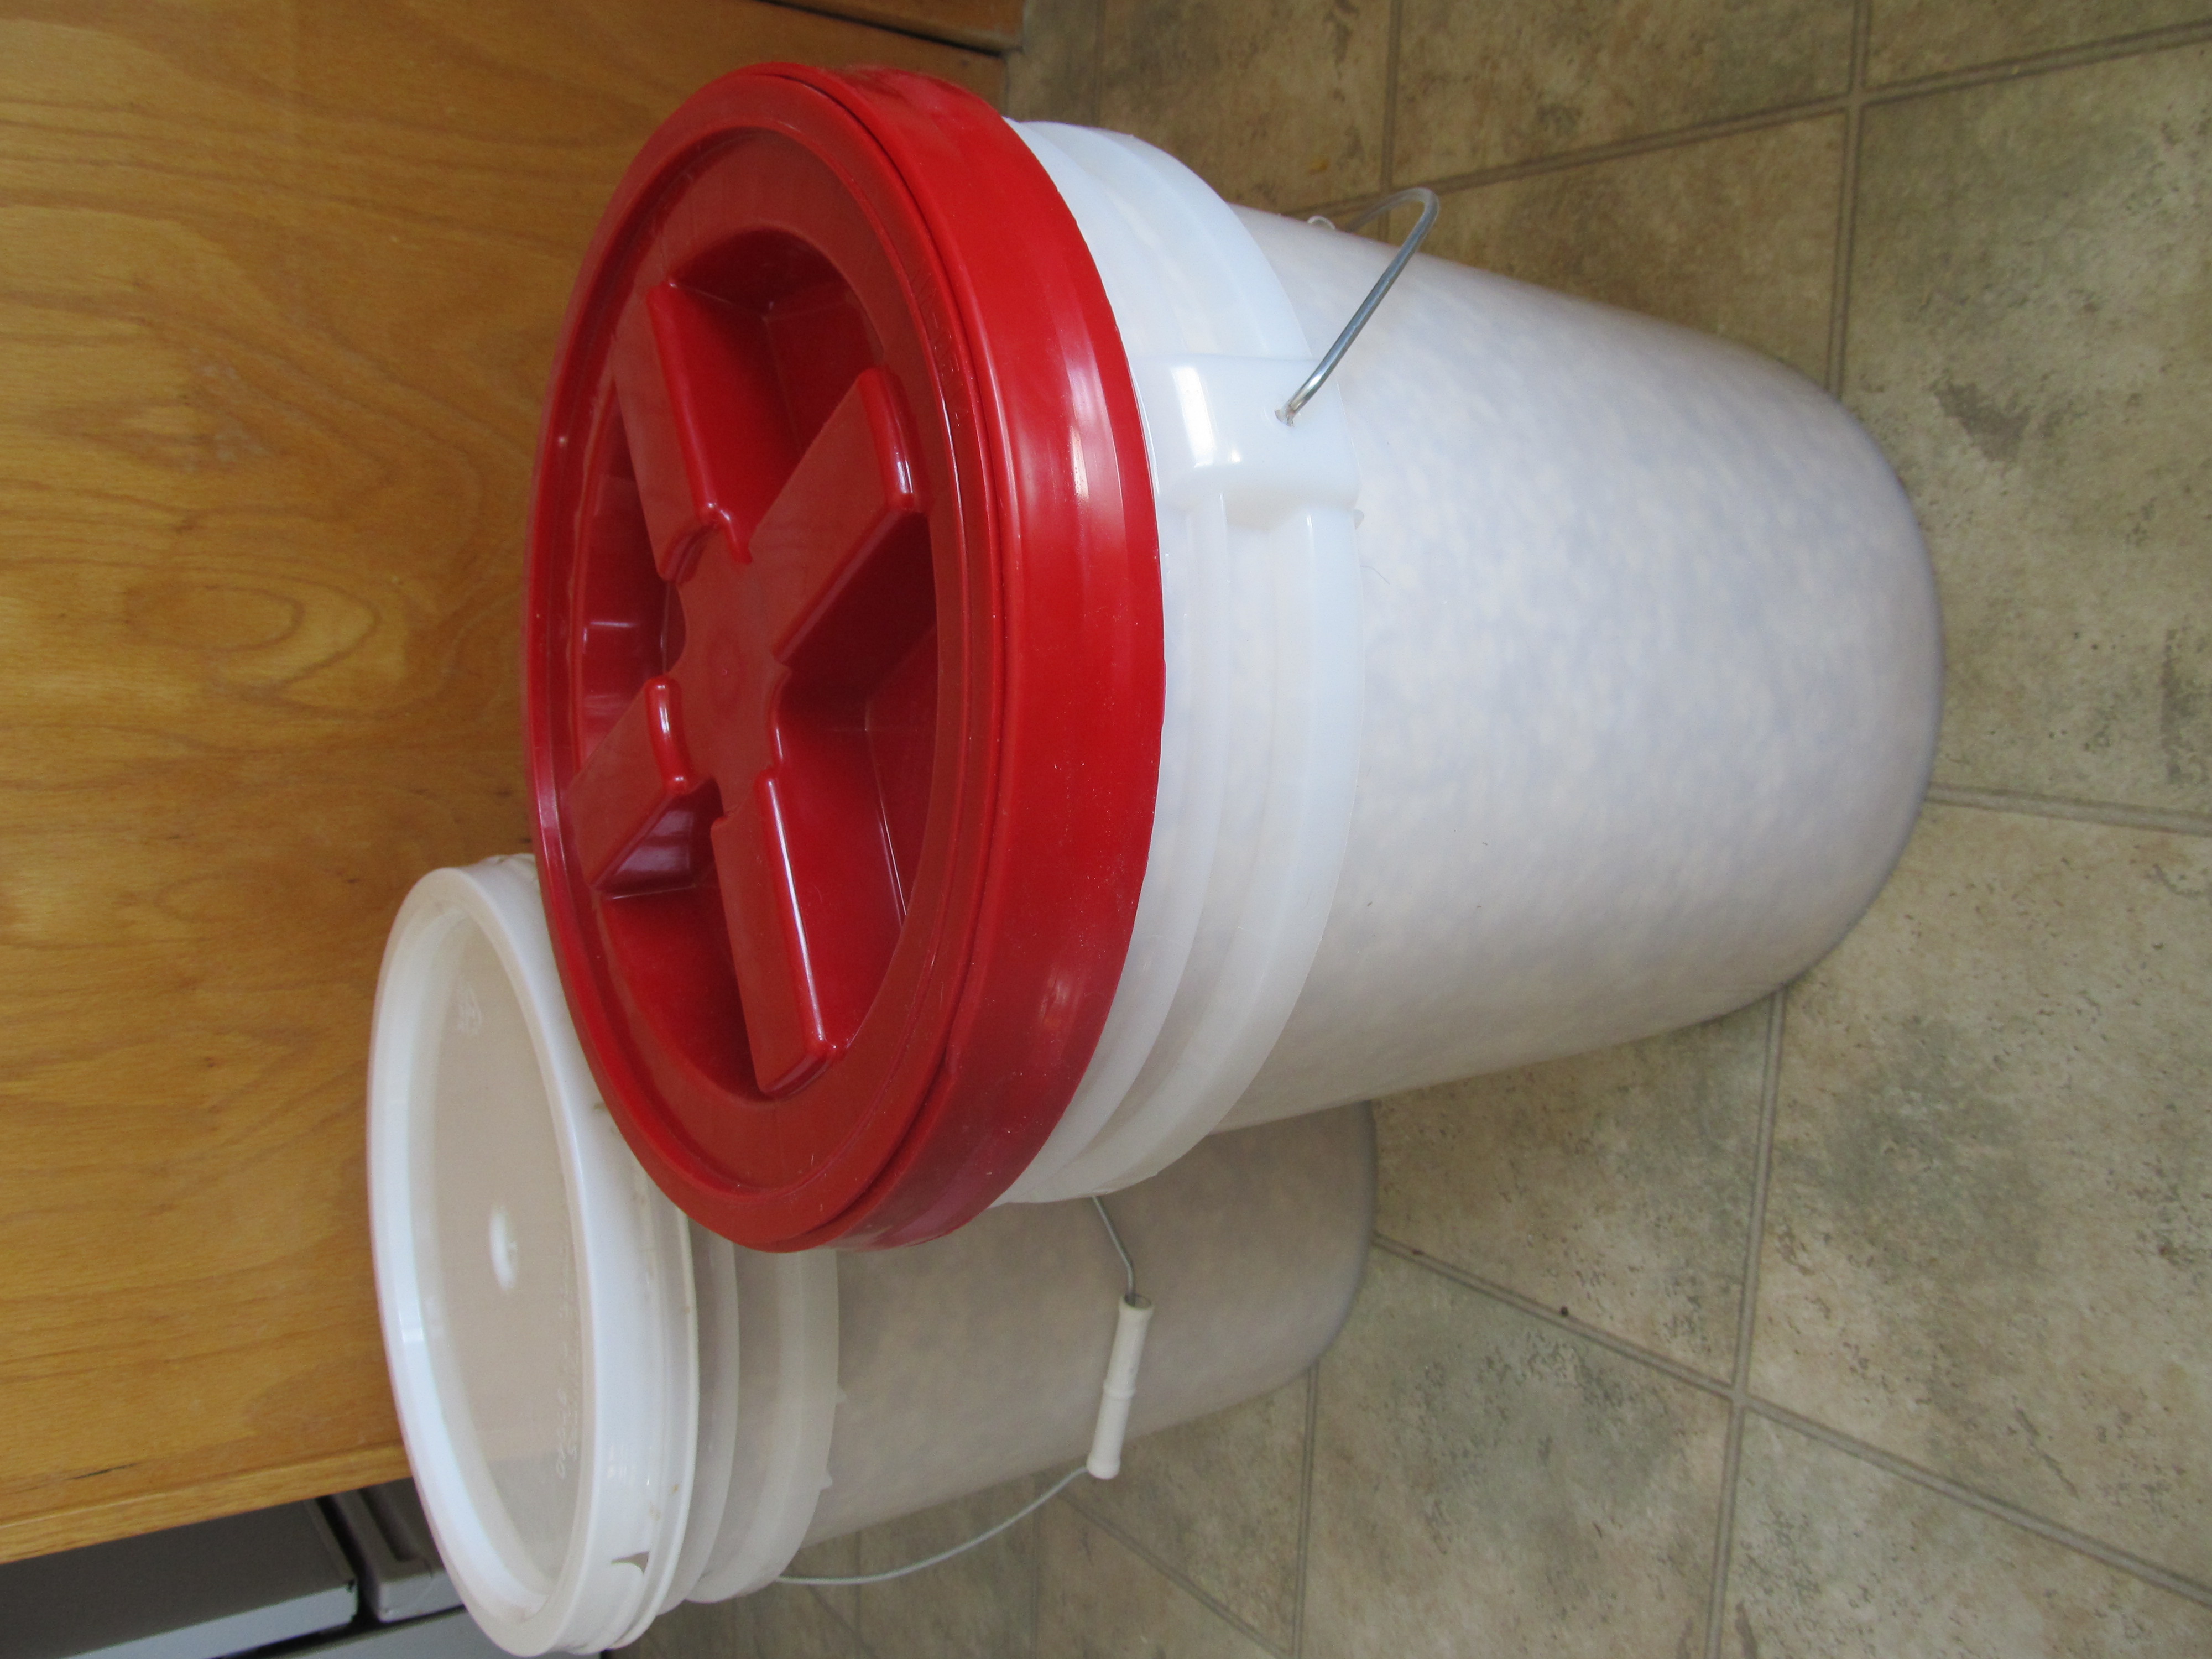
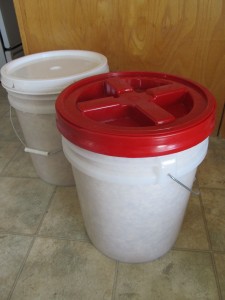 Food storage buckets–front bucket with gamma seal lid
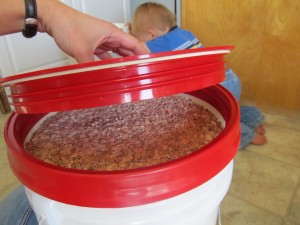 Two pieces of a gamma seal lid with my buddy pushing the inferior-lidded bucket across the floor
Do you need a gamma lid on every food storage bucket? No. In fact, most of my buckets have the regular lids on them. I only have gamma lids on the buckets we get into frequently and then I just refill those buckets with product from other buckets or bags when the gamma lidded bucket gets low or empty.
Would it be nice to have gamma lids on every bucket? You bet. In fact, all of Shelf Reliance’s products that are sold in buckets come with a gamma seal lid already installed. Super nice.
To see how a gamma lid works up close and personal, check out my video below:
Continued BelowLast edited by AirborneSapper7; 10-13-2012 at 04:33 PM.
Join our efforts to Secure America's Borders and End Illegal Immigration by Joining ALIPAC's E-Mail Alerts network (CLICK HERE)


 Reply With Quote


Alabama Case Spotlights Reality of Noncitizens Voting in U.S....
07-08-2026, 05:59 AM in Non-Citizen & illegal migrant voters