

Results 10,111 to 10,120 of 11856
 226Likes
LinkBacks (?)
-
12-26-2016, 11:32 AM
-
09-02-2016, 05:39 PM
-
whole garden made with pallets!! Love it!! | Pallets | Pinterest | Pallets, Pallets Garden and Wooden Pallets
Refback This thread03-06-2016, 11:30 AM -
10-20-2015, 05:29 PM
-
06-12-2015, 08:00 PM
-
02-26-2015, 01:58 PM
-
01-05-2015, 04:13 PM
-
12-19-2014, 10:19 AM
-
EMERGENCY: HUGE FEMA PANDEMIC EXERCISE IN USA IN NOVEMBER, INTERNET SHUT DOWN PART OF EXERCISE | Prepare4Survival
Refback This thread12-03-2014, 10:39 PM -
Off Grid World ? Ugly Duckling Shipping Container Home Built by Artist Is a Beautiful Swan on the Inside
Refback This thread11-25-2014, 03:10 PM -
11-17-2014, 10:59 PM
-
11-13-2014, 11:18 AM
-
11-09-2014, 02:54 PM
-
10-28-2014, 11:38 PM
-
10-26-2014, 05:54 AM
-
10-16-2014, 11:28 AM
-
10-03-2014, 01:25 PM
-
10-02-2014, 09:16 PM
-
09-26-2014, 07:00 PM
-
09-26-2014, 01:56 PM
-
09-19-2014, 04:46 PM
-
09-13-2014, 05:49 AM
-
09-05-2014, 01:52 PM
-
09-01-2014, 09:39 AM
-
08-30-2014, 06:29 PM
-
08-10-2014, 06:29 AM
-
08-04-2014, 05:07 PM
-
07-23-2014, 11:14 AM
-
New Evidence on Expiration Dates | Medical Preparedness | Doom and Bloom (TM) | Doom and Bloom (TM)
Refback This thread07-22-2014, 10:10 AM -
07-18-2014, 08:37 PM
-
07-15-2014, 04:57 PM
-
07-11-2014, 01:40 AM
-
04-22-2014, 11:14 AM
-
04-18-2014, 12:57 PM
-
04-18-2014, 10:10 AM
-
04-14-2014, 12:18 AM
-
04-12-2014, 02:28 AM
-
03-02-2014, 11:43 PM
-
12-24-2013, 11:59 PM
-
12-07-2013, 11:04 PM
-
kitchen | Cob
Refback This thread11-25-2013, 03:24 PM -
10-22-2013, 10:25 PM
-
Apple Pie Braid | Sweets
Refback This thread09-26-2013, 07:58 AM -
09-02-2013, 04:44 PM
-
5 Reasons Why You May have to Bug Out Even Though You Don’t Want to | The Apartment Prepper's Blog
Refback This thread08-23-2013, 03:20 PM -
06-27-2013, 06:30 AM
-
06-23-2013, 08:11 PM
-
06-17-2013, 11:21 PM
-
05-24-2013, 05:06 PM
-
To Eat / BASIC LIST / SUGGESTED ITEMS FOR LONG TERM SURVIVAL - Page 275 - ALIPAC
Refback This thread05-01-2013, 03:49 AM
Thread Information
Users Browsing this Thread
There are currently 8 users browsing this thread. (0 members and 8 guests)
 LinkBack URL
 About LinkBacks
-
06-29-2025, 05:16 PM #10111Senior Member


- Join Date
- Aug 2018
- Posts
- 95,564
How to Make Building Blocks for a Lunar Habitat
By Matthew Williams - June 27, 2025 at 10:40 PM UTC | Space Policy

A vision of a future Moon base that could be produced and maintained using 3D printing. Credit: ESA/RegoLight/Liquifer Systems GroupBy 2028, NASA intends to land the "first woman and first person of color" on the Moon as part of the Artemis III mission. This will be the first time humans have been to the lunar surface since the Apollo astronauts last walked there in 1972. Along with international and commercial partners, NASA hopes that Artemis will enable a "sustained program of lunar exploration and development," which could include long-term facilities and habitats on the Moon. Given the expense of launching heavy payloads, sending all the equipment and materials needed to the Moon is impractical.
This means that structures on the Moon must be manufactured using local resources, a process known as in-situ resources (ISRU). On the Moon, this process leverages advancements in additive manufacturing (AM), or 3D printing, to turn lunar regolith into building materials. Unfortunately, technical issues mean that most 3D printing techniques are not feasible on the lunar surface. In a recent study, a team of researchers led by the University of Arkansas proposed an alternative method where light-based sintering is used to manufacture lunar bricks, rather than printing while structures.
The research team is led by Wan Shou, an Assistant Professor in the Department of Mechanical Engineering at the University of Arkansas. He is joined by Cole McCallum, Youwen Liang, and Nahid Tushar, an Honors College Fellow, Research Assistant, and Doctoral Student in the University's College of Engineering. The team also included researchers from the Department of Mechanical and Aerospace Engineering at the University of Houston and the Faculty of Engineering and Natural Sciences at Tampere University.
 Concept for a lunar habitat, designed by architecture firm Foster + Partners. Credit: ESA/Foster + Partners
As they note in their paper, creating a permanent (or semi-permanent) base on the Moon has been the subject of research studies and proposals since the Apollo Era. These plans have always been marred by the simple fact that the requisite machinery and construction materials would require many heavy launch vehicles to deliver them at great cost. While the cost of sending payloads has dropped significantly in the last decade, largely thanks to the commercial space sector's development of reusable rockets, the cost of launching everything astronauts would need to build a lunar facility is still prohibitive.
As a result, only ISRU will suffice for creating bases on the Moon. Unfortunately, most of the proposed methods for 3D printing structures are not practical in the lunar environment, where the gravity is significantly lower (16.5% that of Earth) and temperatures are extreme. In the Moon's South Pole-Aitken Basin, where NASA and other space agencies are planning to build their bases, temperatures range from 54°C (130°F) in the sunlight areas to -246°C (-410°F) in the shadowed regions. This is because most AM methods require additional supplies to be launched for the Moon, including solvents, polymers, or other bonding agents.
Examples include the European Space Agency's (ESA) work with architecture firm Foster + Partners to create a 3D-printed moonbase concept. As Prof. Sou explained:There are many AM methods that require a solvent to prepare paste or composites for extrusion or printing; these approaches are not feasible, as transporting solvents can be very expensive, and the evaporation of solvents can cause many potential issues. Several methods use binders or polymers to realize AM; they have similar issues—shipping additional materials, waste handling. Also, running these machines (i.e., printers) requires energy supplies.Sintering technology has also been explored as a potential method for 3D printing structures on the Moon. This consists of bombarding regolith with lasers, microwaves, or other energy sources to turn it into a molten ceramic. This ceramic is then printed out, layer by layer, and cools and hardens once exposed to air or the vacuum of the lunar environment. This method is energy-intensive and would likely require a nuclear power source, such as a kilopower reactor.

A 1.5 tonne building block produced to demonstrate 3D printing techniques using lunar soil. Credit: ESA
"Because of this, our team envisions a system where only lunar material is needed for the structures themselves, thus eliminating the bottleneck of binder resupply missions from Earth," added Cole, who was the first author on the paper describing their findings.
The method they tested and recommend is known as light-based sintering, which relies on sunlight concentrated by a set of optics to bombard and melt lunar regolith into feedstock. Researchers have tested this technology on Earth using lunar regolith simulant to manufacture glass and mirrors. On the Moon, solar energy is consistently present and abundant in sunlit regions, making it much more reliable than a power source that must be transported. The system's simplicity makes it highly desirable for challenging environments where repairs will be difficult if anything breaks down.
However, experiments have shown that the technology still experiences problems when used to fashion entire structures. To this end, Sou's team focused on manufacturing building components instead. Said Cole:While most research on this topic still relies on a mixture of binder and lunar soil, the silica content of regolith is such that at high enough temperatures it can bind to itself when sintered. What we found when attempting this with larger structures was that there was less uniformity and therefore less precision in the parts we created.
From this, we determined that the best use case for our method was to focus on fabricating a large number of interlocking and reconfigurable bricks for use in large-scale structures. We believe this "Lego Bricks" approach is also beneficial because the equipment can fit the volume constraints for lunar missions since the overall space needed to fabricate each unit is much smaller.
ATHLETE Rover Busts a Move: A Dancing Robot
Their work builds on existing research into sintering technology that leverages different energy sources to melt lunar regolith and create building materials. This includes NASA's work with space architectural firm SINTERHAB, which proposed equipping the agency's All-Terrain Hex-Limbed Extra-Terrestrial Explorer (ATHLETE) vehicle with microwave-sintering technology. However, said Cole, their concept is especially attractive because of the way it produces reconfigurable bricks.The reconfigurability of our brick assemblies, in particular, is exciting because of the flexibility we can achieve with the building process. Because different parts will have different material requirements, we could see a myriad of techniques being employed depending on the problem being faced. For structures where a bulk of material is needed and where high precision isn't demanded, as in the case of radiation shielding, we feel our method holds a lot of promise.Before the concept can be realized, however, much work still needs to be done. As Shou indicates, more research is needed to optimize the sintering parameters and material properties. The team also plans to build a prototype and conduct laboratory tests, which they hope will allow them to refine and scale the technology for use on the Moon. They also need to consider how the resulting 3D printer will transport itself along the lunar surface, what power options it would rely on, and other considerations.
"When it comes to full implementation, there's a lot of engineering that still needs to be done," Cole concluded. "In the future, we'll need to consider how the sintering process changes in a vacuum, or what modifications to the build platform will be needed so that parts can be reliably made while tracking the sun, for example. In addition, our device needs to be able to withstand harsh conditions compared to the lab environment we worked in for this research. These are all challenging problems, but in the end, the science behind all of this is well understood."
Further Reading: arXiv

Matthew Williams
Matt Williams is a space journalist, science communicator, and author with several published titles and studies. His work is featured in The Ross 248 Project and Interstellar Travel edited by NASA alumni Les Johnson and Ken Roy. He also hosts the podcast series Stories from Space at ITSP Magazine. He lives in beautiful British Columbia with his wife and family. For more information, check out his website.
How to Make Building Blocks for a Lunar Habitat - Universe Today
If you're gonna fight, fight like you're the third monkey on the ramp to Noah's Ark... and brother its starting to rain. Join our efforts to Secure America's Borders and End Illegal Immigration by Joining ALIPAC's E-Mail Alerts network (CLICK HERE)
-
06-29-2025, 05:24 PM #10112Senior Member
- Join Date
- Aug 2018
- Posts
- 95,564
If you're gonna fight, fight like you're the third monkey on the ramp to Noah's Ark... and brother its starting to rain. Join our efforts to Secure America's Borders and End Illegal Immigration by Joining ALIPAC's E-Mail Alerts network (CLICK HERE)
-
06-29-2025, 08:06 PM #10113Senior Member
- Join Date
- Aug 2018
- Posts
- 95,564
Top Barter List You May Want To Consider Stockpiling
1 Comment
Having extra supplies for bartering should be on every prepper’s plan. This enables you to barter for goods or services that you otherwise would be without!

You don’t have to have a set list per-say, but think about what you would need if SHTF and add extra to your stockpile because bets are if you need it, others will.
When I started prepping, I always knew from the start that having backup plans for backup plans is the key to success, in any SHTF situation.
This is the same when we think about bartering… you are planning that others will need something and stockpiling it to trade for things you may need when there are no shops open to supply you.
I am sharing a great list only because I want you to succeed if anything were to happen. I personally have stockpiled extra of all 20 of the following list. I guess the writer and I must be on the same page.
You don’t have to go all gung ho and spend all your wages and stockpile toilet paper. Take your time and start slowly. Buy an extra can of food, an extra roll of duct tape, etc…
Check out this great list and some of the things on the list may surprise you…
Updated Top Barter List You May Want To Consider Stockpiling
The 50 Best Barter Items ALL Preppers Should Stockpile
By Author SHTFPreparedness
Posted on Last updated: July 15, 2024
Categories Survival
Top Barter List You May Want To Consider StockpilingLast edited by Airbornesapper07; 06-29-2025 at 08:08 PM.
If you're gonna fight, fight like you're the third monkey on the ramp to Noah's Ark... and brother its starting to rain. Join our efforts to Secure America's Borders and End Illegal Immigration by Joining ALIPAC's E-Mail Alerts network (CLICK HERE)
-
06-29-2025, 08:18 PM #10114Senior Member
- Join Date
- Aug 2018
- Posts
- 95,564
13 Cheap DIY Greenhouse Project Plans
If you have space I think it is very important you have a greenhouse. If SHTF or you get bad weather for weeks at a time this could affect your vegetables in a bad way.

Build a Greenhouse: The Amazing, Low-cost, Multipurpose, Solar-heated Greenhouse/Guest House
Build a Greenhouse: The Amazing, Low-cost, Multipurpose, Solar-heated Greenhouse/Guest House – Mother Earth News
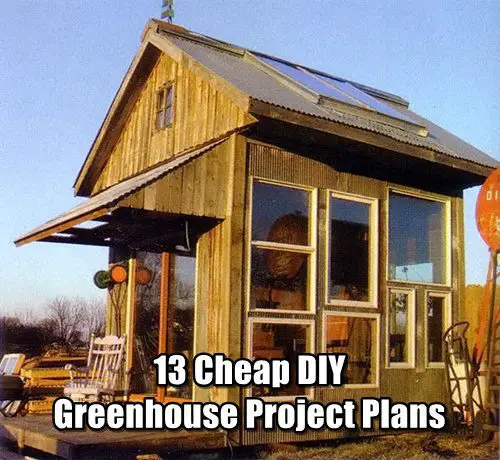
Image Credit: motherearthnews.com
Greenhouses produce a better yield as the temperatures and humidity are more stable. Your food actually LOVES greenhouses. I found a website that has 13 cheap DIY greenhouse plans for you to look at and build.
My favorite looking one is nice enough that it could double as a guest house. The cost is higher, but a building like this would make a beautiful asset to most properties, and it could be built out of recycled materials to save money.
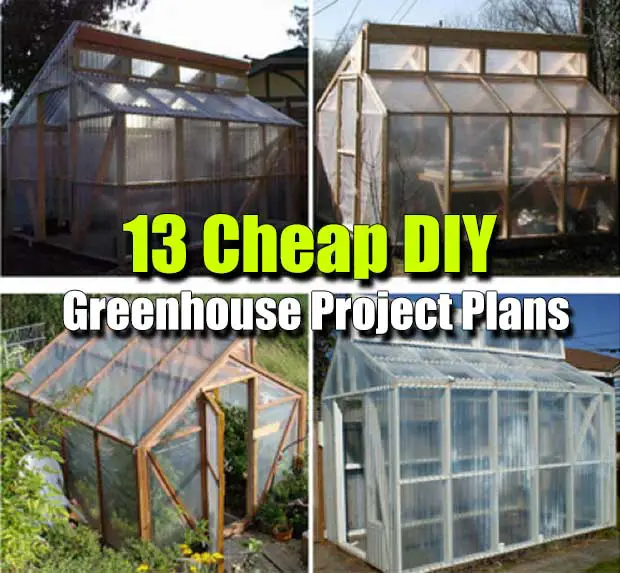
Image Credit: offgridworld.com
By Author SHTFPreparedness
Posted on Last updated: May 17, 2024
Categories DIY
13 Cheap DIY Greenhouse Project Plans - SHTFPreparednessIf you're gonna fight, fight like you're the third monkey on the ramp to Noah's Ark... and brother its starting to rain. Join our efforts to Secure America's Borders and End Illegal Immigration by Joining ALIPAC's E-Mail Alerts network (CLICK HERE)
-
06-29-2025, 09:33 PM #10115Senior Member
- Join Date
- Aug 2018
- Posts
- 95,564

75 August 5, 2014Gardening by Erica
How And Why To Make An Eco-Lawn
I’ve talked before about how “right sizing” my patch of grass really changed my perspective on “evil, non productive lawn” to something almost like fondness.
Well, my thinking on lawn has shifted yet again, and again for the better. We recently converted to an eco-lawn mixture and these days I find myself downright loving my lawn.
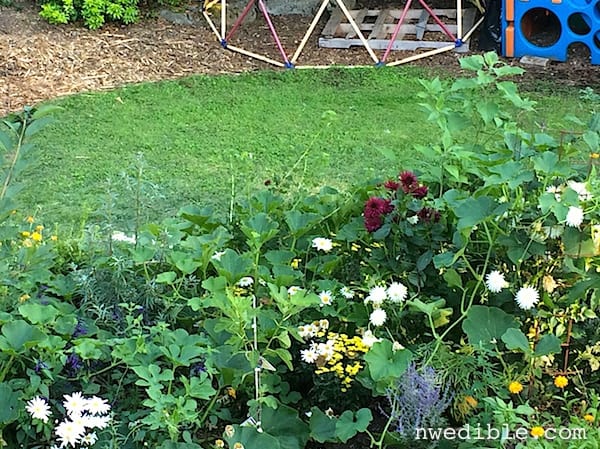
Don’t let the fancy name and Prius-marketing fool you: an eco-lawn is simply a collection of plants that work together to give you a consistently lush, foot-friendly patch of green with less water, less work, and little or no fertilizers. Some blends include low growing herbs and teeny flowers, but these aren’t essential – they just add some prettiness to the mix. The key ingredients in most eco-lawn blends are a blend of drought-tolerant fescue grasses and low growing clover.

Fescues are pretty common in cool-climate grass seed blends, so I’ll assume most folks are reasonably familiar with this component of an eco-lawn.
Here’s why the addition of clover is important. Clover is a member of the legume family, and – with the help of some beneficial microbes – has the quite awesome ability to take nitrogen out of the freaking air and turn it into fertilizer. The legume plants are kinda like the people in Cloudy with a Chance of Meatballs before everything went wrong – they can just snatch their snacks out of thin air.
The nitrogen that the clover doesn’t need immediately away gets stored away in cool little bead-like nodules on its roots, much like my thighs expand with convenient storage fat when I recipe test too many plum galette recipes (OMG, so good).

Rule number one about understanding plants is this: the leaf mass and the root mass are always kept in balance. You cut the top, some roots die. You screw up transplanting and kill off a bunch of roots, some leaf mass dies off until the plant can get the root mass rebuilt. Internalize this and everything from lawn care to tree pruning will suddenly make so much more sense. So when the clover loses leaf mass – because a sheep nibbles it or you come through with your push mower to cut your lawn – the roots of the clover die off to compensate.
This leaf-root balance is key to a successful eco-lawn. When the clover roots – all full of those nitrogen nodules – die off, the nitrogen is released into the soil like some nature-made Miracle Grow, available for neighboring plant roots to scoop up and use. And you know who just loves lots of nitrogen? Grass. Grass loves nitrogen so much that chemical lawn fertilizers have redonkulous NPK ratios like 26-0-2 or 32-0-4.
When you blend grass with clover you are setting up a lawn system that does not require additional fertilizer. Every time you mow, the clover feeds the grass through those cast off nitrogen nodules. And, just in case I didn’t fully emphasize this enough, this is all fed by nitrogen that is in the air. So this process is totally free and requires no additional work on your part.
I researched several brands of eco lawns and the major drawback to every one of them is that they are expensive, at around $30 a pound. Since most eco lawns are simply a blend of fescue grasses and clover plus whatever pretty stuff seems like a good idea, I thought I could save money by blending my own eco lawn seed mix.
I was wrong.
Fescue blends are cheap – you can get 5 pounds for about $15 – but most eco-lawn mixes include a very small leaved variety of clover called microclover or miniclover. This clover is very expensive – about $40 a pound. So, if you are DIY’ing a small eco-lawn, it can actually make more sense to just buy the pre-made blends.

But there is another option. White clover, while not nearly so cute and diminutive as microclover, makes a perfectly serviceable lawn component and is cheap – you can find it for like $5 a pound. Other clovers – particularly crimson clover, an annual, and the red clovers, which are more upright and less dense in their growth – aren’t as good for a lawn.
Whatever clover matches your budget and personal aesthetic, adding clover to the mix of ground covers that make up your lawn is a very good idea. I went with a no-name eco-lawn blend from my local nursery, supplanted with some additional white clover.
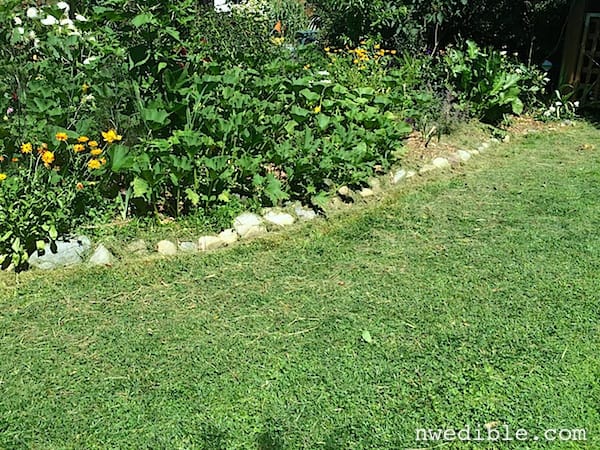
Establishing an eco-lawn takes the same care as establishing an all-grass turfgrass lawn. If you are overseeding a current lawn, raking away thatch to expose bare earth is important. If you have bare earth, good soil prep including grading and amending your soil is key.
I was dealing with neglected grass that had been partially killed off by (unintentional) smothering. I raked the grass area well to remove thatch, then re-graded the lawn area with peat moss. Using a crappy, hand-held seed spreader, I distributed the eco-lawn blend. After about a week of keeping the seeds watered, they germinated. After about a month, the new lawn was really filling in. Now, while it’s not yet as dense as it will be, it’s full and green with very little care. Since the eco-lawn established, about 6 weeks after sowing, we’ve barely watered and yet the lawn has stayed very green. We mow about every 3 – 4 weeks in the summer, which is probably half as often as we mowed our full turfgrass lawn.
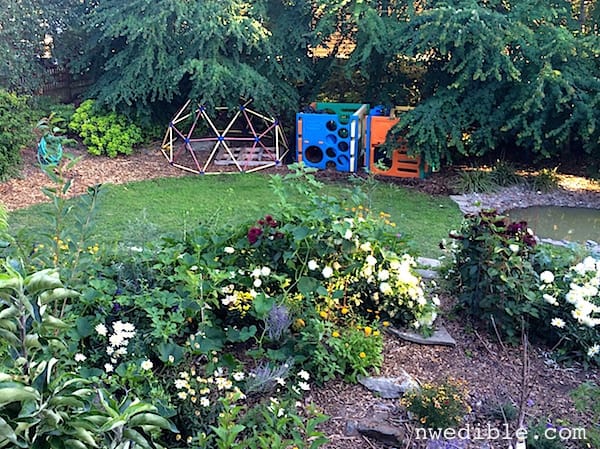
One possible disadvantage is that clover in blossom is very attractive to honeybees. I think this is awesome, but if you have an allergy to bee stings, you’ll need to mow frequently enough to keep the clover from blooming.
How And Why To Make An Eco-Lawn | Northwest Edible LifeIf you're gonna fight, fight like you're the third monkey on the ramp to Noah's Ark... and brother its starting to rain. Join our efforts to Secure America's Borders and End Illegal Immigration by Joining ALIPAC's E-Mail Alerts network (CLICK HERE)
-
06-29-2025, 09:38 PM #10116Senior Member
- Join Date
- Aug 2018
- Posts
- 95,564

History
11 Skills Your Great-Grandparents Had That You Don’t
5 MIN READ
by Marcia Simmons
14 May 2014
RECENT POSTS
- Honoring Juneteenth: Exploring the History & Heritage
- Ancestry Expands Articles of Enslavement Collection
- A Quick Guide to Heritage Travel
- Do You Have a Doppelgänger?
Our parents and grandparents may shake their heads every time we grab our smart phones to get turn-by-turn directions or calculate the tip. But when it comes to life skills, our great-grandparents have us all beat. Here are some skills our great-grandparents had 90 years ago that most of us don’t.
1. Courting
While your parents and grandparents didn’t have the option to ask someone out on a date via text message, it’s highly likely that your great-grandparents didn’t have the option of dating at all. Until well into the 1920s, modern dating didn’t really exist. A gentleman would court a young lady by asking her or her parents for permission to call on the family. The potential couple would have a formal visit — with at least one parent chaperone present — and the man would leave a calling card. If the parents and young lady were impressed, he’d be invited back again and that would be the start of their romance.
2. Hunting, Fishing, and Foraging
Even city dwellers in your great-grandparents’ generation had experience hunting, fishing, and foraging for food. If your great-grandparents never lived in a rural area or lived off the land, their parents probably did. Being able to kill, catch, or find your own food was considered an essential life skill no matter where one lived, especially during the Great Depression.
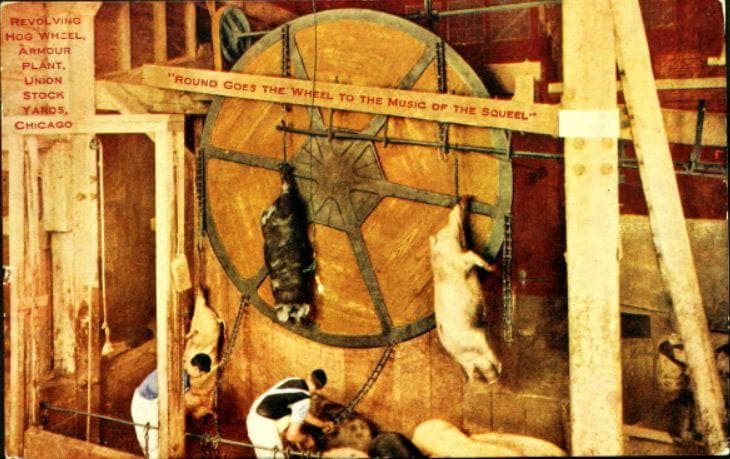 Postcard printed by V.O. Mammon Co.3. Butchering
In this age of the boneless, skinless chicken breast, it’s unusual to have to chop up a whole chicken at home, let alone a whole cow. Despite the availability of professionally butchered and packaged meats, knowing how to cut up a side of beef or butcher a rabbit from her husband’s hunting trip was an ordinary part of a housewife’s skill set in the early 20th century. This didn’t leave the men off the hook, though. After all, they were most likely the ones who would field dress any animals they killed.
4. Bartering
Before the era of shopping malls and convenience stores, it was more common to trade goods and services with neighbors and shop owners. Home-canned foods, hand-made furniture, and other DIY goods were currency your great-grandparents could use in lieu of cash.
5. Haggling
Though it’d be futile for you to argue with the barista at Starbucks about the price of a cup of coffee, your great-grandparents were expert hagglers. Back when corporate chains weren’t as ubiquitous, it was a lot easier to bargain with local shop owners and tradesmen. Chances are your great-grandparents bought very few things from a store anyway.
6. Darning and Mending
Nowadays if a sock gets a hole in it, you buy a new pair. But your great-grandparents didn’t let anything go to waste, not even a beat-up, old sock. This went for every other article of clothing as well. Darning socks and mending clothes was just par for the course.
7. Corresponding by Mail
Obviously, your great-grandparents didn’t text or email. However, even though the telephone existed, it wasn’t the preferred method of staying in touch either, especially long-distance. Hand-written letters were the way they communicated with loved ones and took care of business.
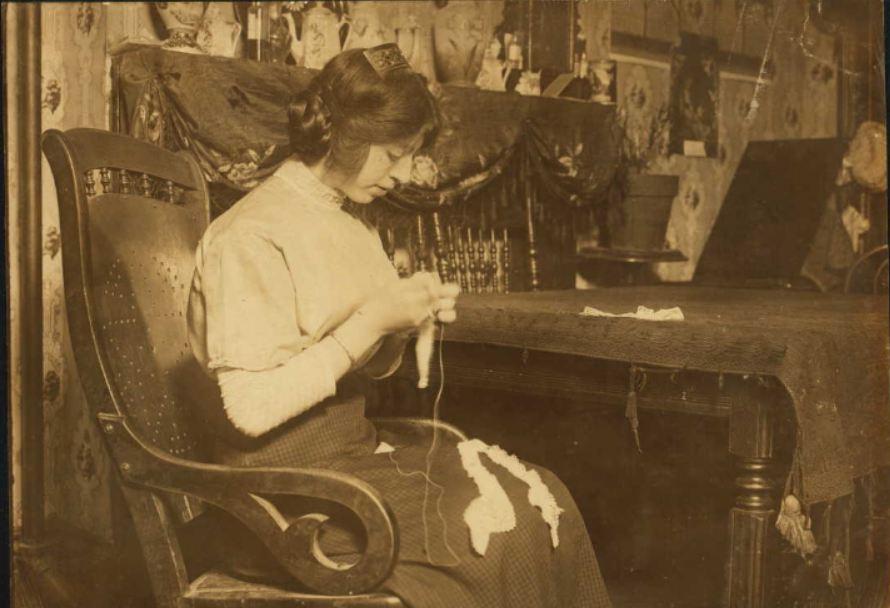 Celina Anzalone, 2264 First Ave. making lace for Cappallino’s factory near by.8. Making Lace
Tatting, the art of making lace, was a widely popular activity for young women in your great-grandparents’ generation. Elaborate lace collars, doilies, and other decorative touches were signs of sophistication. However, fashion changed and technology made lace an easy and inexpensive to buy, so their children probably didn’t pick up the skill.
9. Lighting a Fire Without Matches
Sure, matches have been around since the 1600s. But they were dangerous and toxic — sparking wildly out of control and emitting hazardous fumes. A more controllable, non-poisonous match wasn’t invented until 1910. So Great-grandma and Great-grandpa had to know a thing or two about lighting a fire without matches.
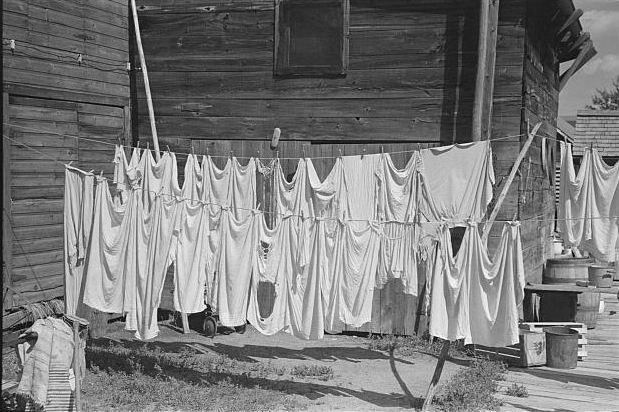 Clothesline, Winton, Minnesota. Photograph by Russell Lee.10. Diapering With Cloth
Disposable diapers weren’t patented until 1948 and it was another decade or two before they became widely used. Until then, cloth diapers held with safety pins were where babies did their business. Great-grandma had a lot of unpleasant laundry on her hands.
11. Writing With a Fountain Pen
While it’s true that your grandparents were skilled in the lost art of writing in cursive, your grandparents probably were, too. However, the invention of the ballpoint pen in the late 1930s and other advances in pen technology mean that your great-grandparents were the last generation who had to refill their pens with ink.
Have you got what it takes to go really retro? Find out. Start your free trial.
11 Skills Your Great-Grandparents Had That You Don’t
If you're gonna fight, fight like you're the third monkey on the ramp to Noah's Ark... and brother its starting to rain. Join our efforts to Secure America's Borders and End Illegal Immigration by Joining ALIPAC's E-Mail Alerts network (CLICK HERE)
-
06-29-2025, 09:48 PM #10117Senior Member
- Join Date
- Aug 2018
- Posts
- 95,564

Home How-To
14 Off-Grid Ways To Use (And Reuse) Aluminum Foil
by Tricia Drevets
in How-To
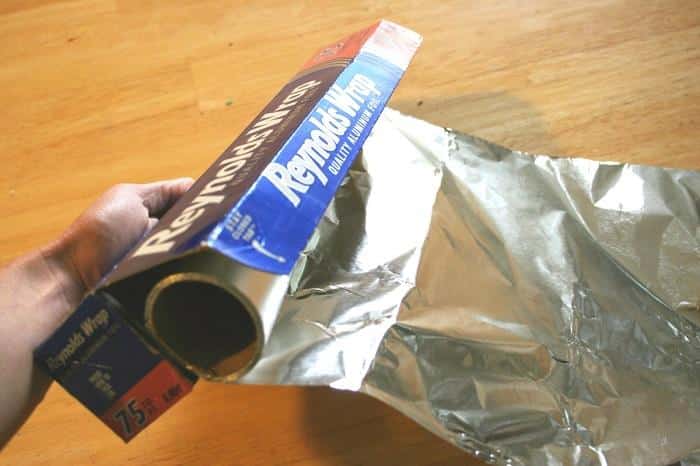
Image source: chicaandjoShare on Facebook
Share on X Share on Truth Email Article
Image source: chicaandjo
One of the most useful items in your house is probably hiding underutilized in a kitchen drawer. Sure, you use it to line a roasting pan or to cover a casserole. You may even use it to catch drips under your stovetop burners. But did you know that there are dozens of other uses for that roll of aluminum foil?
Before we get into a list of our favorite ways to use and/or reuse aluminum foul, let’s consider what it is and why recycling it is important. Standard household aluminum foil is typically 0.016 mm thick, and heavy duty household foil is typically 0.024 mm thick.
Do your parents or grandparents call the product “tin foil?” That’s because foil made from a thin leaf of tin was marketed commercially in the late 19th and early 20th centuries before it began to be replaced by aluminum in 1910. Less malleable than aluminum, tin foil also left behind a slight taste to the food it wrapped. The name “tin foil” has been passed down and is still used interchangeably for aluminum foil in many parts of the country.
Foil was first used to wrap Life Savers candy and chocolate bars in the United States. The Reynolds Company – today called Reynolds Consumer Products – was responsible for the marketing push that made aluminum foil a household staple. In 1947, the company touted its Reynolds Wrap as “the pure aluminum foil for 1,001 kitchen miracles.”
Most supermarkets today sell a couple of choices of aluminum foil brands. The product comes in a variety of widths and thicknesses and can withstand both high heat and extreme cold. It also is very durable. Unfortunately, the average American tosses away about three pounds of aluminum foil each year. Since scientists believe it will take about 400 years for aluminum to break down naturally in landfills, this waste is adding up.
Discover more than 1122 tips, tricks and secrets for a healthier, safer, lower cost, more self-reliant life!
However, aluminum is 100 percent recyclable and can be reworked indefinitely without loss of quality. To find out where you can take your used aluminum foil for recycling in your community, contact your municipal recycling program or enter your zip code at the Earth911.org website. Another way to recycle aluminum foil is to repurpose it yourself. Try washing used sheets with hot water and soap and then letting them air dry for re-use.
Now here are some of our favorite uses – and re-uses — for the tough, shiny stuff:
1. Reduce static cling. Roll aluminum foil into a tight, two-inch ball and toss it into your dryer with your wet clothes. It will help get rid of annoying static cling.
2. Soften brown sugar. Wrap hardened brown sugar in foil and place in a 300-degree oven for five to 10 minutes to soften the clumps.
3. Deter pests. Try hanging strips of aluminum foil around your garden. The sight and sound of the shiny sheets will help keep birds and some animals from eating your plants. Another idea is to place strips or balls of aluminum foil in cracks where insects or rodents could enter your home or outbuildings. Mice do not like crawling near aluminum foil’s sharp edges.
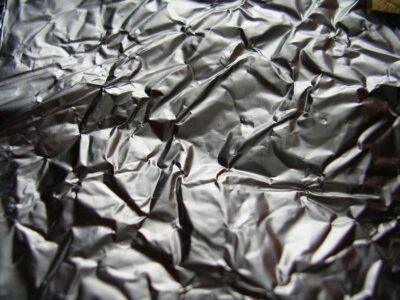
4. Extend the life of bar soap or steel wool. Place a sheet of aluminum foil on your soap dish to help prevent soap from sitting in moisture and/or steel wool from rusting.
5. Glue down loose vinyl. Place a sheet of aluminum foil over a loose or bulging self-stick vinyl tile and run a hot iron over it several times to melt the glue. Then place heavy books or other weights on the tile so the adhesive can reset.
6. Fix a battery connection. The springs that hold the batteries in place in your remote controllers or flashlights can loosen over time. Try folding a small piece of aluminum foil to make a pad between the battery and the spring to hold the battery in place, completing the circuit.
7. Clean jewelry and silverware. Place gold and silver jewelry or silverware in a bowl lined with aluminum foil. Add hot water and about a tablespoon of bleach-free, powdered laundry detergent or baking soda and mix well. After about a minute, take your now shiny valuables out and let them air dry.
8. Improve efficiency of room radiators. Do you have cast iron room radiators in your home? You can increase their efficiency by making a heat reflector to place behind them. Simply tape heavy-duty aluminum foil (shiny side out) to a large piece of nonflammable material and then place it behind the radiator. The radiant heat will reflect off the foil into the room.
9. Clean out fireplace or grill ashes. Place a double layer of heavy-duty aluminum foil under the wood grate of your fireplace or under charcoals in your outdoor grill. When ashes have completely cooled, simply wrap them in the foil and dispose. You also can fashion your own barbecue drip pan out of aluminum foil to catch meat drippings.
10. Scrub pots and pans. Use a ball of aluminum foil to scrub grimy kitchen pots and pans or stove-top messes. Note: Avoid using on non-stick surfaces.
11. Remove wrinkles in clothing. To iron clothes more efficiently, place aluminum foil under your ironing board cover. The foil will act as a reflector, helping to heat the clothing and to remove wrinkles more quickly. Another idea is to place aluminum foil under the hole you are patching in jeans or workpants. It keeps the iron-on patch from sticking to the ironing board.
12. Protect fixtures from paint. Use aluminum foil as you would use tape to protect door knobs and fixtures from drips when you are painting a room. You can also use crumpled aluminum foil to add texture to walls when you paint or plaster.
13. Help TV/radio reception. Do you have an old TV or radio that has an antenna? Resurrect a time-honored tradition of wrapping a little ball of foil and wrap it around the antenna ends for clearer reception.
14. Protect young trees. Rodents and other animals often eat the bark of trees during the winter months. An effective way to protect your young trees is to wrap their trunks with two layers of heavy-duty aluminum foil in October or November. Remove the foil in spring.
Now that we’ve given you some food for thought, you will probably come up with additional ideas for using aluminum foil in your own household. And by the way, it still works great as a way to keep the crust from burning while you are browning a pie or the cheese from getting too crispy when you are baking your favorite lasagna.
Do you know of other uses for aluminum foil? Tell us in the section below:
Get $600 worth of survival blueprints … absolutely free!
14 Off-Grid Ways To Use (And Reuse) Aluminum Foil - Off The Grid News
If you're gonna fight, fight like you're the third monkey on the ramp to Noah's Ark... and brother its starting to rain. Join our efforts to Secure America's Borders and End Illegal Immigration by Joining ALIPAC's E-Mail Alerts network (CLICK HERE)
-
06-29-2025, 09:59 PM #10118Senior Member
- Join Date
- Aug 2018
- Posts
- 95,564
How to Grow Food in the Winter
Jump To:
Do you miss plucking fresh fruits, herbs or veggies from your garden during winter? Do you wish to enjoy beautiful organic produce during the cold months?
You are just in the right place. This write-up is dedicated to all the essentials necessary to learn how to grow food in the winter.

There are lots of things to think about in preparation for winter food gardening!
- What will you need?
- How to prepare the soil?
- Which tools to have handy?
- How to apply the mulch?
- Which vegetable or fruits to pick?
- How to go about the entire process?
How to Grow Food in the Winter?
What do you need for a successful winter garden?
While the colder areas could benefit from a cold frame, many areas are mild enough to grow vegetables right in the outdoor garden.
Here’s what you’ll need for planting your cold-weather garden:
- Garden clean-up tools: rake, leaf blower, tiller, etc.
- Mulch & compost
- Soil pH tester: a digital soil ph tester is pretty convenient
- Seeds of the crop you wish to grow
- Wooden planks for raised beds
- Gloves: for all those who like their hands tidy while gardening
Vegetables suitable for winter cultivation
- Arugula
- Asparagus
- Broad beans
How to Grow Food in the Winter - SHTFPreparedness
If you're gonna fight, fight like you're the third monkey on the ramp to Noah's Ark... and brother its starting to rain. Join our efforts to Secure America's Borders and End Illegal Immigration by Joining ALIPAC's E-Mail Alerts network (CLICK HERE)
-
06-29-2025, 11:06 PM #10119Senior Member
- Join Date
- Aug 2018
- Posts
- 95,564
Delicious Pickled Refrigerator Green Beans Recipe
Domestocrat
A platform for one lady's affairs.
Skip to content
Recipes: Pickled Green Beans
- by Domestocrat
- Posted on October 11, 2013
Did you think I was done pickling? Nope, not even close. Next up – pickled green beans!
Domestocrat’s Pickled Green Beans (makes two 1-pint jars)
For the brine:
1.25 cups vinegar (I used white balsamic, but you could use regular white)
1.5 cups water
1/2 cup sugar
2.5 tbsp. kosher salt
1 tsp. whole peppercorns
Pinch red pepper flake
One giant bag of fresh green beans (my apologies for the lack of a specific quantity here, I got these beans at the farmers market and didn’t get an official measurement, it’s basically 4 big handfuls of fresh, loose green beans)
The brine/pickling liquid is really easy to prepare (see here for more instructions if you get lost). Combine all of the ingredients in a pot and bring to a boil. Once it begins boiling, reduce to a low simmer and stir until the sugar and salt have dissolved. Cool the liquid down to room temperature before using it. I transferred mine to a mason jar to cool so I could use my sauce pot for the next step.
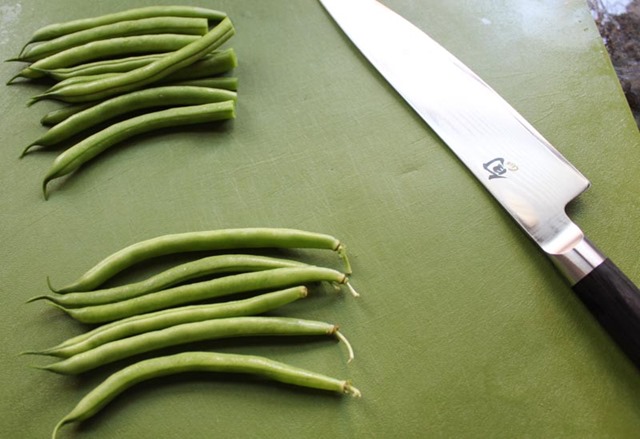
The next step is to prep the green beans! Wash thoroughly and cut off the ends with the stem.
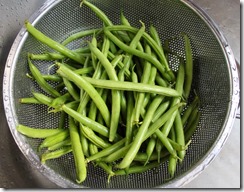
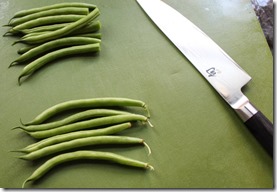

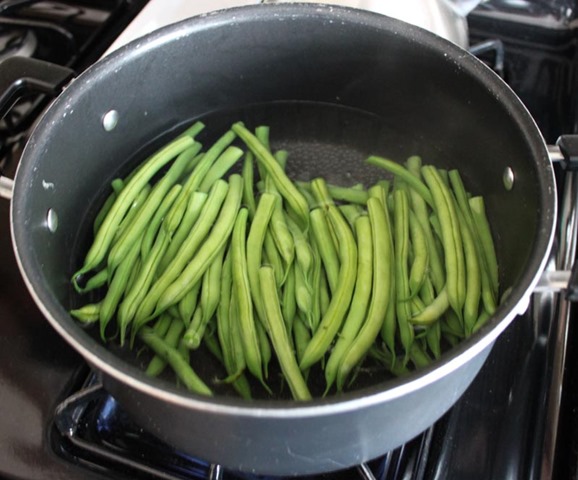
Next, fill up a sauce pot with water and bring to a boil. Blanch the green beans for 4-5 minutes, maximum. Drain the green beans well and let them cool for 7-10 minutes.
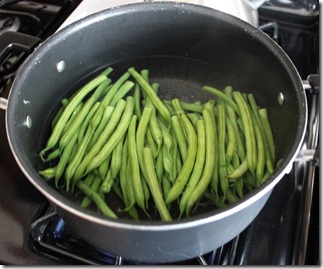
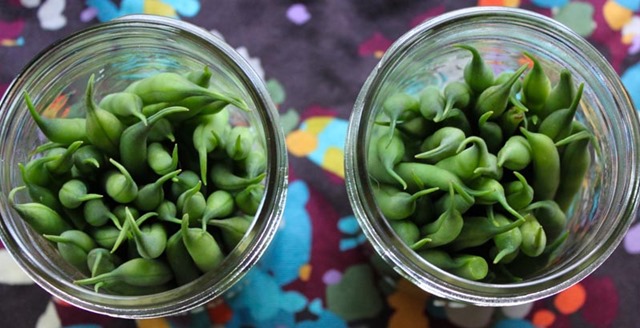
In two wide mouth pint jars, pack all of the green beans as best you can.

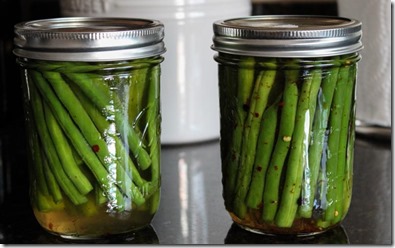
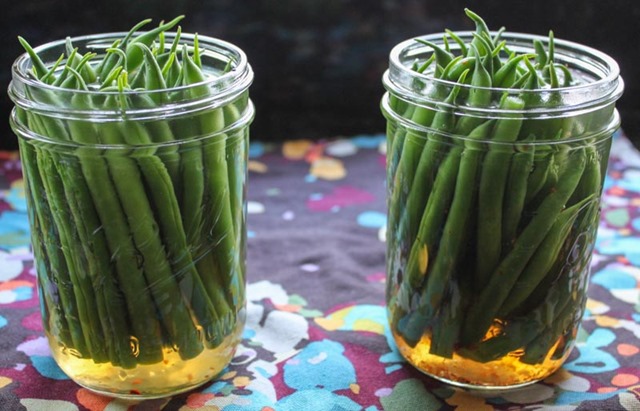
Then take the brine and slowly pour it over the top of the green beans. Be sure to fill the jar right up to the top – green beans tend to float and if the brine doesn’t fill the jar completely, you will have an unbrined air pocket of green beans on your hands. Save any leftover brine in an airtight container in the fridge for your next pickle adventure.

Twist on the lid, give the jar a good shake, and store in the fridge for a minimum of 24 hours before eating. These pickled green beans will keep in the fridge for at least 2 weeks. Enjoy!
Share this:
Related
Recipe: A Pint of Pickled Peppers September 26, 2013In "Recipes"
Recipe: A Quick Pickle February 29, 2012In "Recipes"
Recipe: Homemade Giardiniera September 5, 2013In "Recipes"
Posted in Recipes Tagged green beans, pickle, pickled green beans, pickled vegetables, pickled veggies, pickling, recipe
Author: Domestocrat
I'm a lady who enjoys photography, football, cooking, long drives with the windows down, This American Life, kettlecorn, hot yoga, pop punk, my nephews, my cat Reggie, and my home: Boston. View all posts by Domestocrat
Recipes: Pickled Green Beans – Domestocrat
If you're gonna fight, fight like you're the third monkey on the ramp to Noah's Ark... and brother its starting to rain. Join our efforts to Secure America's Borders and End Illegal Immigration by Joining ALIPAC's E-Mail Alerts network (CLICK HERE)
-
06-29-2025, 11:16 PM #10120Senior Member
- Join Date
- Aug 2018
- Posts
- 95,564
DIY Outdoor Farmhouse Table
October 25, 2012
Disclaimer: This post is brought to you in partnership with 3MDIY.com. All the ideas are mine and the content is still just as awesome as ever ...or so I would like to think so. Enjoy!

You may not remember, but we finally got our patio concrete just a few months ago. I've been waiting years for this! Since we've moved into our house, I've had a dirt patio. May sound extravagant, but it's not Especially when it snowed or rained or became weed ridden. But now...well, that's all in the past. Now I have concrete. I must admit though, I wish it was stamped concrete or something a little more spectacular, but really....I'm just glad its not dirt anymore lol.
So I've had visions of a beautiful patio before the concrete was even poured. And in that patio, it included a beautiful table, of course. The hubs kept wanting me to look for a used patio set for us. I kept saying no. He kept telling me, well, you can always spray paint them and change out the cushions. Then I would look at him in dismay..."duh, look who you are talking to, of course I would change out the cushions and paint it IF we got a used one. But if you also look who you are talking to again, you would know that I would much rather MAKE one." He understood, but I guess didn't care. Cuz he kept mentioning getting a used one. So I took matters into my own hand and just made one before he could mention it again

I'm going to warn you, there are a lot of steps in building this table thus being the bazillion of how to pictures. I made my table approximately 8 feet by 4 feet and 33.5 inches tall. Most tables are around 31 inches, I decided a little higher for the chairs I currently have worked best. You can make the base shorter or taller if you want. Here are the supplies and cuts you need:
Wood:
- Eight 2x6 either 8 feet long each or mine ended up being 92.5"
- Two 2x6 cut at 69"
- Four 4x6 beams, cut at 32" each (have cut at home store, if you don't have a saw big enough to cut, or you can use 4x4 beams also)
- Two 2x4 cut at 38" each
- Two 2x4 cut at 31"
- Two 2x4 cut at 61"
- Two cedar planks cut at 61"
- Two cedar planks cut at 31"
Supplies:
- Circular Saw
- Miter Saw
- Hammer/Screw driver/Chisel
- Drill and screws (exterior wood screws if creating table for outside)
- Wood glue
- Wood filler
- Sandpaper (Sandpaper in 120 grit from 3M Advanced Abrasives)
- Paint
- Stain
- Polyacrylic
- Safety equipment (eyes, respiratory and ears from 3M TEKK Protection)

Step one: Create Notches
Mark on the bottom of each 4x6 where you want your notches made. I put mine 4 inches about the bottom. Make sure you measure your 2x4, and that it measures at 3.5 inches. If it doesn't, use the measurement of the 2x4. Mine was right at 3.5 inches, so I made the top mark at 7.5 inches.

Next, take your circular saw and put it to the depth of the 2x4, which was about 1.5" for me. Once again, to get the correct depth for you, measure your 2x4 -they all have different measurements sometimes. Run the circular saw through the top and bottom marks you made earlier. This can be scary doing this, so make sure you use the proper safety equipment, or have a professional do it When sawing mine, I used 3M TEKK Protection
eyeglasses and earplugs. Circular saws are deafening loud.

Then do three more cuts in between the bottom and top marks.

Next, get your chisel or screw driver and knock out the wood pieces.

You may need to chisel out some stubborn pieces of wood too. Try to make it as even as possible.

Since the notches are more than likely not very even, now you want to make them more even. So get your sandpaper, I used the 120 medium grit paper for 3M Advanced Abrasives
, secured it onto a block of a wood, and started sanding out the notch. I really wished my electric sander could have fit in the notches, but alas, it didn't. So sanding by hand I did

Now do this same process to all 4x6 beams. Make sure your measurements are accurate on every leg.
Step 2: Creating the base.
Line up two of the 4x6s or 'legs'. And place your 38" 2x4 into the notches, making each edge flush to the outside edge of the 4x6. Wood glue this in place. And then countersink a screw. Do this to the other two legs also.

Now, secure a 61" 2x4 to the top inside of the legs. To secure, I used my countersink drill bit and angled it through the 2x4 and into the leg.

Now do the other side the same way, you should get something that looks like this. Finally starting to look like a table!

Now secure the shorter 31" inch 2x4 to the inside of the legs on the shorter edge. Do this to the other side also.

Now, secure your bottom 2x6 pieces (69 inches long) to the bottom (below picture). Connect them to the 2x4 that is held in the notches on the leg.To do this, I turned the table upside down. Found the middle mark on the 2x4 that it is going to connect to, and then marked an inch away from the middle mark on both sides. This is the mark where I want the inner part of the 2x6 to be.
Use your countersink drill bit and drill into 2x6 and into the 2x4. Make sure the top (for now, it looks like the bottom) of the 2x6 is flush with the top of the 2x4. Screw and secure in place. Do this to the other side.

And then do this to the second 2x6. It should end up looking like this:

Here's an idea of what your table should look like at this point:

Step 3: Secure the table top
On the top of the base, measure and mark the middle on the both shorter sides.
Get your first 2x6 (92.5"), measure 14 inches in on the bottom of each side and mark. Since the base measures 64.5 inches and the 2x6 is 92.5 inches, the difference is 28 inches. So that would be 14 inches on each side (sorry for the math lecture lol).
Now line up the first 2x6 on the left or right side of the middle mark, and then make sure you line up the bottom mark where it will hit the outside of the supporting 2x4. Secure this piece with wood glue, and a screw. You don't want this middle piece to move since it is your starting point and all the other pieces will be following its lead. If it gets moved a bit, it could be a big disaster later on

Now add a 2x6 next to the first 2x6, measure and secure with wood glue (not a screw), do this same process working outwards with the other 2x6s. Securing with wood glue first and not placing a screw will give you some leniency when placing the pieces so you can move them and replace them if need be. You will secure them with a screw later.
When you get to the end, it should look like the picture below. You'll have one more 2x6 to go. Glue up and down the base pieces and then secure the end 2x6 with a screw into the legs.

This is what your table should look like now:

Once all your boards are placed and in good order, secure each one into the table base. Use a countersink drill bit first to create the hole for the screw, then drill in the screw. Do this on each 2x6 on both sides.

For mine, I decided to fill the holes. So I just applied some wood filler to each hole.

Step 4: Finishing
Now to make the table pretty! First is to sand the wood. I used 3M Advanced Abrasives
120 medium grit paper to do the sanding. I sanded enough to get ride of obvious marks but kept it 'rustic' enough also still showing some grain. When sanding, make sure you use the proper equipment to protect yourself! This is a big sanding job, I didn't think I needed to cover my eyes since I was outside, but by golly, but the time I was half way through my eyes were stinging from all the saw dust. Use eyeglasses and a respiratory mask when sanding, once again, 3M TEKK Protection
offers great products for this

It took me awhile to figure out what finish I wanted the table to be. It went from white to grey to brown. But I did know I wanted a rustic look. Something that looked older than it was. I looked into staining with tea, but didn't want to wait forever for the process, so I began experimenting with some stain and paint and came up with the perfect look for the table top. This process alone deserves it's own post, so I'll post about that soon and make sure to link back to it here.(Update: Click here to see how to make new wood look old and weathered)
But for now, I just used some paint, stain and sealed it up with some polyacrylic.
Step 5: I also painted/stained/sealed the cedar plank 'apron' pieces before placing them on the table. Once these have dried, secure each piece to the supporting top 2x4 of the base.I secured with wood glue and an exterior wood screw.


Now I have the table for my patio...Just missing a whole bunch of other stuff, like the pergola, the rug, the outdoor chairs, the fire pit, etc etc. But since winter is around the corner, I'll have to wait for anything more until next year

At least I get to enjoy this setting for the fall!

I'm not sold on using the farmhouse bench out here, but I think it works for now. Maybe I'll make another one and stain it the same color as the legs, which by the way is a dark walnut from Minwax.

Here's a closer look on the table top finish. I absolutely love the old weathered look. It turned out perfectly

Here's a video on some tips you can use when making this table from both me and 3MDIY.com. Somethings I explained in the post, some I didn't and you get a sneak peak on the finishing technique . Sorry about the wind on the last section, it was blowing like crazy!! And here's to being 30 weeks pregnant and still building stuff!! lol sorry, had to say it plus you can tell I'm uber pregnant in the video.
Outdoor Farmhouse Table
DIY Outdoor Farmhouse Table — Thrifty and ChicIf you're gonna fight, fight like you're the third monkey on the ramp to Noah's Ark... and brother its starting to rain. Join our efforts to Secure America's Borders and End Illegal Immigration by Joining ALIPAC's E-Mail Alerts network (CLICK HERE)


 Reply With Quote





Marfoogle TV - Military Aged Males - Not Good
08-01-2026, 01:48 AM in Videos about Illegal Immigration, refugee programs, globalism, & socialism