

Results 10,141 to 10,150 of 11574
 226Likes
LinkBacks (?)
-
12-26-2016, 11:32 AM
-
09-02-2016, 05:39 PM
-
whole garden made with pallets!! Love it!! | Pallets | Pinterest | Pallets, Pallets Garden and Wooden Pallets
Refback This thread03-06-2016, 11:30 AM -
10-20-2015, 05:29 PM
-
06-12-2015, 08:00 PM
-
02-26-2015, 01:58 PM
-
01-05-2015, 04:13 PM
-
12-19-2014, 10:19 AM
-
EMERGENCY: HUGE FEMA PANDEMIC EXERCISE IN USA IN NOVEMBER, INTERNET SHUT DOWN PART OF EXERCISE | Prepare4Survival
Refback This thread12-03-2014, 10:39 PM -
Off Grid World ? Ugly Duckling Shipping Container Home Built by Artist Is a Beautiful Swan on the Inside
Refback This thread11-25-2014, 03:10 PM -
11-17-2014, 10:59 PM
-
11-13-2014, 11:18 AM
-
11-09-2014, 02:54 PM
-
10-28-2014, 11:38 PM
-
10-26-2014, 05:54 AM
-
10-16-2014, 11:28 AM
-
10-03-2014, 01:25 PM
-
10-02-2014, 09:16 PM
-
09-26-2014, 07:00 PM
-
09-26-2014, 01:56 PM
-
09-19-2014, 04:46 PM
-
09-13-2014, 05:49 AM
-
09-05-2014, 01:52 PM
-
09-01-2014, 09:39 AM
-
08-30-2014, 06:29 PM
-
08-10-2014, 06:29 AM
-
08-04-2014, 05:07 PM
-
07-23-2014, 11:14 AM
-
New Evidence on Expiration Dates | Medical Preparedness | Doom and Bloom (TM) | Doom and Bloom (TM)
Refback This thread07-22-2014, 10:10 AM -
07-18-2014, 08:37 PM
-
07-15-2014, 04:57 PM
-
07-11-2014, 01:40 AM
-
04-22-2014, 11:14 AM
-
04-18-2014, 12:57 PM
-
04-18-2014, 10:10 AM
-
04-14-2014, 12:18 AM
-
04-12-2014, 02:28 AM
-
03-02-2014, 11:43 PM
-
12-24-2013, 11:59 PM
-
12-07-2013, 11:04 PM
-
kitchen | Cob
Refback This thread11-25-2013, 03:24 PM -
10-22-2013, 10:25 PM
-
Apple Pie Braid | Sweets
Refback This thread09-26-2013, 07:58 AM -
09-02-2013, 04:44 PM
-
5 Reasons Why You May have to Bug Out Even Though You Don’t Want to | The Apartment Prepper's Blog
Refback This thread08-23-2013, 03:20 PM -
06-27-2013, 06:30 AM
-
06-23-2013, 08:11 PM
-
06-17-2013, 11:21 PM
-
05-24-2013, 05:06 PM
-
To Eat / BASIC LIST / SUGGESTED ITEMS FOR LONG TERM SURVIVAL - Page 275 - ALIPAC
Refback This thread05-01-2013, 03:49 AM
Thread Information
Users Browsing this Thread
There are currently 1 users browsing this thread. (0 members and 1 guests)
 LinkBack URL
 About LinkBacks
-
07-01-2025, 01:49 AM #10141Senior Member


- Join Date
- Aug 2018
- Posts
- 92,360
1900 Farmhouse
Remodeling a quaint little farmhouse in Oregon, and getting loads of splinters along the way.
Friday, March 04, 2011
Kitchen Floor
After 2 weeks and nearly 50 hours of work, the kitchen floor is finally complete.
 In 2003 I did a remodelwhere I removed unusable attic space and installed an upstairs bathroom, enlarged a bedroom and tacked on a balcony. After the demolition of the original roof, I kept the old full dimensioned 2x4s for sentimental sake and also in case I might have a chance to reuse them again.
In the design stage of the current kitchen remodel, I came across an interesting wood and tile inlay and the thought occured to me to finally utilize those old 2x4s. To give it more of a worn look, I had them sandblasted. Here are some close up shots.


 The next picture is the collection of split 2x4s after coming from the sandblaster. Earlier, I had cut these to size and checked for nails before running through the bandsaw by Kevin Reedy, who would later become the cabinet maker. He was a reference from my dining room table maker, Dennis.

The kitchen that I'm remodeling was a later addition at the back part of the house. As a result, the floors are at different levels so I had to add some 1/4" plywood to bring it to the same level as the adjacent dining room.

Before installing the 2x4 halves and bricks, I first laid out the centerlines of the 2x4s based on the location of the sink and range for symmetry.


Once the 2x4s were nailed in place, I installed Durock as a solid foundation for the brick veneers to be install on.


Here's a shot of the brick veneer lined up to be installed. I purchased through Holbird Enterprise and the brick is from the Alabama Charcoal Co. in Oklahoma, so lots of character and various colors on the faces.

Thin setting and brick veneer install. I only worked a small area at a time, since there was a lot of cutting due to the angles. After a section or two, I got a good process down and it went fairly smooth, although I felt it in my back the following day, that's for sure.


The grouting was a bit more of an unexpected challenge. The grout tended to adhere to the brick face much more than a glossy tile face so clean up was a bit frantic. I ended up taking a day of "vacation" the next morning to scrub the brick faces to get as much grout off as possible. Later, they went through an acid wash by Gary and that made a huge difference.


More finished shots below.
The two wood "rugs" were strategically placed in front of the sink and the range since a lot of standing is spent there. I figured standing on wood rather than brick would be easier on the body over time.


Posted by Joe at Friday, March 04, 2011
1900 Farmhouse: Kitchen Floor
If you're gonna fight, fight like you're the third monkey on the ramp to Noah's Ark... and brother its starting to rain. Join our efforts to Secure America's Borders and End Illegal Immigration by Joining ALIPAC's E-Mail Alerts network (CLICK HERE)
-
07-01-2025, 02:50 AM #10142Senior Member
- Join Date
- Aug 2018
- Posts
- 92,360

- Home
- Homesteading
- Gardening
- Canning
- Chickens
- Recipes
- Food Storage
- Health
- Emergency Preparedness
- Natural Remedies
Rules of Cooking Wild Mushrooms and Recipes

Melissa Francis
August 30, 2014
Recipes, Recipes WIld Food, Wild Food Foraging
cooking, Mushroom, mushrooms, Recipes, rules, wild
This huge collection of the Rules of Cooking Wild Mushrooms and Recipes helps to find delicious ways to eat wild food foraging mushrooms in meals. Mushrooms can be a wonderful addition to your diet but always remember proper identification can mean the difference between life and death.
Follow the website link below to see the image in a larger form.
Buzz Feed Visit us on Facebook, Pinterest, Twitter, Google + or send an email to homesteadsurvival@hotmail.com to join our single daily email that contain all of that day’s articles.
Best restaurants near me
Click here to read a huge collection of the Rules of Cooking Wild Mushrooms and Recipes:
http://www.buzzfeed.com/christinebyr...s?bfpi#3nhexlv
Rules of Cooking Wild Mushrooms and Recipes - The Homestead SurvivalIf you're gonna fight, fight like you're the third monkey on the ramp to Noah's Ark... and brother its starting to rain. Join our efforts to Secure America's Borders and End Illegal Immigration by Joining ALIPAC's E-Mail Alerts network (CLICK HERE)
-
07-01-2025, 02:57 AM #10143Senior Member
- Join Date
- Aug 2018
- Posts
- 92,360

Plant Your Irish Potatoes This Fall or Winter
11

By Robert L. Williams
Issue #48 November/December, 1997
My family has made a practice of planting Irish potatoes in the fall rather than in the early spring. We tried it both ways for many years and our conclusions are that, season after season, fall planting seems to work better for us.
Heres an illustration: last spring we dutifully planted our potatoes in March, which is about as early as we can work the land successfully. We planted the spuds six inches deep, and then we waited.
And waited. And waited.
In April the first signs of growth appeared, and in the cool spring the plants grew, barely noticeably. When the really warm days of May arrived the potato plants put on a growth spurt that was truly gratifying.
And in June, believe it or not, we had a series of freezes and the plants were killed back by frost. They never made a come-back. The entire potato patch was a total loss of time, energy, and a small amount of money.
Winter or fall planting
Now take a look at winter or fall planting. As soon as all the summer garden crops have been harvested, we till our potato patch and make our winter planting. When the soil is loose and well pulverized, we dig deep rowseight to ten inches. If you wish, you can use shallow rows and later pile dirt onto the top of the planted taters.
With the deep row open and ready, we fill the bottom of the row with dead leaves (Youve been raking leaves from the yard anyhow, and this is a fine way to dispose of them), or we use pine needles. Its good to have at least four or five inches of this dead matter in the bottom of the row.
Then set the potato eyes or cuttings in the row on top of the dead vegetable matter. It works better if you use whole spuds, particularly if you have some small ones that are really too little for good table use. Set the small potatoes a foot apart in the rows.
Now cover the potatoes with another layer of dead leaves, well-rotted sawdust, or other organic mulch material. You can use grass clippings or any other mulch available. Then add the necessary dirt to fill the row and even hill up the row slightly.
Admittedly, this type of gardening is a little harder, takes a little longer, and seems to be a total flop. But wait till spring and see the difference.
During the depths of winter the snows and rains will cause the mulch materials to decay and, as the mulch decays, warmth is generated, just as green hay or green sawdust will generate heat as it decays. The heat is generated for several weeks or even months, depending upon the amount of mulch used, and causes the potato sets to begin their growth cycle so that the roots begin to grow. The second layer of mulch and the dirt on top of it prevents the heat from escaping rapidly, while the soil on top is too cold for the plants to emerge from the soil. Small potatoes start to form very early, and they will grow all winter.
Obviously, the classic manure can be used as well, but this type of material tends to burn the roots of the tender plants. If you use manure, mix it with a generous amount of rotted sawdust or dead leaves.
When the weather is warm enough, the leaves of the plants will shoot forth, and because there is already a great root system the plants will be hardier and will grow faster. We asked a neighbor, a farmer, why the plants grow faster, and he gave us his theory:
The plant when young has a struggle, he says, to provide enough nutrition and growth power for both roots and shoots to grow, and the result is that both are often weak and fragile, more vulnerable to insects and cold snaps.
If the roots are already established, the growth energy can be used by the above-ground plant without robbing the tubers below the soil.
You can add a small amount of commercial fertilizer, if you wish, by sprinkling it along the rows. But the decayed mulch is providing its own fertilizer power by this time. The results are that by very early spring (unless you live in a frigid part of the country) you will have large, sound, beautiful potatoes long before your neighbors have any to harvest.
And this is only part of the beauty of winter potatoes. Because the early growth is done underground in cool weather, the above-ground plants will mature earlier than they would in the usual form of gardening, and you will be ready to harvest before the insects above and below the soil surface appear to devour plants and tubers.
A bonus of this type of planting is that the crop is harvested early enough that you have time to have a second or even a third crop on the same plot of land, especially if you live in an area where the growing seasons are longer.
I confess that I dont know how this system will work where the winters are brutal. What succeeds in the Piedmont of North Carolina may not be successful in Minnesota or Montana or Maine.
Give it a try this winter, but you may wish to try only a small patch of potatoes until you see how the system works. If you are pleased by the results, then next season try it on your larger potato patches.
Plant Your Irish Potatoes This Fall or Winter - Backwoods Home Magazine
If you're gonna fight, fight like you're the third monkey on the ramp to Noah's Ark... and brother its starting to rain. Join our efforts to Secure America's Borders and End Illegal Immigration by Joining ALIPAC's E-Mail Alerts network (CLICK HERE)
-
07-01-2025, 03:13 AM #10144Senior Member
- Join Date
- Aug 2018
- Posts
- 92,360

How to Make Powdered Eggs Step by Step
July 18, 2024 by Tom Harkins
If you’re a homesteader, preserving the foods you grow and harvest is very important. Preserved foods enable you to ensure you have enough supplies on hand during the winter, when your homestead will likely be less productive.
While food preservation techniques like root cellars, canning and smoking are popular options to store the food you harvest or hunt, another somewhat less common preserved food is powdered eggs.
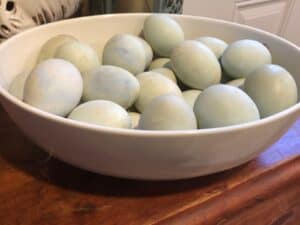
 a bowl of powdered eggs
If you have a flock of chickens, you can create a safe, high-protein preserved food that will last for years, is delicious, and is great for bartering with your neighbors and other homesteaders as well.
So, if you want to learn a traditional and very effective food preservation technique, this article will show you how to make your very own powdered eggs step by step!
What Are Powdered Eggs, Anyway?
Powdered eggs are simply fresh eggs that have been cracked, beaten with a blender, then dehydrated to remove moisture into a powder. They should last a really long time, and can be used like you would real eggs.
Commercially, powdered eggs are made via a technique known as spray drying. This is a method involving atomizing liquid eggs into tiny droplets and feeding them through a large drying chamber.
There they are exposed to hot air that evaporates the water content and transforms them into solid particles – creating the powder we know today.
Of course, it’s also possible to make your own powdered eggs – and it’s far easier than you might think!
Powdered Eggs, from Beloved Camp Food to World War II Staple
Powdered eggs, sometimes called dried eggs, or dehydrated eggs, have been in widespread use for well over a century. Because a container of powdered eggs is so light and compact, it became a very popular camp food.
Hunting lodges and fishing camps relied on foods like powdered eggs and beef jerky to keep their clients well-fed while they were on excursions to the more remote parts of the United States.
Because they were so lightweight and packed with nutrients, it was not long before governments saw the utility of powdered eggs as well.
During the Second World War, when food was a critical commodity that governments controlled closely, powdered eggs were adopted widely. In the UK, dried eggs imported from the United States were distributed widely through the Ministry of Food’s ration systems, due in part to the shortage of fresh eggs.
While not as popular as fresh eggs from the farm, powdered eggs no doubt helped to keep the civilian population in the United Kingdom well-fed, so they could continue to fight the Axis Powers and win World War II.
 dehydrated eggs just finished
In the years following the War, powdered eggs fell out of fashion. People were no doubt happy to be free of the ration system, and the end of the War years also coincided with the beginning of mass poultry production as well.Over the years, fresh eggs became mass-produced, inexpensive, and widely available, and powdered eggs slowly faded into obscurity.
Now, however, homesteaders are continuing to discover old skills and crafts that have become lost or obscure, and putting them to work in the 21st Century.
Interest in both homesteading as well as prepping have led many people to give powdered eggs a second look; many people even buy powdered eggs in bulk now to ensure they have a ready supply of protein on hand at all times.
However, as easy as it is to order a can or bag of powdered eggs online, it’s more practical and satisfying to make them yourself.
So, maybe it is time to give powdered eggs a try on your homestead. After all, this preserved food is a great fit for economical, sustainable, and low-cost homestead living.
Why You Should Make Powdered Eggs
If you’re a prepper, powdered eggs are great to have on hand for emergencies or survival situations as well. Here are a few of the benefits of making and using powdered eggs.
They Stay Fresh Longer
While fresh eggs may be delicious, they don’t stay fresh for long. Powdered eggs on the other hand, when stored in airtight containers in cool storage areas, can last for years. To prolong shelf life, you can also put the powder in Mylar bags with oxygen absorbers.
They Let You Make the Most of Boom and Bust Egg Laying Cycles
If your homestead is in a cold weather climate, your chickens may not lay prolifically throughout the winter; here in New England, even my hardiest cold weather hens slow down their egg laying considerably during the colder parts of the year.
Making powdered eggs during the peak egg-laying months of summer will ensure you have a steady supply of eggs for your breakfast and baking needs all year long.
They’re Easy to Store
Powdered eggs are also easier to store when space is an issue, or you are hiking and want to travel light. A dozen fresh eggs take up about 122 cubic inches of space; however, their powdered equivalent only requires about 22 cubic inches.
The drying process, which we’ll discuss later, helps to kill bacteria that could have possibly contaminated eggs during handling and shipping.
Are Powdered Eggs Good For You?
Powdered eggs are also highly nutritious. A tablespoon of powdered eggs – the equivalent of one whole egg – contains over 5 grams of protein, and other essential vitamins and minerals as well.
So, now that you know a bit about the history and benefits of powdered eggs, let’s take a close look at how you can make them on your homestead.
Equipment and Ingredients
This post contains affiliate links. If you click them and buy, I may earn a commission. Read my disclosure policy.
Making powdered eggs is surprisingly simple, but you will need some basic equipment, including:
- Blender. Any standard blender will do; you’re only using the blender to mix your eggs and then ground the dried eggs into a fine powder, so it won’t get much of a workout! If you choose to do so, you can use a whisk and mixing bowl for both of these steps. However, a blender or food processor does a much more thorough job of mixing your raw eggs and rendering the dried eggs into a fine powder.
- Dehydrator. You’ll need a dehydrator to actually dry your eggs. While you could use a standard oven to dry them, a dehydrator will be much more effective and consistent. Additionally, your dehydrator can do many other important and tasty food preservation tasks as well, so it is a good tool to have on a homestead. Your dehydrator will need solid trays for you to spread out your mixed raw eggs to draw upon; these are the same types of trays used to prepare fruit leather.
- Large Mixing Bowl. You’ll need a large mixing bowl to transfer your eggs into after they’ve been dehydrated. Also, you’ll want to crack your eggs open into a bowl as well, so that you can easily remove any stray eggshells or other debris that happens to get mixed in with them.
- Storage. You’ll need something to store your powdered eggs once you make them. If you plan to consume them relatively quickly, then simple plastic locking bags or containers may suffice. However, if you intend to store your powdered eggs for months or years on end, you will need more sophisticated procedures to ensure they are packed airtight. We will discuss powdered egg storage options for your consideration later.
- Ladle or Spoon. You will use a ladle or spoon to carefully transfer your eggs from your blender onto your dehydrator trays.
- Eggs! Of course, in order to make powdered eggs, you’ll need fresh eggs to start with. This particular recipe calls for two dozen fresh eggs.

Pin
5 from 7 votes
Powdered Eggs Recipe
Equipment
- Blender
- Dehydrator
- Large Mixing Bowl
- Storage
- Ladle or Spoon
Ingredients
- Eggs
Instructions
- Prepare Your Equipment.
As always, ensure the equipment you are going to use is as clean as possible; after all, you are working with a food product you are preparing for potentially long-term storage. Wash and sanitize your dehydrator, dehydrator trays, your blender, and any bowls or utensils you expect to use.
- Prepare Your Eggs.
Try to obtain the freshest eggs you can for this recipe. Ideally, you should gather your eggs from your homestead and prepare your powdered eggs as soon as possible. If you don’t have enough chickens to produce two dozen eggs quickly, get some more from a fellow farmer or homesteader, or buy some from a local store. Prior to proceeding to the next steps, wash any eggs you’ve gathered under warm water and wipe them off with a clean towel.
- Cracking Your Eggs.
Crack your eggs into a large mixing bowl, yolks and all. Take care not to get eggshells or other materials into the bowl. If you do, use a fork to carefully fish any debris out, working the material out along the side of the bowl. Once all two dozen of your eggs are in the mixing bowl, transfer them to your blender. Then, thoroughly wash and dry your mixing bowl, and set it aside for use later.

- Mixing Your Eggs.
Once your eggs are in the blender, blend them at medium speed for approximately two minutes. If you have a smaller blender, you may need to blend them in two separate batches, since the egg mixture fills with air and expands a bit as you blend it all together. Once your eggs are fully mixed, you will be ready to transfer them over to your dehydrator racks.

- Transfer the Egg Mixture onto the Drying Racks.
I use a magic mill dehydrator, and this recipe requires me to use three to four drying racks, depending on the size of my eggs. Set out your drying racks on a table or counter and move your blender alongside them. Using your ladle, carefully transfer your egg mixture from the blender to your drying trays, taking care not to spill any in the transfer or to overfill the trays.

- Once each tray is filled, load the racks into your dehydrator, taking care not to tip a tray and spill your egg mixture everywhere. Wash and dry your blender as soon as you are done transferring your mixture, you will need it to render your dried eggs into powder later on.
- Dehydrate Your Egg Mixture.
Consult your dehydrator manual to determine exactly how long it takes to dehydrate your egg mixture. I dry my egg mixture at a temperature of 149 degrees Fahrenheit (65 Celsius) in the dehydrator for 5 to 7 hours. However, each brand of dehydrator is considerably different, so consult your manual for the proper settings.

- After your egg mixture has dried for the prescribed time, remove and inspect them. If they are thoroughly dry, they should be slightly browned on top, cracked and brittle. If the eggs seem moist or soft, place them back into the dehydrator to dry some more.
- Once they are fully dried out, scrape your eggs off of each tray with a fork or butter knife carefully into your mixing bowl.
- Rendering your Dried Eggs into Powder
Once you’ve removed all of your dried eggs from your blender into your mixing bowl, load them all into your blender. Then, on a medium setting, blend the dried eggs until they are completely rendered into a fine powder. Once the blending is complete, you are ready to store or use your powdered eggs!

Notes
- If you have a compost pile, you should collect up all of the eggshells, smash them up, and then add them to the pile.
Packing and Storing Powdered Eggs
If you plan to use your powdered eggs relatively quickly, you can simply store them in a locking plastic bag in your refrigerator. However, if you intend to store powdered eggs for months or years at a time, you should definitely take additional measures.
One great option to safely store your powdered eggs for the long term is to use a vacuum seal machine to pack your powdered eggs into an airtight plastic bag.
Once you have vacuum packed your eggs, store them in a cool dry place that is out of direct sunlight. Once you’ve opened any of your vacuum-packed powdered egg bags, ensure you store them in a refrigerator.
Another option for storing powdered eggs is in mason jars. Not only do they offer a neat and tidy way to store them, but they provide you with an airtight seal that will help to keep them fresh for longer periods of time. It’s easy to see what’s inside so you can use up your powdered eggs ASAP.
You can learn more about powdered eggs and food safety from the USDA website. Additionally, here is a great video that demonstrates how vacuum packing is used for food preservation and storage, especially for powdered goods:
Cooking with Powdered Eggs
Once you have plenty of powdered eggs on hand, you will be ready to start using them for breakfast and for recipes that call for eggs.
To cook your powdered eggs into scrambled eggs, one tablespoon of powder and two tablespoons of water approximates one egg. Simply mix the egg powder and water together, then add to a skillet and cook the mixture over medium heat for a plate of scrambled eggs.
Here is a video demonstrating how to cook reconstituted powdered eggs in a skillet:
You can also use your powdered eggs in lieu of fresh eggs for recipes requiring eggs, such as cake. Simply use the 1:2 powder-to-water ratio to add the appropriate amount of powder and water for any given recipe.
Of course, dried eggs will make a tasty omelet every time…
You DO NOT have to mix the egg powder and water prior to adding them to a given recipe, either. Simply add the proper amount of egg powder and water separately to a mixing bowl with the other ingredients the recipe calls for, so that you approximate the amount of eggs the recipe calls for.
Parting Thoughts
If you’re looking for innovative ways to preserve food on your homestead, you should definitely consider making powdered eggs.
Powdered eggs are packed with protein and other nutrients and are easy to make and store. Plus, they are absolutely delicious as well. So, follow the directions here, and add some powdered eggs to your pantry today!
Powdered Eggs FAQ
How long do powdered eggs typically last? If stored properly, powdered eggs will last anywhere between 5 and 10 years.
Do powdered eggs taste like real eggs? Most people agree that powdered eggs have their own unique flavor that is pleasantly close to the look and feel of cooked-down real eggs (when simmered with some oil or butter).
Are powdered eggs OK to use in baking? Yes, powdered eggs are an excellent substitute to fresh eggs to bake cakes, bread, biscuits and, oh, so much more!
Are powdered eggs real eggs? Of course, powdered eggs are real eggs! That’s what they’re made of, and fresh eggs are their one and only ingredient!

Tom Harkins
When Tom Harkins is not busy doing emergency repairs to his 200 year-old New England home, he tries to send all of his time gardening, home brewing, foraging, and taking care of his ever-growing flock of chickens, turkey and geese.
How to Make Powdered Eggs Step by StepLast edited by Airbornesapper07; 07-01-2025 at 03:16 AM.
If you're gonna fight, fight like you're the third monkey on the ramp to Noah's Ark... and brother its starting to rain. Join our efforts to Secure America's Borders and End Illegal Immigration by Joining ALIPAC's E-Mail Alerts network (CLICK HERE)
-
07-01-2025, 03:21 AM #10145Senior Member
- Join Date
- Aug 2018
- Posts
- 92,360
- Home
- Homesteading
- Gardening
- Canning
- Chickens
- Recipes
- Food Storage
- Health
- Emergency Preparedness
- Natural Remedies
Minnow Trap from a 2 Liter Plastic Bottle to Catch Fishing Bait
- Home
- Hunting Fishing Trapping
- Minnow Trap from a 2 Liter Plastic Bottle to Catch Fishing Bait
Melissa Francis
September 4, 2014
Hunting Fishing Trapping
2 Liter, Catch, Fish Bait, fishing, Minnow, Plastic Bottle, trap
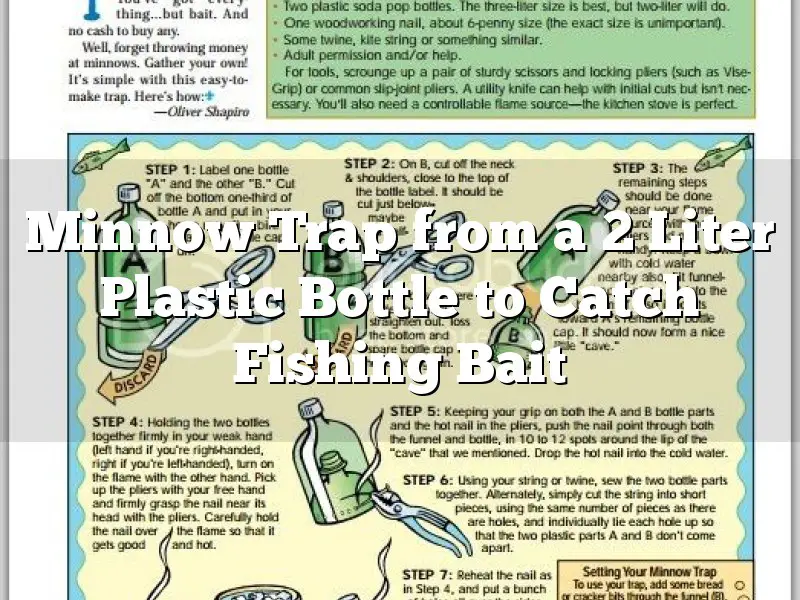
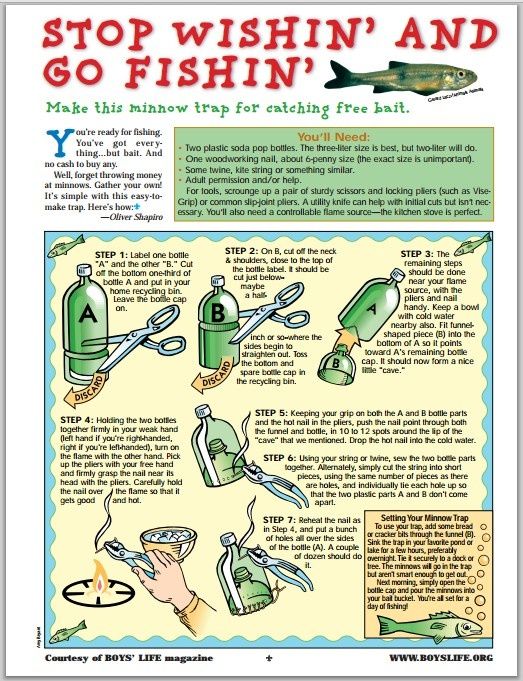
This step by step tutorial of how to recycle and re purpose an clean empty plastic 2 liter soda pop bottle into a funnel minnow trap to catch free fishing bait. Once inside, the fish cannot find the funnel shaped entrance to escape so they are trapped. A tiny handful 4 8 pieces of dry cat food lasts longer than bread and works well to bait the minnow trap.
Boys Life Pin This Picture
To use your trap, add some bread or cracker bits through the funnel (B). Sink the trap in your favorite pond or lake for a few hours, preferably overnight. Tie it securely to a dock or tree. The minnows will go in the trap but arent smart enough to get out. Next morning, simply open the bottle cap and pour the minnows into your bait bucket. Youre all set for a day of fishing!
Below is a video of how to attach a minnow to a fishing hook.
Visit us on Facebook, Pinterest, Twitter, Google + or send an email to homesteadsurvival@hotmail.com to join our single daily email that contain all of that days articles.
Click here to read about how to make a Minnow Trap from a 2 Liter Plastic Bottle to Catch Fishing Bait:
http://media.scouting.org/boyslife/workshop/minnows.pdf
Minnow Trap from a 2 Liter Plastic Bottle to Catch Fishing Bait - The Homestead Survival
If you're gonna fight, fight like you're the third monkey on the ramp to Noah's Ark... and brother its starting to rain. Join our efforts to Secure America's Borders and End Illegal Immigration by Joining ALIPAC's E-Mail Alerts network (CLICK HERE)
-
07-01-2025, 03:53 AM #10146Senior Member
- Join Date
- Aug 2018
- Posts
- 92,360
If you're gonna fight, fight like you're the third monkey on the ramp to Noah's Ark... and brother its starting to rain. Join our efforts to Secure America's Borders and End Illegal Immigration by Joining ALIPAC's E-Mail Alerts network (CLICK HERE)
-
07-01-2025, 04:04 AM #10147Senior Member
- Join Date
- Aug 2018
- Posts
- 92,360
How to Train a Heifer to Become a Family Milk Cow
Share
Share
7.6kPin
We all have that dream of having our own milk cow, she would give us gallons of milk each day. We would make yogurt, sour cream, butter, mozzarella cheese, and still have extra for the other barnyard animals.
While that was certainly my vision when I purchased my family cow, it didnt quite turn out that way. We had trouble getting her bred and she didnt give much milk. But she calved easily and was a gentle cow and terrific mother. So we decided to buy a few more milk cows: HEIFERS.
Today Im welcoming Ashley from The Browning Homestead to the blog! Not all of us are fortunate to start off with a quiet, trained milk cow (I wasnt!), so Ashley is sharing her expertise on how to train a heifer, and end up with a quiet family cow!
Training a heifer (a young female cow) to become a family milk cow can be a bit tricky sometimes. Following these few simple guidelines can set you and your milk cow up for a long, productive relationship together!
How to Train a Heifer Practices for Pre-Calving
1. Bring Your Heifer (or Cow) to Your Homestead Before She Calves.
This will help her to become familiar with YOUR set-up. Shell become comfortable and less nervous about where she will calve and who will most likely be around (kids, dogs, chickens, and other barnyard friends)
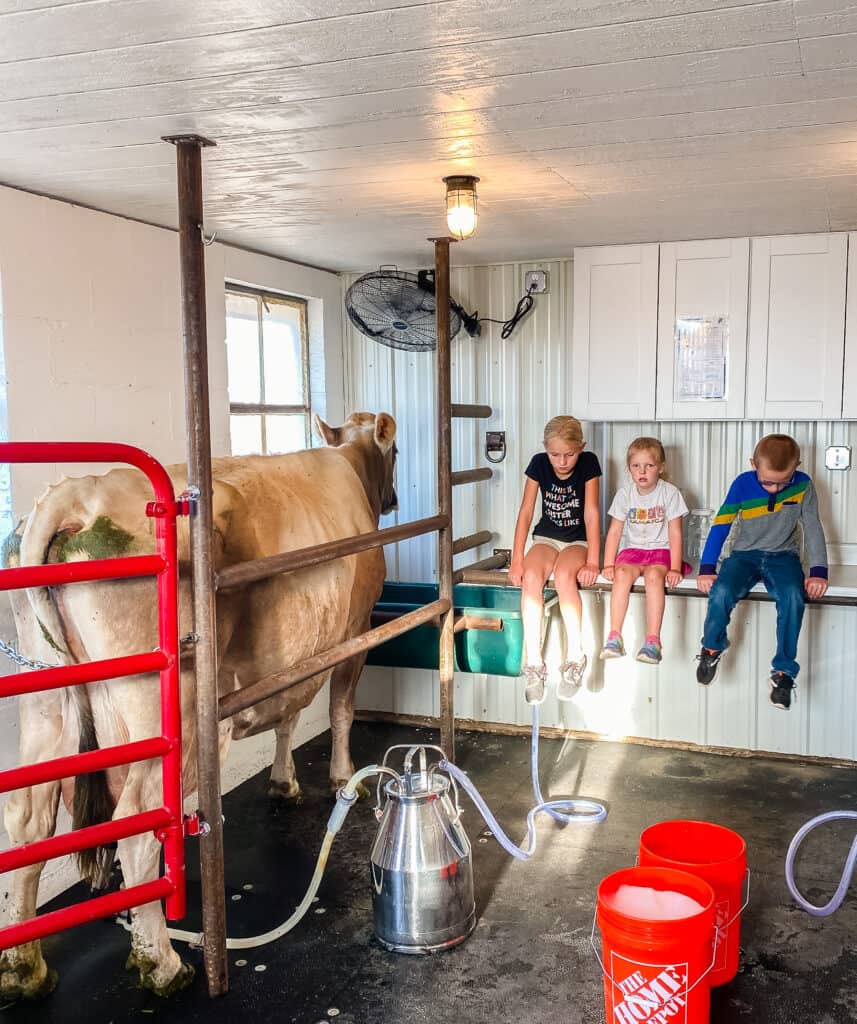
2. Practice Your Milking Routine (without actually milking her).
Tie her up to a post or put her in your milking stanchion. Give her a flake of good hay and practice your routine. Spray her down with fly spray and brush her all over. Dont forget to tell her sweet nothings into her ear: what a good cow she is and how shell be a great mama cow! This goes a LONG way. And it really helps her to know what to expect after she calves. (Click this video to see my milking routine on The Prairie Homestead)

3. Train a Heifer by Touching Her All Over.
Let her become accustomed to your hands. Scratch her neck, her belly, her udders, and her back legs. Practice lifting her legs (this helps her not to kick when you start milking).
4. Practice with a Restraining Device if You Are Using One
Now is the time to get your heifer used to a restraining device if you plan to use one. Whether you use hobbles or a Kow Kant Kick, practice about 5 minutes with the device on so she can get used to it. I highly recommend having one of these around just in case. If you dont need it, great! If you do need it, it is sure handy to have around and have your cow familiar with it.
How to Train a Heifer Practices for Post-calving:
1. Once She has Calved, Her Mama Instincts Will Kick In!
If calving has gone easily, shell eat the afterbirth and start mooing and licking her sweet calf. But oxytocin (the relaxing hormone) wont kick in until the calf starts to nurse in a heifer. So be sure to be safe around her at all times. Mama cows are very, VERY protective of their calves. Their hormones and emotions can go either way: calm and patient or nervous and dangerous to others.
2. Make Sure the Calf is Up and Nursing Within the First Hour
If not, youll need to help the calf nurse. With the utmost regard for your safety, tie your cow up to a post and help him/her nurse. I went in with a shovel and used the handle for protection. Cows, while they are sweet, will try to kill you. Especially a newly freshened cow. Please, be careful.
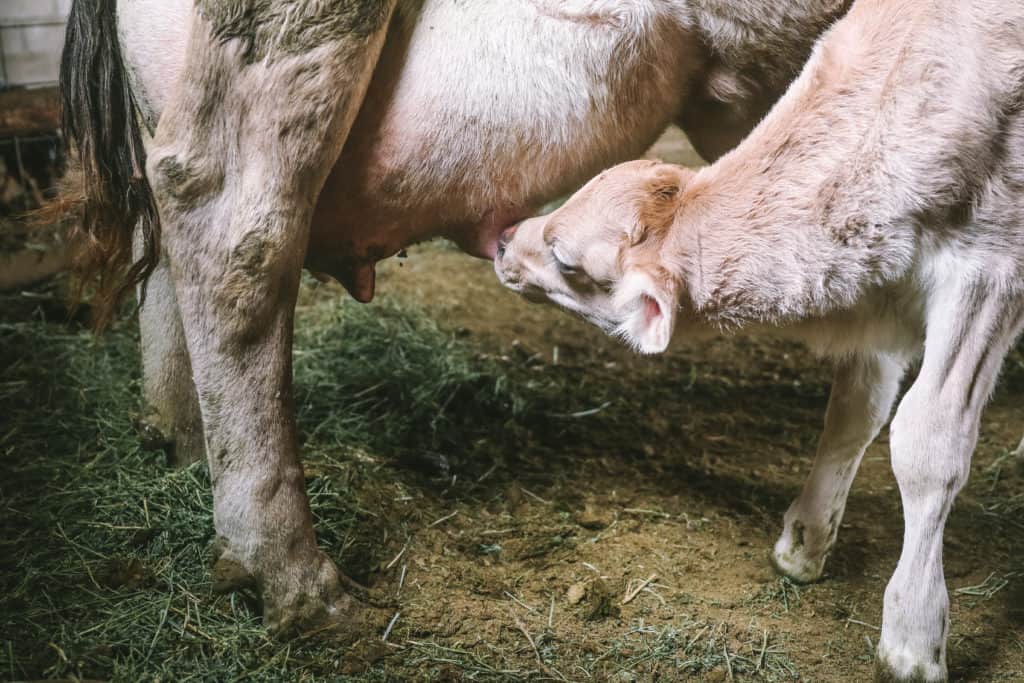
3. Once the Calf is Up and Nursing, Its Time to Slowly Bring Her into Milk
- The first few days after calving: milk her a couple of times a day. Shell have lots of milk! Tie the calf up right next to her or put it in an area where she can see it. Milk out only a pint from each quarter and save the colostrum. Youll be tempted to milk her completely out because she is so full but dont!
- On the fourth day: milk her once in the morning. Milk out about a half gallon total and save the colostrum.
- After the fourth day: continue to milk her once in the morning and slowly take more milk each morning.
- At A week and a half post calving: Start to separate the calf a few hours before milking. The calf will really start to drink all the milk and youll find there is not much milk in her udder to take. After milking her (leave some for the calf), reunite cow and calf. The calf will most likely empty her out.
- Around 1 1/2 months post calving: Now the calf is really starting to grow and naturally goes longer between nursing sessions. Now you can separate the calf before you go to bed and reunite cow and calf after your morning milking!
- Dairy cows are very smart and can hold their milk back for their calf (instead of for you!). If that is the case, simply have the calf nurse for a minute and then take him/her off again. The cow now will let her milk down for you. Ive had to do this several times during one milking.
Are You Ready to Train a Heifer to Be Your Family Milk Cow?
It may take up to 6 weeks for you and your new cow to figure everything out. She will most likely get impatient and try to move around during milking. Have some patience with her (that will teach her patience too) and dont give up. I have spent up to an hour milking one cow that has just freshened for the first time. After many weeks of practice, everything should start to go more smoothly!
Following these guidelines for bringing your heifer into milk will surely set you two up to have a beautiful, working relationship for many years to come!
Remember the three keys to training a heifer to become a milk cow are familiarity, routine, and everyones safety.
Ashley can be found at The Browning Homestead where she writes about life on a homestead, farming, raising farm kids, and enjoying the good life.
More Dairy Cow Articles:
- Caring for a Cow and Calf After Delivery
- Breeding Your Cow with Artificial Insemination
- 10 Tricks to Stop Your Milk Cow From Kicking
- Owning a Family Milk Cow: Your Questions Answered
- How to Milk a Cow
How to Train a Heifer to Become a Family Milk Cow The Prairie Homestead
If you're gonna fight, fight like you're the third monkey on the ramp to Noah's Ark... and brother its starting to rain. Join our efforts to Secure America's Borders and End Illegal Immigration by Joining ALIPAC's E-Mail Alerts network (CLICK HERE)
-
07-01-2025, 04:21 AM #10148Senior Member
- Join Date
- Aug 2018
- Posts
- 92,360
Recipes Low Protein
CARAMEL APPLE JAM
3

Submitted by schmme
"Apples, brown sugar, cinnamon and nutmeg flavors come together in this jam."
I Made This
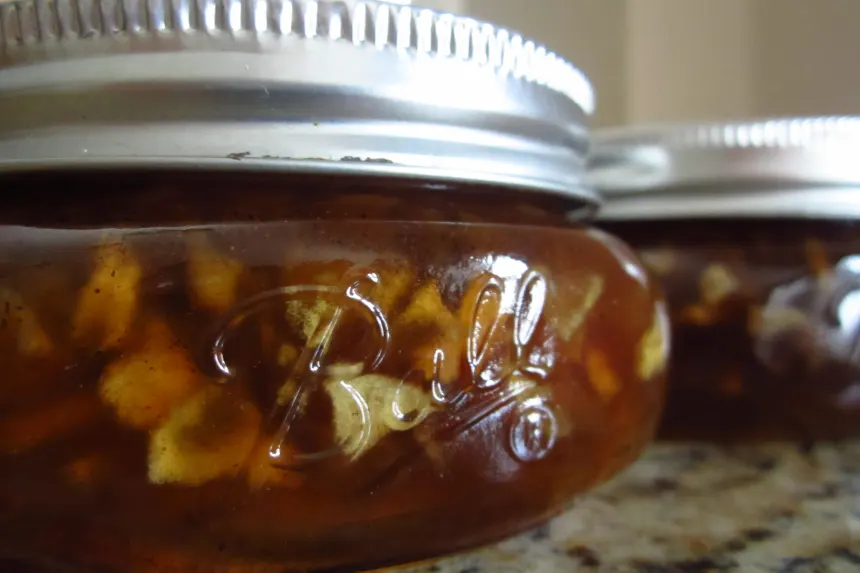
PHOTO BY GAILANNG
Ready In: 1hr
Ingredients: 8
Yields: 7 half pints
Serves: 7
Nutrition information
INGREDIENTS
Units: US
- 6 cups diced peeled apples (1/8-inch cubes)
- 1⁄2 cup water
- 1⁄2 teaspoon butter
- 1 package powered fruit pectin
- 3 cups sugar
- 2 cups brown sugar

- 1⁄2 teaspoon ground cinnamon
- 1⁄4 teaspoon ground nutmeg
Shop Recipe

DIRECTIONS
- In large pot combine apples, water and butter. Cook and stir over low heat until apples are soft.
- Stir in pectin and bring to a rolling boil, stirring constantly. Add the sugars, cinnamon, and nutmeg; return to rolling boil. Boil for 1 minute, stirring constantly.
- Remove from the heat and skim off any foam. Ladle hot jam into hot sterilized jars, leaving 1/4 inch headspace. Process for 10 min in boiling water bath.
Caramel Apple Jam Recipe - Food.com
Last edited by Airbornesapper07; 07-01-2025 at 04:27 AM.
If you're gonna fight, fight like you're the third monkey on the ramp to Noah's Ark... and brother its starting to rain. Join our efforts to Secure America's Borders and End Illegal Immigration by Joining ALIPAC's E-Mail Alerts network (CLICK HERE)
-
07-01-2025, 04:41 AM #10149Senior Member
- Join Date
- Aug 2018
- Posts
- 92,360
How to Start a Survival Garden: A Complete Guide
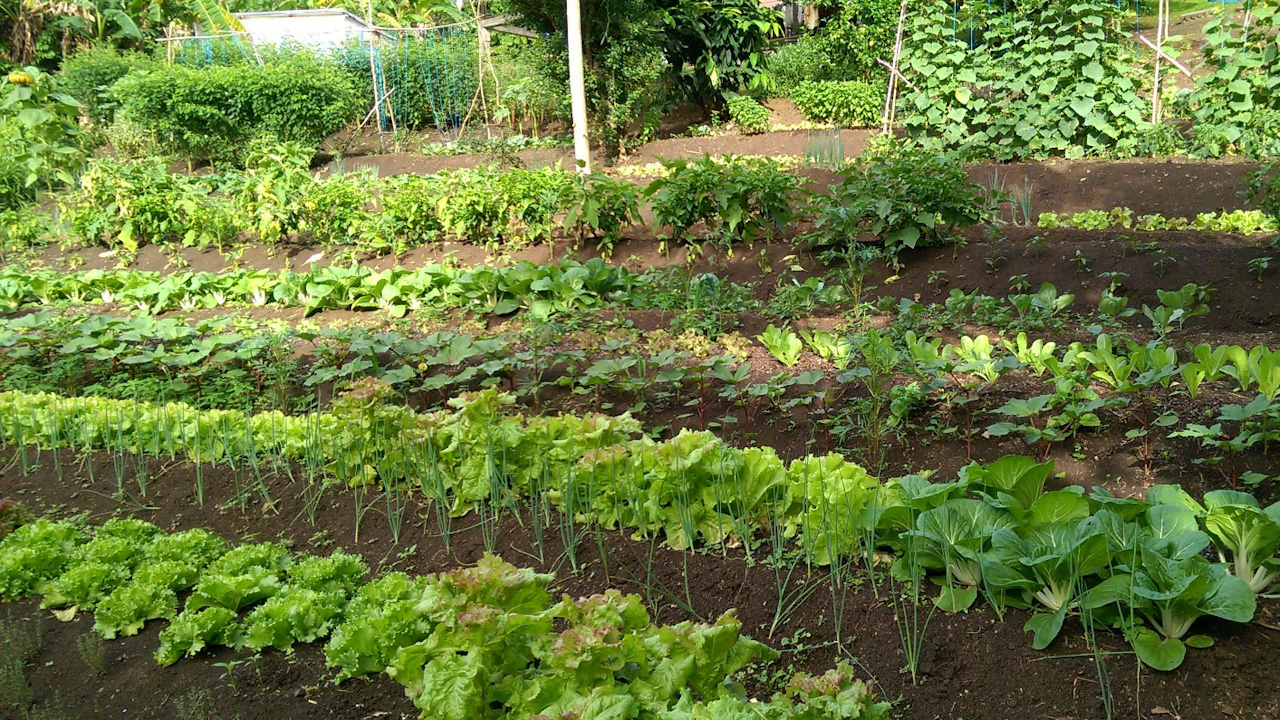
If you want to start growing your own food and have a backyard that can be put to use, then you should start right away.
With the current situation of the economy, it wouldnt hurt to become self-sufficient. We know that it is hard to grow your own food, but you will be thankful for it when the system collapses.
Use this guide to learn how to start a survival garden that will feed your family even when disaster strikes.
 Once youve grown your own food and have it in abundance, youll want to learn how you can store it to create an emergency food supply for your family.
A traditional garden requires prepping the soil every year and then planting the seeds, watering them, and weeding out the garden at least twice a week. You have to keep the pests from ruining the plants and take care of them.
After the economy collapses there will be a shortage of resources and gardeners will find it a challenge to garden since soil, fertilizers, seeds, and pesticides are going to become scarce.
Survival Gardening Books
These days, you can find a lot of gardening information online. But its always a good idea to have a book or two written by people whove been there, done that!
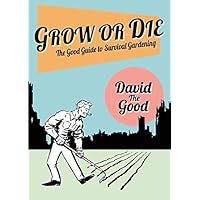
Grow or Die: The Good Guide to Survival Gardening
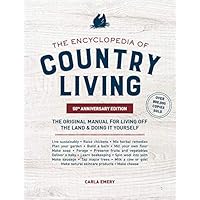 The Encyclopedia of Country Living: The Original Manual for Living off the Land & Doing It Yourself
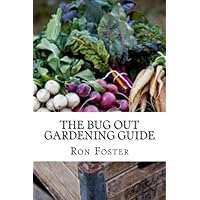 The Bug Out Gardening Guide: Growing Survival Food When It Absolutely Matters
Managing Natural Nutrients for Your Survival Garden
No matter what you want to grow in your backyard, whether its in a container or a greenhouse, you have to supply the plant with the necessary nutrients. Plants need the right conditions to grow and there are certain minerals that they require.
Hydrogen, carbon, oxygen, and other photosynthesis-derived products are a few examples of the nutrition that plants require.
There are other minerals that are required by a plant that gardeners should provide. Every nutrient is essential to the plants health, regardless of the quantity it requires.
If a plant is not provided with proper nutrition, it will not grow to be a healthy plant. A good environment for the plant includes a combination of nutrients.
Once disaster strikes, do not expect to be able to run to the nearest DIY store and buy a bag of soil nutrients.
If you want to manage a prepper garden in a post-apocalyptic world, then you have to learn how to provide the right nutrients yourself.
Composting, vermicomposting and free-range poultry are three fantastic ways to provide the necessary nutrients needed to start your survival garden.
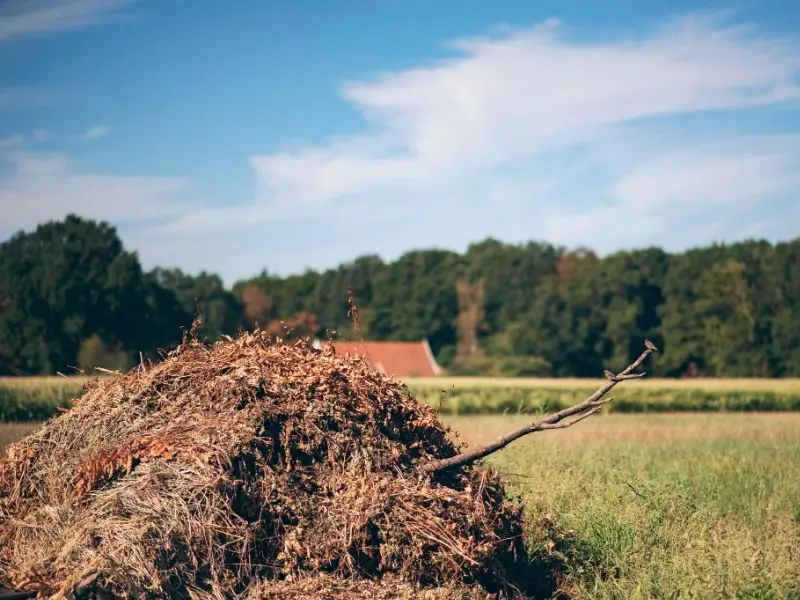
Composting
 Once the entire system collapses, gardening will not only be your hobby, but it will also be your survival mechanism. You should be able to rely on your prepper garden to feed your family. It could mean the difference between a life-or-death situation.
To ensure your plants are healthy, make sure to always have a compost pile ready.
You can add organic material to the garden soil using compost. It increases the ability of the soil to hold moisture, battle diseases, and fight off pests. This will also help the plants survive through cold spells and droughts since it increases their immunity.
Traditionally, composting is the collection of carbon (brown material) and nitrogen (green material) in a bin that is two square feet. The carbon-containing materials that can be added include:
- newspaper
- paper towels
- dried corn stalks
- cardboard
- old leaves
- hay and straw
- some people even add the dead plants to their compost bins at the end of the spring season (just make sure you dont add diseased plants to your compost pile).
Nitrogen can be obtained from:
- fresh lawn clippings
- manure droppings
- kitchen waste
Coffee filters contain magnesium and calcium, while eggshells have calcium. And banana are a source of potassium that is necessary for plant growth.
Tips for Compost Management:
- If the compost bin starts to smell, that means you have added too much green material or water to it
- If the compost is not getting hot enough, then there are too many brown materials in it
- Water should only be added once the compost gets hot or if it is too dry
- Animal manure can also be added to the compost
- The composting process can be sped up by flipping the heap with a shovel or pitchfork
Vermicomposting

Vermicomposting is the process of using worms to convert the organic compost waste into nutrient-rich black earth that is necessary for plant growth.
The process is also called worm castings, vermicast, worm humus, or worm manure. Research shows that the average U.S. household wastes almost a third of the food they purchase.
An eight-inch-deep and two-foot-square box can be used for vermicomposting. The box can be kept under the kitchen sink or even outside in the garden.
Once the worm bin is ready, bedding is required, which can be made using leaves, manure, newspaper, or unwaxed cardboard.
Once this step has been completed, you can add worms and then empty the kitchen waste in it every week to allow the worms to do the composting.
Tips for Vermicomposting:
- There are many different types of worm bins that can be constructed, depending on the requirements
- You should use wood to construct the bin
- Red earthworms are the best for composting since they reproduce quickly and can convert a large amount of organic waste into compost.
- The worm beds should not be kept in direct sunlight or they will dry out and harden.
- Worms can convert up to half their body weight into compost. New food should be added once the old one have been used up. Once the worms have settled in, they can convert their body weight in kitchen waste to compost every day.
- To prevent small rodents and insects from ruining the compost, use a closed bed and do not include meat scraps in the waste.
You can start the survival garden you need in a post-apocalyptic world with the help of the nutrient-rich soil that vermicomposting produces. It helps provide an essential mix of nutrients to the soil.
Free-Range Poultry
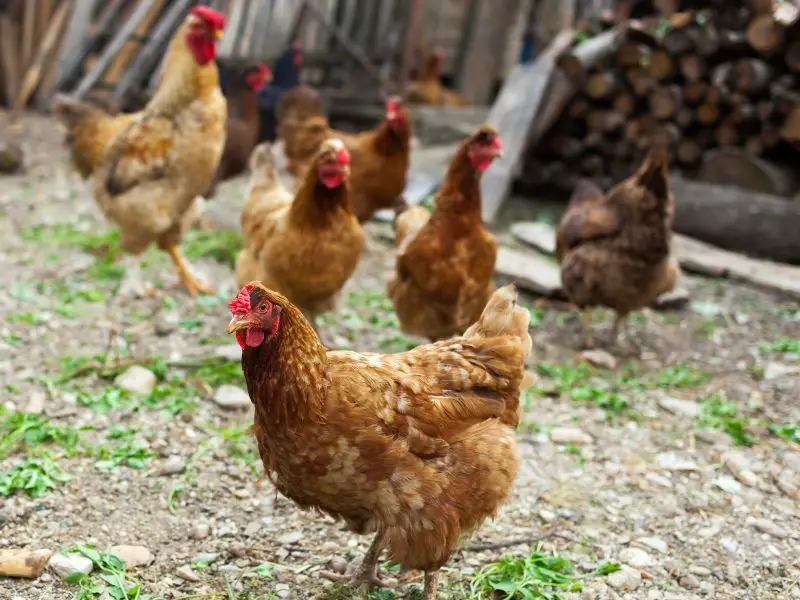
Poultry such as guinea fowl and chickens can be used to help garden and manage the soil. The bird droppings are great for developing the earth and providing the necessary nutrients.
Chickens usually go back to their coops at night and roam around the gardens during the daytime, which is why they are easy to manage.
Chickens also scratch the ground with their claws and get rid of any insects and pests that can be ruining your garden. You can let birds loose in the backyard and they will clean up the leftovers and also prepare the ground for planting.
A guinea fowl is a great way to keep the ticks under control and they can also alert the owners of any intruders on the property.
How to Start a Survival GardenMethods of Gardening
As a survivalist, you must always be prepared for the time when things go south and you and your family will need to bug out.
In order to do that, many survival experts suggest tips for setting up a perfect bug out location.
And even if you decide on a great bug out site, you will still need to start a survival garden right alongside it. The presence of a steady food supply is necessary.
Your garden should not only house edible plants but also essential herbs. There are several aspects to consider when starting your own prepper garden.
The first question that arises when you start up a survival garden is: what method of gardening should you adopt? This greatly depends on the kind of land that you will use for your garden.
For example, if there is fertile, nutrient-filled soil present, you may not need to make any special arrangements for the garden.
However, if the soil is damaged permanently due to its chemical nature, climate, or any other reason, you must consider some alternatives.
Hydroponics
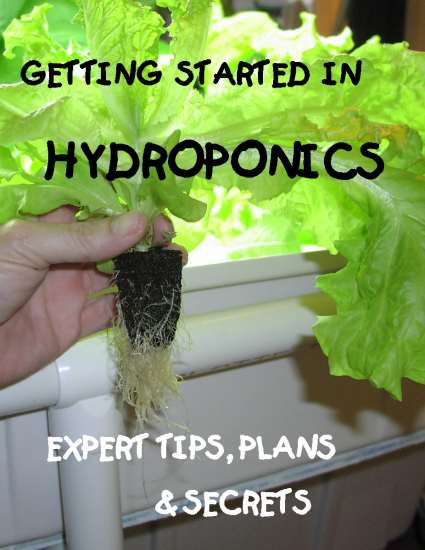
A good substitute for natural soil is hydroponics. In this method, you do not need soil for growing plants.
Instead, you can stir up a mixture of water and certain chemicals. This gives you a nutrient-rich solution in which your plants can grow. This completely eliminates the need for soil.
Another advantage of this system of gardening is that you can easily control and monitor the type and quantity of nutrients that your survival garden plants receive.
This kind of environment is strictly man-made. It has been observed that plants that are grown hydroponically exhibit a higher rate of development than those grown in natural soil.
If you manage the nutrient levels in the water efficiently, the amount of waste produced can also be kept to a minimum. This will help you lessen the amount of pollution that is usually associated with hydroponic gardening.
The best part is that the water that enters the system once can often be reused. There is no need to replace it with fresh water very frequently.
Aquaponics

VIVOSUN Aquaponic Fish Tank Hydroponic Cleaning Tank Fish Feeds Plants and Plants Clean Tank
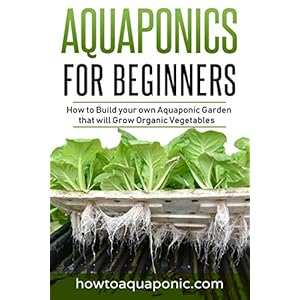
Aquaponics for Beginners: How to Build your own Aquaponic Garden that will Grow Organic Vegetables
Aquaponics is an even better option than hydroponics. It involves the use of cheaper nutrients that are obtained from fish feed instead of industrially manufactured chemicals.
The issue of toxicity of water is also eliminated. Also, the amount of nitrogen is balanced naturally. Aquaponic systems are also easier to maintain and monitor. They only require weekly or monthly checkups.
Research has also revealed that aquaponic plants show a better yield and quality than hydroponically-grown plants. The chances of plants getting infected by diseases are also much lower in aquaponic systems.
What to Plant to Start Your Survival Garden
The type of plants that you grow depends on your familys needs. However, you must also consider what will grow in your climate without any difficulty.
You need to observe the average temperature and rainfall level trends in your area before deciding. Once you have decided on the plants, you need to pick the type of seeds you will sow.
GMO Versus Non-GMO Seeds
The debate of GMO versus non-GMO seeds has been going on since the advent of genetic modification.
Both types of seeds have their own pros and cons. While genetically modified seeds bear better-looking fruit, this should not be your main concern when setting up a prepper garden.
Pretty fruit is of no use when you are dependent on it for your survival. The nutritional value of your plants is a far more important factor. A healthier fruit can be obtained from seeds that have not been genetically modified.
Many experts in the field have also revealed that the produce from genetically modified seeds reduces every year. On the other hand, you can save a higher number of seeds every year from plants that are non-GMO.
Seeds that are obtained from organic plants or plants which have not been exposed to artificial pest control are also highly recommended.
You can easily buy organic seeds from small-scale farmers or people who have their own family gardens. Hybrid seeds are also preferred. These are often thought to be GMO, but they can also be obtained from naturally cross-pollinated plants.
Make sure that you do not choose plants that inhibit each others growth. For example, if you pick broccoli and tomato for your garden, make sure you place them far apart since broccoli hinders the growth of tomatoes.
System of Irrigation
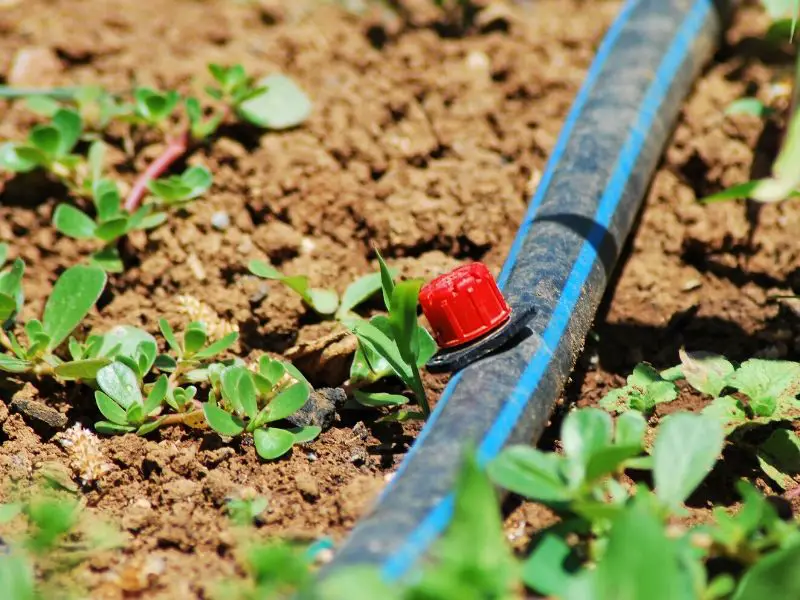
Water is an absolute necessity for plant growth. There is no substitute for it. Therefore, you need to make sure that you have a steady, reliable supply of water near your garden.
It is also recommended to locate your prepper garden near a tap or water source so that you can connect a hosepipe to it if needed.
The method you use for supplying water to your plants is also critical. When using off-grid irrigation methods, there may also be some legal issues that you need to take care of.
The easiest and simplest way to provide water to your plants is by using rainwater. You can easily collect rainwater by placing basins or large containers under the roofs of your house or garden.
Since this water will not be used for human consumption, there is no need to bother with the filtration process. You can supply this water directly to your plants.
However, in some climates, it does not rain very often or very heavily. Therefore, it would be impossible to rely entirely on rainwater in such climates.
In this case, you can use greywater instead. This includes all the used water that is produced as waste in your house. Toilet water is not a viable option; therefore, it is excluded.
You can collect the water draining out of your house by preventing it from flowing into the gutters. Instead, you can divert the route of the drainage pipes and let the water flow out into a different location.
This can act as your collection point from where you can lead the water to the location of your garden.
Pest Control

There are many artificial pesticides and insecticides available in the market which can be used to keep your plants safe.
However, when times are difficult, there may be a restricted supply of resources. You must, therefore, rely on natural means of protection for your plants.
One way to do that is companion planting. This is when you place your plants in such a manner that they mutually benefit from each other.
For example, you can grow carrots next to your plant in order to get rid of caterpillars. This will be beneficial because carrots grow flowers that attract wasps.
Wasps are known for hunting down caterpillars. Another natural pest control method is using homemade chemicals.
For example, in order to protect your plants from fungal diseases, you can spray them with a mixture of baking soda and water. This is a very effective form of defense against fungus in plants.
Unique Ways to Start a Survival Garden No Matter Where You Live
If you are growing grass in your garden, then its not going to help you in a crisis situation and isnt going to benefit you in any way.
Whereas, a survival garden is one that is designed to offer enough vegetable crops, to allow you and your family to survive for an indefinite amount of time.
No one is certain about the economic situation in any country and it can deteriorate at any time. Therefore, having a well thought out and planned prepper garden design will save you from chaos.
Sustainable gardening is not just a trend, but a way of life. So, in planning a sustainable prepper garden, there are few rules you should follow.
Forget About the Conventional Way of Gardening
The first thing is to grow plants in garden beds rather than in rows. Growing plants in a garden bed enable better use of limited space. It allows you to separate your garden into smaller portions and do gardening in various places around your land.
Keep the observable food plants away, like behind the barn or hidden in the woods so that people cant view them from the road. This way, you can make your prepper garden area more productive.
Also, the other benefit is it allows you to plant on several locations instead of a single location. Therefore, if one location gets taken or destroyed, then you and your family members would be able to get your food supply from alternative sources.
Adopt the Camouflage Technique
Your survival garden design needs a camouflage tactic. There are various ways to camouflage your prepper garden to protect it from intruders that may happen upon it.
In any SHTF situation, once other peoples food runs out, they are most certainly going to be looking for yours. Thus, a camouflage method will help you to protect your prepper garden, without being an obvious target for people.
Camouflage Netting
You can use some camouflage netting such as the intermingling of plants in such a way that people will not able to identify that you are growing crops in there. Camouflage netting is used to disguise your food plants as well as the greenhouse from sight.
You can grow many plants of medicinal and nutritional benefits in a natural landscaping manner to shield them from any offender.
Bushes, ferns, hedges, flowers, vines, trees, or ivy all act as a natural physical barrier to your survival garden. You can plant goldenrod around your land or near the road to keep people away due to its ability to cause allergies.
Also, use the deadliest plants or thorny bushes in your survival garden to make it tough for intruders to pick away the food.
You can also use other unpleasant plants like poison ivy or stinging nettles to stop intruders from penetrating into your prepper garden.
Additionally, you can consider defensive plants such as Lisbon-lemon (with large green thorns) or varieties that contain plenty of spine branches such as Gooseberry, Choisya Trifoliate, or Japanese Barberry.
Edible Landscaping

Bushes, trees, and ground cover all work together to provide edible landscaping. This is also one of the methods to hide your food from the sight of others.
For this purpose, you should consider planting edible perennial herbs around your land. You can incorporate those plants in your survival garden that are not easily detectable as food.
Some examples are:
Prickly Pear
An edible cactus fruit that has many medicinal benefits as well as high in nutritional value.
Scarlet Emperor Runner Bean
The Scarlet Emperor is known to attract bees and hummingbirds due to their appealing look. But, you need to cook them to eat their pods and beans.
Siberian Pea
You can also consider growing peas when you start your survival garden. Siberian Pea shrubs are known to grow in a wide range of conditions.
And, they are able to fix nitrogen in the soil and thus increase its availability to other plants. They also help bring beneficial insects and are edible too for people as well as livestock.
Day Lillies
Disease-tolerant Day Lilies are very easy to grow. This food crop is not only edible but also tastes so spectacular. Their root tubers and florae are edible in nature.
Garden Sorrel
Garden sorrel or spinach dock, a look-alike to spinach, is a dense form of nutrients. While making soup and stews in your kitchen, you can use this from your survival garden to give your meal a tantalizing flavor.
Berries
You can also consider other kinds of edibles such as Serviceberries, Aronia Berries, Booseberries, and Currants.
Introduce Edible Weeds

To grow a nutritious weed in your backyard is also a good option. Dandelion, probably the most well-known of all weeds, has been in use to treat literally everything.
This weed can treat many diseases: from kidney disease to heartburn and appendicitis. Every part of this weed is edible from its roots to the blossoms. You can use its leaves while making sandwiches and its roots are good to make an herbal tea.
Your Survival Garden Could Be a Food Forest

Creating a Forest Garden: Working with Nature to Grow Edible Crops
Even though your survival garden is beautiful and helps in maintaining ecology and the whole planet, its main purpose is to sustain you and your family. Growing a food forest doesnt just limit you to food, but it can be used to create medicines as well.
Its a style of gardening that mimics a natural forest environment. Requiring many stages, growing a food forest implies selecting and preparing the land, the actual plantation, and constant maintenance
Usually, food forests are centered around one medium or large-sized fruit tree. In temperate climates, it might be an apple or a nut tree. You can use avocado and lime trees as focal trees too.
Around the avocado tree, you need to include a great diversity of different plants that not only help avocado to grow but will also yield you some glorious foods.
The way these plants help avocado (or the focal tree) to grow is by producing organic matter to the soil and by providing a habitat that is beneficial for insects and animals.
It also prevents weeds from growing and maintains the humidity level of the soil. All together, this system works.
Year after year, you will get a successful result in the form of fruits as your reward. You need to re-plant every year for the first few years until the system gets established.
Companion Planting

Companion Planting: Organic Gardening Tips and Tricks for Healthier, Happier Plants
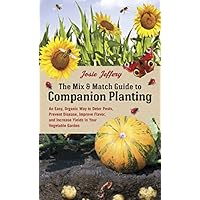
The Mix & Match Guide to Companion Planting: An Easy, Organic Way to Deter Pests, Prevent Disease, Improve Flavor, and Increase Yields in Your Vegetable Garden
Companion Planting: How to Grow Organic Vegetables at Home Even if You Are a Beginner.
We all know that some plants hurt each other while others help each other. This is historically being called Companion Planting.
Some examples of plants that chemically alter their environment are legumes. Lupines, peas, beans, etc. take nitrogen from the air and then put it into the soil.
They act as fertilizer for other green plants. So, for beans and peas, the companion planting would be green varieties such as kale, lettuce, and spinach.
Allium family is a family of plants that includes onions and garlic. These types of plants are great because they repel or distract many pests including rabbits and mice, from chewing the bark and damaging the trees.
You can leverage this by doing inter-cropping. So, avoid planting all the same variety in one place, and instead plant in companion groups.
In Conclusion
We live in a very fragile society and we need to be prepared in case of any disruption. Bottom line, we need to be more self-reliant. There is surely a need to grow your own food for yourself and your family.
Being a prepper and starting a survival garden means you are preparing yourself for any kind of crisis that could occur. Survival gardening is all about sensible preparation for food in the event of a collapse of the global food supply.
You will hopefully have all the information you need to start a survival garden. Once you have made your choice wisely, your garden will be ready to grow, thrive, and provide you with the fruit of your labor.
Make sure you monitor your garden carefully and regularly if you want to reap long-term benefits from it.
Since food is a valuable asset in bad times, it may attract unwanted attention or even put your life in danger. That is why it is also important to keep your garden secure, secret, and, above all, hidden.

The Survival Garden You Need to Start Today
What if I told you about a garden that needs no digging, no watering, and no weeding AND it can grow in the most extreme places on earth?
This type of food forest grows on auto-pilot with minimal energy because it mimics how nature works. No one is watering the woods, yet every plant has managed to survive for thousands of years there.
Start your very own survival garden thats 100% concealed from prying eyes and stay well-fed in case of any kind of long-term disaster.
By Author SHTFPreparedness
Posted on Last updated: August 9, 2024
Categories Gardening
How to Start a Survival Garden: A Complete GuideIf you're gonna fight, fight like you're the third monkey on the ramp to Noah's Ark... and brother its starting to rain. Join our efforts to Secure America's Borders and End Illegal Immigration by Joining ALIPAC's E-Mail Alerts network (CLICK HERE)
-
07-01-2025, 05:02 AM #10150Senior Member
- Join Date
- Aug 2018
- Posts
- 92,360
How to Make Echinacea Tincture (its easy)
This post may contain affiliate links which wont change your price but will share some commission.
Echinacea is excellent for supporting the immune system during a cold.

As a teenager I was involved in dancing, acting and singing and went to auditions every now and again. The day before a very important (to me) audition I came down with a severe cold and could barely breathe through my nose! I felt terrible. Singing at an audition the next day seemed out of the question.
The local health food store suggested Echinacea. I took Echinacea tincture throughout the day and woke up well in the morning! This was my first experience with Echinacea and I was sold.

I was a little disheartened each time I became ill and wanted to buy more tincture. While it is not exorbitantly expensive, it is not cheap either. (Especially for a struggling artist.)
Thankfully Ive discovered that takes very little time and money to make my own. Its about as easy as preparing a cup of tea. Most anyone can do it.
Today Im going to share the simple steps for making a traditional tincture with Echinacea. You can also make it with glycerin, for those who wish to avoid alcohol.
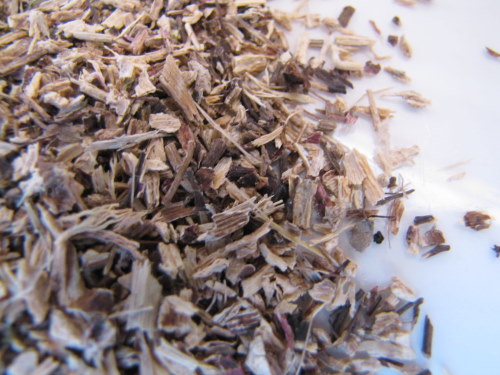
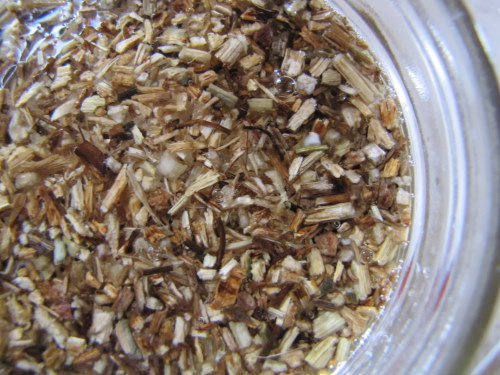
It is probably more beneficial to make a tincture with fresh Echinacea, but it is often easier (and still highly effective) to make it with dried material since not everyone grows or has access to fresh flowers and roots. When using dried Echinacea try to find some that has been dried recently and as always, organic is preferred.
How to Make Echinacea Tincture

You will need:
Wide mouth canning jar (make sure it is clean and sanitized)
dried Echinacea (where to buy)
Vodka (with at least 40% alcohol 80 proof)
Note: if using fresh herbs, you will need a higher percentage of alcohol (95%)
Method:
Place dried Echinacea in the jar until the jar is about half full.
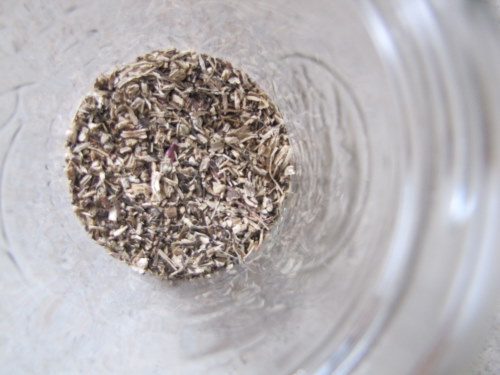
Pour vodka over the top. Fill to the shoulder of the jar so there is a little room at the top. The dried herbs will swell over the coming weeks.
Seal tightly with lid.
Label jar with the date and the expected date your tincture will be ready. Also, include the ingredients on your label. You probably think you will remember, but trust me, that doesnt always happen!
You have now created a menstruum. Leave menstruum at room temperature for four to six weeks. Shake every few days.
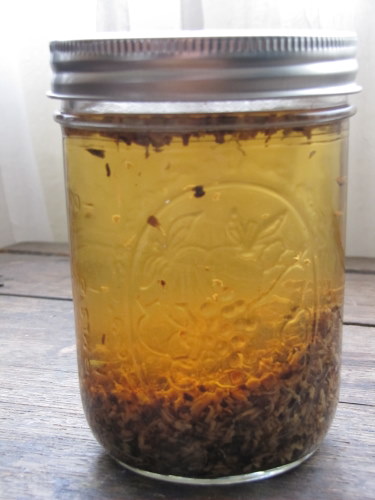
(The above picture is of some tincture I started this morning. It begins to turn brown very quickly)
After the four to six weeks has passed, strain the herbs out of the vodka.
To strain the herbs:
Place a layer of cheesecloth over a mesh strainer and set over a large measuring cup or bowl. Pour menstruum slowly into the cheesecloth and allow to drain for a few minutes. Then use your hands to wrap the cheesecloth around the herbs and squeeze out the excess liquid.
Discard the herbs.
You now have Echinacea tincture! Woo hoo! (Isnt this fun?)
Pour tincture into dark, glass bottles for storage. Dont forget to label them.
To use:
At the first sign of a cold or throughout a cold take ½ to ¾ of a teaspoon 3 to 4 times a day. per day.
Important note About when to use echinacea:
Echinacea has shown to be most beneficial at the beginning and for the duration of a cold. It is not intended as a long-term preventative.
{Top Image Credit}
Please remember I am not a certified Herbalist, just someone who is crazy about herbs and natural living. It is important you do your own research.
Post navigation
Previous
How to Dilute Essential Oils for DIY Natural Body Care
Next
How to Make Calendula Salve (and why you should)
How to Make Echinacea Tincture (it's easy) - No Fuss NaturalIf you're gonna fight, fight like you're the third monkey on the ramp to Noah's Ark... and brother its starting to rain. Join our efforts to Secure America's Borders and End Illegal Immigration by Joining ALIPAC's E-Mail Alerts network (CLICK HERE)


 Reply With Quote


Biden-Released Illegal Alien Accused of Repeatedly Raping...
05-19-2026, 08:46 AM in illegal immigration News Stories & Reports