

Results 411 to 420 of 11512
 226Likes
LinkBacks (?)
-
12-26-2016, 11:32 AM
-
09-02-2016, 05:39 PM
-
whole garden made with pallets!! Love it!! | Pallets | Pinterest | Pallets, Pallets Garden and Wooden Pallets
Refback This thread03-06-2016, 11:30 AM -
10-20-2015, 05:29 PM
-
06-12-2015, 08:00 PM
-
02-26-2015, 01:58 PM
-
01-05-2015, 04:13 PM
-
12-19-2014, 10:19 AM
-
EMERGENCY: HUGE FEMA PANDEMIC EXERCISE IN USA IN NOVEMBER, INTERNET SHUT DOWN PART OF EXERCISE | Prepare4Survival
Refback This thread12-03-2014, 10:39 PM -
Off Grid World ? Ugly Duckling Shipping Container Home Built by Artist Is a Beautiful Swan on the Inside
Refback This thread11-25-2014, 03:10 PM -
11-17-2014, 10:59 PM
-
11-13-2014, 11:18 AM
-
11-09-2014, 02:54 PM
-
10-28-2014, 11:38 PM
-
10-26-2014, 05:54 AM
-
10-16-2014, 11:28 AM
-
10-03-2014, 01:25 PM
-
10-02-2014, 09:16 PM
-
09-26-2014, 07:00 PM
-
09-26-2014, 01:56 PM
-
09-19-2014, 04:46 PM
-
09-13-2014, 05:49 AM
-
09-05-2014, 01:52 PM
-
09-01-2014, 09:39 AM
-
08-30-2014, 06:29 PM
-
08-10-2014, 06:29 AM
-
08-04-2014, 05:07 PM
-
07-23-2014, 11:14 AM
-
New Evidence on Expiration Dates | Medical Preparedness | Doom and Bloom (TM) | Doom and Bloom (TM)
Refback This thread07-22-2014, 10:10 AM -
07-18-2014, 08:37 PM
-
07-15-2014, 04:57 PM
-
07-11-2014, 01:40 AM
-
04-22-2014, 11:14 AM
-
04-18-2014, 12:57 PM
-
04-18-2014, 10:10 AM
-
04-14-2014, 12:18 AM
-
04-12-2014, 02:28 AM
-
03-02-2014, 11:43 PM
-
12-24-2013, 11:59 PM
-
12-07-2013, 11:04 PM
-
kitchen | Cob
Refback This thread11-25-2013, 03:24 PM -
10-22-2013, 10:25 PM
-
Apple Pie Braid | Sweets
Refback This thread09-26-2013, 07:58 AM -
09-02-2013, 04:44 PM
-
5 Reasons Why You May have to Bug Out Even Though You Don’t Want to | The Apartment Prepper's Blog
Refback This thread08-23-2013, 03:20 PM -
06-27-2013, 06:30 AM
-
06-23-2013, 08:11 PM
-
06-17-2013, 11:21 PM
-
05-24-2013, 05:06 PM
-
To Eat / BASIC LIST / SUGGESTED ITEMS FOR LONG TERM SURVIVAL - Page 275 - ALIPAC
Refback This thread05-01-2013, 03:49 AM
Thread Information
Users Browsing this Thread
There are currently 5 users browsing this thread. (0 members and 5 guests)
 LinkBack URL
 About LinkBacks
-
12-12-2010, 05:56 AM #411Senior Member


- Join Date
- May 2007
- Location
- South West Florida (Behind friendly lines but still in Occupied Territory)
- Posts
- 117,087
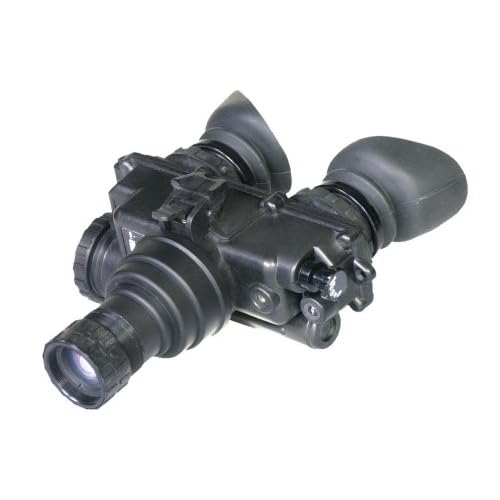
Night Vision Goggles
A Night Vision Device can be either a 1st, 2nd, 3rd or 4th generation unit or a WPT device


Cabella's http://www.cabelas.com/catalog/browse/s ... _104463180
Bass Pro Shop http://www.basspro.com/Hunting-Optics-N ... t#Category
NIGHT VISION DEVICES GENERATIONS
A Night Vision Device can be either a 1st, 2nd, 3rd or 4th generation unit. What this stands for is what type of image intensifier tube is used for that particular device; the image intensifier tube is the heart and soul of an NVD.
1st generation is currently the most popular type of night vision in the world. Utilizing the basic principles described earlier, a 1st generation unit will amplify the existing light several thousand times letting you clearly see in the dark. These units provide a bright and sharp image at a low cost, which is perfect, whether you are boating, observing wildlife, or providing security for your home. You may notice the following when you are looking through a 1st Gen. unit.
* A slight high-pitched whine when the unit is on.
* The image you see may be slightly blurry around the edges. This is known as Geometric Distortion.
* When you turn a 1st Gen. unit off it may glow green for some time.
* These are inherent characteristics of a 1st Gen. unit and are normal.
2nd generation is primarily used by law enforcement or for professional applications. This is because the cost of a 2nd Gen. unit is approximately $500.00 to $1000.00 more then a 1st Gen. The main difference between a 1st and a 2nd generation unit is the addition of a micro-channel plate, commonly referred to as a MCP. The MCP works as an electron amplifier and is placed directly behind the photocathode. The MCP consists of millions of short parallel glass tubes. When the electrons pass through these short tubes, thousands more electrons are released. This extra process allows 2nd generation units to amplify the light many more times then 1st generation giving you a brighter and sharper image.
Generation 1
Generation 2 Standard Night Vision view

Generation 3
Generation 4
View through WPT device
Studies show that nighttime scenes appear remarkably more natural in black and white versus the usual green. B&W provides clearer information about contrast, shapes and shadows. ATNs White Phosphor Technology provides users with this natural B&W night vision image.
Operators that tested units that use ATN WPT reported a significantly better degree of detail, overall contrast, full moon similarity and range of shades. WPT provides more discriminating shades of intensity between white and black than between green and black resulting in better contrast and depth perception then when compared to green phosphor NVGs.
The majority of the WPT performance characteristics are on par or better then the latest Gallium Arsenide based image intensifier tubes. WPT specifications include typical resolution of 68lp/mm (with some over 74lp/mm) and Signal-to-Noise figures as high as 25.
7 out of 10 users name WPT as a Night Vision PreferenceLast edited by AirborneSapper7; 02-19-2012 at 05:53 AM.
Join our efforts to Secure America's Borders and End Illegal Immigration by Joining ALIPAC's E-Mail Alerts network (CLICK HERE)
-
12-12-2010, 06:06 AM #412Senior Member
- Join Date
- May 2007
- Location
- South West Florida (Behind friendly lines but still in Occupied Territory)
- Posts
- 117,087
Good outfitter's can be pricy though

http://www.cabelas.com/ghome.jsp?rid=20 ... 1=64367335Last edited by AirborneSapper7; 02-01-2012 at 09:43 AM.
Join our efforts to Secure America's Borders and End Illegal Immigration by Joining ALIPAC's E-Mail Alerts network (CLICK HERE)
-
12-12-2010, 06:46 AM #413Senior Member
- Join Date
- May 2007
- Location
- South West Florida (Behind friendly lines but still in Occupied Territory)
- Posts
- 117,087
M1950 Yukon Stove


Compact and lightweight, the Yukon stove is primarily designed for heating tents but may also be used for heating water, cooking rations and various duties, Utilizing leaded gasoline as its normal fuel, the Yukon is fully versatile and can be adapted for burning white gasoline, kerosene, fuel oil, diesel oil, naptha, jet fuel, coal and wood.
Using only 5 gallons of fuel, the Yukon will heat the inside of a tent to a temperature of 54C (60F) and maintain it for about 15 hours, when the outside temperature is 6C (15F). Gravity fed by means of a 12 foor rubber hose and drip interceptor for clean efficient operation.
Built to rigid military specifications, the Yukon stove is designed for fast, easy disassembly. Compact, lightweight construction permits all of the Yukon's parts to be stored within the stove body for complete portability.
http://www.herman-nelson.com/itemInfo.cfm?itemID=727
We used them in Alaska and they were fricken AWESOME in heating our 10 man squad tentsLast edited by AirborneSapper7; 02-01-2012 at 09:44 AM.
Join our efforts to Secure America's Borders and End Illegal Immigration by Joining ALIPAC's E-Mail Alerts network (CLICK HERE)
-
12-12-2010, 06:55 AM #414Senior Member
- Join Date
- May 2007
- Location
- South West Florida (Behind friendly lines but still in Occupied Territory)
- Posts
- 117,087
Arctic Tent 10 Man 17'6 X 17'6

Note: the stove above (M1950 Yukon Stove) is designed for this
Tent Specifications
Peak Height 8'6"
Diameter 17'6"x17'6"
Weight ( including poles) 76 lbs
Floor Area 198 sq. ft
Eave Height 3 ft.
Packaged size 7.1 cu. ft
Windows None
Doors 2
Stove pipe vent 1
The tent is a six-sided pyramidal tent supported by a telescopic center pole Doors.
The tent has two doors 5 feet high on opposite sides, permitting tents to be joined together with suitable access from one to the other.
Door flaps may be securely closed either by slide fasteners or by loops over wood toggles. The doors are operated from both inside and outside.
Ventilation. The tent is ventilated by four built-in ventilators on opposite sides and near the peak of the tent. The ventilators have inside ducts, which may be closed by tie cords. The ventilator hoods are of the fixed type, each hood being constructed with a stiffener inserted in the hem to keep it extended out from the ventilator opening.
A stovepipe opening with a silicone rubber-molded ring is built in one side of the tent near the eave.
Snow clothe. There is a snow cloth sewed to the bottom of each side of the tent. When the tent is pitched, the snow cloths are flat on the ground on the outside of the tent. Snow is deposited on the snow cloths for insulation purposes.
Screen doors. Screen doors are attached to the tent for protection against insects.
Sock lines. Four sock lines are provided for drying clothing and equipment.
Liner. A fire-resistant liner, made of 5.2 ounce permeable cotton sheeting is provided to insulate the tent to prevent frost from falling on the occupants. The liner is held in place by metal toggles.
Cover. The tent is provided with a cover for use when it is in storage or is being transported. The tent and liner, when folded, fit into the cover.
Aluminum tent pins are nested and the magnesium pole telescoped to its shortest length and placed in the pocket at one side of the cover
http://www.rddusa.com/Military-Tents.aspxLast edited by AirborneSapper7; 02-01-2012 at 09:44 AM.
Join our efforts to Secure America's Borders and End Illegal Immigration by Joining ALIPAC's E-Mail Alerts network (CLICK HERE)
-
12-12-2010, 07:16 AM #415Senior Member
- Join Date
- May 2007
- Location
- South West Florida (Behind friendly lines but still in Occupied Territory)
- Posts
- 117,087
How to Dry Green Firewood Safely
By an eHow Contributor
A fireplace is a wonderful inviting amenity in any household but it is especially grand when it's freezing outside and there's a cheery fire blazing inside. Cutting your own firewood can save you a bundle of money - if you are willing to take the time it needs to properly dry out and be safe and smart to burn. Here's how to do just that.
Difficulty: Easy
Instructions.Things You'll Need:
1 Green wood should never be burned. First it really doesn't generate any heat because the fire ends up just evaporating the moisture inside the wood. Sometimes the water weight equals half the weight of the actual wood so the water content is considerable. Also green wood smokes badly and leaves creosote deposits inside the chimney which is a chief cause of chimney fires. Another problem with green wood comes if you try to cut it. It will often cause a chain saw to hang up which can be really dangerous.
2 You can tell if firewood is green because the bark will adhere to it strongly and it will be damp on the cut ends. If you bang pieces of the wood together and it has a dull flat sound, it is probably green. The other option is that it is rotten which you don't want either as it burns far too quickly. Another sign of rotten wood is that it has cracks on the ends that go into the rings and it looks and feels overly dry.
3 Green wood can be dried simply by leaving it outside for six months to a year. You need to make sure that it isn't stored directly on the ground where insects can invade and where it can grow rotten. If you don't have a commercially bought wood holder, there are things you can make yourself. Just putting down some long pieces of metal or plastic for the wood to sit on will help a great deal. Old lengths of PVC or metal pipe would be great. Just lay then ten or twelve inches apart and put the wood so that it's lying across both pieces. You don't want any of the wood touching the ground.
4 You can also make a wood box to store green wood while it's aging. You want to make sure that the wood is exposed to the air so that it will dry well and evenly. If you make a box for wood to lay flat in, make the back out of boards with spaces between them or use lattice work. If you want the logs to stand upright, put the box up on blocks and leave spaces between the boards on the floor. You can't use lattice for this as the wood will break through it with it's own weight.
5 You can store wood inside near a heat source like in a basement near the hot water heater. You still don't want to have it laying on the floor because of bugs. You also should make really sure that the wood is coming in clean and free of bugs. You don't want your house infested with anything you may bring in with the wood. You can put the wood up on pipes or make a wood box inside, too.
6 If you find you've bought green wood when you didn't want to, don't burn it. It will cost more in the long run by gumming up your chimney and it burns really badly, throwing little heat but burning really quickly. It's not safe to burn. Just bite the bullet and go out and get you some that you know (after reading this) is aged. Next season you will have a nice pile of seasoned wood and you won't have to buy any.
Tips & Warnings
Always store wood up off the ground or floor with plenty of ventilation for even drying..Green wood is dangerous to burn indoors.
http://www.ehow.com/how_2364471_dry-gre ... afely.htmlLast edited by AirborneSapper7; 02-01-2012 at 09:45 AM.
Join our efforts to Secure America's Borders and End Illegal Immigration by Joining ALIPAC's E-Mail Alerts network (CLICK HERE)
-
12-12-2010, 07:38 AM #416Senior Member
- Join Date
- May 2007
- Location
- South West Florida (Behind friendly lines but still in Occupied Territory)
- Posts
- 117,087
The Poncho
From FM 21-15, Care and Use of Individual Clothing and Equipment, January 1966
Chapter 3 BIVOUAC EQUIPMENT
http://www.hardscrabblefarm.com/vn/poncho.html
# Ground cloth. The poncho may be used as a ground cover for shelters and as a waterproof barrier between the ground and sleeping bag.
# Sleeping bag. The poncho may be used as a sleeping bag either by itself or in conjunction with a blanket (fig. 5). Spread the poncho fiat on the ground, making sure the hood opening is tightly closed. If a blanket is used, place it on the top of the poncho, fold (lie poncho and blanket in half lengthwise, and fasten the snap fasteners together. If the poncho is being used without a blanket, snap the sides together along their entire length and tuck the foot end under to keep the feet from sticking out.
Caution. (Do not fasten the snap fasteners together when the poncho is used as as a sleeping bag in combat areas; it cannot be opened quickly.

http://www.hardscrabblefarm.com/vn/poncho.htmlLast edited by AirborneSapper7; 02-01-2012 at 09:47 AM.
Join our efforts to Secure America's Borders and End Illegal Immigration by Joining ALIPAC's E-Mail Alerts network (CLICK HERE)
-
12-12-2010, 07:42 AM #417Senior Member
- Join Date
- May 2007
- Location
- South West Florida (Behind friendly lines but still in Occupied Territory)
- Posts
- 117,087
How to Use a Poncho Liner
By Jay Angel, eHow Contributor
A poncho liner is a military issued piece of field gear that is used to provide additional warmth to the standard issued poncho. The liner can also be used as a makeshift sleeping bag in an emergency situation during mild weather. The liner is very small and can easily fit into any backpack or rucksack.
Difficulty: Easy
Instructions
Things You'll Need:
* Standard issue military poncho
* Standard issue military poncho liner
Uses of a Poncho Liner
1. Use the liner with a poncho to provide some added warmth. Lie the poncho on the ground. Place the liner over it and then line up the ties from the liner with the grommets on the poncho. Attach the ties to the grommets with standard shoelace knots.
2. Use the liner as a makeshift sleeping bag. Lie the liner on the ground and then fold it in half aligning the ties. Tie off each corresponding tie until you have a "bag." This makes a great emergency sleeping bag for mild climates.
3. Store the liner in your vehicle to be used as an emergency blanket. This ultra compact piece of equipment can be stored most anywhere. It can be used for extra warmth in an emergency situation, like if you are stranded in your car for an extended length of time. It can also easily be added to any backpack for the same purpose without taking up much room or adding much weight.
Tips & Warnings
* You can insert the makeshift bag into a larger, winter style sleeping bag for additional warmth.
http://www.ehow.com/how_5756305_use-poncho-liner.htmlLast edited by AirborneSapper7; 02-01-2012 at 09:48 AM.
Join our efforts to Secure America's Borders and End Illegal Immigration by Joining ALIPAC's E-Mail Alerts network (CLICK HERE)
-
12-12-2010, 07:48 AM #418Senior Member
- Join Date
- May 2007
- Location
- South West Florida (Behind friendly lines but still in Occupied Territory)
- Posts
- 117,087
Gear Review: Exped Poncho, Liner, Chaps - Part 2.1/3 (Poncho Liner)
http://www.youtube.com/watch?v=RgQ2V85VcmY
Gear Review: Exped Poncho, Liner, Chaps - Part 1 (Poncho)
http://www.youtube.com/watch?v=7OHnr47u ... re=related
Gear Review: Exped Poncho, Liner, Chaps - Part 3. (Poncho Chaps)
http://www.youtube.com/watch?v=DSHYgrZe ... re=related
Last edited by AirborneSapper7; 02-01-2012 at 09:51 AM.
Join our efforts to Secure America's Borders and End Illegal Immigration by Joining ALIPAC's E-Mail Alerts network (CLICK HERE)
-
12-12-2010, 02:55 PM #419Senior Member
- Join Date
- May 2007
- Location
- South West Florida (Behind friendly lines but still in Occupied Territory)
- Posts
- 117,087
TC 31-29/A - U.S. ARMY SPECIAL FORCES CACHING TECHNIQUES
http://www.ssrsi.org/Onsite/PDFbin/FMs/ ... aching.pdfLast edited by AirborneSapper7; 02-01-2012 at 09:48 AM.
Join our efforts to Secure America's Borders and End Illegal Immigration by Joining ALIPAC's E-Mail Alerts network (CLICK HERE)
-
12-12-2010, 03:01 PM #420Senior Member
- Join Date
- May 2007
- Location
- South West Florida (Behind friendly lines but still in Occupied Territory)
- Posts
- 117,087
Bug-Out Kits: Your Papers Please (important papers for evacuees)
People need to remember that in a crisis they may not be able to remember basic information. So take originals or photocopies of. . .
By Joe Katzman on September 2, 2005 3:16 AM
5 Comments
Talking to my sweetie yesterday. She had been discussing the New Orleans situation with a lawyer friend, when talk turned to bug-out kits and disaster preparation. Just one more reason why I love her so.
Anyway, the point about including critical papers & documents in your bug-out kit, or having them quickly at hand together in an identifiable place, struck me as an under-appreciated concept. People need to remember that in a crisis they may not be able to remember basic information. So take originals or photocopies of:
1. All insurance policies or info. Quick test: can you name the companies and agent's name for all of your key insurance policies? At minimum you need the policy number, the issuing company name and the agent's name and phone number.
2. At least one copy of bank books or a bank statement. Can reduce hassle in getting to your money. Esp. important if your funds are at a small local bank or credit union.
3. Ruth, who lives in Tornado Alley, suggests having some traveler's cheques in your kit. Not a bad idea.
4. A bill, any bill - cable TV works well. Can be used to establish residency.
5. Tax return, preferably your most recent. Can be helpful in getting emergency loans.
6. Passport, if applicable.
7. Birth Certificate(s).
8. Marriage certificate.
9. Eyeglass prescription, if applicable.
10. Doctor(s) name and phone number, a list of any chronic conditions, allergies, or vulnerabilities you may have, and a list of all prescriptions you take. The prescription medicines themselves should go in your version of Armed Liberal's emergency medical kit when it's time to leave, of course, but that isn't always possible. That's when having the paper et. al. can be a lifesaver.
Reader "htom" suggests "Photocopies (notarized copies if applicable) of all of those documents. Leave the originals in the safety deposit box. Seal both sets in zip lock bags, twice."
NOTE: If you face no-warning disaster possibilities like an earthquake zone, have these papers handy somewhere else like your car, or even a trusted person far outside your area who you can call. Doesn't do much good to have them handy in the house if you're at work, and your house is rubble, and they're inaccessible.
Any other must-have recommendations?
http://www.windsofchange.net/archives/007441.htmlLast edited by AirborneSapper7; 02-01-2012 at 09:52 AM.
Join our efforts to Secure America's Borders and End Illegal Immigration by Joining ALIPAC's E-Mail Alerts network (CLICK HERE)


 Reply With Quote

Reuters: China Puts Freeze on ICEs Deportations of Chinese...
05-06-2026, 06:29 AM in illegal immigration News Stories & Reports