

Results 9,811 to 9,820 of 11923
 226Likes
LinkBacks (?)
-
12-26-2016, 11:32 AM
-
09-02-2016, 05:39 PM
-
whole garden made with pallets!! Love it!! | Pallets | Pinterest | Pallets, Pallets Garden and Wooden Pallets
Refback This thread03-06-2016, 11:30 AM -
10-20-2015, 05:29 PM
-
06-12-2015, 08:00 PM
-
02-26-2015, 01:58 PM
-
01-05-2015, 04:13 PM
-
12-19-2014, 10:19 AM
-
EMERGENCY: HUGE FEMA PANDEMIC EXERCISE IN USA IN NOVEMBER, INTERNET SHUT DOWN PART OF EXERCISE | Prepare4Survival
Refback This thread12-03-2014, 10:39 PM -
Off Grid World ? Ugly Duckling Shipping Container Home Built by Artist Is a Beautiful Swan on the Inside
Refback This thread11-25-2014, 03:10 PM -
11-17-2014, 10:59 PM
-
11-13-2014, 11:18 AM
-
11-09-2014, 02:54 PM
-
10-28-2014, 11:38 PM
-
10-26-2014, 05:54 AM
-
10-16-2014, 11:28 AM
-
10-03-2014, 01:25 PM
-
10-02-2014, 09:16 PM
-
09-26-2014, 07:00 PM
-
09-26-2014, 01:56 PM
-
09-19-2014, 04:46 PM
-
09-13-2014, 05:49 AM
-
09-05-2014, 01:52 PM
-
09-01-2014, 09:39 AM
-
08-30-2014, 06:29 PM
-
08-10-2014, 06:29 AM
-
08-04-2014, 05:07 PM
-
07-23-2014, 11:14 AM
-
New Evidence on Expiration Dates | Medical Preparedness | Doom and Bloom (TM) | Doom and Bloom (TM)
Refback This thread07-22-2014, 10:10 AM -
07-18-2014, 08:37 PM
-
07-15-2014, 04:57 PM
-
07-11-2014, 01:40 AM
-
04-22-2014, 11:14 AM
-
04-18-2014, 12:57 PM
-
04-18-2014, 10:10 AM
-
04-14-2014, 12:18 AM
-
04-12-2014, 02:28 AM
-
03-02-2014, 11:43 PM
-
12-24-2013, 11:59 PM
-
12-07-2013, 11:04 PM
-
kitchen | Cob
Refback This thread11-25-2013, 03:24 PM -
10-22-2013, 10:25 PM
-
Apple Pie Braid | Sweets
Refback This thread09-26-2013, 07:58 AM -
09-02-2013, 04:44 PM
-
5 Reasons Why You May have to Bug Out Even Though You Don’t Want to | The Apartment Prepper's Blog
Refback This thread08-23-2013, 03:20 PM -
06-27-2013, 06:30 AM
-
06-23-2013, 08:11 PM
-
06-17-2013, 11:21 PM
-
05-24-2013, 05:06 PM
-
To Eat / BASIC LIST / SUGGESTED ITEMS FOR LONG TERM SURVIVAL - Page 275 - ALIPAC
Refback This thread05-01-2013, 03:49 AM
Thread Information
Users Browsing this Thread
There are currently 1 users browsing this thread. (0 members and 1 guests)
 LinkBack URL
 About LinkBacks
-
06-11-2025, 04:11 AM #9811Senior Member


- Join Date
- Aug 2018
- Posts
- 97,485
If you're gonna fight, fight like you're the third monkey on the ramp to Noah's Ark... and brother its starting to rain. Join our efforts to Secure America's Borders and End Illegal Immigration by Joining ALIPAC's E-Mail Alerts network (CLICK HERE)
-
06-11-2025, 04:12 AM #9812Senior Member
- Join Date
- Aug 2018
- Posts
- 97,485
If you're gonna fight, fight like you're the third monkey on the ramp to Noah's Ark... and brother its starting to rain. Join our efforts to Secure America's Borders and End Illegal Immigration by Joining ALIPAC's E-Mail Alerts network (CLICK HERE)
-
06-11-2025, 04:49 AM #9813Senior Member
- Join Date
- Aug 2018
- Posts
- 97,485
If you're gonna fight, fight like you're the third monkey on the ramp to Noah's Ark... and brother its starting to rain. Join our efforts to Secure America's Borders and End Illegal Immigration by Joining ALIPAC's E-Mail Alerts network (CLICK HERE)
-
06-11-2025, 04:51 AM #9814Senior Member
- Join Date
- Aug 2018
- Posts
- 97,485
If you're gonna fight, fight like you're the third monkey on the ramp to Noah's Ark... and brother its starting to rain. Join our efforts to Secure America's Borders and End Illegal Immigration by Joining ALIPAC's E-Mail Alerts network (CLICK HERE)
-
06-11-2025, 04:52 AM #9815Senior Member
- Join Date
- Aug 2018
- Posts
- 97,485
If you're gonna fight, fight like you're the third monkey on the ramp to Noah's Ark... and brother its starting to rain. Join our efforts to Secure America's Borders and End Illegal Immigration by Joining ALIPAC's E-Mail Alerts network (CLICK HERE)
-
06-11-2025, 04:56 AM #9816Senior Member
- Join Date
- Aug 2018
- Posts
- 97,485
How to Water a Tree for Guaranteed Survival
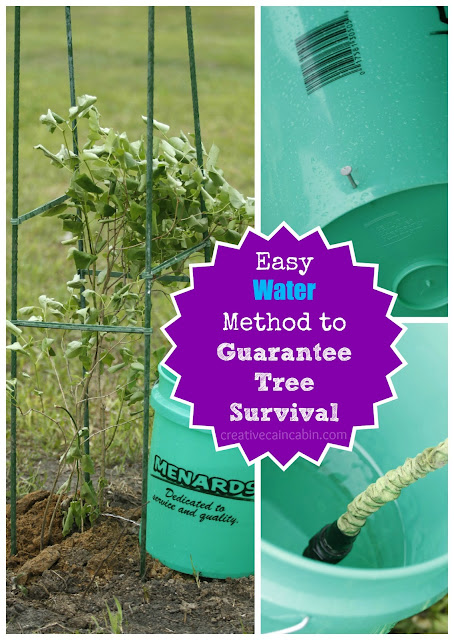
While on Face Book this week I had a friend pop in
and ask me if I would like some
“White Lilac Bushes”
Well of course my answer was, YES and when do
you want me to come dig them.
I must say I made quite a haul. He gave
me 3 Lilac Bushes, 2 Walnut Trees, and a Trumpet Vine.
So home I went to get planting….and decided
to show you the method I have used for years to guarantee
my shrubs and trees survive.
Water is the key……and my bucket method
works every time.
Find yourself a clean, chemical free 5 gallon bucket or if you’re not
sure what was in it give it a good cleaning before using.
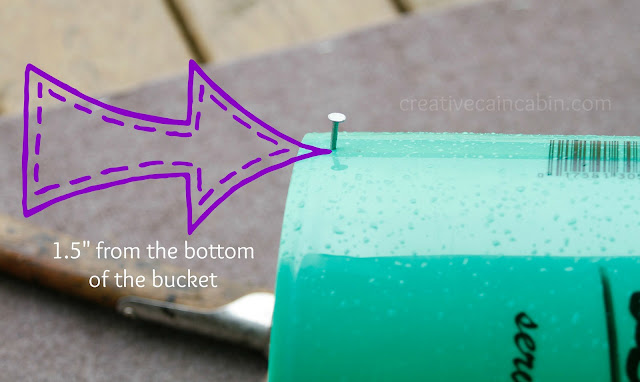
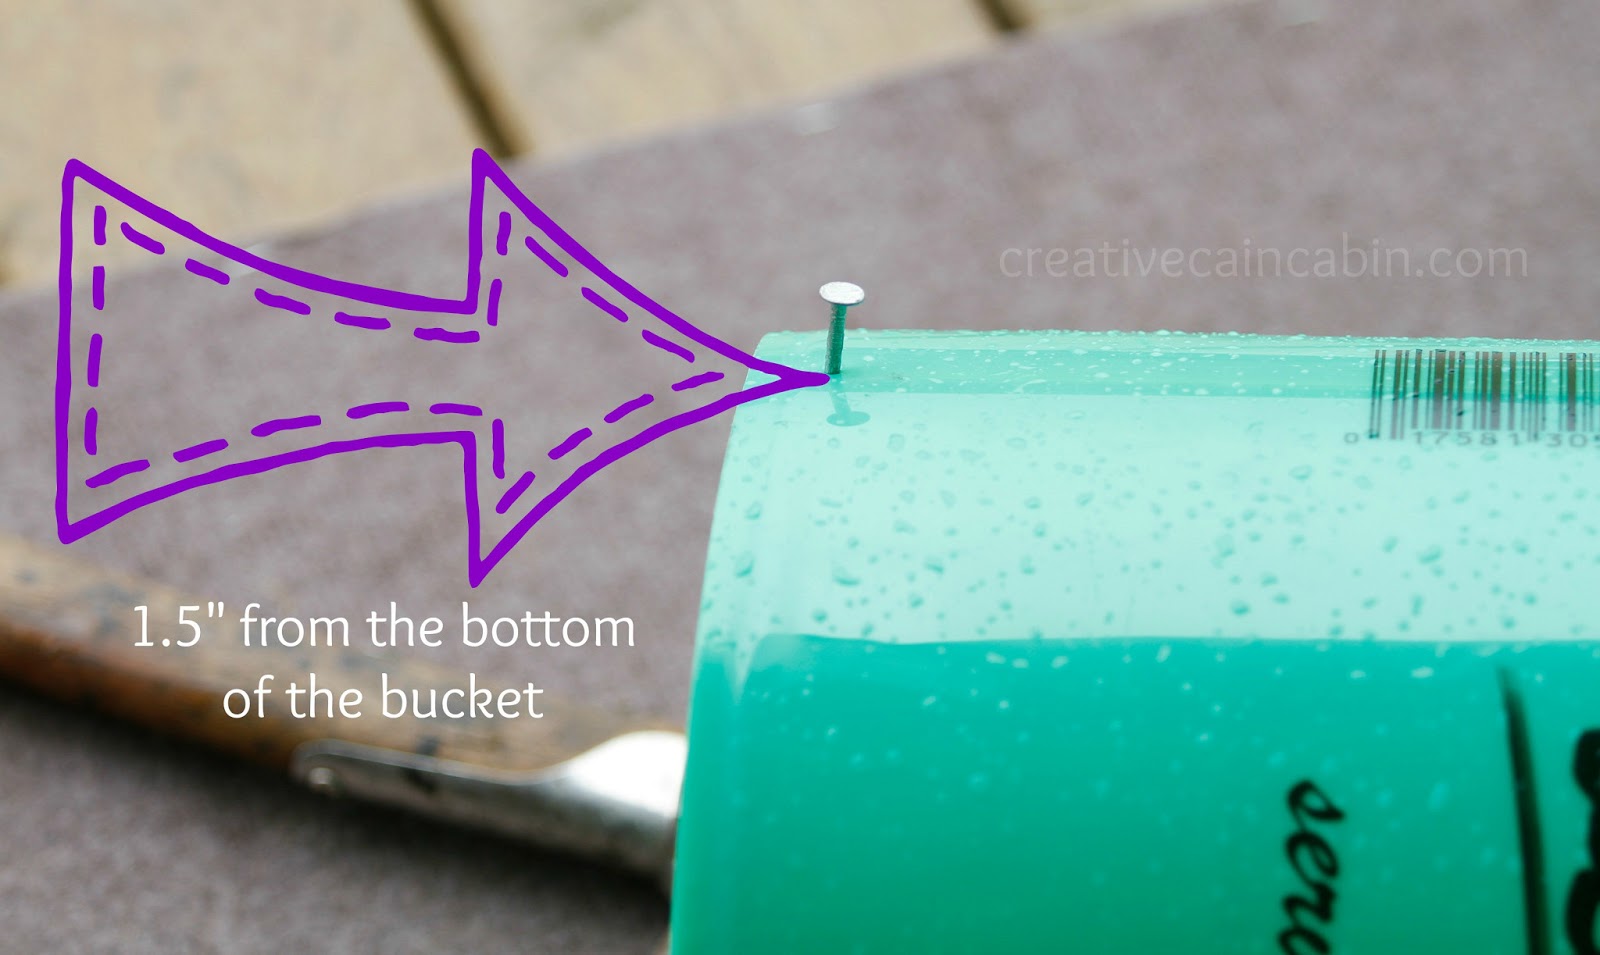
Grab a Hammer and Nail and pound the nail into the bucket 1.5″ from the bottom. Leave the nail sticking out enough so you can pull it out again.
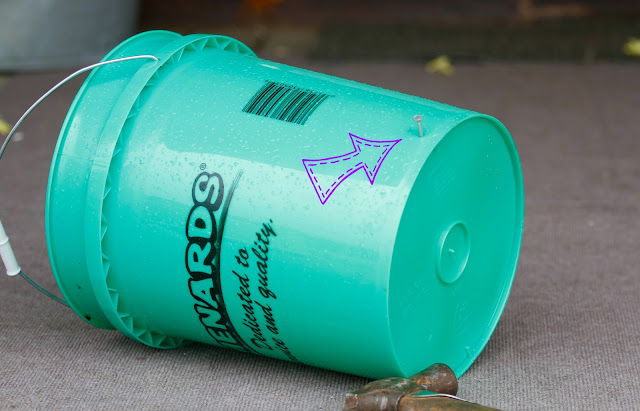
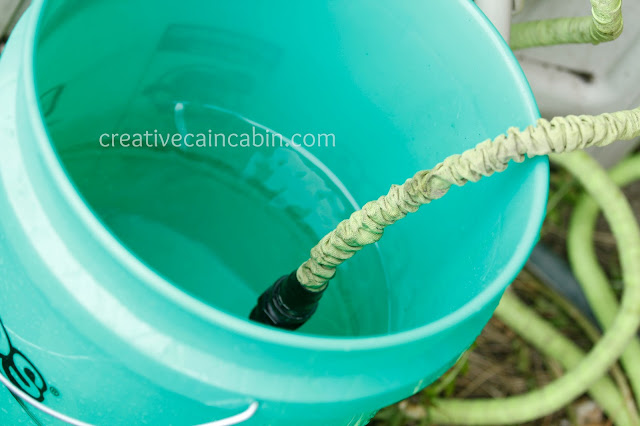
Leave the nail IN the bucket and fill with fresh water.

Carry the bucket over to the tree and PULL the nail out.
I always drop the nail in the bottom of the bucket so I can
locate it when I need it again.
Direct the water flow towards the trunk of the tree and
let the small stream of water do its job.
I fill my buckets morning and night for 2 WEEKS, and
have never lost a tree.After two weeks I leave the trees to
survive on their own.
It is very important for a new tree to get plenty of water while
it’s getting a good root system, and this method works
for me every time.
I also like to cage my new trees in for the first season, the
mowers in my family like to cut down anything in their
path
(I lost all my blueberry bushes last year due to an over eager mower)
Go give it a try.
It’s the simplest way to
assure all your hard work of planting isn’t going to waste.
Post navigation
Previous
Friday Night in Black and White (22)
Next
Budget Decorating Party
Similar Posts
Easter Tea Cup Place Card Setting

Sunflower Blooms

8 ideas you may want TO ADD TO YOUR GARDEN

How To Customize A Flagpole To Match Your Homes Exterior
How to Water a Tree for Guaranteed Survival - CREATIVE CAIN CABINLast edited by Airbornesapper07; 06-11-2025 at 04:59 AM.
If you're gonna fight, fight like you're the third monkey on the ramp to Noah's Ark... and brother its starting to rain. Join our efforts to Secure America's Borders and End Illegal Immigration by Joining ALIPAC's E-Mail Alerts network (CLICK HERE)
-
06-11-2025, 05:05 AM #9817Senior Member
- Join Date
- Aug 2018
- Posts
- 97,485
 Projects
Contests
Teachers
Drill Press for ~$20
By Victor805 in WorkshopTools
305,431
3,379
55Featured
Introduction: Drill Press for ~$20
 By Victor805Youtube channel.Follow
More by the author:


About: I'm an electronic engineering student. I don't usually have much spare time but I like to work on random projects to keep myself entertained. I hope you like them! More About Victor805 »
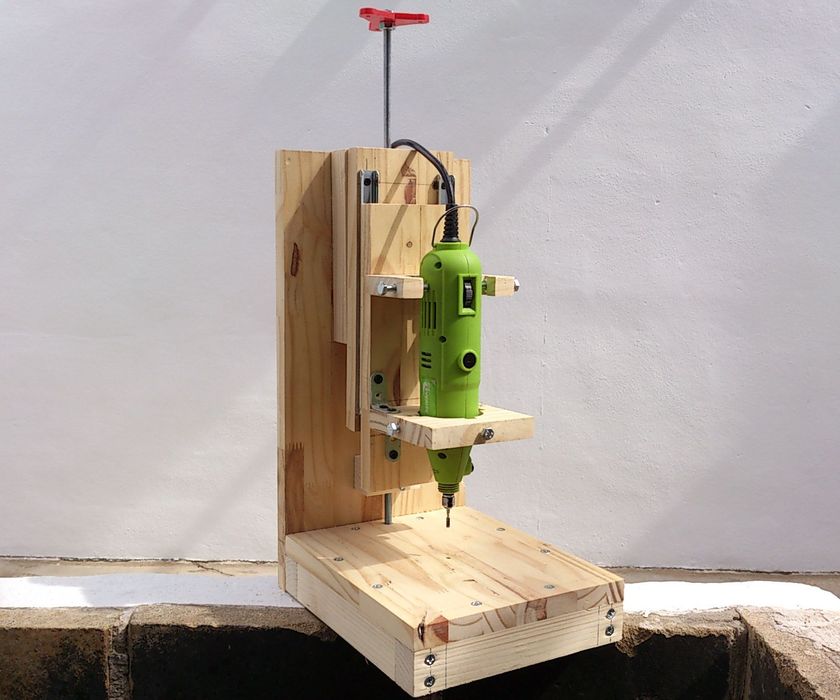
Anyone who works with wood knows you have to make hundreds of holes for the screws and its almost impossible to make a series of holes perfectly straight and with the same depth by hand.
This instructable will help you to build a tool that will save you a lot of time and effort when drilling precise holes on wood, plastic, metal, or whatever material you're working with, it can also be very useful to carve sections of materials like wood thanks to its adjustable tool height.
You will need:
- Wooden board (I used ~2 Cm thickness)
- Wood slat (at least 2 meters, I used 25x35mm but any similar one will do the job)
- 2x Small drawer guides
- Around 30 long wood screws (and around 20 shorter ones)
- Wood glue (optional)
- High speed drill or similar tool to be attached.
- M8 threaded rod M8 threaded tube M6 screws and nuts
Tools needed:
- Ruler and pencil
- Square and bevel
- Wood saw and jewelers saw
- Mitre
- 80 grit sandpaper
- Drill
- Wood clamp (optional, but it makes the job a lot more easier)
- Screwdriver
Step 1: The Base
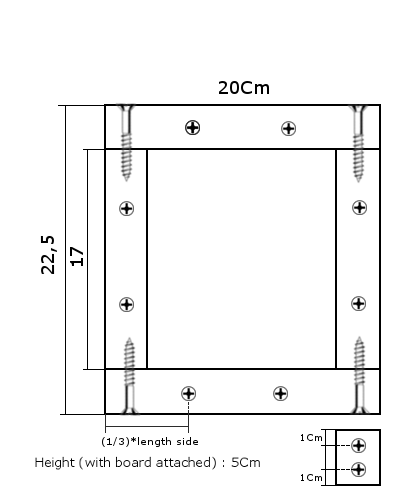
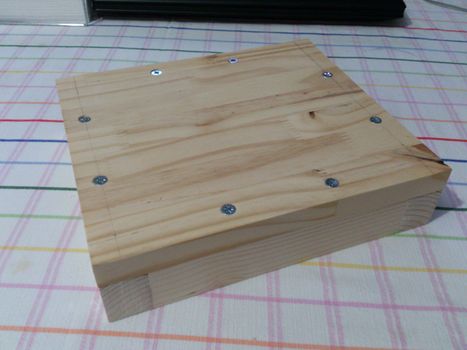
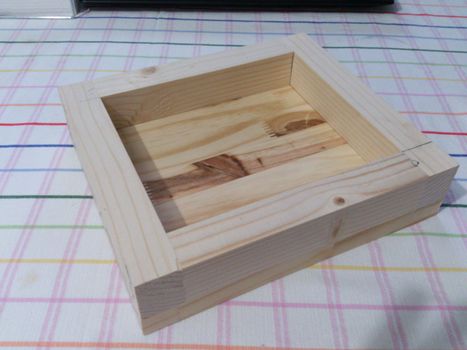
Sorry about the lack of pictures, but by the time I decided this project to become and instructable I had already finished the base.
To made the base, cut four pieces out of the wooden slat, the dimensions are specified at the image, to avoid problems when assembling them I used a mitre and a clamp to keep the slat attached to it, this tool keeps the blade in a vertical position, avoiding irregular cuts, a minimal amount of sanding might be made afterwards.
When you've finished cutting the slat, make the definitive rectangle shape with it, play with the position of the slats to find the optimal configuration, once aligned, hold them together by applying pressure with the clamp to the short sides of the rectangle, now they're ready to be drilled. Mark the position of the screws, I've chosen to put them 1cm away from the edge. With some measurements, find the center of the slat and mark the position, once you have found it, drill the holes, which must be slightly narrower than the screw.
Once all the holes are drilled you can remove the clamp (or not if you prefer) and place the screws, I put some wood glue at each union to reinforce them.
TIP: If you remove the clamps when the holes have been already made, make some marking where two pieces come together (like circles, triangles, lines), if you disorder them, you can always put them together like a puzzle.
TIP: If your wood screws have an angled head you can use a special bit or a large metal bit (8mm for example) to make a countersink so the screws don't protrude.
To attach the cover, just draw the contour over some wooden board, cut it and attach it to the slat frame with more screws, I placed 2 at each side, leaving a gap between them of about 1/3 the length of that side. If you're like me, the chances are some of the slats or parts of the board will slightly protrude from the shape we're looking for, so grab that 80 grit sandpaper or an equivalent tool and start sanding until the edges are completely flat.
NOTE: It's not necessary to copy the dimensions to the millimeter, just get the general idea, and use the materials you find more convenient.
TIP: If you want your sanding to be more accurate put some sandpaper over a wood plank and use it to sand the wood, that will ensure your pieces will come out straight.
Step 2: The Arm
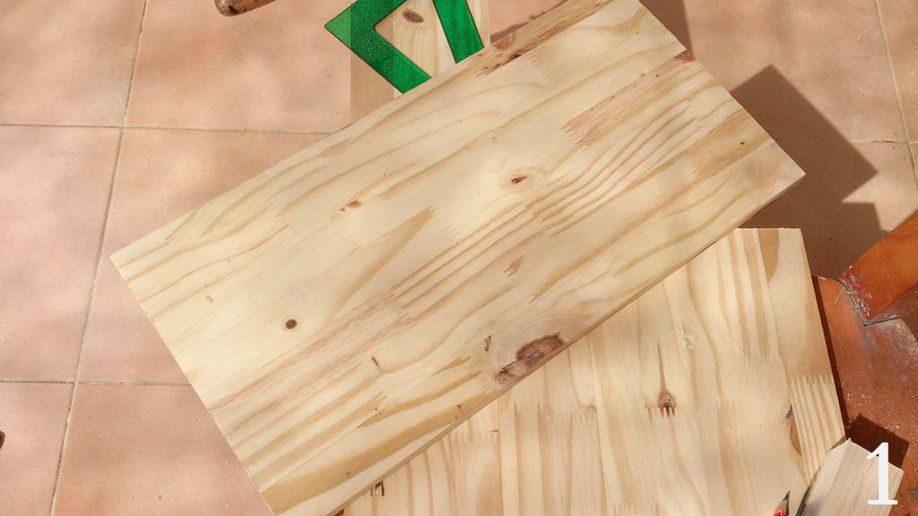
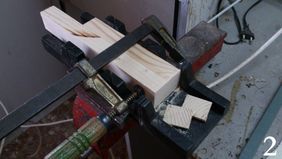
 6 More Images
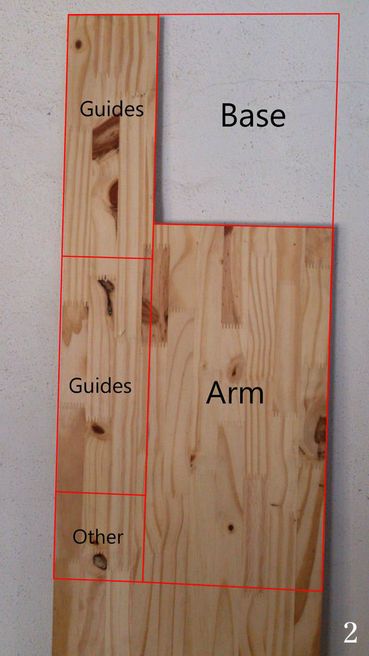
The next part of the drill press will be the arm that will hold the guides to attach the drill. To make it, I cut a 40Cm tall board with the same width than the base, (Pic 1) then I sand the edges.
To install the guides we need to set a separation between the board and the drill, to achieve this I cut two pieces of wood from a slat (Pic 2), they are 17Cm tall. Once attached to the board they'll provide some separation so the drill can be more far away from the board and I can work with larger materials easily.
To attach these slats I mark the center of the large board, then I add 5Cm to each side, the space between the opposite edges of the slats must be 10Cm, with this in mind I use an square and a bevel to trace parallel lines to delineate the place where the slat will stay (Pic 4 and 5), also, I use half the width of the slat to draw another parallel, that line will be useful to know where I should put the screws.
To place the screws I divide the length of the slats by 4 (Pic 5), that will give me the space between each one of the three screws, I mark those places and proceed to drill the holes through them, then I attach the slats to their corresponding location with a clamp and using the holes I had previously made as a guide I drill the rest of the hole through the slats.
Once the holes are drilled, I make the countersinks (Pic 6) and insert the screws until the point comes out at the other side (Pic 7), that will be useful because I want to remove the slats, put some glue and then put them back in place (Pic . After this, I place the slats and screw them in place (Pic 9).
We don't want to attach the arm to the base now because that operation should be made when the guides are ready to be installed, that will allow us to make some corrections on the go if necessary
Step 3: The Guides
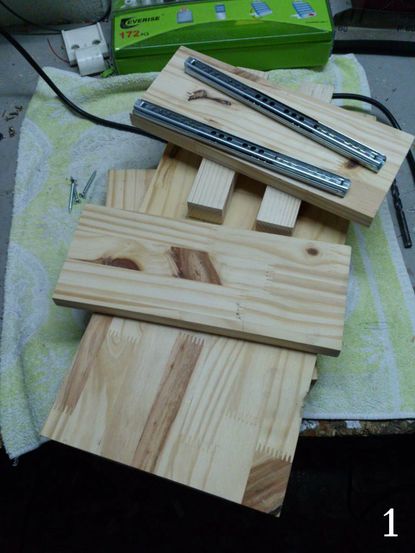
 6 More Images
Placing the guides is the most trickiest operation, they must be completely perpendicular respect to the base, and they must be completely parallel to each other to avoid getting stuck.
First I cut two 25Cm long boards (per 10mm wide) (Pic 1), notice I'm not throwing away any wood (Pic 2). After sanding the edges place my set square at one edge, and I do two marks, one at 10cm, and one at 90 (pic 3), I repeat the operation with the lower part of the board and with the other board.
TIP: To do the markings with the set square, use left edge of the small boards (pic 2) this edge comes perfectly straight, so errors and other problems when marking won't be a problem.
Once finished, these lines must be parallel between each other, now, with the set square I do a line 1.5 cm above the lowest edge, perpendicular to the other two, that line will help the guides to be at the same height.
With the lines that define the position of the guides I place them so the longer lines pass through the middle of the holes, then, with the pencil I mark the shape of those holes, and I drill them out of the wood (Pic 4).
TIP: Maybe this is useful or maybe I'm too paranoid, but I marked the guides to know which goes where after marking the holes to drill, theoretically they're exact, but anyway, let's not risk it... After the holes are have been drilled, screw the guides to the small board (pic 5).
Important: Notice the my guides have different sets of holes, on one side there are lots of them, but on the other one there are just a few. The side with just a few holes will be the side attached to the arm, this is because it'll be easier to disassemble in case the guides get stuck, or to do any adjustment...
To screw the board to the spacers we need to follow a special procedure, this board must be perfectly parallel respect the big board, to do so I made a simple but effective tool to align the board (pic 6), I slide it along the flat edge of the board and check that the screw is always touching the small board, once I'm sure the board is aligned I clamp it in place, drill the holes, and without removing the clamp I insert the screws (pic 7 &.
After this we just have to screw the guides in place (Pic 9). I
IMPORTANT: While placing the screws the board can change of position to accommodate to the screws, to avoid this place the screws with the clamp attached, that way the screws will have to get accommodated to the wood, and not the other way around.
Step 4: The Union
 2 More Images
This is also one of the most crucial operations, the guides are now aligned, but if we goof it when joining the board with the base we'll end making holes with a certain deviation. Luckily, there are some tricks that make this process easier.
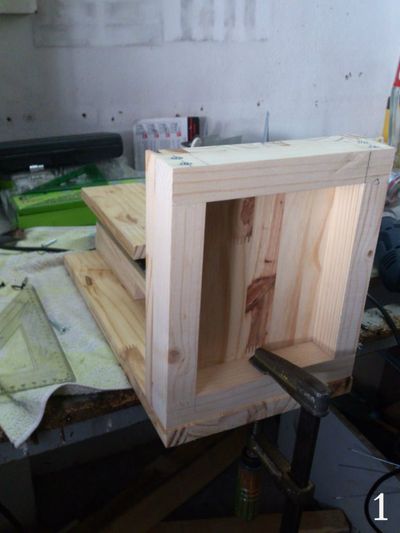
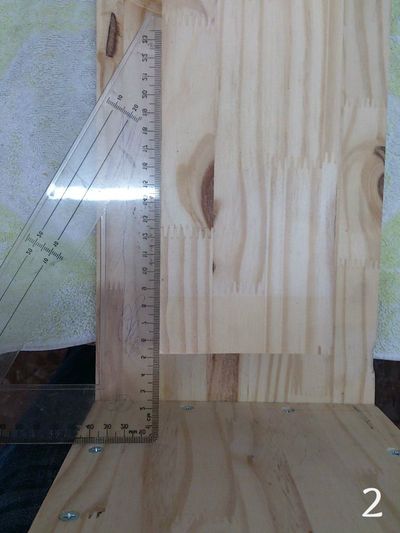
We first clamp the base to the board by eye, make sure the edges are more or less aligned, don't apply to much pressure because we want it to have a certain degree of movement (Pic 1), then, we place a carpenter's square touching the base, the board must be parallel to the side touching it, and also, when we slide down the guide, the board must remain at the same distance from the square (Pic 2), if it gets closer or further we must change the inclination of the base by tapping it gently at the bottom, the clamp will allow us to make and conserve those subtle adjustments.
Once the base is aligned with the guides we clamp it strongly, and we mark the places where the screws will be attached (Pic 3), make sure you don't get in the way of a previously places screw. To make the lines I divided the length of the slat and board by two, that way I'm sure the screws will go through the middle of them, in my case I placed 4 long screws up (at the slat) and 4 short (at the board) (Pic 4), this is just temporary.
Now I've got a problem! and I guess some of you will have the same one. The board is misaligned with the base (Pic 5), this is not a serious problem and I kinda expected it, to solve this, I sand the upper part of the base, where the board is attached, so it forms a perfect 90º angle. It might take some tries but the hardest part is finished.
Step 5: Adding the Drill Support
 5 More Images
Now I must create a support for the drill, since I might also use a high speed drill, I opted to use have a general holder and some kind of screws to hold the tool in place regardless the diameter of it. This part is kinda general, since some measurements might change due the tool used.
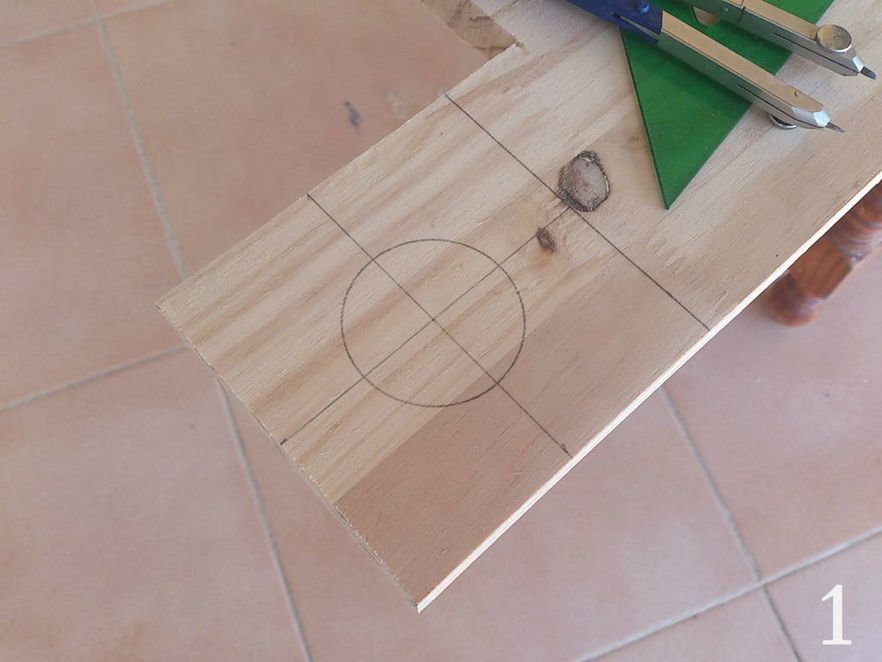
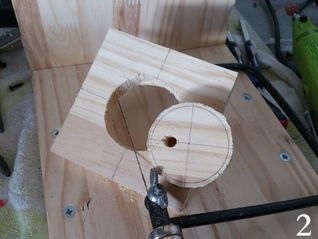
I cut the last piece of wood, then I make a hole though it, I'm not very proud of how that hole came out, jeweler's saw and thick wood don't get along, but that's easy to fix with sandpaper wrapped around a tube (Pic 1 & 2). The diameter of the hole is the diameter of the high speed drill since it's the widest power tool I'll be using.
The flat side (the side that hasn't been cut) will be attached to the guide board, the other sides are sanded to remove the saw dents and I do a mark at the middle of each of them to do a hole to pass the screws through.
I check the support is perfectly straight and I clamp it while I drill the holes to install 90º brackets to hold the support in place (Pic 3 & 4), then I insert the screws, when all fits correctly I unscrew the thing to proceed with the next operation.
I mark a point at the middle of each side, then with a 6mm wood bit I drill holes through them, the screws to hold the tools will go in there (Pic 5).
I carefully cut away a piece of wood equivalent to the size of an M6 screw nut, that will keep the nuts in place and will allow them to be attached without protruding and touching the tool (Pic 6)
I attach another support, this time a bit higher, I also use some screws to allow some margin when holding the tool (Pic 6, 7 &.
Step 6: Final Details: Hole Depth Adjuster
 5 More Images
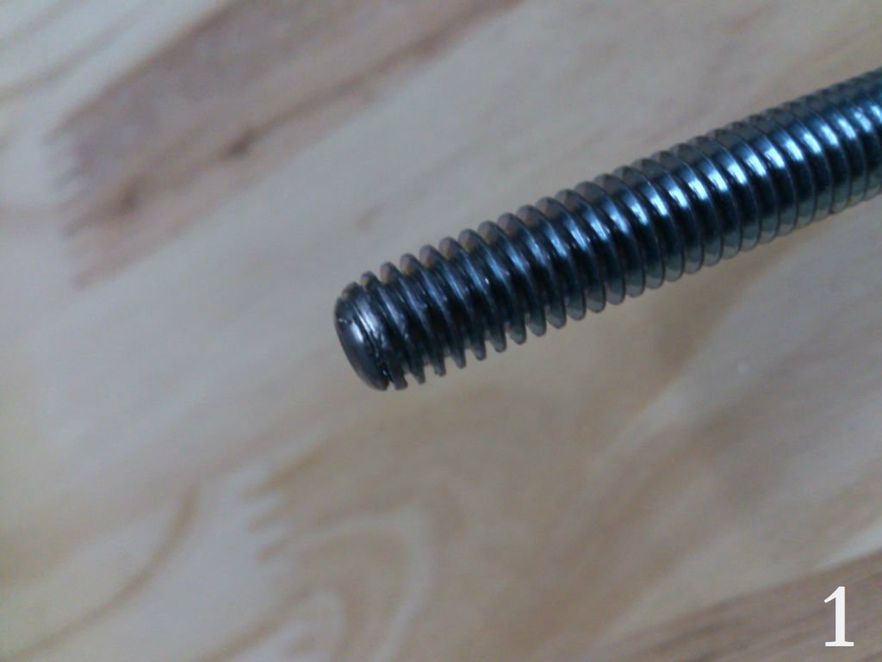
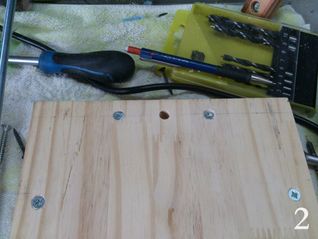
To be able to make holes at the same height we'll need some sort of adjustable stopper. I've used a 8mm (M threaded rod, I've cut it to a length of 50 Cm and I sanded an extreme to give it a round shape and to dull the thread a bit (Pic 1). Next I make a hole at the base (Pic 2), that hole must be big enough to let it rotate freely but not to be to loose (Pic 3).
Gluing a piece of slat to the top with a hole drilled through will keep the rod stable (Pics 4, 5 & 6)
With a small wood block a long screw/nut and a threaded tube I make a stopper (Pic 7). It will be touching the board, so when I twist the rod it goes up and down setting a limit for the tool with a lot of precission (Pic. I also added a small red knob to the rod to make it easier to turn.
Step 7: Final Details: Optional Improvements
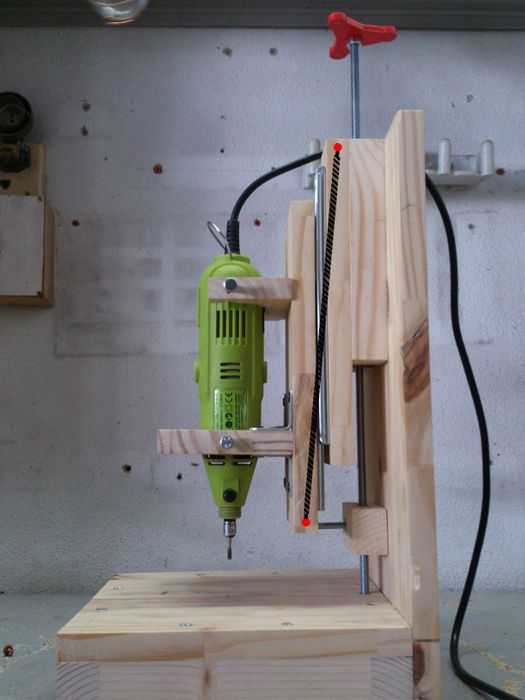
You can make an automatic regression mechanism by attaching some sortof spring or elastic bands to the parts depicted, but since I mostly use it for carving wood I personally haven't made it.
A handle could also be easily attached by attaching a piece of wood to the top of the guide.
Another interesting add-on would be some sort of clamps, like the ones used on CNCs, they could be easily made out of wood and could be screwed to the base with M6 screws to hold pieces tightly, although I don't find these clamps to be very practical when used on a drill press.
I've been also thinking about installing an LED powered by a couple of batteries to have a better illumination when drilling.
Step 8: What Can You Use It For?
 2 More Images
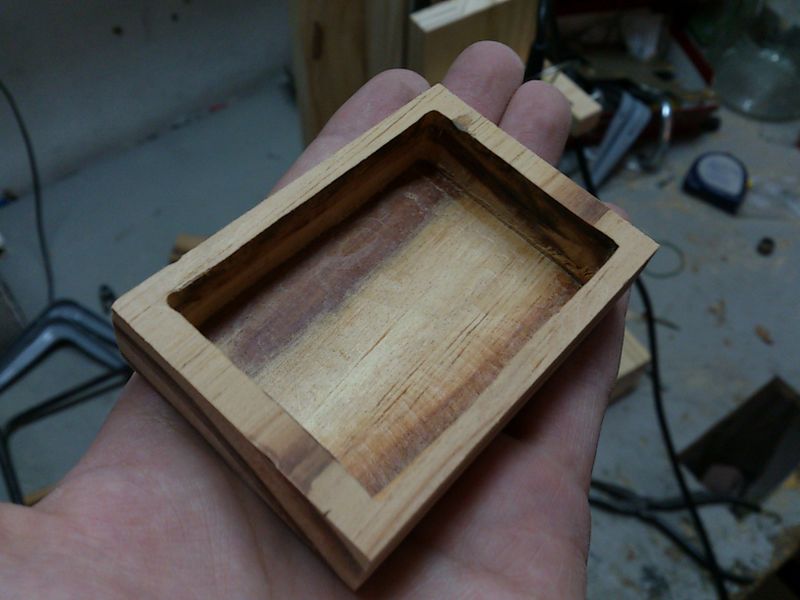
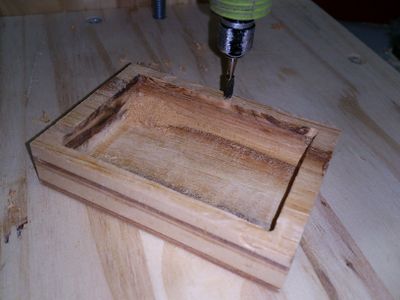
As I said, this tool is very useful to drill straight holes with a minimal effort, but combined with a high speed tool and a carving bit can be a great help to carve holes or to cut borders at the same height, as seen in the pictures.
Another interesting property is it can cut perfect squares out of a roughly square-shaped piece of wood for example.
As always, thanks for viewing, if you have any questions just let me know.
Drill Press for ~$20 : 8 Steps (with Pictures) - InstructablesIf you're gonna fight, fight like you're the third monkey on the ramp to Noah's Ark... and brother its starting to rain. Join our efforts to Secure America's Borders and End Illegal Immigration by Joining ALIPAC's E-Mail Alerts network (CLICK HERE)
-
06-13-2025, 08:10 AM #9818Senior Member
- Join Date
- Aug 2018
- Posts
- 97,485
Reviving a medical marvel: DIY penicillin trends enter risky territory
06/12/2025 // Willow Tohi // 500 Views
Tags: alternative medicine, badhealth, badmedicine, Censored Science, DIY, emergency medicine, healing, homemade antibiotics, homesteading, natural antiobiotics, natural cures, natural medicine, natural remdies, off grid, oxymel, penicillin, preparedness, prepper, prepping, remedies
- DIY penicillin sparks controversy amid resurgence in home remedies.
- Allergy risks highlight dangers of unregulated self-medication.
- Complex process involves multiple steps and specialized equipment.
- Ancient fungal use and modern antibiotic resistance drive interest.
- Oxymel offers safer, natural alternative in emergencies.
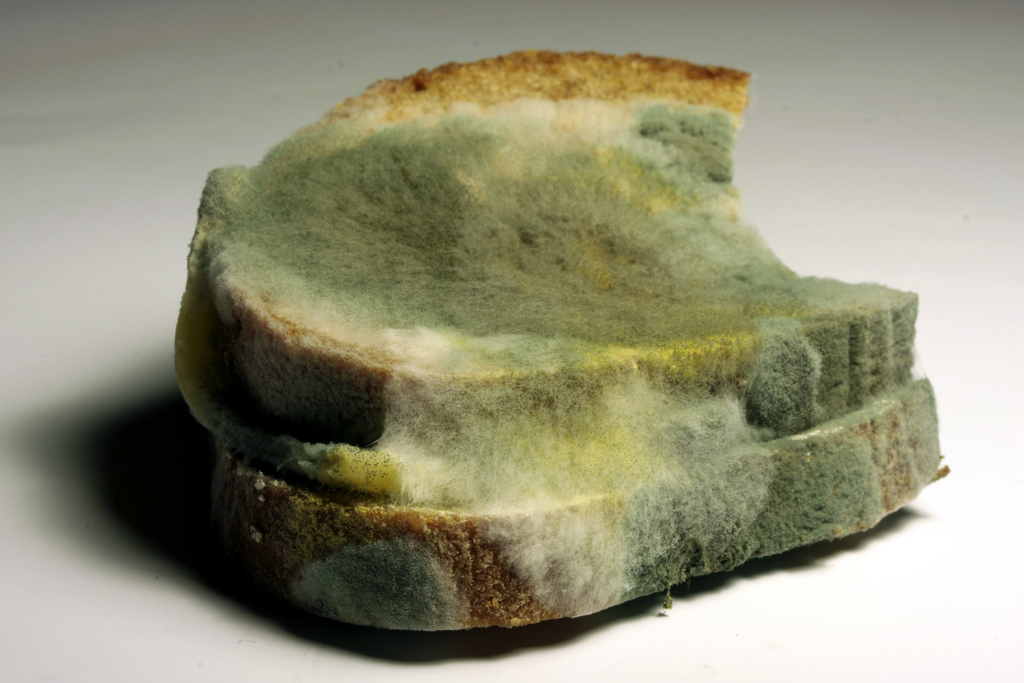
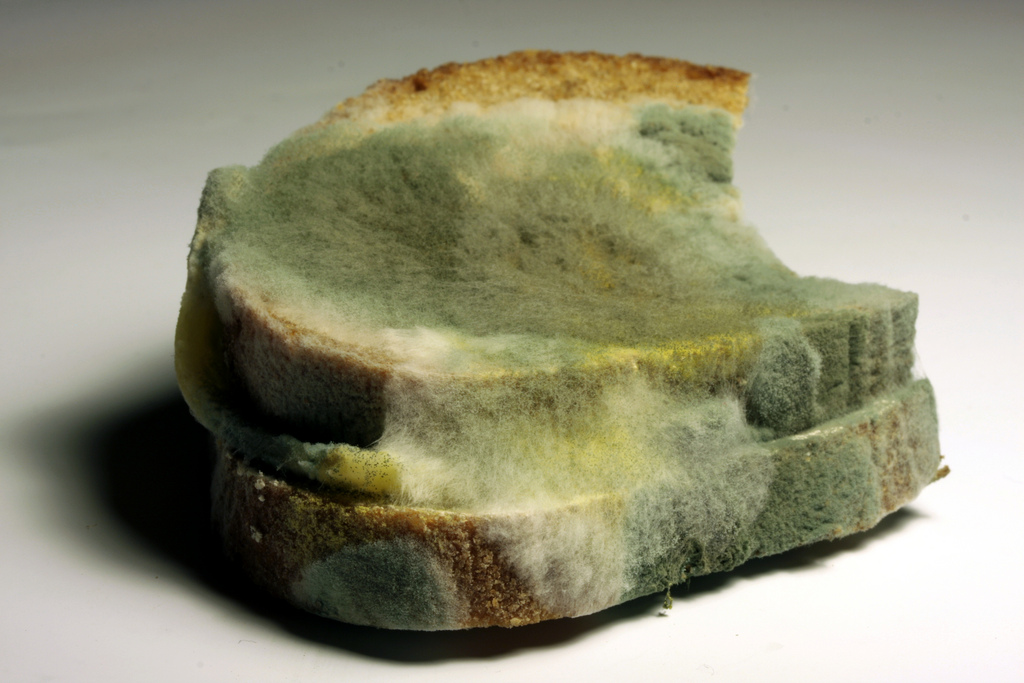
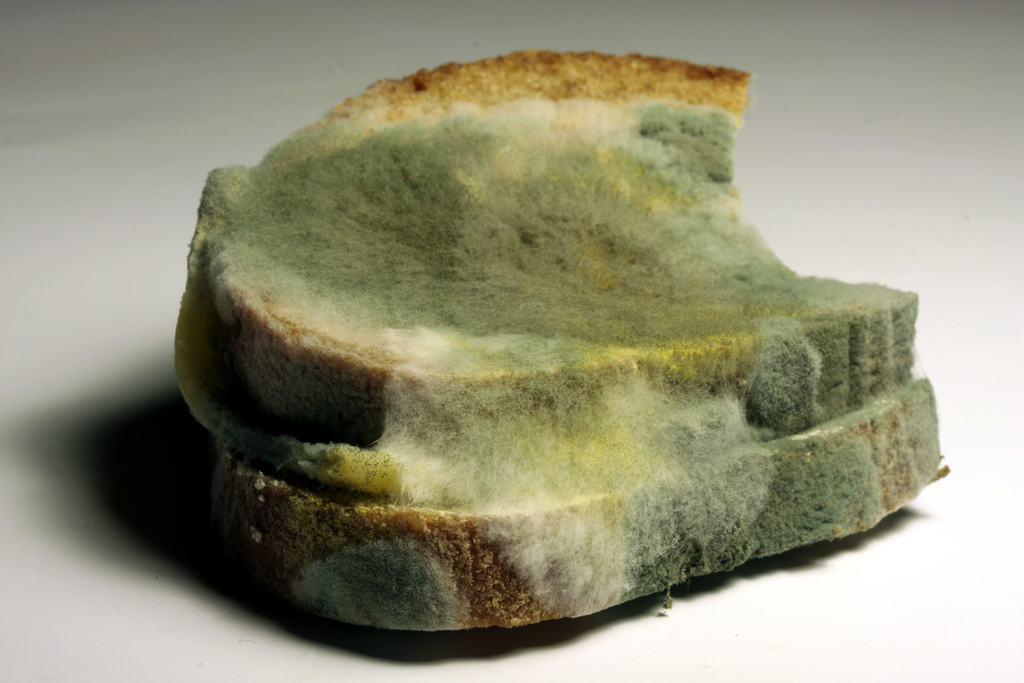
A growing number of preppers and natural health enthusiasts are attempting to produce penicillin at home, employing methods such as moldy bread to intricate fermentation processes. Despite its legacy as a life-saving antibiotic, penicillin’s resurgence in DIY guides has raised alarms among medical experts who emphasize its dangers, including severe allergic reactions, antibiotic resistance risks and the potential for contamination. As clinics caution against self-medication, a simpler alternative — oxymel, a medicinal honey-and-vinegar blend — has resurfaced as a safer, natural option.
The allure and risks of DIY penicillin
The quest to make penicillin at home traces its roots to the compound’s pivotal role in 20th-century medicine. Alexander Fleming’s 1928 discovery revolutionized infection treatment, yet its modern DIY revival highlights a fraught balance between self-reliance and health risks. Online guides, such as James Hershey Jr.’s method, tout simplicity: allowing bread to grow mold, then applying it directly to wounds or mixing into tea. However, unrefined mold mixes often contain harmful contaminants, and Susan Morrow, a natural health expert, warns that 10% of the population risks severe allergic reactions. “Penicillin can cause anaphylaxis, rashes, or gastrointestinal distress,” she stated in A Step-by-Step Guide to Making Your Own Penicillin at Home, “Regardless of your health status, this process is inherently risky.”
The stakes escalate when considering cross-contamination. Unsterilized equipment or improper isolation of penicillin strains could introduce deadly pathogens like Salmonella. Greek Prepper’s fermentation method, for instance, requires precise pH adjustments and ethyl acetate — a toxic solvent — to isolate pure penicillin, a task beyond most home kitchens. “This isn’t your grandmother’s homemade remedy,” says Morrow, citing cases where untrained attempts caused sepsis or further infection.
A high-stakes process: From bread mold to medical grade
Producing penicillin at home demands meticulous steps and specialized supplies. Preppers Are We’s detailed guide outlines seven stages, including culturing mold on potato broth and fermenting it in an Erlenmeyer flask — a setup replicating 1940s pharmaceutical labs. Key steps include:
- Isolation: Incubating mold on bread or citrus in a sealed container, then transferring spores to sterile dishes.
- Fermentation: Using nutrient-enriched broth to amplify the culture, with precise temperature and pH control.
- Extraction: Straining the mixture and using chemicals like hydrochloric acid to purify penicillin crystals — a process requiring lab-grade equipment.
Even if successfully isolated, natural penicillin is highly unstable. “You’d have to use it immediately, ideally through injection, which adds another layer of danger,” explains Hershey, noting that oral ingestion destroys it in stomach acid. The final yield — less than 100mg from a 100ml batch — may not even meet therapeutic thresholds, making it irrelevant for serious infections.
Penicillin’s past mirrors present concerns
The 1940s wartime rush to mass-produce penicillin offers stark parallels to today’s debates. Early batches were mired in contamination, claiming lives until rigorous sterilization and bottleneck fermentation improved standards. Antibiotic resistance was noted as early as 1940, now a global crisis. Researchers like Spain’s Laich, Fierro and Martin reveal another layer: penicillin naturally occurs in foods like corn and walnuts, exposing populations to the compound centuries before Fleming. This duality underscores both penicillin’s ubiquity and the complexity of harnessing it safely.
The oxymel alternative: Nature’s antibiotic
Amid DIY penicillin’s pitfalls, a simpler option emerges: oxymel, an ancient blend of honey, apple cider vinegar, turmeric and black pepper. Speir Outdoors’ recipe, requiring just five minutes to prepare, touts its anti-inflammatory and antimicrobial properties. Unlike raw penicillin, oxymel can be taken orally without decomposition, supports gut health and has no documented allergies. Its use traces to Roman-era remedies, proving efficacy across millennia.
“I always advise people to choose proven, accessible alternatives,” says Hershey, who acknowledges eliminating penicillin from wound management by simply applying raw honey. The blend’s accessibility and safety — coupled with minimal equipment needs — positions oxymel as a pragmatic choice for preppers and health advocates alike.
Between innovation and caution
The DIY penicillin movement reflects a broader desire for self-reliance in healthcare. Yet, its risks — amplified by the lack of sterilization and pharmacological knowledge among laypersons — outweigh its potential benefits. As antibiotic resistance grows, experts urge reliance on proven science and emergency preparedness strategies like oxymel. “Medicine evolves because professionals methodically test safer solutions,” stresses Morrow. For now, penicillin remains best left to laboratories, where controlled precision ensures its revolutionary power endangers no one but the germs.
Sources for this article include:
AllNewsPipeline.com
PreppersAreWe.wixsite.com
Reviving a medical marvel: DIY penicillin trends enter risky territory – NaturalNews.com
If you're gonna fight, fight like you're the third monkey on the ramp to Noah's Ark... and brother its starting to rain. Join our efforts to Secure America's Borders and End Illegal Immigration by Joining ALIPAC's E-Mail Alerts network (CLICK HERE)
-
06-13-2025, 08:18 AM #9819Senior Member
- Join Date
- Aug 2018
- Posts
- 97,485
Penicillin
penicillin – NaturalNews.com
 Survey finds that nearly one-third of Americans believe a vaccine for the Wuhan coronavirus already exists but is being withheld
April 27, 2020 - Posted by JD Heyes
(Natural News) Would the U.S. government withhold information about a treatment or a cure for a disease that is currently ravaging the country? You bet it would, and in fact, that’s very likely been happening for years — which explains why a health plurality of Americans think it may be happening again. According to The […]
in: Coronavirus, Current Events, Government, Health, Infectious Diseases, Medicine
 EMERGENCY MEDICINE skills: Creating your own penicillin at home
February 13, 2020 - Posted by Darnel Fernandez
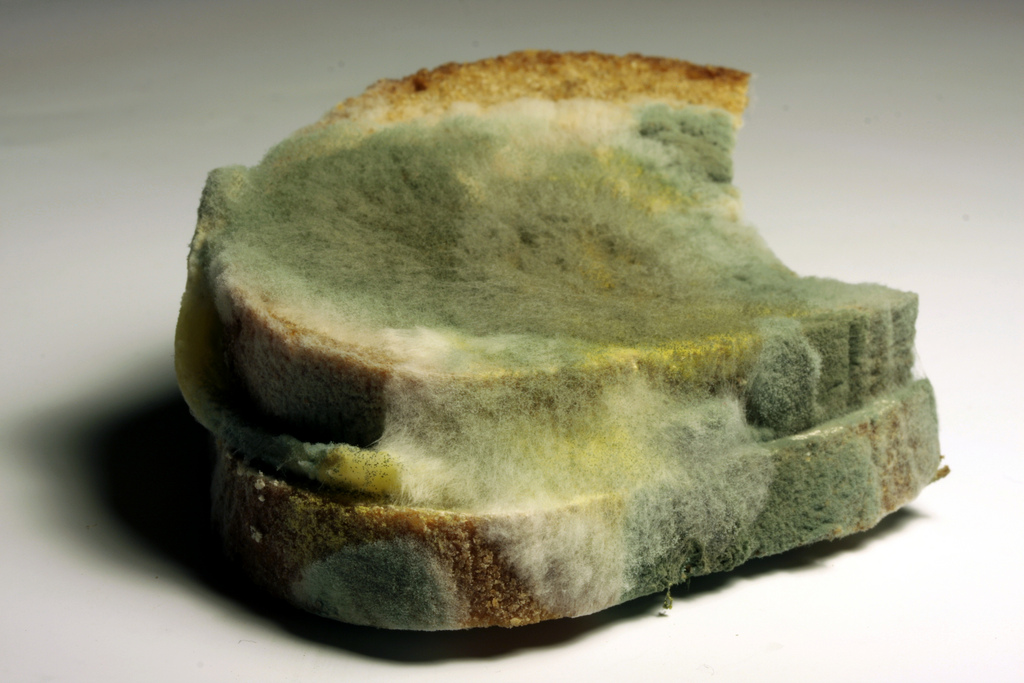
(Natural News) The discovery of penicillin was considered a landmark that changed the face of modern medicine. Penicillin refers to a group of powerful antibacterial drugs that target a wide variety of bacterial infections. While the overuse of antibiotics has been a growing problem in recent years, there is no denying the fact that there […]
in: Preparedness & survival, Prepping, Survival
 Neanderthals were mostly carnivores, new tooth analysis reveals
September 2, 2019 - Posted by Ralph Flores
(Natural News) “Back to the basics” is a buzzword phrase that’s been getting a lot of traction these days, especially when it comes to eating habits. Those who lived in ancient times, of course, did not eat processed food, and they lived off what they could grow (or hunt). For those interested in understanding what […]
in: Diets, Science
 How do you deal with dental abscesses in a SHTF situation?
August 21, 2019 - Posted by Edsel Cook
(Natural News) Tooth abscesses can become deadly if you don’t have access to specialized dental care. Preppers and homesteaders must learn about the warning signs of a dental abscess, how to prevent it, and how to treat this dental emergency when it happens off-grid. An infection produces pus, which accumulates into an abscess. In tooth infections, the pus pools […]
in: Health, holistic dentistry, holistic dentistry, Homesteading, oral health, Preparedness & survival, Prepping, Survival
 Pharma concoction goes awry: Man’s medication nearly kills woman who gave him oral sex
March 16, 2019 - Posted by Ethan Huff
(Natural News) A woman from Spain recently had to be admitted to the hospital after she suffered a severe case of anaphylactic shock resulting from an unusual sexual encounter involving pharmaceutical drugs to which she is apparently extremely allergic. According to reports, the woman reacted to a drug known as amoxicillin-clavulanic acid, which is a […]
in: Antibiotics, Big Pharma, Biological agents and warfare, Birth defects, Brain function, Children's health, Current Events, Diseases, Disorders, Drug Addiction, Drugs, Education, Harmful medicine, Health, Heavy metals & toxic elements, Infant's health, Learning, Medicine, Men's health, Mental Health, Pharmaceutical Drug Addiction, Pregnancy, Reproduction, Science, Women's health
 How to make your own penicillin… just in case
January 3, 2019 - Posted by Isabelle Z.
(Natural News) The discovery of penicillin is considered a landmark moment in modern medicine. Although antibiotic overuse is a very serious problem, there is no denying that there are situations where antibiotics like penicillin can save your life. But what happens when you don’t have the luxury of heading to a hospital to get it? […]
in: Antibiotics, Culture & Society, Health, Preparedness & survival, Prepping, Survival
 Use of penicillin early in life, even in low doses, affects the gut microbiome, contributing to brain inflammation and changes in behavior
November 18, 2018 - Posted by Rita Winters
(Natural News) It is truly unavoidable to catch a cold or contract a disease, especially with today’s lifestyle trends and medical misinformation. A lot of the medicine we use to treat our health conditions may actually cause more harm than good. A St. Joseph’s Healthcare Hamilton and McMaster University joint study found that low doses […]
in: Brain function, Harmful medicine, Health, Medicine
 Fungal strains found naturally in the soil, including a relative of penicillin, could be an alternative to herbicides
September 21, 2018 - Posted by Edsel Cook
(Natural News) Penicillium molds have been used to ripen cheese and produce the life-saving antibiotic penicillin. Now, a member of the large and common genus of fungi could serve as a natural alternative to synthetic herbicides. The discovery was made by Nigerian researchers from the University of Ilorin, who were looking for local microbes that could reduce the need for chemical weed-killers that polluted […]
in: Agriculture, Environment, Plants
 Bowel cancer risk skyrockets after taking antibiotics for just two weeks
April 9, 2017 - Posted by Earl Garcia
(Natural News) Taking antibiotics may increase your risk of developing bowel cancer by up to 73 percent, according to a recent study. Bowel cancer, more commonly known as colorectal cancer, is a type of cancer that starts in the colon or rectum. It was recognized as the third most common cancer in the U.S. Data from […]
If you're gonna fight, fight like you're the third monkey on the ramp to Noah's Ark... and brother its starting to rain. Join our efforts to Secure America's Borders and End Illegal Immigration by Joining ALIPAC's E-Mail Alerts network (CLICK HERE)
-
06-14-2025, 09:35 PM #9820Senior Member
- Join Date
- Aug 2018
- Posts
- 97,485
If you're gonna fight, fight like you're the third monkey on the ramp to Noah's Ark... and brother its starting to rain. Join our efforts to Secure America's Borders and End Illegal Immigration by Joining ALIPAC's E-Mail Alerts network (CLICK HERE)


 Reply With Quote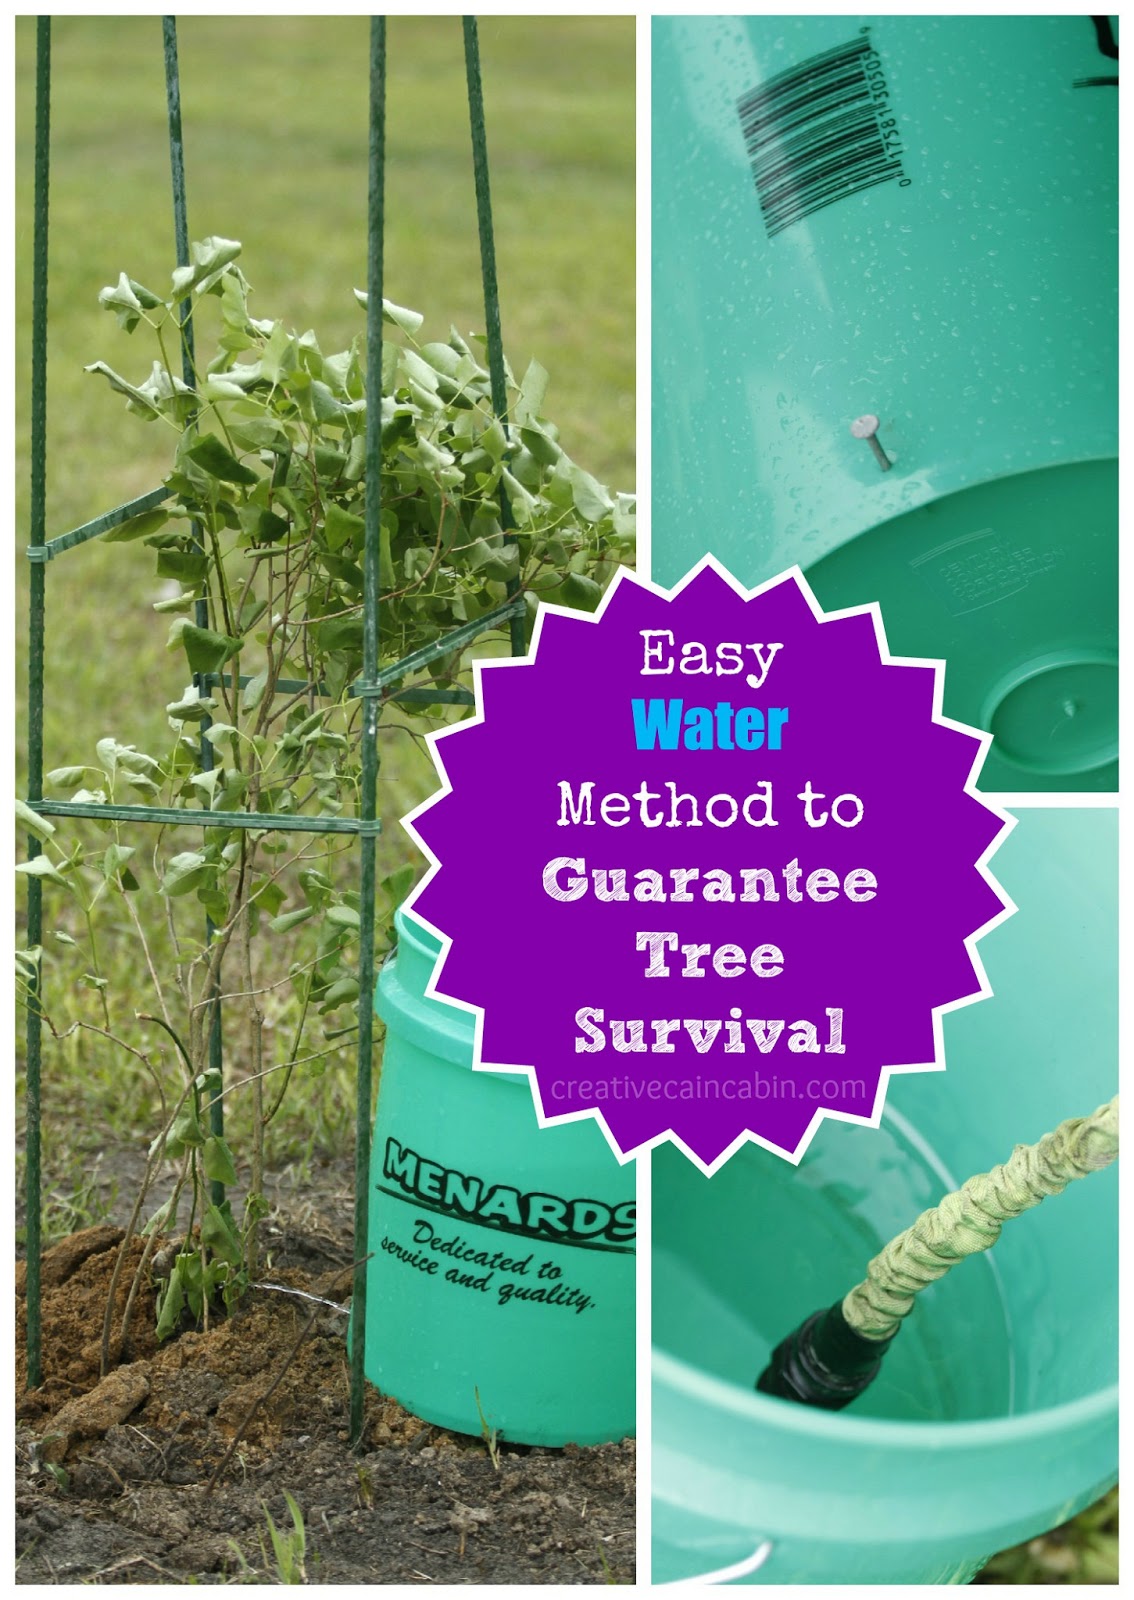


Argentina’s Milei tells UN it’s a ‘useless organization’ full of...
09-23-2026, 03:49 PM in General Discussion