

Results 9,941 to 9,950 of 11786
 226Likes
LinkBacks (?)
-
12-26-2016, 11:32 AM
-
09-02-2016, 05:39 PM
-
whole garden made with pallets!! Love it!! | Pallets | Pinterest | Pallets, Pallets Garden and Wooden Pallets
Refback This thread03-06-2016, 11:30 AM -
10-20-2015, 05:29 PM
-
06-12-2015, 08:00 PM
-
02-26-2015, 01:58 PM
-
01-05-2015, 04:13 PM
-
12-19-2014, 10:19 AM
-
EMERGENCY: HUGE FEMA PANDEMIC EXERCISE IN USA IN NOVEMBER, INTERNET SHUT DOWN PART OF EXERCISE | Prepare4Survival
Refback This thread12-03-2014, 10:39 PM -
Off Grid World ? Ugly Duckling Shipping Container Home Built by Artist Is a Beautiful Swan on the Inside
Refback This thread11-25-2014, 03:10 PM -
11-17-2014, 10:59 PM
-
11-13-2014, 11:18 AM
-
11-09-2014, 02:54 PM
-
10-28-2014, 11:38 PM
-
10-26-2014, 05:54 AM
-
10-16-2014, 11:28 AM
-
10-03-2014, 01:25 PM
-
10-02-2014, 09:16 PM
-
09-26-2014, 07:00 PM
-
09-26-2014, 01:56 PM
-
09-19-2014, 04:46 PM
-
09-13-2014, 05:49 AM
-
09-05-2014, 01:52 PM
-
09-01-2014, 09:39 AM
-
08-30-2014, 06:29 PM
-
08-10-2014, 06:29 AM
-
08-04-2014, 05:07 PM
-
07-23-2014, 11:14 AM
-
New Evidence on Expiration Dates | Medical Preparedness | Doom and Bloom (TM) | Doom and Bloom (TM)
Refback This thread07-22-2014, 10:10 AM -
07-18-2014, 08:37 PM
-
07-15-2014, 04:57 PM
-
07-11-2014, 01:40 AM
-
04-22-2014, 11:14 AM
-
04-18-2014, 12:57 PM
-
04-18-2014, 10:10 AM
-
04-14-2014, 12:18 AM
-
04-12-2014, 02:28 AM
-
03-02-2014, 11:43 PM
-
12-24-2013, 11:59 PM
-
12-07-2013, 11:04 PM
-
kitchen | Cob
Refback This thread11-25-2013, 03:24 PM -
10-22-2013, 10:25 PM
-
Apple Pie Braid | Sweets
Refback This thread09-26-2013, 07:58 AM -
09-02-2013, 04:44 PM
-
5 Reasons Why You May have to Bug Out Even Though You Don’t Want to | The Apartment Prepper's Blog
Refback This thread08-23-2013, 03:20 PM -
06-27-2013, 06:30 AM
-
06-23-2013, 08:11 PM
-
06-17-2013, 11:21 PM
-
05-24-2013, 05:06 PM
-
To Eat / BASIC LIST / SUGGESTED ITEMS FOR LONG TERM SURVIVAL - Page 275 - ALIPAC
Refback This thread05-01-2013, 03:49 AM
Thread Information
Users Browsing this Thread
There are currently 1 users browsing this thread. (0 members and 1 guests)
 LinkBack URL
 About LinkBacks
-
06-22-2025, 05:41 AM #9941Senior Member


- Join Date
- Aug 2018
- Posts
- 93,755
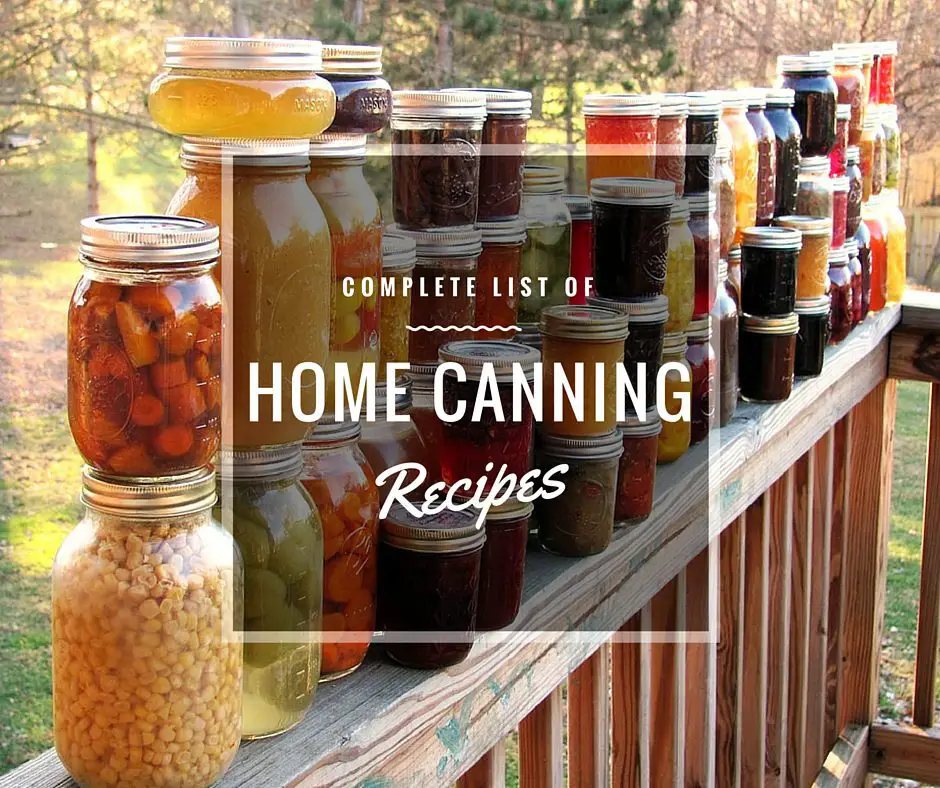
Complete List of Home Canning Recipes
1 Comment
These canning recipes will not only keep you busy any time of the year but they will keep your grocery bills low too.
Canning any time of the year is just wonderful. If you have an abundance of crops, fruits and veggies to eat or get rid of, canning is perfect to do just that and ensure you have food for the uncertain times.
Bookmark this website and you can have it handy any time you want to have a little look at what to can depending on what season you are in.
Complete List of Home Canning Recipes
By Author SHTFPreparedness
Posted on Last updated: May 18, 2024
Categories
Recipes
Complete List of Home Canning Recipes -SHTFPreparednessIf you're gonna fight, fight like you're the third monkey on the ramp to Noah's Ark... and brother its starting to rain. Join our efforts to Secure America's Borders and End Illegal Immigration by Joining ALIPAC's E-Mail Alerts network (CLICK HERE)
-
06-22-2025, 06:04 AM #9942Senior Member
- Join Date
- Aug 2018
- Posts
- 93,755

- Canning Methods
- Canning Book
- Free Canning Quick Start
- Online Canning Classes
Strawberry Rhubarb Jam Recipe Easy Water Bath Canning
Apple Butter Recipe for Canning
Beef Stew for Canning: Recipe and tips.
Pickled Three Bean Salad Canning Recipe, Water Bath or Steam ...
Candied Jalapeños Recipe for Canning
Canning Applesauce Recipe
Home » Canning
Home Canning Recipes for Beginners
By Sharon Peterson
March 11, 2024
This page may contain affiliate links. More Information.
This is an index list of all home canning recipes and canning instruction on Simply Canning. Safe, easy step by step recipe tutorials, food preservation articles.
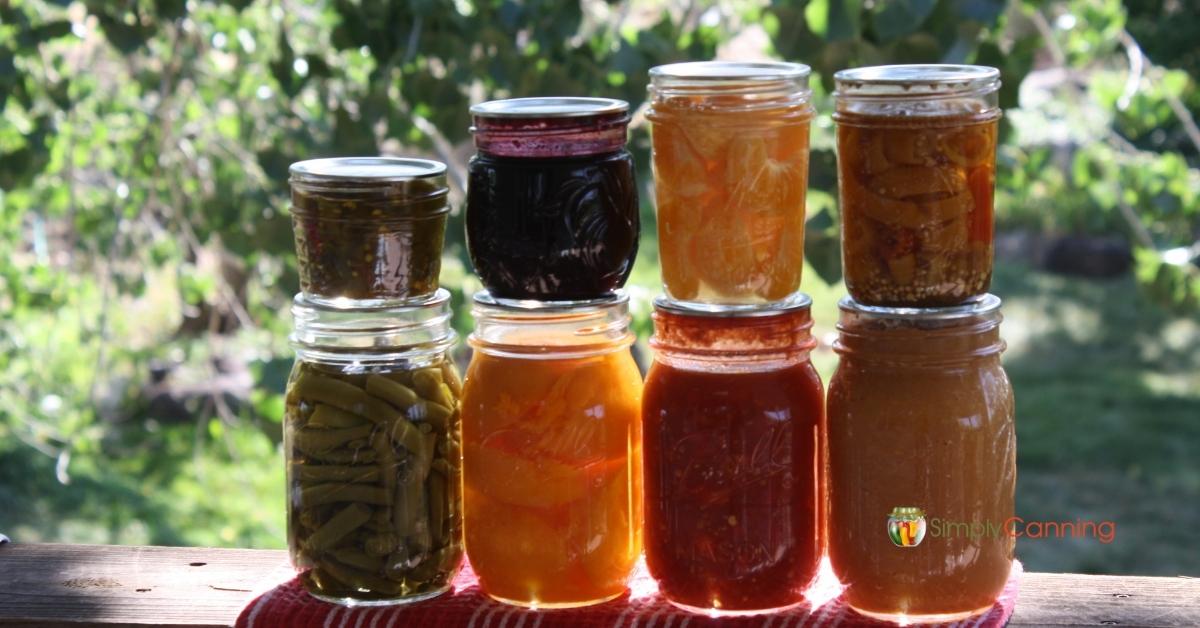 Table of Contents
- Canning Vegetables
- Tomatoes and Tomato Products
- Canning Fruit and Fruit Products
- Jam, Jelly and Other Sweets
- Canning Meat
- Pickles and Condiments
- More Canning Information and Tutorials
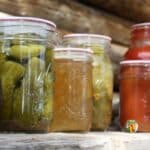
- What is siphoning in home canning? Why does liquid loss happen?
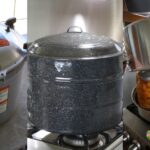
- Which Canning Methods Should I Choose?
- Canning Food for Beginners: How to Can Safely and Confidently
- Canning Terms and Definitions
- Canning at High Altitude. Adjustments must be made.
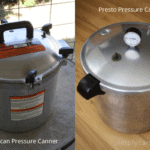
- How to Use a Pressure Canner
- Water Bath Canning ; Beginner Friendly Tips and Instruction
- How to Use a Steam Canner
- Canning with an Instant Pot
- Presto Electric Pressure Canner Review
- Canning on a Glass Top Stove: Will your stove work?
- Small Batch Canning: Scale down recipes & maintain safety.
- What is Botulism? Why Im not afraid.
- What is Flat Sour in Home Canning? Causes and Prevention.
- Canning Safety Overkill?
- Canning Mistakes: What Should You Do?
- Misunderstandings in Canning: A Microbiologists Advice
- Is water bath canning green beans safe?
- How to Can Tomatoes: Adding Lemon Juice and Other Adaptations.
- Re-canning food from #10 Cans
- Home Canning and boiling your food before serving. Is it needed?
- How to Sterilize Canning Jars
- Avoid Spoiled Food
- How To Blanch Food For Freezing And Dehydrating
- Preparing Canned Food for Storage
- Frequently Asked Questions
Canning Vegetables
Tomatoes and Tomato Products
- Avoid Common Tomato Canning Issues
- Canning Tomatoes: Pressure Canning or Water Bath.
- Making Tomato Juice for Canning
- Spaghetti Sauce
- Spaghetti Sauce(meatless)
- Stewed Tomatoes
- Tomato Juice in a Pressure Canner
- Tomato Juice in a Water Bath
- Tomato Vegetable Juice Recipe
- Tomatoes Whole or Halved
- Unseasoned Tomato Sauce
- Zucchini in Tomato Sauce
Canning Fruit and Fruit Products
- Apples
- Applesauce
- Apple Butter
- Apple Chutney Recipe
- Apple Pie Filling
- Apricots
- Asian Pears
- Canning Berries
- Canning Cherries
- Canning Fruits
- Canning Guava Fruit
- Canning Peaches
- Canning Pears
- Cherry Wedding Theme Ideas
- Canning with Splenda
- Cherry Pie Filling
- Plum Sauce Recipe for Canning
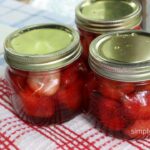
- Strawberries
- Strawberry Lemonade Concentrate
- Zucchini in Pineapple Juice
- How to Can Homemade Cranberry Juice
Jam, Jelly and Other Sweets
- Dandelion Jelly
- Spiced Peach Jam
- Cherry Jam
- Strawberry Jam
- Strawberry Rhubarb Jam
- Orange Rhubarb Jam
- Grape Jam
- Apricot Jam Recipe
- Peach Butter
- Apple Butter
- Pear Butter
- Orange Marmalade
Canning Meat
- Beef or Venison Ground
- Beef or Venison-hot pack
- Beef or Venison -raw pack
- Chicken
- Fish
- Homemade Chicken Broth
- Homemade Chicken Soup
- Meat
- Smoked Fish
Pickles and Condiments
- Dilly Beans
- Pickled Carrots
- Pickled Beets
- Pickled Green Tomatoes
- Pickled Peppers
- Pickled Peppers Rings
- Sweet Pickle Relish
- Bread and Butter Pickles
- Homemade Ketchup
- Pickling Spice Recipe
- Simple Pickled Eggs Recipe
- Sweet Zucchini Relish Recipe
More Canning Information and Tutorials
Basic Canning Information
What is siphoning in home canning? Why does liquid loss happen?
Number one Canning Question ever asked so I will list it first. Find the answer here.
Learn more about it here

Which Canning Methods Should I Choose?
Do I choose a water bath canner or a pressure canner? And why? That is a common question ~ and a good one. Learn how to choose the right method for your project.
Learn about choosing the right method
Canning Food for Beginners: How to Can Safely and Confidently
Before you fill your first jar, or use your home canning recipes from your great grandmother, it is important to understand what you are doing. Decisions are much easier when you know why.
Read more canning science here
Canning Terms and Definitions
Index of canning terms and meanings for home canners. From basic terms like jar and lid to more advanced concepts like headspace and venting time, weve got you covered.
Find an index of common canning terminology

Canning at High Altitude. Adjustments must be made.
Home Canning at high altitude above 1,000 feet requires careful adjustments to your recipe. Changes need to be made for high-altitude water bath canning, steam canning, and pressure canning.
Learn about adjusting for your altitude

How to Use a Pressure Canner
Pressure canning is for canning vegetables and meats. These are low-acid foods and need the high heat that a pressure canner provides. Don't let it intimidate you! You can do this.
Learn how to use a pressure canner
Water Bath Canning ; Beginner Friendly Tips and Instruction
Water bath canning is the perfect place for a beginning canner to start. By the end of this article youll have the confidence to pull our your canner and start with some simple projects.
Learn how to use a water bath canner
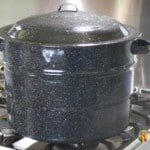
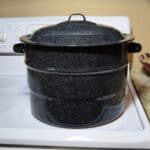
How to Use a Steam Canner
Steam canners are similar to water-bath canners. They are both used to process high acid home-canned food. However, there are some definite differences not only in how they work. These are general instructions on how to use a steam canner; be sure to check your canner's manual for more details.
Learn how to use a steam canner

Special Canning Methods
Canning with an Instant Pot
I totally understand that pressure canners can be intimidating. And I also understand why people would want to use an instant pot for canning. Pressure Canning with an Instant Pot. Can you?? Or cant you?? Why?
Learn why you shouldnt can with an InstantPot

Presto Electric Pressure Canner Review
So many many questions about using an electric pressure canner. Is it safe? What about the one from Presto? Learn about the safety aspects and what I see coming from extension services and the NCFHFP. You might be pleased to hear what I found.
Learn about the electric pressure canner

Canning on a Glass Top Stove: Will your stove work?
I realized that I really needed to address the issue of canning on a glass top stove because Im asked about it a LOT! So is it safe? Yes and no. Its complicated.
See if you can trust your glass top stove for canning
Small Batch Canning: Scale down recipes & maintain safety.
Discover small batch canning. Perfect for solo canners, cooking for two, or thoughtful gifts. Scale down recipes & maintain safety.
Learn how to reduce recipes for small batch canning
Safety Concerns
What is Botulism? Why Im not afraid.
This page may be scary to some people. I truly dont want to scare you! This is actually a canning risk that is easily avoided by following safe home canning tested procedures and the proper canning methods.
Learn how to avoid botulism

What is Flat Sour in Home Canning? Causes and Prevention.
Ever heard of flat sour? It's that unappealing off-flavor think a disagreeably sour or bitter taste of your canned goods.
Learn how to avoid flat sour

Canning Safety Overkill?
I want to emphasize that there is a lot of wisdom in SOME of the old ways Im not saying your grandmother or aunt or whoever was crazy. Absolutely not! Many old-fashioned skills are fading away, and that is so very sad. Some of the old ways can be improved upon. Not discarded, but made better.
Are we making a big fuss for nothing?

Canning Mistakes: What Should You Do?
In this article, well address common canning errors and guide you on how to salvage your precious jars, emphasizing safety and quality. By the end, youll confidently rectify canning mishaps, with an emphasis on safety and saving your hard work.
Learn how to fix canning mistakes

Misunderstandings in Canning: A Microbiologists Advice
This is a guest post about misunderstandings in canning by reader Freda Bradely. She brings up some good points, including some of the potential dangers associated with canning using the old methods. I thought Id share it with you and Freda agreed.
Read more here

Is water bath canning green beans safe?
In this article, well discuss why water bath canning plain green beans is not recommended. But dont click away just yet. Well also discuss how your green beans CAN be preserved when you dont have a pressure canner. So all is good!
Heres what we think of water bath canning green beans

How to Can Tomatoes: Adding Lemon Juice and Other Adaptations.
How to Can Tomatoes the way want to. Information on adding lemon juice or other acidification, safe adaptations, seasonings, canning methods and more.
Learn how (& why) to acidify tomatoes

Re-canning food from #10 Cans
I often get questions from people who are asking about re-canning store-purchased foods. Especially when it is purchased in those large, #10-size cans. But is it a good idea? Is it safe? Is it really economical?
Can you save money by re-canning food? Learn more.

General Home Canning Information
Home Canning and boiling your food before serving. Is it needed?
This article is not about how to process your foods during the home canning process. It is rather about the choice of boiling the food before you serve it. Some say yes, you need to boil your meats and veggies prior to serving them some say you dont.
Answer To boil, or not to boil

How to Sterilize Canning Jars
Did you know that sterilizing jars for home canning is not always needed? You DO need to start with clean jars, so yes do wash them, either in a dishwasher or by hand with hot, soapy water and a clear water rinse. If you need to sterilize your jars, heres how.
Learn how & when to sterilize canning jars

Avoid Spoiled Food
Do you know how to recognize spoiled food? Sometimes it is obvious sometimes not.
Learn how to avoid different types of spoilage

How To Blanch Food For Freezing And Dehydrating
How blanching food makes it easier to freeze and dehydrate it. Includes step-by-step instructions for steam blanching and boiling water blanch. Information on microwave blanching and printable blanching time charts.
Learn how to blanch food

Preparing Canned Food for Storage
What do you need to know about preparing canned food for storage? Here are some tips.
Learn how to store home canned food
Frequently Asked Questions
What are the three ways of canning?Pressure Canning, Water Bath Canning, and Steam Canning are the 3 ways of canning. You can read more about how to choose the correct canning method here.
What is the easiest thing to can for a beginner.For beginners, jams are often recommended however, I disagree. Getting a nice set on jam can be tricky sometimes. It is perfectly safe and good to star with jam if you want! If you do choose a recipe with added pectin to make it super beginner friendly.
But honestly something like homemade applesauce is even easier. Or plain canned apples.
If you are just beginning and want to jump into pressure canning, green beans are super easy.
What are the best foods for canning.The best thing to can is food you have available that also has tested instructions from the National Center for Home Food Preservation. You can really start with many foods. Just remember the food that comes out of your jar reflect the ingredients that went in. Canning does not fix bad food. Choose fresh ripe produce to the the best flavors for your dinner table.
Does the USDA approve canners?The USDA does not approve specific canners, but it does provide guidelines and recommendations for safe canning practices, as well as lists of approved canning equipment. You should choose a canner that meets these guidelines and is suited to the type of canning youll be doing, whether water bath or pressure canning.
Here is more on Pressure Canners
Here is more on Water Bath Canners
AND here is more on Steam Canners. (If youve never steam canned you should check it out. It is a safe tested substitute for waterbath canning.)
Post navigation
Previous
Home Canning Questions Canning Chat
Next
Home Canning and boiling your food before serving. Is it needed?
Expand Your Pantry

Chokecherry Jelly Recipe; low sugar recipe
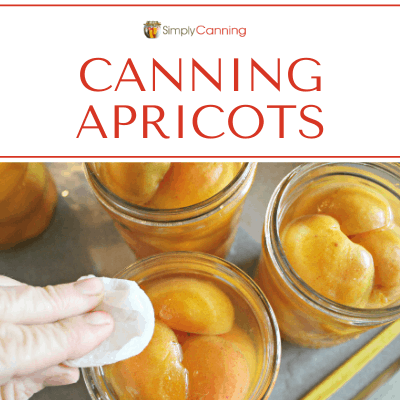
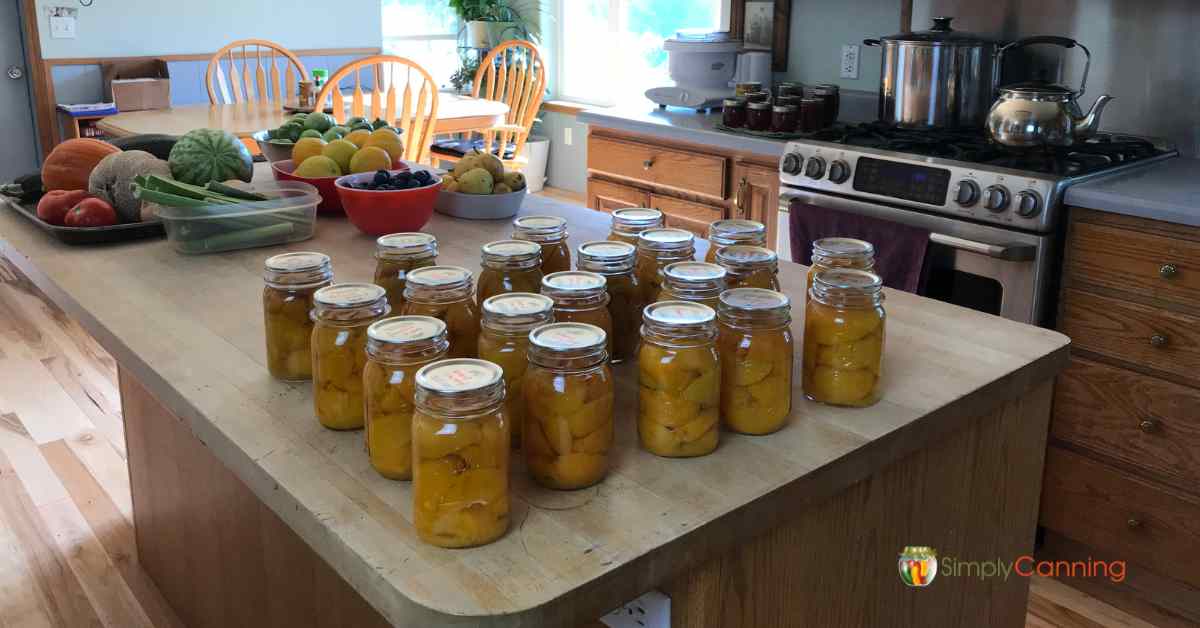
Canning Apricots
Canning Food Preservation Day
Superb Canning Lids Review
Canning Pinto Beans FAQs
Home Canning and boiling your food before serving. Is it needed?
0 Comments

About Sharon
I am Sharon Peterson author of the Simply Canning Guide and a dedicated expert in food preservation. Through my Simply Canning School, I teach practical, step-by-step methods to help others confidently preserve their own food at home.
Search

FTC Disclosure: If you make a purchase via a link on this site, I may receive a sheadmall commission on the transaction
Home Canning Recipes for Beginners. Safe, easy step by step.
If you're gonna fight, fight like you're the third monkey on the ramp to Noah's Ark... and brother its starting to rain. Join our efforts to Secure America's Borders and End Illegal Immigration by Joining ALIPAC's E-Mail Alerts network (CLICK HERE)
-
06-22-2025, 06:26 AM #9943Senior Member
- Join Date
- Aug 2018
- Posts
- 93,755
 Projects
Contests
Teachers
Log In
Sign Up
Build Yourself a Portable Home - a Mongolian Yurt
By davidbuzz in Outside Camping
1,118,672
2,489
271Featured
Save PDF
Introduction: Build Yourself a Portable Home - a Mongolian Yurt


Yurt/Gher Construction 101
A guide to Building Yurts...or more specifically, how I built mine!
Based on Knowledge Gained from "Doing it Myself", and reading about it on-line.
I've now built three yurts, for myself and friends, and we go camping in Luxury in these a few times a year.
If you like the outdoors, but you hate having to crawl around in pokey little tents then this one's for you!
We sleep two of us in luxury in this tent, in a full queen-sized bed! Of course, sleeping on the floor, like a plastic tent, you could probably sleep 20 people, easily!.
We have dedicated hanging space for our clothes so they don't crumple or anything, and lockable boxes for our belongings (or a lock on the door works too!)
When we invite other camping-inclined friends over for a party in our tent, we can confortably fit 15-20 people in, sitting around on cushions and lounging on the bed and on the rugs on the floor... now that's what I can a party tent!
If you like pictures, please be sure to have a look at step 9 - it's got over 50 assembly photos on that step alone !
Step 1: Overview of the Parts and Process.!


I'm going to cut right to the chase, and assume you know the following (in principle):
1) What a yurt is, and what it's made from.
2) How all the components should look when together.
If you've ever seen a yurt in the flesh, or photo's, or read a bit about them, that's enough.
As you can see from the photo/s, there are a few major components, so I'm going to write about each of these in turn, with some background info, and how to make them, and after that I'll show you how it all comes together for the assembly!
- Dimensions and background.
- Timber Components
- wall
- roof
- door.
- Metal Components
- roof hub
- bolts, pins, pegs.
- canvas components
- wall
- roof
- roof cap
- Assembly!
below are a few sample pictures of some components, just for intereste sake:
Step 2: Dimensions and Background
Over all DImensions:
Tent Diameter: approx 15' ( 5 meters) across.
Tent Height: approx 10' (3 meters) in the centre, and 5'6" ( 1.6m) at the edges.
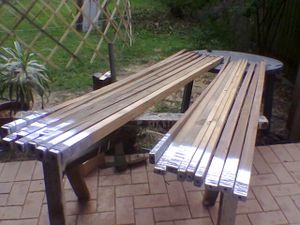
My Yurt Components (A reference guide for later) :
Wall Timbers: 8'(2400mm)long x 6mmx35mm Slats (see below) Quantity: 70ish
Wall Bolts: 1" or 1&1/2" long x 1/4(6mm) bolts Quantity: almost 300
Main Roof Supports: 8'(2400mm) x 45mmx35mm Beams Quantity: 8
Secondary Roof Supports: 8'(2400mm) x 45mmx16mm Beams Quantity: 8
All roof supports and wall slats are cut-down from 90x35 F8 or F12 pine framing timber - see below for details.
Roof 'HUB': Constructed from metal (see later steps)
Wall Canvas: 8oz canvas - preferably "proofed", but I used untreated and unbleached canvas and treated it myself (see details in later steps)
Roof Canvas: 12oz canvas - MUST be "proofed" (water proofed, and anti-mound treated) ...don't use 8oz or you'll regret it. If you can find a really strong and properly treated 10oz canvas(I couldn't), then that will probably do, but it might sag a little.
UNRELATED ASIDE: If I was going strictly "traditional" I wouldn't be using zinc plated bolts
(or any bolts), I'd be lashing saplings together not using machine-sawn timber, I'd be using
natural felt made from sheep and yak fur mixed and pressed with oils (linseed and boiled
animal fats) not water proofed and anti-mould treated canvas. I wouldn't have a tarpaulin on
the floor, it would be dirt, and there would be a rock-surrounded fire-place inside the tent
for warmth (and smoke). The door would always point south, the north inside wall would have
a religious idol/importance. The men and visitors would always sit/sleep on the west, the
women and children on the east, you would always stop for a meal when passing, you would
always ask 'How are you?' '..And your family?' '..And your flock is fat and well?' (and the
answer would always be yes even if it's not true) I'm not THAT anal about "traditional"
form nor am I a "historical" nazi.
Step 3: Timber Components - the Wall


 3 More Images
How I decided on the size:
Some designs I saw specified 1&1/2"x1/4" OR 1"x1" OR 1&1/5"x1/2" sizes.
I figured that the smallest size would be lighter and would be strong enough if I had the slats
"overlap" enough, and I saw at least 3 sets of plans that used 1/4" thick slats, so I used
that size.
As it turns out, the flexibility of the thin slats is really good for portability as it allows the yurt wall to be rolled-up rather than split into sections and layed out flat.
I thnk 5-6mm is OK, but only if your timber is not prone to breaking, and has natural flexibility in it. Other timber batches do require 7-8mm. In all three tents that I've made, I've always used pine, because it's easily available, and cheap, but there are differing qualities, and using the lowest quality pine (once, in my second tent) did result in more damage occuring, more easily, so I prefer the higher grade/s now.
The extra 2mm might not sound like much, but it'll make a big difference while still giving
the flexibility...or you could leave it that thin and use a slightly harder timber than pine
(eg meranti)...pine is probably as soft as it comes, so anything comercially available will
be stronger than pine. If you don't have pine locally, use whayever softwwood it is that your house frames are normally made out of.
What size I ended up using:
I used approx 6mmx35mm (1/4"x1&1/2") cut from 90x35mm pine construction timber.
Using a "thin kerf" saw blade in a standard circular power saw I was able to cut 9 or 10 slats from
each 90x35 length, so I cut up 8 lengths into about 80 slats, and this gave me some spares
to allow for the more than occassional knot in the timber which weakened the slat and/or
caused it to snap. Don't throw out broken slats as these are used around the door where
the slats must be shorter.
The structure is quite flexible with such thin slats ..it's quote strong enough tho, so if you are after a LIGHT and easy to carry wall structure then go for 6mm, a reasonably sized guy (me!) can easily carry my entire wall structure when it's rolled up into one 8' long 300mm across cylinder.
I've seen other designs that said when they rolled their walls up they rolled up to 2' (600mm) across, so either mine is more flexible/lighter or I rolled it tighter, or both.
Length of timber was 8' because the slats are angled at 45 degrees when setup, giving a wall
height of approx 5'6", which is adequate for anyone 'normal' (if you are 6'6" tall u might like
slightly taller walls).
My timber yard is aimed more at the commercial market, and they sell in
3.0,4.8 or 6.0 metre lengths only...which is great, I just bought the 4.8 lengths and asked them to
cut them down the middle (to 2.4m or 8') "so I can transport them easier in my car".
How I cut it:
I mounted the circular saw upside down (with the blade parallel to the wall) onto a "saw table"
which I made up temporarily from a few scraps of timber I had lying around. The table top
needs to be almost twice as long as the timber you are cutting "longwise". The table I jigged up
was about 4 meters long.
I then screwed a "running board" to the top of the 'table', parallel to the saw blade, so that it was 6mm (or your prefered slat width) behind the saw blade.
Remember that the saw itself is actually underneath the table, and has the blade sticking up
through a slot that you sawed in the table just for this purpose!.
Don't use your dining table for this! DANGER: dont ever try this at home! Using an exposed saw blade like this is a definite danger. If you like your fingers DO NOT go anywhere near the saw while it is running.
In order to switch the saw on/off and keep it on without holding the trigger in all the time, I
plugged it into a powerboard that had built-in switches, and used these to switch on/off, I then
used a "zip-tie" around the handle to keep the trigger "on" permanently.
In order to keep the timber that is being cut hard up against the timber running board( and hence
make sure that the slats are consistent in width - which is important), I added a little swinging
pivot to the table near the saw blade, and hung a heavy weight off the pivot with a piece of thin
rope.
It was arranged such that the strip of timber that made up the pivot pushed up against the
front edge of the timber being cut, and the counter-weight (in my case a large lump of hardwood,
but a house brick or 2 would also do) pulled on one end of the rope with the other end tied to
the pivot.
The overall result is that the weight on the rope pushes the 'pivot' timber, and
that in turn holds the timber being cat hard against the running board. If none of this makes
sense to you, thats OK, don't worry about it, just find a willing volunteer, give them a "push
stick" and charge them with the responsibility of holding/pushing the timber hard against the
running board while you feed it along the length of the timber being cut.
See the picture below if this is all still to much. It really quite simple, it's just hard to describe.
(SIDE NOTE: a "push stick" is a piece of scrap timber at least a metre long (or 2) than anyone
working with a table saw should be using at all times that they are anywhere near the saw. It
is used to push the piece of timber that is being cut, so that you can push it right up to and
through the saw blade without worrying about things like loosing fingers, etc, having your grip
on something slip and 'whoops there goes that hand'. The end of the 'push stick' is sacrificed
to the god of the power-saw as it becomes sliced and diced up...better it than your fingers!)
Calculating the Quantity of slats required:
A number of factors are involved... 1) how many bolt holes (ie overlapping slats) you have in
each slat. 2) how big you want the finished tent to be, and 3) how many roof supports you want to have.
1) number of bolt holes can be between 5 and 10 per slat. I have seen examples of 5,7, 8 and 10.
The person/plans I saw that said they used 5 later said they had modified their plan by adding
intermediate holes, and converted the 5 to a 9 hole. I figured that I'd pick a middle figure
out of 5,8 and 10. I used 8 holes, layed out thus:
first hole : 3"(75mm) from one end (the top)
next 7 holes: 1'(300mm) in from the last
leaving : 9"(225mm) between the last hole and the other end (the bottom)
This gives a "grid" when assembled whose sides are 1' (300mm) in length.
My finished tent is approx 15' diameter. It seems that most designs I could get my hands on a based around a 15" tent (or close to) as it is quite large enough to normally sleep say 6 or 8, and
this makes it perfect for two or three and leave lots of room to spare.
Some maths: lets assume we want a tent of around 15'(4.5m) diameter, and we are using 8 bolt holes separated by one foot into an 8' slat as described above. When the slats are assembled we will also assume that they are angled at 45 degrees. This results in a wall height of around 5'6" with the slats at 45 degrees.
The angle of the roof will mean that the centre of the tent is over 7' tall (more on that later), so if you are more than 5'6" tall, don't worry, youll only have to duck when going thru the door.
If the slats are at 45deg. then they will be forming diamond shapes in the wall grid that are actually completely square. the width of these "squares" across the diagonal (ie horizontal to the ground) is (using pythagoras) square-root of 2, or 1.41' (424mm).
In order to get a tent that is 15'(4.5m) round you need a circumference of 3.14x15' (3.14x4500mm) ie: 47.1' (14.13m). with each 'square' being 1.41'(424mm), that means we need 33.65 of them to go the entire way round the circumference.
Each square takes two slats, so we need 67.3 (must be multiples of 2) rounded to 68 slats for the entire tent. That said, we haven't allowed for the door yet, or taken into consideration how the roof sits on the top of the walls, but you get the idea....next, the doors etc....
If we make the door 2x1.41' or 2.82' (846mm) wide, then it's an nice even figure, and we can
simply reduce the number of required slats by 4 to 64. (the door taking up the space that those
slats would have take up).
Since the roof supports have to have their lower end supported onto a point where the slats
intersect, then we must be able to divide the number of 'squares' around the tent evenly by
the number of roof supports we decide to use.(or suffer un-evenly spaced roof supports - eek!)
When building my yurt, I forgot this next bit of the step, so every time I put the roof onto the walls, the roof suports never quite sit right as I have to put them onto the nearest intersection , which isn't exactly spaced out. Oh well, it still works well, just not quite as neat.
The neat way: Lets say we decide the roof is to have 8 primary supports that hold up the centre ring, and 8 secondary(smaller cross section) supports that are for stopping the canvas sagging, so we end up with 16 supports.
In order to divide the number of roof slats up evenly into the number of wall 'intersections',
we must have either 16,32,48,64 or 80 'squares' around the yurt (counting the door as two for the
sake of the math). Since we figured that we we going to have '33.65' (rounded to 34) squares
(see above), then we were pretty close to the required 32 that we have just said we must use. Of course, you could also change the number of roof supports to match the walls, rather than change the number of wall slats to match the roof supports. Say you've done what I did, and built your walls, then realising that the number of roof supports you cut is wrong, it's easier to cut another roof support or two than it is to change the wall structure...so long as you haven't built your center 'hub' yet, otherwise it's easier to add or remove a few slats from the wall.
So, the decision I made was to have 16 roof supports, meaning 32 'squares' (two of them
are the door), so with 30 actual squares (32 minus two for the door), we should need 60
slats (plus or minus a few to be cut up either side of the door), and have a resulting tent
size of just a smidgen smaller than we originally said.
The final size is 32x1.41' or 45.12'(13536mm) circumference, and 14.37'(4310mm) diameter
if you keep the "diamonds" perfectly square. Just push the walls out a little more, and make
them a couple of inches shorter, and you still have the 15'-16' tent you started with.
Phew!.
SIDE NOTE: other plans I've seen vary the roof supporting structures from 5 to 45, so there is a
lot of variation here. The upper end of the range is most likely for areas that experience
snow, or that are using extremely thin roof supports, or that like the idea/neatness that
comes from having a roof support on the top of every single wall 'intersection' - ie where
two wall slats join at the top hole, the lower end is possibly for those using a very heavy
canvas, or a smaller tent size that doesn't need as much 'support' to stop sagging) My original
planned roof used 8 as I was goinf for maximum portability, minimum weight, but I modified the
roof before I had even finished building the yurt to be 16 as stated above, and this is a much
better result for minimal weight gain - the secondary supports don't really have to hold much
weight at all, just some canvas. It's the primary ones that hold up the ring. Some other plans
don't use two types of roof support, but instead opt for all of them to be load bearing. This
works too, and will probably give you a roof ring that you can do chin-ups from without any
problems. I hang entire wardrobes of garb from mine with no problems.
Drilling the holes into the slats:
Use a drill press, or be VERY careful to make sure you drill straight thru.
Every plan I read said that a drill press was a good idea. I didn't use one, I was just really careful, and mine worked, but if you are "powertool-impaired" like some of my friends (hi Wolfe!) then you must use a drill press, or get one of your non-impaired friends to do it.
Because the timber I'm using is soft (pine) and gives a bit due to how thin it is, I was able
to get away with the holes being up to 3 or 4 mm off center by the time they came out the other
side of the the 90x35 (drilled thru the 90), but I really strongly recommend taking your time
and getting the holes really straight as it makes lining up the bolts so much easier.
Be accurate and consistent in your measurements when marking them onto your timbers before you drill too as this is also really important.
Assembling the walls:
I've seen plans that specified rivetting, tying with cord, cotterpins, and bolts.
Bolts are so much easier then rivets, and so much stronger than cord or cotterpins. Just make sure that you either use self-locking nylon nuts , or deliberately damage the end of the bolt thread after putting the nut on (this stops the nuts coming off in-transit and getting lost).
I just hit the thread end of the bolt with a hammer a bit as it's cheaper than nylon nuts
(go to the hardware store and check the price difference for yourself - if you are on a tight
budget you'll do what I did).
If you are building a yurt/ger then you've obviously seen how the walls are put together so I
wont bore you any more. It's just a case of inserting 300 odd bolts thru the right holes, putting
all the nuts on (no need to tighten them - actually tightening them is very bad!), and then
making sure the nuts won't come off easily after you damage the thread a bit.
The only assembly point that is ESSENTIAL is that all the slats angled one way are *inside* the circle, and all the slats angled the other way are outside the circle, otherwise the frame won't fold-together in a scassor-like fashion.
Like I metioned, my holes were sometimes up to 5 mm off in places, but the timber has plenty of 'flex' in it so I just encouraged it a bit with a hammer where necessary, and made it fit.
(don't hit the timbers to hard or you'll break the slats before you even start).
Near the doors, the slats must get shorter by one hole at a time, I fiddled with the shape of the
timbers where they joined onto the door frame, just because I wanted a neat finish. Everyone does their doors differently as it depends what you want.
Traditionally (in the 1600's and earlier) the monguls would have just had felt 'flap' doors, not solid timber hinged ones, but I've seen quite a few that go the solid door (and it's popular in mongolia nowdays!) as it makes for a very secure structure, and is pretty cool.
Mine is a extremely simple frame made from (suprise suprise) 90x35mm pine framing timber. Two lengths the height of the finished wall (5'6"), and two of the desired door width (2.82' or 846mm). I made the simplest possible door frame, and the door is a canvas drapery that I hang over the space. I did that because I wanted portability, and a big solid door seemed like a real pain to carry around. To do similar, I suggest using a large timber screw called a coach screw, two in each corner of the door, , and drill a hole through them, and screw them together.
Other options might be :
1) a 'door' that is still canvas/cloth covered, but is actually
made of lattice like the walls, this is portable and secure, I'm sure you could make a lock for
it somehow.
2) on one plan I saw recently on the web (it might be in the URLs listed below, I
don't remember) had a "double" door, by that I mean solid "french" doors. Two
half-width doors with one hung from each side. It's more portable, and still solid. I'll
probably do this way eventually.
Step 4: * Timber Components - the Roof!


 6 More Images
Main roof supports:
Cut up the roof supports from 90mmx35mm (just like everything else).
4x2400mm lengths, each cut down the middle makes the 8 primary supports.
2x2400mm lengths, each cut into 4 makes the 8 secondary supports.
I live in a snow-free zone. If you are going to be snowed on you'll probably want a greater
roof pitch (eg make them 9' or 10' long instead of 8' long) AND stronger beams.
Roof/height Support lengths/pitch/angle:
A 15' diameter tent has a radius from the centre of 7&1/2' (which is shorter than the 8' length
of the recommended roof supports), When the roof is angled, the pitch is slightly longer than
the straight radius, so with a bit of math, depending on the actual pitch and size you choose, you might find that 8' is actually to short to reach the centre, or perhaps a bit long. That's ok because it doesn't have to reach the centre. The centre contains a 'hub' that can be anywhere from 1'(300mm) to 3'(900mm) across.
I could say I figured out the exact roof pitch I wanted, used some more math to get the required length of the supports, then used that to figure the size of the ring I needed if the
supports were 8'(2400mm) long, but I didn't. I decided I wanted a 1&1/2' (450mm) ring, and
that I didn't care what pitch the roof ended up at, so long as it wasn't flat.
I stood in the back yard with a half-assembled yurt and no centre ring, put a ladder in the middle, and propped the top ends of the roof supports on the top of the ladder (a 10' ladder I think), and
guestimated that it would be fine.
I built the ring and I put it together, and it's close enough. I could increase the pitch a little, but heck it works the way it is, so why change it?
You do it however you like.
My First yurt was assembed this way, and it assembles fine, but it's more of an art to put together than a science. The next two yurt/s actually turned out a bit smaller (13-14' foot diameter), so I actually found it was necessary to cut up to a 20cm(6") off the roof timbers, so that they don't hang-out-over the edge of the yurt. That's OK too, and I find these are actually easier to assemble!.
Roof Support Connections:
Joining the roof supports to the centre 'hub' is detailed in the hub section, but joining the bottom of the roof supports to the top of the walls can be done in a number of fashions:
1) the first method I used, and the one I currently still use on my first yurt (but don't recommend) involves tying them down. Drill a 6mm hole thru/across the bottom end of the roof supports about 30-40mm (1&1/2") from the end, and tie a loop of strong woven cord (eg 4-5mm nylon venetian blind cord) that is about 150mm (6") across through that loop. The loop can then just be tied around top of the wall , when the support sits on the wall. I currently do that, and also extended the loop with about 450mm (1&1/2') of cord that can be lashed to the wall further down so the joint is secure (this bit works well enough).
2)What I did on yurt numbers 2 and 3 was to use a steel "pin" on the top of the wall, and have a holedrilled into the rool timbers at an angle matching the pitch of the roof. the steel pin on the frame goes into the hole on the roof timber, and creates a joint. have a look at the pictures, and you'll see what I mean.
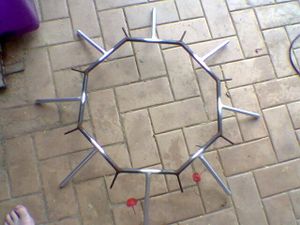
Step 5: Metal Components - the Roof Hub


Roof Hub Options:
The whole purpose of the 'hub' is simply a way of connecting the centre of the roof all together
while also giving a centre 'vent' or 'port' for circulation/ventilation/smoke/watching the stars.
1)Traditionally it would have been a ring of saplings that the roof saplings were lashed to, but that's not something that's easy to dissassemble, and reassemble.
2)Today the most common form (I've seen it in other yurts) is a 3 layer "laminate" ring made of two layers of ply and a middle layer of wedge shaped timbers, the result being that there are squares to push the roof poles into. (the roof poles need to have an angle cut into them to use this form). I have seen this form work well and would recommend it if you have timber skills,but not metal working skills, but I did not use it myself.
3) A timber "ring" formed by building a vertical laminate up from long thin lathes of timber
which are steamed and bent into a ring, and glued and clamped together, with more lathes of timber being added into the inside of the 'ring' until it has a thick-enough profile/width.
This is lighter than 1), doesn't require the roof supports to be weakened by cutting onto an angle,
(only rounded off to fit the large holes that are then drilled into the ring laminate), and is
probably the best form to use if you ignore the construction. It's just really hard to make and
get it to work right.
4) Finally, The form I ACTUALLY used: I own a welder, and have reasonable metal working skills, so I made a 450mm (1&1/2') ring from solid metal 15mm rod (actually an ocatagon, but it looks like a circle if you don't look to closely!), and off of that I welded 8 large (15mm round) 'prongs', and 8 smaller 8mm round 'prongs' (one for each of the 16 roof supports), I arranged these so that they were angled down at the same pitch as the roof is supposed to be (whatever you worked it out to be for yout tent, I just guessed).
To join the roof timbers to this steel "star", I then VERY CAREFULLY drilled a very deep 16mm or a 9mm hole long-ways straight into the end of the roof supports/timbers. (I bought 2 spade bits(16&9mm) and a "spade bit extender" in order to drill a really deep hole.
I drilled about 200mm into the timber end for the large supports, and made the large 'prongs' 220mm long, and 100/120mm for the smaller 'prongs' ).
The idea is that the roof supports slide over the 'prongs', and produce a very strong joint. This
works really well, and I found it easy enough to make.
I made this joint up..I've never seen anyone else use this method on their yurts/plans..I just
guess no one's thought of doing it this way before...or they don't like it because it's not
"traditional" enough for them.
My 'hub' (the first yurt) is really rusted - because it was recycled steel in the first place, but the newer yurts I made were painted with zinc-impregnated (rust inhibiting) paint, which keeps them looking reasonable.
Step 6: Metal Components - - Bolts, Pins, Pegs.


The remaining metal components that need to be manufactured in some way or another are:
Metal Pins
- for pinning the doorframe to the wall lattice. these are just bent steel 6mm (1/4") rod. they need to be removable so that the yurt can be dis-assembled, and re-assembled easily. I made the ones in the picture from a piece of mild steel 150mm long, with a 50mm (2") handle/bend at one end.
Newer ones I actually make by purchasing galvalised tent pegs (just like the one shown), and cutting them in half. It's easier, and they don't rust so much.
The 3rd picture shows a close-up of the pin assembled through part of the wall lattice and door frame/s.
Bending them is actually really easy with one end in a bench vice and hitting the other end with a hammer (start lightly, don't rush it, or you'll create cracks).
Roof Eyelets, and Hooks.
- the hooks are actually an option, but something I find makes it easier to assemble the finished roof.
At each of the 16 points around the roof edge where the timber/s point to (ie equidistant), your should put a brass "puch-through" eyelet which is large enough to lace your cord through.
Every second of these should have an "S-hook" fitted (see the second picture for mine) so that you can easily hook tie-down rope through it when you are assembling the yurt. I custom-made mine out of large calvanised nails, bent into a funny U shape, such that the head of the nail will not fit through the brass eyelet in the tent, but the shank will.
Bending them like this, I can permanently fit them to the roof, and not lose them, but can still lace the rope around the open end easily.
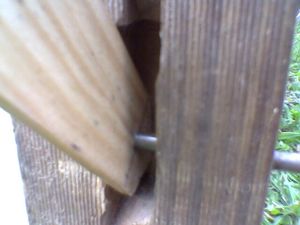
Pins for connecting walls to roof
Look closely at the last picture in this set, and you'll see that the vertical part of the "pin" appears to join onto the nut/bolt that goes through the wall lattice X. It's actually all the same bolt, just a long one, with the head cut off.
The bolt is a 1/4"(6mm) diameter, 120mm long bolt with thread on about 1inch of the shank.
By threading a nut on as far as it will go, and bending it almost exactly where the thread stops next to the nut, you get a L-shaped pin which is threaded on the short-section, and has the nut permanently locked into the "corner" (due to the distortion of the thread that occurs while bending the bolt right next ot it).
It's actually quite easy (just bend a bolt)...it's just hard to explain.
These special L-shape bolts are used in-place-of the short bolts at the top edge of the roof, but only on every second joint. (where the timbers sit).
Step 7: Canvas Components - the Wall!


 5 More Images
Buy a piece of canvas that's as long as your tent is round, including the door, plus a bit spare - perhaps 30cm( 1').
The simple version (my first method) :
I didn't have to do anything else to mine apart from hem the two raw ends, and put a few brass eye-lets into the hemmed ends. To keep it up, it just has the top few inches hung over the wall,
and held in place by the weight of the roof supports (bull-dog clips during assembly).
At the door, the canvas end is just taken thru the door, and string/light rope is used to lash
from the eye-lets in the end seam back to the lattice on the inside of the wall, which holds
the canvas tight around the outside of the wall when these are tightened a bit. The wall itself
can then act a little like a "tension band" ..the tensioning ropes are still a must though!.
The longer version (my perferred method now) :
background: my yurt's are constructed such that when all the timber frames are together, and the roof timbers are fitted, the top edge of the wall/lattice has a roof timber fitted on every second X joint. This leaves every second bolted joint free, and accessable for hanging the wall from.
To do this, I sew a reinforcing to the canvas just below the point that would be matched onto the joint in the wall, and sew a wodden "toggle" , via a strong nylon cord into the reinforcing. The wall canvas can then just be hitched-up onto the wall timbers, and hung there from the wooden toggles.
This gives a result that is invisible from the outside of the tent, easy to erect in a repeatable way, and still within the spirit of the construction.
Note about Tensioning ropes:
These tension ropes/cords (I use two bands, each of 3mm woven venetian blind cord) must be
permanently fitted to the timber walls before the camvas walls and roof are put on. I will go into how these cords are tied to the wall at the end of the Instructable. During test assembly though, you can just wrapt them round the whole yurt, and at least the top one must be partially tightened, or the timber lattice walls will fall down. This must be done before any weight is put on them like when you put the the roof timbers us, or the wall canvas is put on.
Step 8: Canvas Components - Roof

Roof Canvas Construction:
Buy 16 metres of roof canvas at approx 6' wide, and cut/sew it as per the picture below.
Notice how there are two sections 1800(6') wide, these are the full width of the canvas. The two smaller rectangles (top, and bottom) are from the same length of canvas, just split down the middle to half their width.
The "wedge" that is shown missing needs to be cut out and sewn up so that the roof canvas becomes "cone" shaped. to match your roof pitch.
I actually find it easier to just assmemble the whole timber structure in the back yard at this point, and hang the completed flat circle onto the framework/roof. Using a stepladder, and lots of strong pins, I can then pin the roof so that it's clear exaclty how much canvas (the wedge shape) needs to be removed, leaving the roof as a "good fit".
For the simple version:
Do a final Trim, and hem of the outer edge only after you have removed the "wedge" and sewed that bit up, located the roof on the structure again, and finally walked round the outside with a piece of chalk drawing a line where you think the hem should go. I didn't, and no matter how I tried to make it an exact circle, the hems are still a bit uneven. Oh well.
For the more complicated (but preferred) version:
I sew a flat and straight "band" of canvas, about 20cm (6") wide, all the way around the roof edge. This fabric is deliverately NOT curved to match the roof, it is instead straight to match the walls, and it hangs from the bottom of the roof, down the walls, and fully covers-over the wall->roof joint making is really wind/rain/sleet/bug/insect proof.
This also gives a nice professional finish to the outside of the yurt.
I only did this in my 3rd yurt, for which I forgot to take pictures, but believe me, it's really good having a nice air/wind-tight seal there ( my current yurt, the oldes one doesn't have this, and gets a bit drafty). Most of the pictures in this instructable are from my second yurt, which has "dagging" (ie zig-zag square shapes) around the roof edge, this was at the request of the "new owner", and is a bit prettier, but also less traditional, and not as airtight as the 3rd yurt with a solid band.
FINALLY: Don't throw out that "wedge" that you cut out from the yurt.... Cut the biggest equilateral triangle or circle that you can from it, and use that as the "cap" to go over your vent hole.
You'll need at least 24' (8m) of cord/rope to hold that 'cap' in place (three ropes that go from
the tips of the triangle or edge of the circle out to the the walls to be tied off.)
Step 9: Assembly - Putting It All Together/up

 57 More Images
The best way is to just give it a go and try putting it up. Expect the first few times you do it
to take quite a while. You'll need two or 3 people, but no more. I can do it on my own now, but
it's still easier with two.
Follow along through the pictures below for a detailed step-by-step pictographic guide with text hints. Seriously, looking at all the pictures is worth it - there are about 50 of them on this step! That's gotta be worth more than 1000 words.
Hints:
*) You'll need a "tension" cord/band (or even two) to go right round the top (and optionally
the middle) of the wall. It's important that you put this in place before you put the roof
supports on. Some people use a band of canvas that is a few inches wide, I use a 3mm venetian
blind cord round the top and middle of the wall (a thicker slat might not need two tensioners).
I use two tensioners just to reduce the slight "bow" in the walls after everything is in place.
I bought a complete 100m roll of cord and it was cheaper than buying 40m at the by-the-metre
price, so I have plenty for things like tying the roof down.
- you can fit the tensioner cord permanently to the timber walls, by tying it onto each bolt-head all the way round the wall, which is a great idea, and makes putting it up so much easier too! See the pictures for details.
*) put(or keep) the tensioning cords/ropes in place before even getting the canvas out of the car. I
always forget them, and then have to take the wall canvas off again in order to put them on. You can put them under, or over the wall canvas, I always prefer under, but others use over, it doesn't really matter, and is just cosmetic.
*) If the wind is light, hang the wall canvas over the walls before putting the roof supports on, and hold it in place with bull-dog clips (or stitch little pockets for the canvas to hang from). If the wind is strong, the wall canvas can act like a sail, and blow your tent away, so leave the canvas untill you have the weight of the roof timber/s to hold it down.
*) Put the centre ring up by putting in 3 opposing main supports first, the ring will then
hold itself up, and the person who was holding it up will not get such sore arms. Try not to stand under the centre-ring very much while assembling it, because getting hit in the head with a large heavy object (if it falls down unexpectedly) is unpleasant and dangerous.
*) Start to pull the roof canvas over the roof, and at the same time have one or two people
inside the tent with long poles (borrow a couple of minor roof supports for this if necessary),
get them to use the poles to push the canvas up and over the roof. It's easier than trying to
just drag it over with ropes.
*) Get a tarp, or large black-plastic dropsheet for your floor, you won't regret it. Cut a circle
about 3/4-1' (~200-300mm) larger all round than your tent, and fold the sides up inside your tent to
prevent water getting into the tent. I origninally used 2500mm wide black-plastic "concrete underlay" plastic sheet (as it was cheaper than a 15' square tarp) and joined it together down the middle with
that wide-brown "duct-tape". It sticks to that black plastic like glue, and is waterproof
enough to survive a month underwater if necessary. The longevity of the black plastic isn;t great though ( a dozen uses or more over 5 years) before the ground/rocks tear it up) , so having a tarpaulin floor is good, which is what I now use - I found a local canvas and tarpaulin supplier who made it to-measure for the circular shape for only $AU100 (about $US150) .
*) In anything except nil-wind conditions you definitely will want to take along a few tent pegs, I use 8 or them, placed in the ground directly as the bottom of the walls, and roped to the roof. (ie tie the edge of the roof canvas to the tent pegs) by putting the eye-lets and S-hooks every so soften around the roof hem, and zig-zagging the tie-down rope between these eyelets with the S-hooks and the tent-pegs set at the same spacing around the bottom of the wall. You end up with this nice regular tringular pattern visible around the edges of the yurt.
*) Otherwise (ie in nil-wind conditions) you can hold the roof canvas down with a noughts-and-crosses # pattern of ropes across the roof.
*) take three times as much 'cord' or 'rope' as you think you'll need, use it for:
- tensioning rope/s (about 15m per tensioner - I use two, so 30m)
- zig-zag tie-downs (roughly every meter round peremeter means 35-40m) or # roof ties (roughly 25-30m)
- cap ties (about 8m or more)
- tying wall canvas in place (either side of the door) (about 5 m)
(I bought 100m and use just about all of it somewhere. I even managed to not have to cut it, so it's
still useful for other things for the other 350 days of the year)
Now, the assembly pictures! There are a LOT of these, in the order of assembly, so just have a look!
Build Yourself a Portable Home - a Mongolian Yurt : 9 Steps (with Pictures) - InstructablesIf you're gonna fight, fight like you're the third monkey on the ramp to Noah's Ark... and brother its starting to rain. Join our efforts to Secure America's Borders and End Illegal Immigration by Joining ALIPAC's E-Mail Alerts network (CLICK HERE)
-
06-22-2025, 06:32 AM #9944Senior Member
- Join Date
- Aug 2018
- Posts
- 93,755

Search for:
Growing and Using Cabbage
March 19, 2012 by Angi Schneider
This post may contain affiliate links. If you click on a link and make a purchase I may receive a commission. Thank you for supporting this site.
 Cabbage is a staple in our kitchen during the winter and early spring, its probably our favorite winter vegetable. Every year we grow enough cabbage to eat fresh and preserve some for the summer. Growing cabbage in the home vegetable garden is relatively easy and a great way to have greens all winter long.
Cabbage is a member of the Mustard family, more specifically its categorized as a brassica along with broccoli, Brussels sprouts, cauliflower, and kale. All of these vegetables are cool weather crops and are highly nutritious.
For cabbage that develops a head, youll get just one harvest per plant but for cabbages that are loose leaf you can harvest a few leaves at a time. I keep a set of worksheets to track how much I need to plant each year to feed my family. You can get a copy of these worksheets emailed to you by filling out the form below.


 How to Plant Cabbage
There are two ways to plant cabbage sow seeds directly in the garden or plant transplants (ones youve bought or started indoors.) I usually do both.
For spring gardens, direct sow seeds about two weeks before average last frost. If starting indoors, sow seeds in seedlings trays or small pots four to six weeks before average last frost. You can plant the transplants in the garden just before the average last frost.
Cabbage loves cool weather so it shouldnt be harmed by a late light frost. The edges of the outer leaves might get burned but the cabbage will be fine.
If you live in a climate that has a short spring it goes from winter weather to hot weather very quickly plant varieties that have have a short maturity date.
For fall/winter gardens sow cabbage seeds 8-10 weeks before average first frost. Plant transplants 6-8 weeks before average first frost. Cabbages are frost tolerant plants so dont worry about harvesting them all before the first frost.
If you live in an area with a mild winter, you can grow cabbage all winter long. I usually plant cabbage transplants in late September or early October. When I plant them, I direct sow some seeds too. This is my lazy way of succession planting and ensures that not all the cabbages are ready at the same time.
Sow cabbage seeds about 1/2″ deep. Depending on the cabbage variety, cabbage will need 24″-36″ of space between heads. Since I garden in raised beds, I like to off set my rows to squeeze three rows in a 4x8′ garden bed.
Cabbage plants are heavy feeders that like rich, well draining soil.
Growing Cabbage
After sowing seeds or planting transplants, water the cabbage regularly. This is hard for me once the cooler temperatures come but its important to do. Cabbage likes consistent water, not a flooding then a drying out. If it doesnt rain, water at least once a week.
Cabbage will do better if you top dress with some compost after growing about 4-6 weeks. This will give the cabbage the nutrition it needs to make a good full head.
Once the temperatures reach the upper 80s cabbage will get bitter.
 Cabbage Varieties
There are many varieties of cabbage. The colors range from light green (almost white) to deep green and even purple. While most of us think of head cabbage when we think of cabbage there are also leaf cabbage varieties.
Days to maturity can range from 55 days to over 100 days. Planting a variety of cabbages with different days to maturity is a great way to have cabbage all seasonal long.
Early season cabbage varieties mature in less than 70 days and include Copenhagen Market, Savoy Express, Gonzalez, and Red Acre. All of these produce fairly small heads. Savoy Express has fun crinkly leaves and Red Acre is a red variety.
Specialty cabbages such as Pak Choi and Napa are also early cabbage varieties.
Mid-season cabbage varieties mature in 70-90 days and include varieties such as Primero and Mammoth Red Rock. Both of these produce round heads, Primero is green and Mammoth Red Rock is red. Savoy Perfection is a savoy mid-season variety.
Late season cabbage varieties mature in 90-120 days and are usually very large plants. Late varieties also tend to store better than early or mid-season varieties. Some late season varieties are Late Flat Dutch, January King, and Danish Ballhead.
Many of these seeds can be found at MiGardener Seed Company. MiGardener sells heirloom seeds for just $2 a packet. You can get a 10% discount on your order by using this link.
Problems and Pests of Growing Cabbage
For the most part cabbage is pretty easy to grow. splashing-not the plant in order to not splash dirt down into the cabbage head. This will make it easier to clean when you harvest.
Cabbages can attract aphids, leaf beetles, cabbage moths, slugs, and black rot. Companion planting with dill to attract ladybugs can help with the aphids.
Since cabbage doesnt need pollination, growing cabbage under row covers can help with leaf beetles and cabbage moths. Just be sure to put the row cover on early before the leaf beetles and cabbage moths find the cabbage or youll trap them in. They wont care but it wont be good for your cabbage.
Black rot can be controlled by rotating crops and not watering the leaves. Heres a good article from Cornell on managing black rot.
 Harvesting and Storing Cabbage
You can harvest head cabbage after the head has formed and filled out, gently squeeze the head to make sure its firm. You can harvest the outer leaves whenever you want to. They arent as tasty as the tender inner leaves but still good. I like to harvest a few and saute them with cauliflower and broccoli leaves early in the season as a secondary harvest.
In mild winter climates, you can let the cabbage stay in the ground all winter and just harvest as needed. In colder climates, you can grow cabbage during the winter under frost row tunnels and the snow will insulate the tunnels.
To harvest a cabbage, cut the head off at the base. There will probably be some outer leaves that dont get cut. Some cabbage varieties will produce a few baby heads once the large head is cut off, so its okay to just leave the plant in the ground.
Once the head is harvested, I will usually cut remove the outer leaves, and chop and drop them for mulch; if they dont have pests or diseases on them.
Cabbage can be stored in the root cellar for several months. I dont have a root cellar so Im no help here, but Homestead Honey does and stores quite a bit in it. Here are her root cellar tips.
Cabbage can also be stored for a few weeks in the refrigerator by putting it in plastic bag thats not sealed but has some moisture in it.
What to do with cabbage
Cabbage is pretty versatile and can be cooked in soups, such as this potato cabbage soup, or stuffed and rolled into cabbage rolls.
It can also be eaten raw in cole slaw. My family doesnt care much for cole slaw but I really like it. There are two main types of cole slaw, mayonnaise cole slaw and no-mayo cole slaw. But you can also make a slaw with pomegranate in it which sounds amazing.
One of the best ways to preserve cabbage for the year is to make sauerkraut, its super easy and really good for you.
 If you have other tips for growing cabbage, feel free to leave them in the comments.
Thanks for sharing with your friends!
Tags cabbage
Growing and Using Cabbage - Creative Simple Living
If you're gonna fight, fight like you're the third monkey on the ramp to Noah's Ark... and brother its starting to rain. Join our efforts to Secure America's Borders and End Illegal Immigration by Joining ALIPAC's E-Mail Alerts network (CLICK HERE)
-
06-22-2025, 06:36 AM #9945Senior Member
- Join Date
- Aug 2018
- Posts
- 93,755
Search for:
 Simple living shouldnt be exhausting Let me show you how you can grow and preserve some food, do a few DIY projects and use your pantry to make simple and delicious meals all without feeling overwhelmed.
~Angi
Growing Food
 Vegetables
 Fruit
Fruit

Preserving the Harvest


Organic Gardening Tips
Preserving Food and Simple Recipes
DiY and Crafts
Herbs and Oils
Seasonal Simple Living
Using Herbs and Essential Oils


 Fill your pantry with home preserved goodies!
Learn to grow and preserve vegetables by canning, dehydrating, fermenting and freezing in The Ultimate Guide to Preserving Vegetables.
Pressure canning doesnt have to be scary. Learn all you need to know to safely pressure can in Pressure Canning for Beginners and Beyond.
DiY and Craft Projects


More Simple Living Articles
If you're gonna fight, fight like you're the third monkey on the ramp to Noah's Ark... and brother its starting to rain. Join our efforts to Secure America's Borders and End Illegal Immigration by Joining ALIPAC's E-Mail Alerts network (CLICK HERE)
-
06-22-2025, 06:56 AM #9946Senior Member
- Join Date
- Aug 2018
- Posts
- 93,755
What is your car telling criminals?
March 27, 2014 / national safety
Theyre on the road in front of us every day, those cars with the stick figures in the back window and the bumper stickers that tell us how proud they are to have a child whos an honor student at such and such a school. Just as bad are the custom license plates that let us know your name.
Your car can be telling criminals an awful lot about you and your kids; information they can use to carjack you, mug you or break into your house while youre away.
Heres an example of stuff that shouldnt be on your car and why:

In addition, as I mentioned, if your name is somehow included as part of your custom plate, youve giving the potential mugger or carjacker your name. How many of us dont turn around when someone calls our name? Were also a lot more likely to allow a perfect stranger to get close enough to rob us or shove us into the car at gun point when they are telling us that they know us and back it by using our name. Lets face it we dont remember half the people we meet and just assume weve forgotten this person as he or she draws ever closer.
Take a look at your car and think about removing anything that might give a criminal an edge.
Share this:
What is your car telling criminals? | Nationalsafety's WeblogIf you're gonna fight, fight like you're the third monkey on the ramp to Noah's Ark... and brother its starting to rain. Join our efforts to Secure America's Borders and End Illegal Immigration by Joining ALIPAC's E-Mail Alerts network (CLICK HERE)
-
06-22-2025, 07:06 AM #9947Senior Member
- Join Date
- Aug 2018
- Posts
- 93,755
If you're gonna fight, fight like you're the third monkey on the ramp to Noah's Ark... and brother its starting to rain. Join our efforts to Secure America's Borders and End Illegal Immigration by Joining ALIPAC's E-Mail Alerts network (CLICK HERE)
-
06-22-2025, 07:46 AM #9948Senior Member
- Join Date
- Aug 2018
- Posts
- 93,755
How to Dehydrate Tomatoes: Different Recipes Compared
5.0K SHARES
Pin3.5K
Share1.5K
Tweet
There are many signs of summer, and one of the best is a plate of ripe tomatoes.
If you grow them in the summer, you know how unrelenting they can be. If you know how to dehydrate and preserve tomatoes, you can do something very useful with all that harvest.
A cornerstone of Italian cooking, the tomato is actually a fruit! From the best sauce to fresh slices of tomato, there is nothing really like a tomato when its ripe.
Dont be fooled, though, dehydrated tomatoes, particularly sun-dried tomatoes, are a powerful asset for preparedness.
Growing fresh tomatoes is not as hard as you might think. In fact, if you get a harvest going, then tomatoes are going to be coming out of your ears. They are so prolific that it can be overwhelming.
Did I mention the lycopene and other health benefits? Tomatoes are one of the best vegetables to preserve and add to your food storage arsenal.
How to Dehydrate Tomatoes

There are several ways that you can dehydrate tomatoes. However, three methods work the best and are most commonly used.
You can dehydrate or dry tomatoes in a countertop dehydrator, in your own oven, or by using the power of the sun.
Note that these methods can be used, no surprise, to make sun-dried tomatoes as well.
Im going to share my favorite recipe, but first, lets touch briefly on how to prep your tomatoes.
Preparing Tomatoes for Dehydration
There are many varieties of tomatoes in our world. Some may be as big as softballs or as small as grapes.
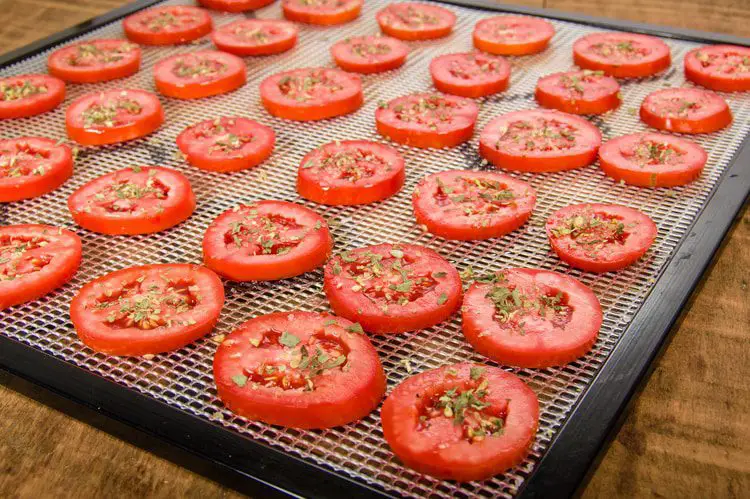
My preferred tomato to dehydrate is a Roma tomato. They have more meat and fewer seeds than your larger, rounder varieties. Likewise, they are great for drying as they are less juicy.
Roma tomatoes should be cut in half, not sliced, and dehydrated with the cut side up (skin side down). This retains the juices and sugars within the skin instead of draining this bounty into the pan. Nice!
Larger varieties can be sliced about ½ inch across.
The most important part of processing your tomatoes is to do so consistently. Dehydrate one type at a time, and be sure that all of the pieces are uniformly dried.
Remember, a thicker slice of tomato will take longer to dehydrate than a thinner one.
Finally, dont forget to save some of those tomato seeds. You can grow a tomato from a tomato!
How to Dehydrate Tomatoes: Different Recipes Compared
If you're gonna fight, fight like you're the third monkey on the ramp to Noah's Ark... and brother its starting to rain. Join our efforts to Secure America's Borders and End Illegal Immigration by Joining ALIPAC's E-Mail Alerts network (CLICK HERE)
-
06-22-2025, 12:40 PM #9949Senior Member
- Join Date
- Aug 2018
- Posts
- 93,755

- Home
- Homesteading
- Gardening
- Canning
- Chickens
- Recipes
- Food Storage
- Health
- Emergency Preparedness
- Natural Remedies
Delicious Blackberry Applesauce Canning Recipe

Melissa Francis
February 16, 2024
Canning, Food Storage & Skills
applesauce, BLACKBERRY, delicious
While I find homemade applesauce pleasant, especially the batch I created last year, it tends to be a bit mundane for my taste, even when enhanced with cinnamon. It primarily serves as a comforting food during illness for me. Otherwise, its primary use is as a companion to sour cream atop my latkes. It seems Im not particularly enthusiastic about applesauce on its own.
However, introducing several cups of frozen blackberries, which were wisely preserved earlier in the summer, transforms the ordinary applesauce into an extraordinary, vibrant hot pink creation that is both visually striking and delicious.
Blackberry Applesauce: A Culinary Delight
The addition of blackberries not only bestows a stunning color upon the applesauce but also infuses it with a distinct tartness, enriching the overall flavor profile. The sauce becomes more apple-centric and lively, requiring a slight adjustment in sugar to balance the tartness of the blackberries. This adjustment is dependent on the natural sweetness of the apples used. A taste test is recommended to determine the ideal sugar quantity, allowing for personal preference regarding sweetness or tartness.
For this particular recipe, a blend of Golden Delicious and Rome apples is utilized. The subtle pink hue of the Rome apples is complemented by the rich color of the blackberries, creating a visually appealing sauce. These apples, along with the blackberries, are sourced locally, underscoring the importance and enjoyment of regional produce.
Packaging and Presentation
The applesauce is elegantly presented in jars, adorned with custom-designed labels printed on kraft paper and accented with silver-striped washi tape for a decorative touch. The jars, purchased in bulk, are specifically chosen for their smooth surfaces, facilitating label application. Despite the standard processing time, traditional two-piece lids are preferred to ensure the quality and safety of the applesauce.
Yield: 7 Half-Pint Jars Cook Time: 1 Hour
Ingredients:
- 5 pounds of apples (mix of sweet varieties such as Gala, Fuji, Rome, Golden Delicious, or Pink Lady)
- Juice of 1 lemon (approximately 3 tablespoons)
- 1/4 to 1/2 cup granulated sugar (adjust according to taste)
- 8 ounces (2 cups) fresh or frozen blackberries
Directions:
- Start by preparing the canner and sterilizing 8 half-pint mason jars, keeping them warm until use. Also, warm the lids to soften the seals.
- Core and quarter the apples, removing any blemishes, and cook them in a large saucepan with an inch of water until soft. Simultaneously, soften the blackberries in a separate pan.
- Process the cooked apples and blackberries through a food mill to remove skins and seeds, then return the mixture to the saucepan. Add lemon juice and sugar gradually, tasting to adjust for sweetness.
- Fill the jars with the hot sauce, leaving appropriate headspace, and process in a water bath for 15 minutes, adjusting the time for larger jars if necessary.
- Allow the jars to cool on a wire rack undisturbed, check seals, and store appropriately. Unsealed jars should be refrigerated and used promptly.
This blackberry applesauce recipe elevates a traditional staple into a delightful, visually appealing, and flavorful treat that showcases the richness of combining simple ingredients with a creative twist.
Delicious Blackberry Applesauce Canning Recipe - The Homestead Survival
If you're gonna fight, fight like you're the third monkey on the ramp to Noah's Ark... and brother its starting to rain. Join our efforts to Secure America's Borders and End Illegal Immigration by Joining ALIPAC's E-Mail Alerts network (CLICK HERE)
-
06-22-2025, 12:46 PM #9950Senior Member
- Join Date
- Aug 2018
- Posts
- 93,755
- Homesteading
- Gardening
- Canning
- Chickens
- Recipes
- Food Storage
- Health
- Emergency Preparedness
- Natural Remedies
Off The Grid Non Electric Laundry Tools Round Up
Melissa Francis
June 11, 2013
Off Grid, Water
hand washing
Many of our readers have asked us what tools do they need to be able to do laundry in a disaster or in a long term power outage.
This round up of different options will hopefully point people in the right direction so they can find what works for them.
Challenge: Do not use your electric washing machine or dryer for one week.
Find alternative ways to wash your clothes. Do these tools seem more appealing ?
I did the above challenge.
I found that I enjoy hanging laundry on a clothesline, for some reason I find it relaxing.
(182) A forgotten area for preppers. Solve it NOW - YouTube
Family Size Washboard
10 3/4 x 11 rubbing surface. 12 7/16 x 23 3/4 overall. Hand assembled, fully mortised and nailed at 6 points. Wood frame metal wash surface
You can find it here http://amzn.to/17Fqfl2
Round Galvanized Steel Tub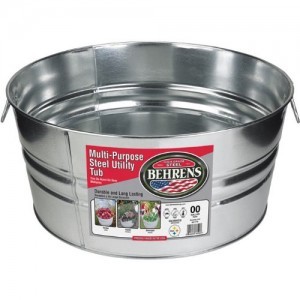
11.5 x 26.8 x 26.8 inches and it is 5.5 pounds
You can find it here http://amzn.to/11dQmYQ
Plunger Washer Hand Operated Washing in a five gallon bucket
The holes allow more water to follow and circulate washing the clothes faster and more thoroughly.
You can find it here http://amzn.to/12jNHBP

Green Vinyl Jacketed Outdoor Clothesline Wire
100 feet
You can find it here http://amzn.to/12jUM5n

Traditional Wood Spring 100-Pack Clothespins
You can find it here http://amzn.to/109XXwq
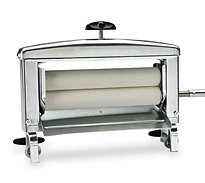
Best Hand Clothes Wringer
Rustproof all steel frame like antique washing wringers
Attaches to round galvanized tubs or square wash tubs
You can find it here http://amzn.to/12jOvGW

Splash Guard Mop Bucket/Wringer
6.50 gallon Capacity
You can find it here http://amzn.to/12jPgzT

Clothes Washing in a Grid-Down World Article
Click here to read the article:
http://www.tacticalintelligence.net/...down-world.htm
Off The Grid Non Electric Laundry Tools Round Up - The Homestead Survival
If you're gonna fight, fight like you're the third monkey on the ramp to Noah's Ark... and brother its starting to rain. Join our efforts to Secure America's Borders and End Illegal Immigration by Joining ALIPAC's E-Mail Alerts network (CLICK HERE)


 Reply With Quote


15 Antifa Wackos Federally Charged For Interfering With Federal...
06-17-2026, 07:20 AM in General Discussion