

Results 9,951 to 9,960 of 11856
 226Likes
LinkBacks (?)
-
12-26-2016, 11:32 AM
-
09-02-2016, 05:39 PM
-
whole garden made with pallets!! Love it!! | Pallets | Pinterest | Pallets, Pallets Garden and Wooden Pallets
Refback This thread03-06-2016, 11:30 AM -
10-20-2015, 05:29 PM
-
06-12-2015, 08:00 PM
-
02-26-2015, 01:58 PM
-
01-05-2015, 04:13 PM
-
12-19-2014, 10:19 AM
-
EMERGENCY: HUGE FEMA PANDEMIC EXERCISE IN USA IN NOVEMBER, INTERNET SHUT DOWN PART OF EXERCISE | Prepare4Survival
Refback This thread12-03-2014, 10:39 PM -
Off Grid World ? Ugly Duckling Shipping Container Home Built by Artist Is a Beautiful Swan on the Inside
Refback This thread11-25-2014, 03:10 PM -
11-17-2014, 10:59 PM
-
11-13-2014, 11:18 AM
-
11-09-2014, 02:54 PM
-
10-28-2014, 11:38 PM
-
10-26-2014, 05:54 AM
-
10-16-2014, 11:28 AM
-
10-03-2014, 01:25 PM
-
10-02-2014, 09:16 PM
-
09-26-2014, 07:00 PM
-
09-26-2014, 01:56 PM
-
09-19-2014, 04:46 PM
-
09-13-2014, 05:49 AM
-
09-05-2014, 01:52 PM
-
09-01-2014, 09:39 AM
-
08-30-2014, 06:29 PM
-
08-10-2014, 06:29 AM
-
08-04-2014, 05:07 PM
-
07-23-2014, 11:14 AM
-
New Evidence on Expiration Dates | Medical Preparedness | Doom and Bloom (TM) | Doom and Bloom (TM)
Refback This thread07-22-2014, 10:10 AM -
07-18-2014, 08:37 PM
-
07-15-2014, 04:57 PM
-
07-11-2014, 01:40 AM
-
04-22-2014, 11:14 AM
-
04-18-2014, 12:57 PM
-
04-18-2014, 10:10 AM
-
04-14-2014, 12:18 AM
-
04-12-2014, 02:28 AM
-
03-02-2014, 11:43 PM
-
12-24-2013, 11:59 PM
-
12-07-2013, 11:04 PM
-
kitchen | Cob
Refback This thread11-25-2013, 03:24 PM -
10-22-2013, 10:25 PM
-
Apple Pie Braid | Sweets
Refback This thread09-26-2013, 07:58 AM -
09-02-2013, 04:44 PM
-
5 Reasons Why You May have to Bug Out Even Though You Don’t Want to | The Apartment Prepper's Blog
Refback This thread08-23-2013, 03:20 PM -
06-27-2013, 06:30 AM
-
06-23-2013, 08:11 PM
-
06-17-2013, 11:21 PM
-
05-24-2013, 05:06 PM
-
To Eat / BASIC LIST / SUGGESTED ITEMS FOR LONG TERM SURVIVAL - Page 275 - ALIPAC
Refback This thread05-01-2013, 03:49 AM
Thread Information
Users Browsing this Thread
There are currently 1 users browsing this thread. (0 members and 1 guests)
 LinkBack URL
 About LinkBacks
-
06-22-2025, 01:04 PM #9951Senior Member


- Join Date
- Aug 2018
- Posts
- 95,564

- Home
- Homesteading
- Gardening
- Canning
- Chickens
- Recipes
- Food Storage
- Health
- Emergency Preparedness
- Natural Remedies
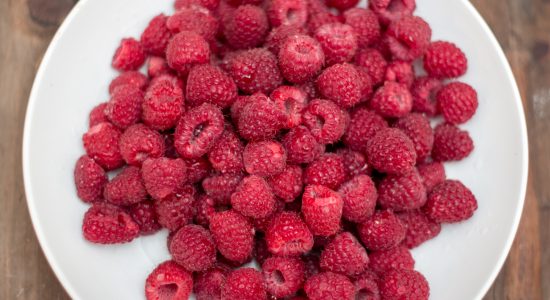
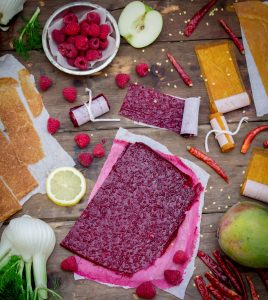
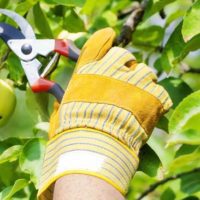
3 Different Apple Mango and Raspberry Fruit Leather Recipes

Melissa Francis
March 26, 2014
Food Storage & Skills, Recipes
apple, dried fruit, fruit, Fruit Leather, mango, Raspberry
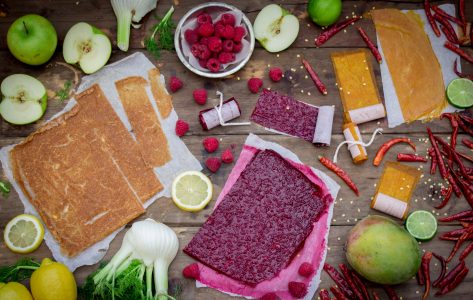
3 Different Apple, Mango & Raspberry Fruit Leather Recipes
This apple, mango and raspberry fruit leather recipe is a great way to use the sweet ripe fruits of the summer to make a delicious snack that can be enjoyed anywhere.
These three flavored fruit leather recipes are tailored towards adults taste buds: (Just match the ingredients with the title of the flavor you prefer)
Apple & Fennel
Mango Chili Lime
Raspberry Vanilla
Click here to read how to make a Apple, Mango & Raspberry Fruit Leather Recipe:
http://cookingstoned.tv/recipe/apple...fruit-leather/
3 Different Apple Mango and Raspberry Fruit Leather Recipes - The Homestead Survival
If you're gonna fight, fight like you're the third monkey on the ramp to Noah's Ark... and brother its starting to rain. Join our efforts to Secure America's Borders and End Illegal Immigration by Joining ALIPAC's E-Mail Alerts network (CLICK HERE)
-
06-22-2025, 01:12 PM #9952Senior Member
- Join Date
- Aug 2018
- Posts
- 95,564
Jerry James Stone
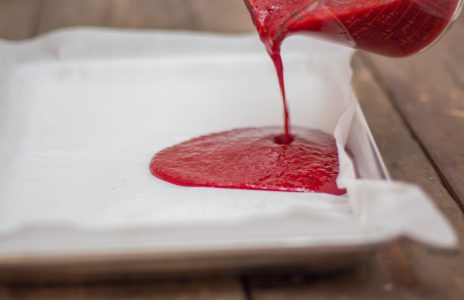
Apple, Mango & Raspberry Fruit Leather
A Jerry James Stone Recipe
March 14, 2014
Categories
Red, Snack, Vegan, Yellow
Ingredients
- ▢1 lb raspberries
- ▢2 vanilla beans
- ▢¾ cup sugar
- ▢2 ½ lb mangos
- ▢1 lime
- ▢¼ tsp salt
- ▢½ tsp chili powder
- ▢1 lb Granny Smith apples
- ▢2 fennel bulbs
- ▢1 lemon
- ▢1 tsp ground cinnamon
Jump to instructions
Print
Save
Prep Time 10minutes minutes
Cook Time 6hours hours
Total Times 6hours 10minutes
Instructions
- Im only showing the steps for the Raspberry Vanilla Leathers here because, well, it is pretty much the same the whole way through. First things first, fruit leathers work best with perfectly ripened fruit. Not overly ripe or mushy, though. Look at these gorgeous raspberries. I wanted to motorboat them! It was a bit tough to turn them into leather (no pun intended) and I admit, I snuck a few for myself.
- Next we are going to create our purees. Take the 1 pound of raspberries and puree them, then halve and scrape both vanilla beans and add the seeds along with 1/4 cup of sugar to the puree, mixing well. For the mangoes, slice and cut them then puree fruit (hell, sneak a few bits for yourself). Juice 1 lime and add that juice along with 1/4 cup sugar, 1/4 teaspoon salt and 1/2 teaspoon chili powder to the puree. The apples and fennel bulbs take an extra step. Prep the fennel bulbs, then chop them. Peel and core the apples, then chop them, placing them in a bowl with enough water to cover, and the juice of 1/2 lemon; this keeps them from browning until youre ready to use them. Add the chopped fennel and apples to a frying pan along with the juice of 1/2 lemon and cook over a medium-low heat until tender. Then puree the mixture, adding in 1/4 cup of sugar and 1 teaspoon of cinnamon.
- Line three separate quarter-sized baking sheets with parchment paper and pour each puree onto its own sheet. Holding each sheet on the short ends, give the sheets a shake
trying to evenly spread out the puree. You can use a spatula to make sure you get it to each corner. This part is a bit of a pain but you really do want an even spread.
- Place the baking sheets in a pre-heated oven at 170 degrees F and let them bake for about 6 hours, rearranging the pans midway, for an even dehydration. If you are just baking one of these at a time, it will only take about 3 hours individually.
- When finished, the end bits will be a bit crispy and you might even have to cut them off as they wont have a leathery texture you can work with.
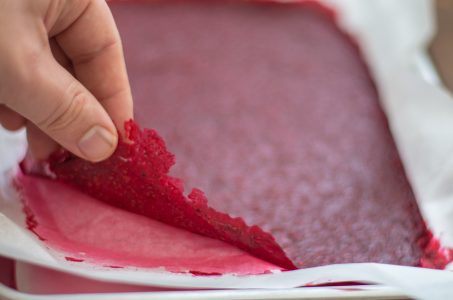
- Cut the flats of leather into 1-inch strips, parchment paper and all. If you find the parchment paper is tearing and hard to work with, you might need to use fresh sheets. But if you can use the stuff you baked, it means less waste. Every piece of paper you re-use saves a kittens life, just keep that in mind. Tie 'em off and enjoy!
Print
Save
Share
Related

Thai Peanut Sauce Hummus Dip
How to make a Thai peanut sauce inspired hummus dip that is nutty, sweet, and spicy with a food waste busting twist using aquafaba.
See Moreabout Thai Peanut Sauce Hummus Dip
Shiitake & Portabella Mushroom Vegan Pâté
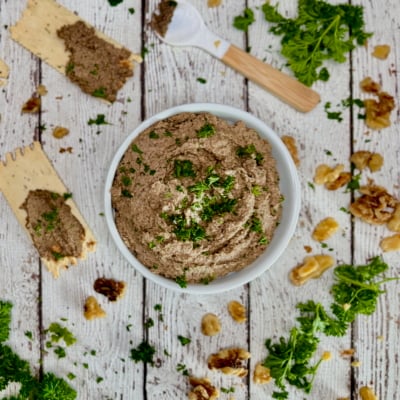
How to make a creamy vegan pâté with sautéed mushrooms, walnuts, and white beans. A touch of miso, cocoa, and herbs adds depth. Perfect for crackers or a charcuterie board. Pair with a SIP Certified Pinot Noir.
See Moreabout Shiitake & Portabella Mushroom Vegan Pâté

Butternut Cranberry Side Dish with Walnuts & Greens
Learn how to make a delicious butternut cranberry side dish with walnuts and fresh greens in this easy recipe. Perfect for Thanksgiving, Christmas, or any winter meal!
See More about Butternut Cranberry Side Dish with Walnuts & Greens
View All Recipes
Apple, Mango & Raspberry Fruit LeatherIf you're gonna fight, fight like you're the third monkey on the ramp to Noah's Ark... and brother its starting to rain. Join our efforts to Secure America's Borders and End Illegal Immigration by Joining ALIPAC's E-Mail Alerts network (CLICK HERE)
-
06-22-2025, 01:13 PM #9953Senior Member
- Join Date
- Aug 2018
- Posts
- 95,564
If you're gonna fight, fight like you're the third monkey on the ramp to Noah's Ark... and brother its starting to rain. Join our efforts to Secure America's Borders and End Illegal Immigration by Joining ALIPAC's E-Mail Alerts network (CLICK HERE)
-
06-22-2025, 01:21 PM #9954Senior Member
- Join Date
- Aug 2018
- Posts
- 95,564
 Projects
Contests
Teachers
Log InSign Up
DIY Berkey Water Purifier
By sspence in LivingKitchen
173,484
184
21
Introduction: DIY Berkey Water Purifier

 By sspenceArduinotronicsFollow
More by the author:


About: Professionally, I'm an IT Engineer (Executive Level) and Electronics Tech. I'm a Amateur Radio Operator (KK4HFJ). I lived off grid, with Solar (PV), Wind, and veggie oil fueled diesel generator power for 6 yea More About sspence »
Here we will show how we make our own water purifiers from used food grade plastic buckets, and Berkey water purification elements.
Materials Needed:
2 food grade Buckets w/ lids (these buckets are naturally BPA free)
a Berkey filter twin pack (we like the black, but the white ceramic are also very good)
a faucet kit
3/4" drill bit
7/16" drill bit
Step 1: Selecting the Buckets

We highly recommend food grade (BPA free) buckets. These can be obtained online, or picked up used at restaurants. We like the used ones due to the recycling and low embodied energy benefits. Any stackable bucket with lids from 3 gallon to 6 gallon, round or square can be used.
Step 2: Prime the Filters

The filters need to be primed before first use, or if the filters are left uncovered and dry out. Instructions come with the filter cartridges on priming, as well as a small "priming button".
Step 3: Top Bucket Modifications

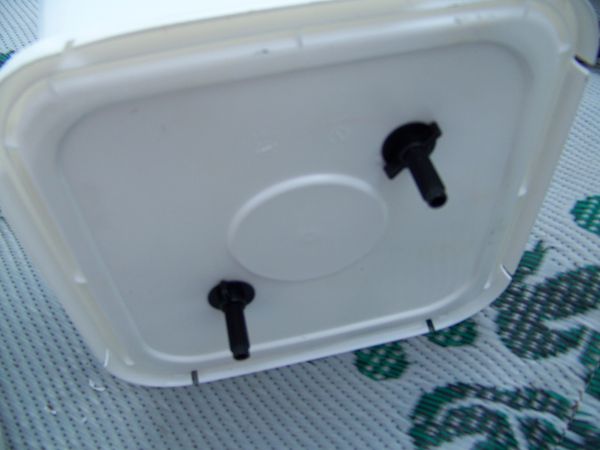
Two 7/16" holes are drilled through the bottom of the top bucket and the lid of the bottom bucket. Insert the two (primed) Berkey filters into the top bucket with the rubber grommet between the bucket and the filter. Tighten the nuts on the filter shafts with the lid between the nuts and the bottom of the top bucket.
Step 4: Modifying the Bottom Bucket

Drill a 3/4" hole near the bottom of the bottom bucket, high enough so the spigot clears the bottom of the bucket. Two inches is usually sufficient. Install the spigot kit, with washers on both sides and nut on the inside. You don't want the spigot to be below the bottom of the bucket, but you want it as low as possible.
Step 5: Finished
Stack the buckets (seal the bottom bucket lid), fill the top bucket with water, cover lightly (don't seal) and enjoy! Filters can be lightly "scraped" with a brillo pad when water flow decreases, and each filter element is good for approximately 3000 gallons. Multiple elements (1-6, depending on size of bucket) can be installed for increased flow.
DIY Berkey Water Purifier : 5 Steps - InstructablesIf you're gonna fight, fight like you're the third monkey on the ramp to Noah's Ark... and brother its starting to rain. Join our efforts to Secure America's Borders and End Illegal Immigration by Joining ALIPAC's E-Mail Alerts network (CLICK HERE)
-
06-22-2025, 02:29 PM #9955Senior Member
- Join Date
- Aug 2018
- Posts
- 95,564
March 27, 2014 Last updated: June 2, 2021
3 Ways to Escape Zip Ties: An Illustrated Guide
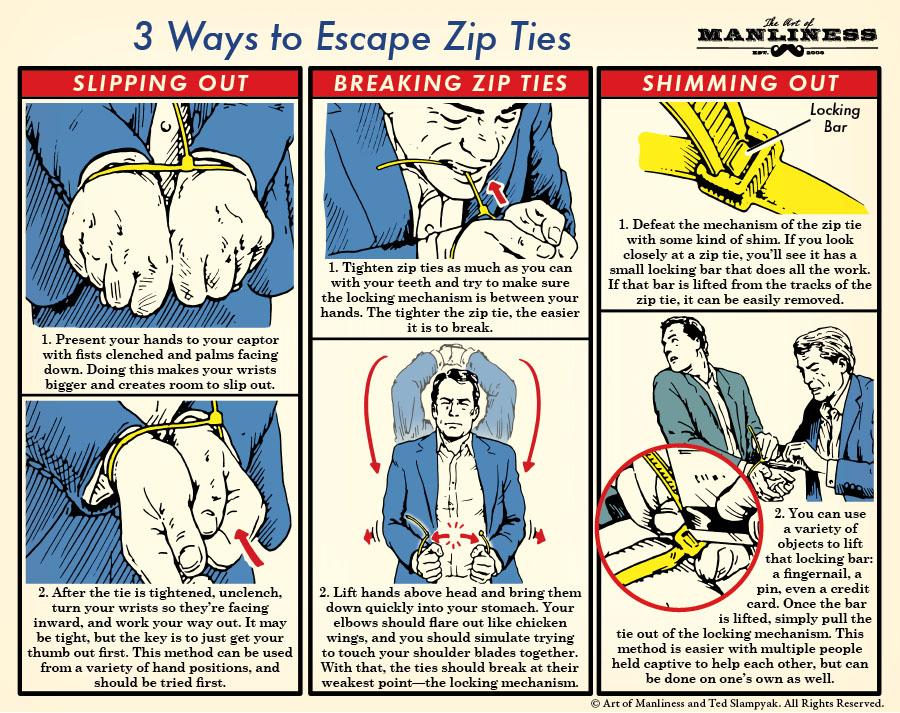
Zip ties are increasingly being used to restrain innocent folks in home invasion and kidnapping scenarios. With a quick Google search, youll see a number of situations where suspects used standard zip ties from the local hardware store to restrain their victims.
We tried out all of these methods, and they all work. We even did it with the heavy duty variety, rated at 175 lbs. With a little bit of practice, its actually fairly easy to escape from zip ties, and you should be well-prepared should you ever find yourself in the unfortunate situation of being illegally restrained by a home invader or other criminal with zip ties.
Slipping out
1. Present your hands to your captor with fists clenched and palms facing down. Doing this makes your wrists bigger and creates room to slip out.
2. After the tie is tightened, unclench, turn your wrists so theyre facing inward, and work your way out. It may be tight, but the key is to just get your thumb out first. This method can be used from a variety of hand positions, and should be tried first.
Breaking zip ties
1. Tighten zip ties as much as you can with your teeth and try to make sure the locking mechanism is between your hands. The tighter the zip tie, the easier it is to break.
2. Lift hands above head and bring them down quickly into your stomach. Your elbows should flare out like chicken wings, and you should simulate trying to touch your shoulder blades together. With that, the ties should break at their weakest point the locking mechanism.
Shimming out
1. Defeat the mechanism of the zip tie with some kind of shim. If you look closely at a zip tie, youll see it has a small locking bar that does all the work. If that bar is lifted from the tracks of the zip tie, it can be easily removed.
2. You can use a variety of objects to lift that locking bar: a fingernail, a pin, even a credit card. Once a credit card. Once the bar is lifted, simply pull the tie out of the locking mechanism. This method is easier with multiple people held captive to help each other, but can be done on ones own as well.
The folks over at ITS Tactical have a great series of videos on how to escape from zip ties that, with their permission, we based this illustrated guide on.
Like this illustrated guide? Then youre going to love our book The Illustrated Art of Manliness! Pick up a copy on Amazon.
Illustrated by Ted Slampyak.
Related Posts

Skill of the Week: Escape From Quicksand
How to Escape a Sinking Car: An Illustrated Guide
Ski Etiquette: An Illustrated Guide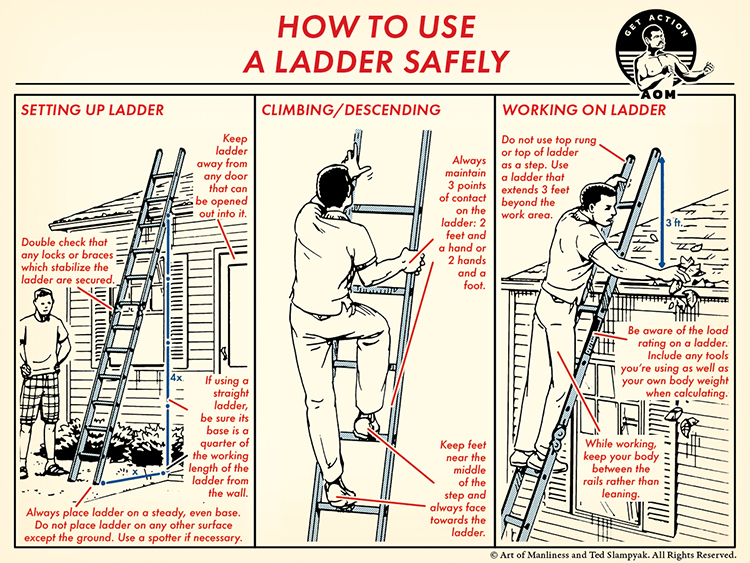
Skill of the Week: Use a Ladder Safely
Skill of the Week: Shine Your Shoes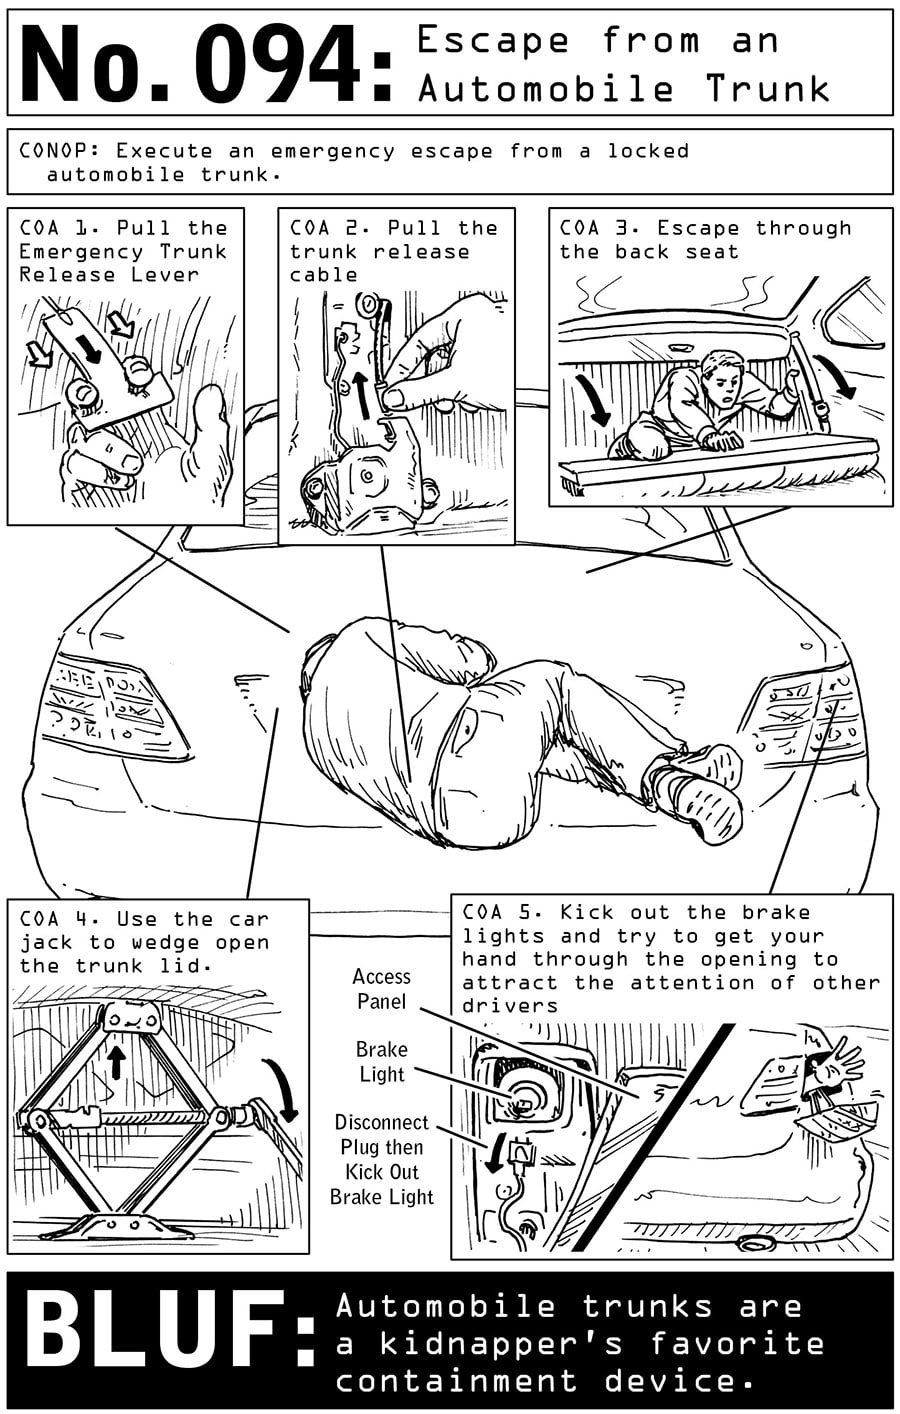
How to Escape From the Trunk of a Car: An Illustrated Guide
Tags: Self-Defense & Fighting
3 Ways to Escape Zip Ties: An Illustrated Guide | The Art of Manliness
If you're gonna fight, fight like you're the third monkey on the ramp to Noah's Ark... and brother its starting to rain. Join our efforts to Secure America's Borders and End Illegal Immigration by Joining ALIPAC's E-Mail Alerts network (CLICK HERE)
-
06-22-2025, 02:33 PM #9956Senior Member
- Join Date
- Aug 2018
- Posts
- 95,564
If you're gonna fight, fight like you're the third monkey on the ramp to Noah's Ark... and brother its starting to rain. Join our efforts to Secure America's Borders and End Illegal Immigration by Joining ALIPAC's E-Mail Alerts network (CLICK HERE)
-
06-22-2025, 02:40 PM #9957Senior Member
- Join Date
- Aug 2018
- Posts
- 95,564
Gardening
Cultivate your green thumb with our gardening insights. From urban balconies to sprawling backyards, we provide practical advice for growing vibrant flowers, hearty vegetables, and creating your own serene outdoor retreat.

How to Build an Underground Greenhouse: A Complete Guide
According to the CDC, only 9% of American adults eat enough vegetables. So, the odds are that youre not eating enough. You can help increase
Read More about How to Build an Underground Greenhouse: A Complete Guide

How to Grow An Indoor Survival Garden
If at any given moment, an emergency situation unfolds, and you are forced to somehow survive off of your own resources for quite some time,
Read Moreabout How to Grow An Indoor Survival Garden

Discover What To Start Planting In March
I get a lot of messages asking what you can plant in March, so here are some great tips to help you along and get
Read Moreabout Discover What To Start Planting In March
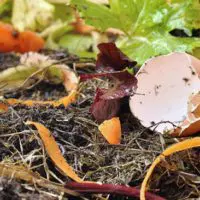
What Should Not Be Put in Your Compost
Compost can be defined as the organic matter that is the result of the decomposition of everyday waste. Compost is used as a fertilizer and
Read Moreabout What Should Not Be Put in Your Compost

How To Grow Mushrooms At Home Fun And Nutritious!
Love mushrooms? Would you like to grow your own? Learning how to grow mushrooms at home could be a fun experience for the whole family.
Read Moreabout How To Grow Mushrooms At Home Fun And Nutritious!

How To Grow Garlic: A Step by Step Guide
One of the most exciting things about the late winter and early spring is when those little tendrils begin to emerge from the soil. If
Read Moreabout How To Grow Garlic: A Step by Step Guide
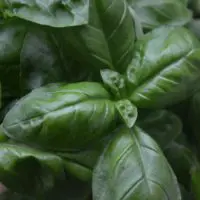
13 Best Herbs to Grow Indoors
Herbs are known to enhance flavors in food and offer natural remedies for ailments. Therefore, trying your hand at growing them indoors is well worth
Read Moreabout 13 Best Herbs to Grow Indoors
Food Producing Bushes on your Property
For a long time Americans have bought into these strange rituals. They are weird things that we all do so that we fit in. One
Read Moreabout Food Producing Bushes on your Property

How To Build A PVC Cucumber Trellis
The PVC Cucumber Trellis is a cool way to grow your cucumbers. PVC is quite cheap and very sturdy. Although there are no instructions on how
Read Moreabout How To Build A PVC Cucumber Trellis

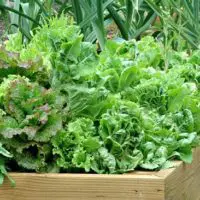
Nontraditional Gardening Methods
Most of our gardens are shut down for the year. The cold weather is blowing in and its time to start padding up ourselves for
Read Moreabout Nontraditional Gardening Methods
70 Gardening Hacks That Will Blow You Away
While the gardening days have come and gone, for most, there is no better time for planning next years garden. After that first frost there
Read Moreabout 70 Gardening Hacks That Will Blow You Away

Basics of Soil Enrichment: Things You Need to Know
If you want to produce seriously nutritious food, it all starts with your soil. One of the most important aspects of gardening is revitalizing the
Read Moreabout Basics of Soil Enrichment: Things You Need to Know
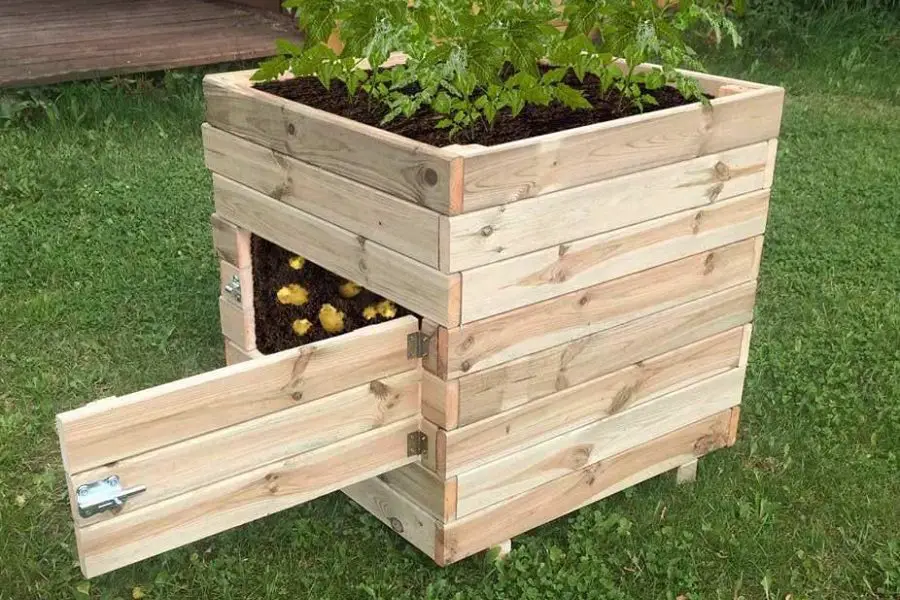
How To Build A Potato Box: A Step-By-Step Guide
Growing potatoes in a box may seem weird and a lot of effort but actually can double and even quadruple your potato yield! Potatoes are
Read Moreabout How To Build A Potato Box: A Step-By-Step Guide

Failing as a Prepper
If you are thinking about starting to prep or even if you are years into this thing, failures abound. One of the biggest prepper failures
Read Moreabout Failing as a Prepper
Growing Fruit Trees on your Homestead
It only takes a few seasons to realize that you are not going to want to reseed your land every year. Not all of it,
Read Moreabout Growing Fruit Trees on your Homestead

Indoor Vegetable Gardening: 37 Edibles You Can Grow Indoors
As a prepper, one of the essential skills is for you to be able to sustain yourself and have food available to you the whole
Read Moreabout Indoor Vegetable Gardening: 37 Edibles You Can Grow Indoors

Keyhole Gardens: A Drought Tolerant Composting Garden
The Keyhole Garden concept is brilliantly simple. A circular raised bed has a center compost basket that distributes nutrients to the surrounding lasagna-style garden bed. A
Read Moreabout Keyhole Gardens: A Drought Tolerant Composting Garden

How To Grow Banana Trees At Your Home
Nothing says the tropics quite like the sight of a grove of banana trees. The good news is that these versatile and tasty fruit-bearing trees
Read Moreabout How To Grow Banana Trees At Your Home
How To Build A Mini Water Garden Oasis: 20 Different Styles
There are a ton of different things that can happen to a garden. Tragedy can befall all of your growing spaces in a hurry. It
Read Moreabout How To Build A Mini Water Garden Oasis: 20 Different Styles

How To Build Your Own Vertical Garden with a Pallet
The world of preparedness and self-reliance is as full of good information as it is of excuses. People are looking for a reason to make
Read Moreabout How To Build Your Own Vertical Garden with a Pallet
If you're gonna fight, fight like you're the third monkey on the ramp to Noah's Ark... and brother its starting to rain. Join our efforts to Secure America's Borders and End Illegal Immigration by Joining ALIPAC's E-Mail Alerts network (CLICK HERE)
-
06-22-2025, 02:53 PM #9958Senior Member
- Join Date
- Aug 2018
- Posts
- 95,564
16 DIY Survival Stove Projects You Should Try
1 Comment
8.2KSHARES
Pin7.9K
Share280
Tweet
There are countless ways to make survival stoves.
They can be ultra-simple hobo stoves made from a single food can, alcohol stoves from soda cans, or more complex stoves that require some tools and preparation.
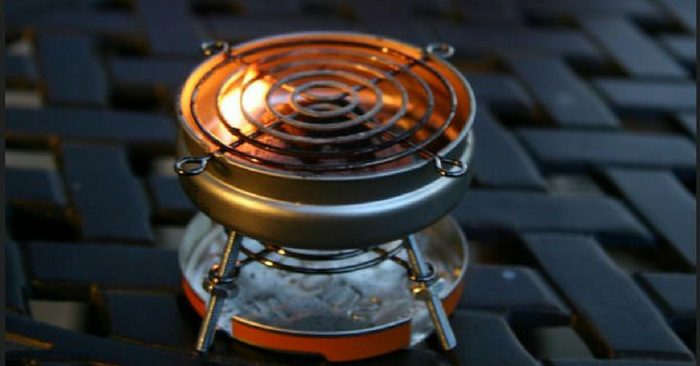
The Instructables community has some of the best examples of how to make stoves to fit every need and every situation imaginable. I spend a lot of time browsing the website to further my own knowledge on a daily basis.
So whether you want a cleverly handcrafted camp stove to impress your friends or you need to know how to make one in a pinch for that random power outage or night spent in a broken-down car, you’ll find it here!
My favorite is the alcohol stove. I think they are pretty cool and work well. I made one a year ago, and it worked perfectly.
My next survival stove project is going to be a homemade rocket stove from #10 cans. I love rocket stoves because they burn so economically and produce very little smoke.
See all the survival stove projects at the link below. If you have other stove designs or ideas, we would love to see them. Head on over to our Facebook page and leave us a comment.

16 DIY Survival Stove Projects You Should Try
If you're gonna fight, fight like you're the third monkey on the ramp to Noah's Ark... and brother its starting to rain. Join our efforts to Secure America's Borders and End Illegal Immigration by Joining ALIPAC's E-Mail Alerts network (CLICK HERE)
-
06-22-2025, 03:05 PM #9959Senior Member
- Join Date
- Aug 2018
- Posts
- 95,564
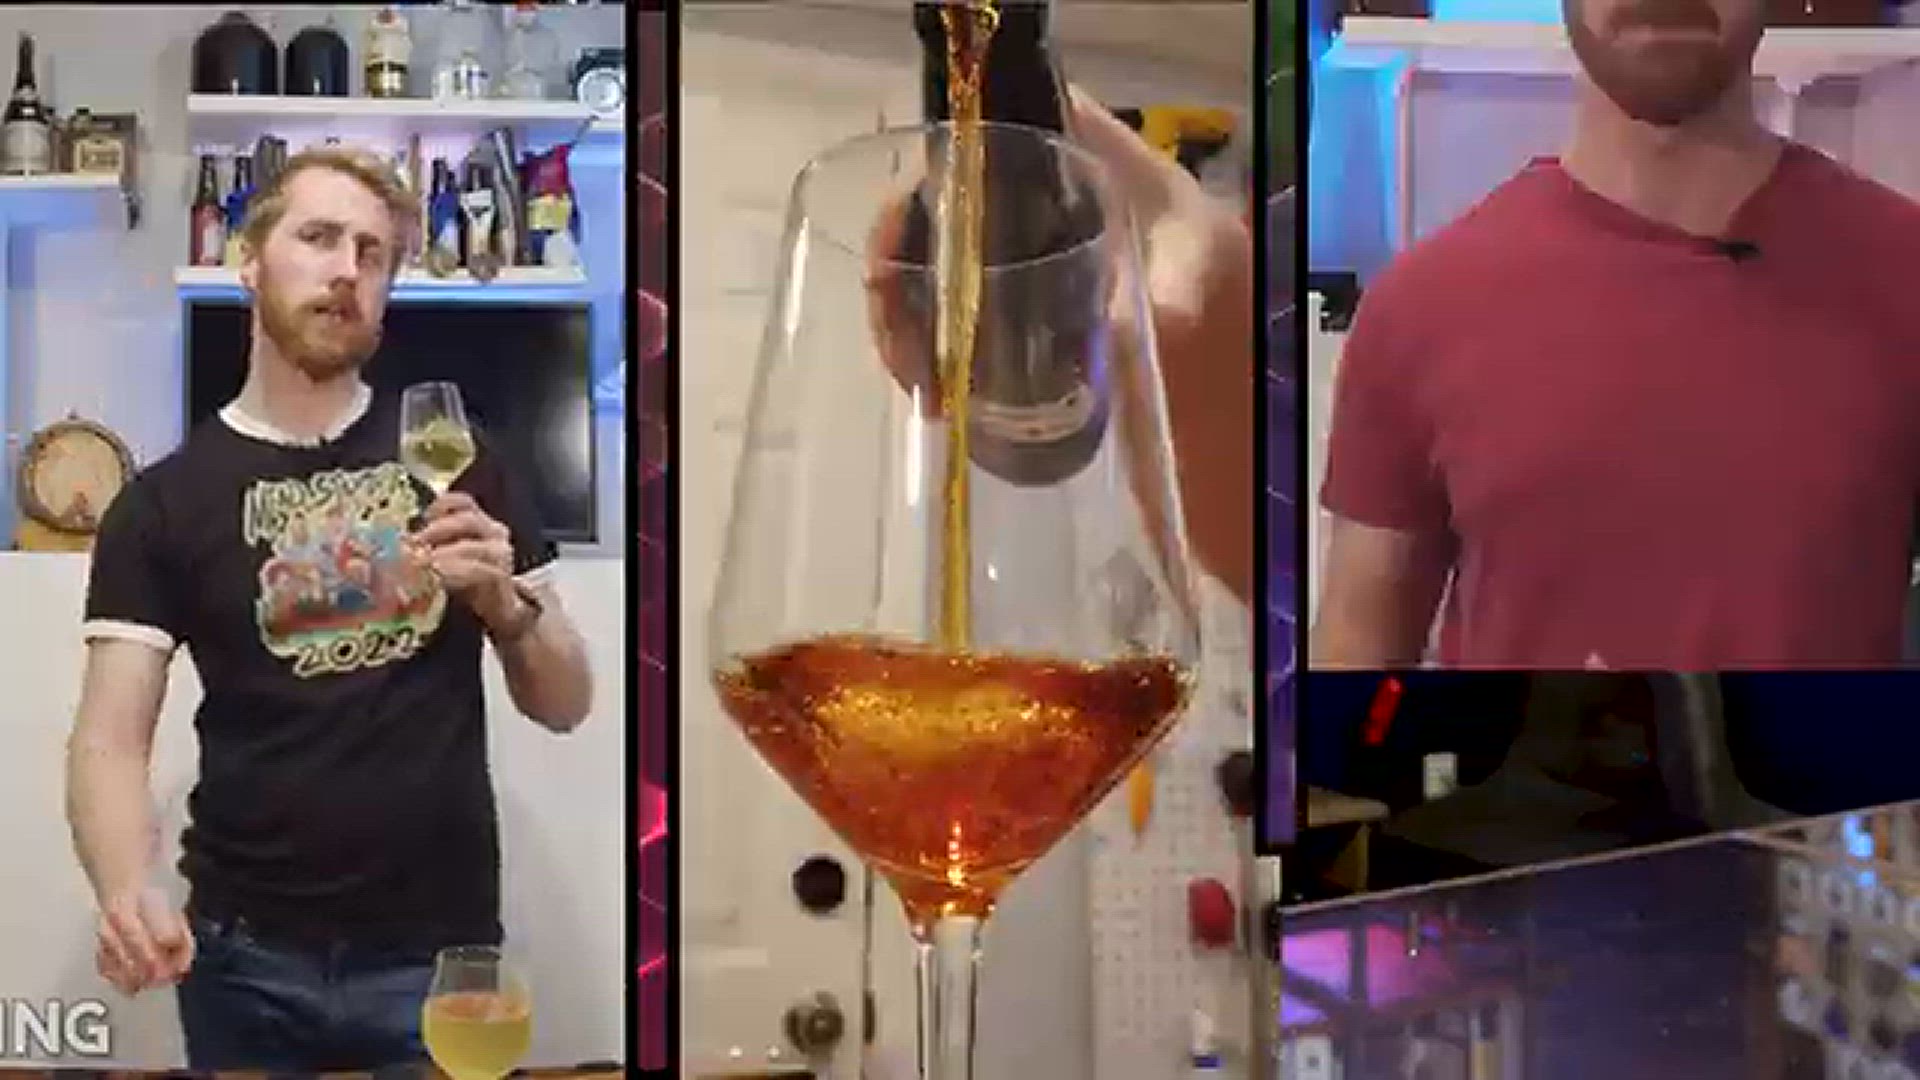
7 Of The Best Mead Alcoholic Beverage Recipes On The Net (Honey Based)
1 Comment17.5KSHARES
Pin16.4K
Share1.1K
Tweet
Making mead wine is satisfying, easy and the best tasting beverage you can make at home. The last mead recipe was a success, so I hunted down more mead recipes to make.
 All of these sound really yummy and look easy to make. Mead or honey wine is an alcoholic beverage created by the fermentation of water and honey.
Meads alcohol content can vary greatly between mild and strong, and it can range between still and sparkling.
Mead is known from many sources of ancient history throughout Europe, Africa, and Asia. It can be regarded as the ancestor of all fermented drinks. Similar to grape wine, mead can be dry, semi-sweet, or sweet.
My favorite is sweet .. Just writing this I think I need to be making another batch.
7 Of The Best Mead Alcoholic Beverage Recipes On The Net (Honey Based)

7 Of The Best Mead Alcoholic Beverage Recipes On The NetIf you're gonna fight, fight like you're the third monkey on the ramp to Noah's Ark... and brother its starting to rain. Join our efforts to Secure America's Borders and End Illegal Immigration by Joining ALIPAC's E-Mail Alerts network (CLICK HERE)
-
06-22-2025, 03:08 PM #9960Senior Member
- Join Date
- Aug 2018
- Posts
- 95,564
Master Terafan Greydragon's
Mead (or Honey based) Recipes

Mead, using a 13th/14th century English manuscript
The “Tractatus de magnete et operationibus eius”
England, 13th centuryUpdated 13 Sep 04
Master Terafan's Clove Mead
Add the honey to one gallon of boiling water. Turn off the heat and stir well. Slice or juice the lemons and add along with the clove and tea. Let stand covered until cool. Pour into a gallon jug and add the yeast. Epernay II yeast works very well, but champagne yeast or ale yeast are also fine.Ingredients
1 Gallon Water 3 lbs Honey (1 quart) 1 Lemon 12 Cloves 1 cup strong tea Epernay II yeast
Let it ferment for 18 days, and then siphon into bottles. Seal or cap the bottles and let sit at room temperature for two weeks, then put in the refrigerator. You can drink it at any. time now.
Syr Michael of York Mead
Syr Michael of York, raised in the East Kingdom, wrote the original article in the Knowne World Handbook on brewing. He has won East Kingdom brewing competitions several times with this recipe.Ingredients
1 Gallon Water 2 1/2 lbs Honey 1 Lemon 1/2 tsp Nutmeg 1 pkg Ale or Champagne yeast
Boil the water and honey. Add the juice of the lemon and the nutmeg. Boil, skimming the foam that rises to the surface, until it stops foaming. Let cool to blood temperature, actually under 90 degrees F, then pitch the yeast.
Let it work two and a half weeks, bottle it and let it age two weeks.
PUT IT IF THE REFRIGERATOR, AS IT CAN BECOME EXPLOSIVE IF LEFT OUT AFTER THIS.
Drink at your leisure!
Maple Mead
This mead was made from an original recipe I developed when I was staring into my larder one day. Looking for some breakfast and staring at a bottle of pure maple syrup, I realized that syrup would ferment with honey, just like fruit. Drawing upon (at that time) 3 years of brewing experience, I came up with the following recipe for 1 gallon:Ingredients 3 lbs Honey Boil some water and pour about 4 oz into a cup with a single teabag. Let this sit for a couple of hours. Boil honey with 7 cups of water until it stops foaming, then add maple, brown sugar, lemon, and tea. Turn of the heat and let cool. Pitch yeast when approximately 70 degrees F.3 TBS lemon juice 1/4 cup brown sugar 4 oz very strong tea 3 fluid oz of Pure maple syrup yeast according to preference
I tried hard to stick to 'period' ingredients like lemon juice and tea (instead of using chemicals). The lemon juice adds acidity and the tea adds tannin.
Let it ferment for a month, and then rack into a secondary. After about 2 more months, rack again and taste. If you like it, bottle it. If not, let it sit another couple of months and then bottle. If you don't like sweet meads, you can cut the honey down to either 2 or 2 1/2 lbs. Drink at your leisure!
White Pyment
This pyment was made when I first started brewing, and was focused on success rather than period techniques. It is from a recipe in Acton and Duncan's Brewing Mead, in the section on Melomels, Hippocras, Pyment, and Cyser. Although mead is called melomel when fruit has been added, when the fruit is grapes it is called pyment. This is white pyment because white grape juice is used (as opposed to red). I used for following for 5 gallons:Ingredients 9 lbs honey Boil honey and water until it stops foaming, then add remainder of ingredients except yeast, and turn off the heat. Let cool and pitch yeast when approx 70-80 degrees F.Four 12oz cans white grape juice concentrate 5 tsp yeast nutrient 1/3 oz grap tannin 2 1/2 oz malic acid Sauternes yeast
Rack into a secondary after one month. After 2 more months, rack again and taste. At this point, I found it dry and so added 1 lb of honey to the 5 gallon batch. After 2 more months, rack again, and taste. if you like, bottle it, otherwise let it sit some more.
Master Robyyan's Quick Mead or Weak Honey Drink
Drinks of fermented honey and water are some of the earliest known to man. This weak honey drink is based on a recipe from Sir Kenelme Digbie's Closet, although Robyyan has modified it.
Original recipe (Digbie, p. 124):
Take nine pints of warm fountain water, and dissolve in it one point of pure white honey, by laving it therein , till it be dissolved. Then boil it gently , skimming it all the while, till all the scum be perfectly scummed off; and after that boil it a little longer, peradventure a quarter of ah hour. In all it will require two or three hours boiling, so at least one third part may be consumed. About a quarter of an hour before you cease boiling, and take it from the fire, put to it a little spoonful of cleansed and sliced Ginger; and almost half as much of the thin yellow rind of Orange, when you are even ready t take it from the fire, so as the Orange boil only one walm in it. Then pour it into a well glassed strong deep great Gally-pot, and let it stand so, till it be almost cold, that it be scarce Luke-warm. Then put into it a little silver spoonful of pure Ale-yeast and work it together with a Ladle to make it ferment: as soon as it beginneth to do so, cover it close with a fit cover, and put a thick dubbled woollen cloth about it. Cast all things so that this may be done when you are going to bed.
Next morning when you rise, you will find the barm gathered all together in the middle; scum it clen off with a silver spoon and a feather, and bottle up the Liquor, stopping it very close. It will be ready to drink in two or three days, but is will keep well a month or two. It will from the first, very quick and pleasant.
Master Robyyan's recipe:
Add one. pound of honey to 5 quarts of water, bring the mixture to a simmer and skim the foam as it rises, until there is no more foam, approximately 30 minutes. Add approx. 2 tbsp. coarsely chopped fresh ginger, the juice of one lemon, and 8 cloves, stuck into the lemon peel for easy removal. Boil for 15 minutes, then remove from the heat and cool to lukewarm. Place the wort in a jug, straining the ginger and lemon pieces out. Add 1/4 tsp. ale yeast, and fit a fermentation lock.
After 48 hours, bottle and store at room temperature. After 48 hours in the bottle, refrigerate.
Gyrth's Quick or "Short" Mead
What follows is a step by step explanation from Duke Sir Gyrth Oldcastle of Ravenspur on exactly how he makes mead:Ingredients
2 quarts honey 5 gal water 2 cups strong tea 1 teaspoon ginger 1 teaspoon nutmeg 2 teaspoons cinnamon 3-5 lemons Mead yeast
A plastic sieve wooden spoon big pot 5 gallon jug or carboy thermometer all yours and everyone else's
used coke or beer bottles
First, boil water. I make two batches at a time with a three gallon pot. Add honey on a one part honey to nine parts water basis. (Honey weighs 12 lb. to the gallon.) I use a quart per 2 1/2 gallon batch. Stir it about to dissolve the honey in the water. 7he honey will sink to the bottom of the pot and burn unless stirred at first. When the mixture is bubbling happily, a whitish scum will riser to the surface. Spoon it away.
Scum removal is a topic of controversy among brewers. Some maintain that complete removal is the only way to go,- others like myself skim until there's only a very little left. Suit yourself.
Remove from heat and add one cup of very strong tea (2 cups per 5 gallons) (From herein on I assume that the measurements are for 5 gallons of mead)), 1 teaspoon of ginger, 1 teaspoon of nutmeg, and 2 teaspoons of cinnamon. Then take 3-5 lemons, Slice them thin, and throw them in. Let the lemons steep in the must (must is what you call incipient mead) for 30 minutes; then remove the slices. The tea and lemon move the pH of the must towards one comfortable for the yeast.
Let the whole caboodle cool to about 80-85 degrees F. Then introduce your yeast to it, cap it with an airlock, and stand back. Afier 5 days taste it. If too sweet, let it continue; if too alcoholic (unlikely) add more boiled honey and water. Keep tasting daily until sweetness and alcohol balance each other out. Syphon it off into bottles and refrigerate. If not refrigerated, it will get progressively less sweet and slide irrevocably into undrinkability. Let stand 2-5 weeks. Drink and enjoy. it ties up refrigerator space, but tends to be worth it.
NOTE - When refrigerated the mead tends to settle, and at this point I find it advantageous to siphon again into clean bottles, seal tightly, and re-refrigcrate. It makes for a sweeter, more sparkling mead.
Basic Wildflower Mead
To one gallon of water add two quarts of honey and the white of one, egg, mixing WELL. Cook the mixture at medium heat on the stove, stirring continuously. When the mix comes to a boil all the scum rises to the top to be skimmed, assisted by the egg white, just like you clear stock. When no more scum rises add the raisin, turn off the heat, and cover overnight. In the morning crush and strain out the raisins, add the yeast, and transfer the liquid (called 'must') to a glass jug with a fermentation lock. Keep any excess to top off the mead after racking.Ingredients
2 quarts honey (preferrably wildflower) 1 gallon water 1 cup white raisins 1 egg
The first racking should be done after one month and the next when fermentation stops. Rack again about three, months later. It is important to keep the mead topped off to keep the airspace in the bottle to a minimum. When you can read newsprint through the jug of mead, bottle and cork. Don't touch for at least a year.
If you're gonna fight, fight like you're the third monkey on the ramp to Noah's Ark... and brother its starting to rain. Join our efforts to Secure America's Borders and End Illegal Immigration by Joining ALIPAC's E-Mail Alerts network (CLICK HERE)


 Reply With Quote


Marfoogle TV - Military Aged Males - Not Good
08-01-2026, 01:48 AM in Videos about Illegal Immigration, refugee programs, globalism, & socialism