

Results 9,741 to 9,750 of 11787
 226Likes
LinkBacks (?)
-
12-26-2016, 11:32 AM
-
09-02-2016, 05:39 PM
-
whole garden made with pallets!! Love it!! | Pallets | Pinterest | Pallets, Pallets Garden and Wooden Pallets
Refback This thread03-06-2016, 11:30 AM -
10-20-2015, 05:29 PM
-
06-12-2015, 08:00 PM
-
02-26-2015, 01:58 PM
-
01-05-2015, 04:13 PM
-
12-19-2014, 10:19 AM
-
EMERGENCY: HUGE FEMA PANDEMIC EXERCISE IN USA IN NOVEMBER, INTERNET SHUT DOWN PART OF EXERCISE | Prepare4Survival
Refback This thread12-03-2014, 10:39 PM -
Off Grid World ? Ugly Duckling Shipping Container Home Built by Artist Is a Beautiful Swan on the Inside
Refback This thread11-25-2014, 03:10 PM -
11-17-2014, 10:59 PM
-
11-13-2014, 11:18 AM
-
11-09-2014, 02:54 PM
-
10-28-2014, 11:38 PM
-
10-26-2014, 05:54 AM
-
10-16-2014, 11:28 AM
-
10-03-2014, 01:25 PM
-
10-02-2014, 09:16 PM
-
09-26-2014, 07:00 PM
-
09-26-2014, 01:56 PM
-
09-19-2014, 04:46 PM
-
09-13-2014, 05:49 AM
-
09-05-2014, 01:52 PM
-
09-01-2014, 09:39 AM
-
08-30-2014, 06:29 PM
-
08-10-2014, 06:29 AM
-
08-04-2014, 05:07 PM
-
07-23-2014, 11:14 AM
-
New Evidence on Expiration Dates | Medical Preparedness | Doom and Bloom (TM) | Doom and Bloom (TM)
Refback This thread07-22-2014, 10:10 AM -
07-18-2014, 08:37 PM
-
07-15-2014, 04:57 PM
-
07-11-2014, 01:40 AM
-
04-22-2014, 11:14 AM
-
04-18-2014, 12:57 PM
-
04-18-2014, 10:10 AM
-
04-14-2014, 12:18 AM
-
04-12-2014, 02:28 AM
-
03-02-2014, 11:43 PM
-
12-24-2013, 11:59 PM
-
12-07-2013, 11:04 PM
-
kitchen | Cob
Refback This thread11-25-2013, 03:24 PM -
10-22-2013, 10:25 PM
-
Apple Pie Braid | Sweets
Refback This thread09-26-2013, 07:58 AM -
09-02-2013, 04:44 PM
-
5 Reasons Why You May have to Bug Out Even Though You Don’t Want to | The Apartment Prepper's Blog
Refback This thread08-23-2013, 03:20 PM -
06-27-2013, 06:30 AM
-
06-23-2013, 08:11 PM
-
06-17-2013, 11:21 PM
-
05-24-2013, 05:06 PM
-
To Eat / BASIC LIST / SUGGESTED ITEMS FOR LONG TERM SURVIVAL - Page 275 - ALIPAC
Refback This thread05-01-2013, 03:49 AM
Thread Information
Users Browsing this Thread
There are currently 3 users browsing this thread. (0 members and 3 guests)
 LinkBack URL
 About LinkBacks
-
06-02-2025, 12:59 AM #9741Senior Member


- Join Date
- Aug 2018
- Posts
- 93,823
The "Mister Fantastic" Sensor
By powellcubs in CircuitsArduino
1,505
Save PDF
Introduction: The "Mister Fantastic" Sensor

 By powellcubs Follow
More by the author:


This project involves a flex sensor, a type of sensor that senses when it is flexed, or the Mr. Fantastic of all sensors much like the laser LED is the Cyclops of sensors. It basically a resistor that puts more resistance as it is flexed. This can be useful in many different ways, such as in toys when an arm is bent, it can make a sound. Or if a shoe is flexed, LED’s turn on. The possibilities are only limited by your own imagination.
Step 1: Materials

Things You Will Need: (And where to get them.)
Arduino Uno: https://www.sparkfun.com/search/results?term=ardu...
9 LED’s: https://www.sparkfun.com/products/9590
Flex Sensor: https://www.sparkfun.com/products/10264
1 22K Resistor: http://www.jameco.com/1/1/28314-cf1-2w223jrc-resi...
9 33o-630 Ohm Resistors: http://www.jameco.com/webapp/wcs/stores/servlet/P...
11 Jumper Wires: https://www.sparkfun.com/products/11026
Breadboard: https://www.sparkfun.com/products/12002
Here is also some things that helped me in the process.
Resistor Color Code Calculator: http://www.robotroom.com/Calculators/Resistor/Resi...
Base Code and Function: http://arduinobasics.blogspot.com/2011/05/arduino-...
Step 2: Wiring the Flex Sensor

To start, plug a jumper wire to the analog pin 0 on the Arduino. Plug this jumper cable behind the left side of the flex sensor on the bread-board. Then, take another jumper wire and plug it into the 5v on the Arduino. This jumper will connect behind the other side of the flex sensor on the breadboard. Next, plug in the 22k resistor behind the same analog 0 jumper wire, and plug the other end 2 spaces apart. This will be where the ground wire will be. Plug another jumper cable into the ground on the Arduino and put the other end on the same rail as the other end of the resistor not connected to the flex sensor. The wiring for the flex sensor should now be done. Up next, the wiring for the LEDs!
Step 3: Wiring the LED's

On the opposite side of the breadboard, line up LED’s in a horizontal row, with the positive leg (longer leg) leading to the left. Then, plug in jumper cables from the 12, 11, 10, 9, 8, 7, 6, and 5 pins on the Arduino to the negative leg (shorter leg) on the Arduino. Following this, plug in those 330ohm resistors into the same rail as the long leg of the LEDs, while putting the other leg into the negative rail of the Arduino. The wiring for this project should be finished as of now. The end result should be that the flex sensor shuts off the LED's depending on the amount of flex used.
Step 4: Sample Code
Here is the sample code for the project. Feel free to adjust, use it, or do whatever you want with it to fit your needs.
Attachments


 Participant in: Sensors Contest
View Contest
Be the First to Share
Did you make this project? Share it with us!
Log in to post an I Made It
Recommendations
 VIGOR - a Fashiontech Artwork Representing the Symbiosis of Fashion and Technology by RaspiMari in Wearables
66
11K
 Arduino Powered Wet and Dry Garbage Segregation Systemby ROBO HUB in Arduino
38
9.6K
 Laser Harpby Cybercraftics in Arduino
137
15K
Make it Glow
Visual Effects Student Contest

Make it Temporary
Architecture Student Contest

Big and Small
Contest

The "Mister Fantastic" Sensor : 4 Steps - InstructablesIf you're gonna fight, fight like you're the third monkey on the ramp to Noah's Ark... and brother its starting to rain. Join our efforts to Secure America's Borders and End Illegal Immigration by Joining ALIPAC's E-Mail Alerts network (CLICK HERE)
-
06-02-2025, 03:15 AM #9742Senior Member
- Join Date
- Aug 2018
- Posts
- 93,823
Comfrey and Calendula Poultice
A few weeks ago I hurt my ankle. I'm not really sure what I done to it, but I do know it hurt and it swelled up. I had to wear a brace and one evening the swelling seemed worse than ever so I decided it was time to try a herbal remedy.
Last year I started growing Comfrey in my herb garden. This is an herb that has always captured my interest as it has so many great healing properties. It is for external use only and is good for muscle pains, reducing swelling, bruising and even healing broken bones. Yes, broken bones! Comfrey knits things together. You can even use it on open wounds, but you have to be very careful when doing this because it can heal a cut extremely fast. If you don't have the wound cleaned properly it can close it up with the dirt/infection inside. So be sure to clean your wound very good if you intend on using it on any open wounds.
Calendula is another favorite of mine. I didn't grow the annual flower this year but I had plenty of dried flower heads from last year. Calendula is good for bruising, strains and inflammation (just to name a few). So I decided to add it with my comfrey pultice and see what happened.
I picked some fresh comfrey leaves and got my jar of dried calendula flowers. I tore the comfrey into smaller pieces and put both herbs in a bowl. I then boiled some water and poured the boiling hot water over my herbs. I let the herbs steep for about 20 minutes. After the 20 minutes I drained off the access water and made several bandages by putting the poultice on strips of gauze. I then put them in the freezer.

After they were nice and frozen I removed it from the freezer and applied the gauze poultice directly to my ankle.

I also wrapped an ace bandage around my ankle to hold it in place.

And guess what!!!! The swelling was COMPLETELY gone in the morning. The pain was hardly noticeable. I went ahead and continued changing the poultice the next day and my ankle was all better! I was so excited. I love using herbal remedies and to know without a doubt that it works give me an amazing feeling.
There are a few things I would do different. Next time I'll put the herbs in a blender to make more of a softer puree. I think I'll add a little flour or cornstarch to make it a thick gel like substance. I'll still use the gauze because it worked really well. A matter of fact, I think I'll whip a few up and keep them in the freezer. You never know when an injury might happen and you need a quick remedy! Plus it will be great to have in the winter months when I can't go out and pick fresh comfrey.
Posted by Sheila at 1:33 PM
Labels: country living, gardening, herbs, natural living
Dots & Daisies: Comfrey and Calendula Poultice
If you're gonna fight, fight like you're the third monkey on the ramp to Noah's Ark... and brother its starting to rain. Join our efforts to Secure America's Borders and End Illegal Immigration by Joining ALIPAC's E-Mail Alerts network (CLICK HERE)
-
06-02-2025, 03:21 AM #9743Senior Member
- Join Date
- Aug 2018
- Posts
- 93,823
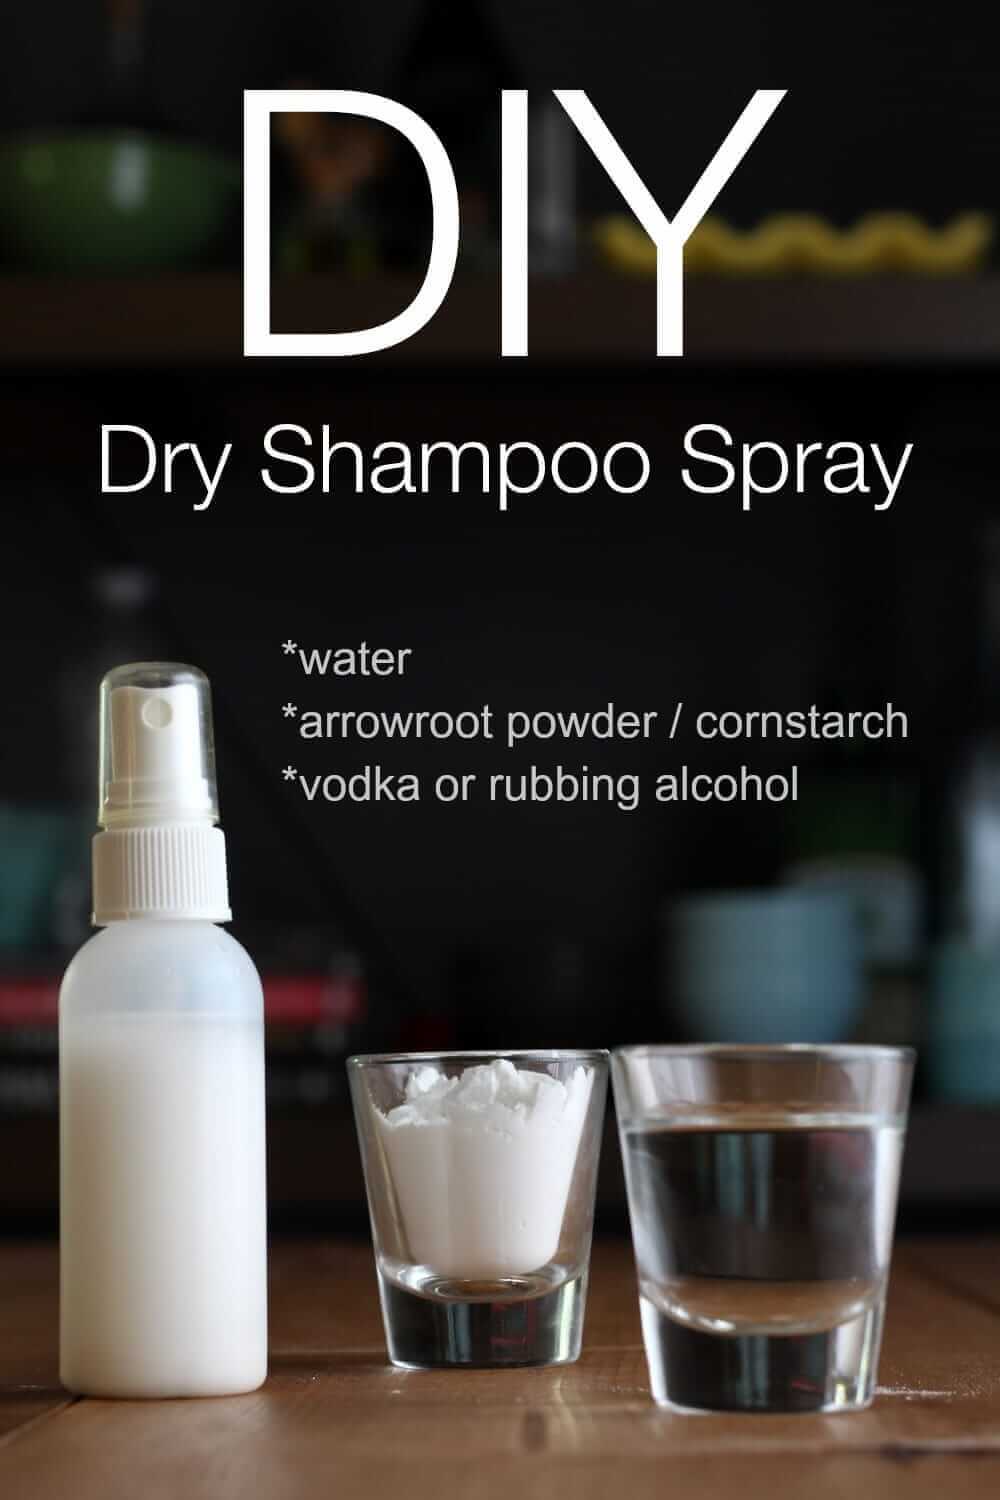
DIY Dry Shampoo Spray
June 9, 2014
Heather Dessinger, FDN-P
This post contains affiliate links.Click here to read my affiliate policy.

Its alchemy for your hair. Okay, not exactly, but DIY dry shampoo spray or dry shampoo powder for that matter does feel pretty magical on days you need a quick way to wash your hair without, er, washing it. Now, if youre thinking that a dry spray doesnt quite make sense, heres the deal: Your hair is dry, the spray is wet.
Interesting, no? Let me tell you more: By absorbing excess oils, dry shampoo transforms limp, oily strands into voluminous, grease-free tresses in just a matter of minutes. It can help your hair look great while washing less often, and thats a good thing because:
- Most store-bought shampoos contain detergents that strip oils from your hair (This one is an exception)
- Washing your hair too often will stimulate your scalp to produce extra oils in order to compensate.
- This often leads to a situation where the scalp is very oily, but ends are dry and possibly damaged
DIY dry shampoo spray and dry shampoo powder can both be helpful in breaking the cycle of overwashing/excessive oil production. Over time, most people find that they need to use less dry shampoo between washes as their scalp adjusts to the new routine.
Powder Or Spray ~ Which One Should I Use?
Ive found both to be helpful in different situations. When my hair is already styled and I just need a little volume/oil control at the roots I use homemade dry shampoo powder. On days I need to style from scratch or have all-over oiliness I prefer the spray. The method that works best for you might be different, though, so you might try making both at the same time to see what you like more. They both call for the same ingredients and together theyll take about five minutes to make, so its easy to try them both.
Bottom line: Whether you hit the snooze button one-too-many times, spent your getting ready time trying to convince your toddler that he must, in fact, wear pants, or just want to extend the time between washes for healthier hair, give this stuff a try.
Bonus fact: Your hair may actually already contain trace amounts of gold no alchemy needed! (source)
Tip For Avoiding Clogs
Use a high-volume styling spray bottle like this one to avoid clogs. If youre using a different bottle and it does become clogged, try soaking it in hot water and clearing the nozzle with a needle to get it working again.
DIY Dry Shampoo Spray For All Hair Colors
I have almost black hair and this recipe does not leave any light spots on my hair, but for those who have issues with some shampoo being visible after styling Ive included another recipe below.
Ingredients
- 1/2 c cup water
- 2 tablespoons arrowroot powder or cornstarch (where to buy arrowroot powder, where to buy non-GMO cornstarch)
- 2 tablespoons vodka rubbing alcohol can also be used, but it is more drying (info on sourcing non-GMO vodka can be found in this post)
- a few drops of essential oil, optional (lemon, peppermint, rosemary, bergamot, lemongrass and lime are good options)
To Make
Combine all ingredients thoroughly and pour into a spray bottle.
To Apply
Arrowroot and cornstarch powder tends to settle at the bottom between uses, so shake thoroughly. (Also, apply before you get dressed to go out. The spray may land on clothing and leave a light layer of powder.)
Hold spray bottle about three inches from hair and apply wherever it looks greasy. Hair should be damp, but not soaking wet. Dry with a hair dryer this will only take a couple of minutes because its just damp- then touch up any spots you missed if necessary. Style like you normally would.
DIY Dry Shampoo Spray For Dark Hair
I have almost black hair and this recipe does not leave any light spots on my hair, but for those who have issues with some shampoo being visible after styling Ive included another recipe below.
Ingredients
- 1/2 c cup water
- 1 tablespoons arrowroot powder or cornstarch (where to buy arrowroot powder, where to buy non-GMO cornstarch)
- 1 tablespoon cocoa or cacao powder (where to buy cocoa powder, where to buy cacao powder)
- 2 tablespoons vodka or rubbing alcohol (info on sourcing non-GMO vodka can be found in this post)
- a few drops of essential oil, optional (lemon, peppermint, rosemary, bergamot, lemongrass and lime are good options)
To Make
Combine all ingredients thoroughly and pour into a spray bottle.
To Apply
Arrowroot and cornstarch powder tends to settle at the bottom between uses, so shake thoroughly. (Also, apply before you get dressed to go out. The spray may land on clothing and leave a light layer of powder.)
Hold spray bottle about three inches from hair and apply wherever it looks greasy. Hair should be damp, but not soaking wet. Dry with a hair dryer this will only take a couple of minutes because its just damp- then touch up any spots you missed if necessary. Style like you normally would.
Do you want to give gorgeous, handcrafted gifts for family and friends, without spending a bunch of time on them?
Then Id love to give you a free copy of DIY Body Care Gifts Made Simple my step-by-step guide to making gorgeous handcrafted gifts without stressing yourself out as a gift for signing up for my newsletter. Ill show you how to make vintage labels, luxurious lotion bars, lip balms, sugar scrubs, body sprays and more like a pro. Sign up for my newsletter and youll be redirected to the download page immediately!

FREE Ebook: DIY Body Care Gifts Made Simple
Join my weekly newsletter to download your free gift!
GRAB MY COPY
Related Posts
DIY Dry Shampoo Spray Recipe | Mommypotamus
If you're gonna fight, fight like you're the third monkey on the ramp to Noah's Ark... and brother its starting to rain. Join our efforts to Secure America's Borders and End Illegal Immigration by Joining ALIPAC's E-Mail Alerts network (CLICK HERE)
-
06-02-2025, 03:36 AM #9744Senior Member
- Join Date
- Aug 2018
- Posts
- 93,823
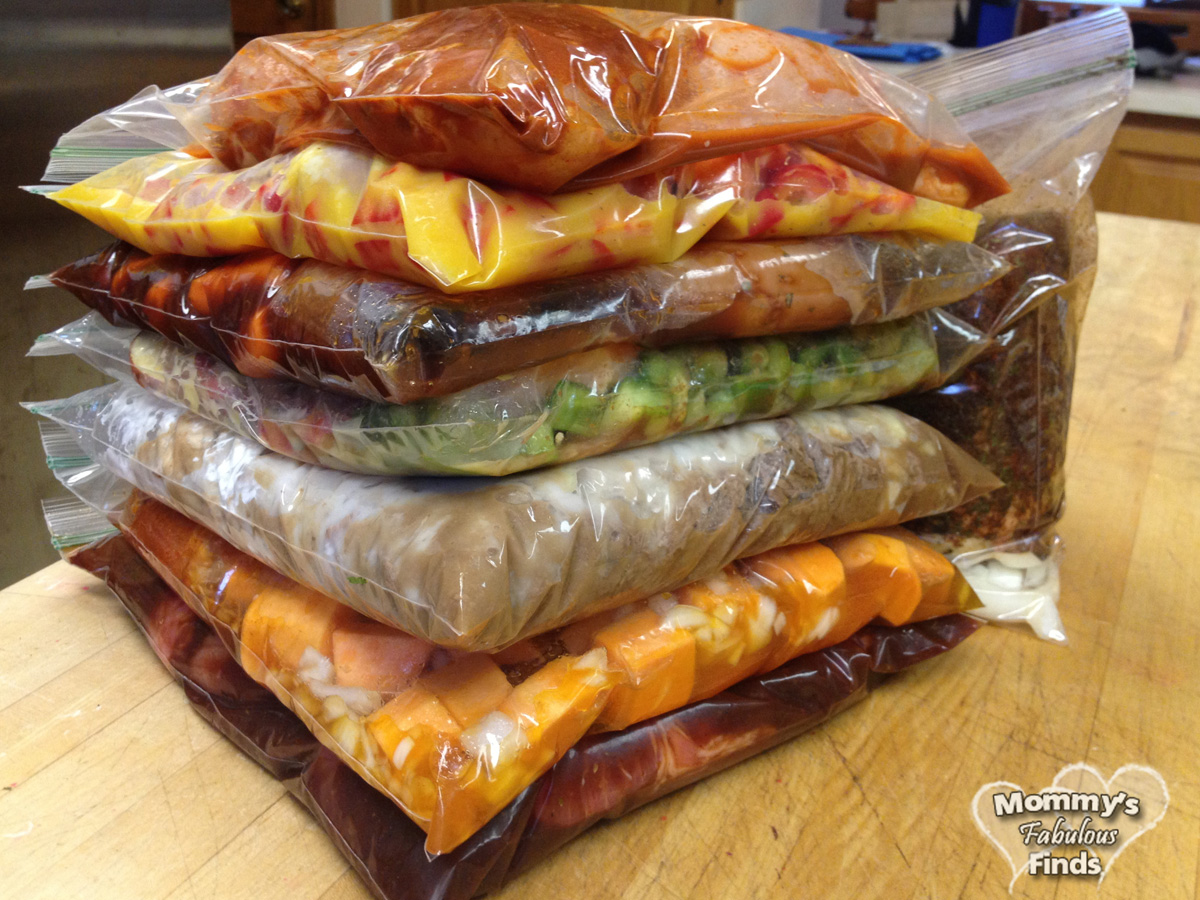
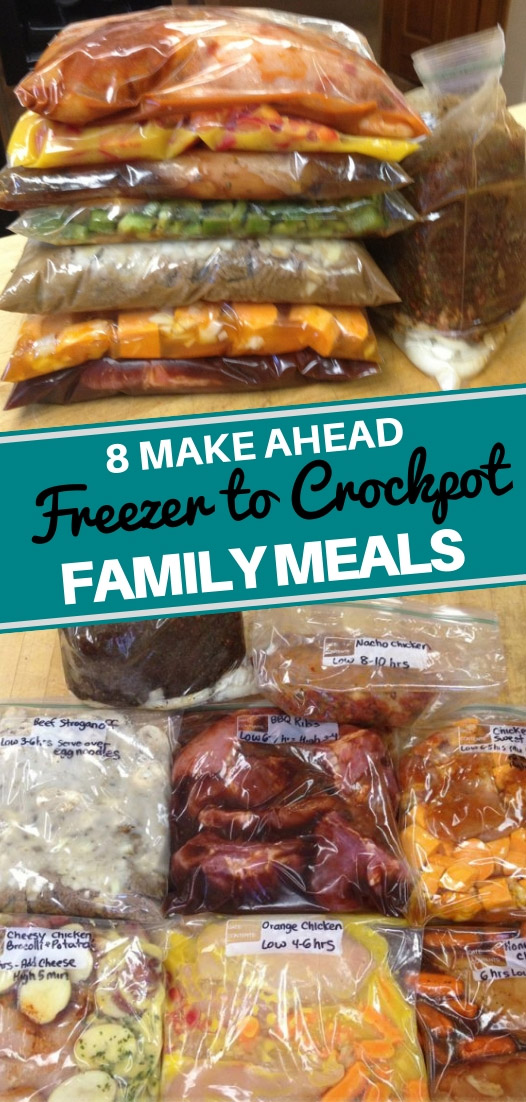
8 Easy Crockpot Freezer Meals
Crockpot Main Dish Recipe Round Up
Get a jump start on your meal prep with these crockpot freezer meals, perfect for busy families and new moms. Make ahead freezer meals save time and save money. Prep and freeze the crockpot meals in a plastic bag for easy weeknight dinners.
This site uses ad networks and affiliate links to generate revenue.
Make Ahead Freezer Meals for The Crockpot:
Last month I decided to try out meal planning using crockpot freezer meals. The premade crock pot meals were a huge success and made dinner time so much easier. I didnt have to deal with looking through the pantry and fridge wondering what I would cook for dinner.. I can take one of the slow cooker meals out of the freezer and thaw it in the fridge over night. In the morning I can add a crockpot liner and empty the freezer bag right into the crockpot.
By dinner time we had a home cooked meal ready without the stress of running around the kitchen making dinner, and little to no mess to clean up.
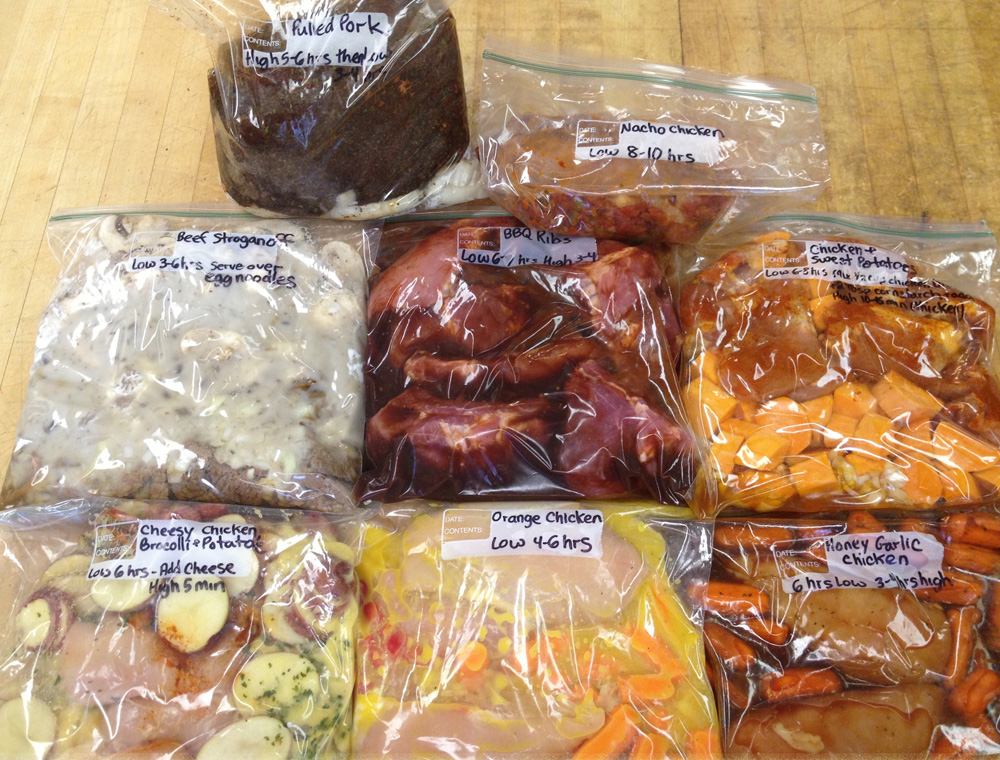
We enjoyed trying out the five slow cooker recipes that I made last month, but decided to give some new recipes a try. I decided on 8 different crockpot freezer meals. All these premade crock pot meals feed our family of 4, 2 adults 2 children, usually with at least one serving leftover great for lunch the following day. You can always add in more veggies or meat to customize for your family.
Tips for making meals ahead of time.
- Gather all of your recipes
- Make a grocery list
- Write the name & directions on the freezer bag
- Dedicated one to two hours preparing the meals
- If you dont have an extra set of hands, I highly recommend these baggy clips. Theyll keep the freezer bag open so that fill with meat, vegetables, spices, and sauces.
What crockpot do I use?
I use a programmable Hamilton Beach Slow Cooker With Temperature Probe, 6 Quart.

This week we decided on 8 frozen crockpot recipes to prepare that included chicken, spareribs, pork, and beef. The frozen crockpot meals included pulled pork, beef stroganoff, cheesy chicken potato and broccoli, BBQ spareribs, orange chicken, honey garlic chicken, chicken sweet potatoes, and nacho chicken for movie night.
Our Favorite Crockpot Products:
8 Crockpot Freezer Meals:
Crockpot Nacho Chicken
Crockpot Nacho Chicken
4.76 from 81 votes
Print
Pin
Ingredients
- 2-4 chicken breast
- 1 can Rotel
- 1 package taco seasoning
Instructions
- Place all ingredients in gallon size freezer bag. Seal bag and place in freezer. When ready to use thaw in fridge overnight. Empty the contents out of the bag and into crock pot. Cook on low 8-10 hours.
- Spread Nacho Chicken over tortilla chips, and top with your choice of toppings including shredded cheese, green onions, black olives, lettuce, tomatoes, sour cream and salsa.
Not familiar with Ro-Tel? Its diced tomatoes with green chilies and can be found in the isle near the cans of diced tomatoes.
Crock-Pot Cheesy Chicken Potato & Broccoli
Crock-Pot Cheesy Chicken Potato & Broccoli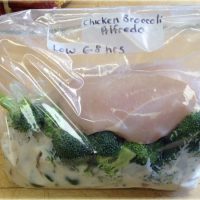
4.76 from 81 votes
Print
Pin
Ingredients
- 2-4 chicken breasts
- 1 large green pepper chopped
- 2 cups broccoli chopped
- 1 lb. red potatoes sliced thin
- 1 tsp. paprika
- 1 can condensed cream of chicken soup
- 1/4 lb. 4 oz. VELVEETA®, cut into 1/2-inch cubes
- 1 Tbsp. Worcestershire sauce
- 1/4 cup chopped fresh parsley
Instructions
- Add all ingredients except for cheese in a gallon freezer bag. Seal bag and place in freezer. When ready to use thaw in fridge overnight. Cook 6 hours low. Add cheese and cook on high for 5 minutes. Stir melted cheese in.
Crock Pot Orange Chicken
Onge Chicken
4.76 from 81 votes
Print
Pin
Ingredients
- 2 cups carrots
- 2 cups bell pepper
- 1 lb chicken breast
- 3 cloves garlic
- 1 tsp salt
- 1/2 tsp pepper
- 8 oz orange juice concentrate
Instructions
- Combine all ingredients in freezer bag. Seal bag and place in freezer. Thaw over night in fridge. Empty contents out of bag and into crock pot. Cook on low 4-6 hours. Serve over rice.
Crock Pot BBQ Spareribs
Crock-Pot BBQ Spareribs
4.76 from 81 votes
Print
Pin
Ingredients
- 2 lbs of pork ribs
- 1 1/2 cups ketchup
- 1 1/2 Tbsp seasoned salt
- 1/2 cup brown sugar
- 1/2 cup white vinegar
Instructions
- Place pork ribs in gallon sized ziplock. Mix remaining ingredients together in a separate bowl and pour over ribs. Seal bag and place in freezer. Thaw over night in fridge. Empty contents out of bag and into crock pot. Cook on high for 3-4 hours or low for 6-7 hours.
Crock-Pot Honey Garlic Chicken
With just 5 minutes of prep this honey garlic chicken is a simple and easy weeknight dinner recipe. The chicken cooks all day in the crock pot with a delicious 5 ingredient honey garlic sauce.
Crock-Pot Honey Garlic Chicken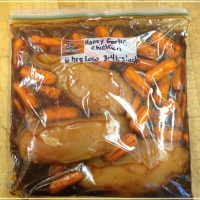
With just 5 minutes of prep this honey garlic chicken is a simple and easy weeknight dinner recipe. The chicken cooks all day in the crock pot with a delicious 5 ingredient honey garlic sauce.
4.76 from 81 votes
Print
Pin
Course: Main Course
Keyrd: Chicken, Crockpot
Ingredients
- 2-4 boneless chicken breasts
- 3 garlic cloves minced
- 1 Teaspoon dried basil
- 1/2 cup soy sauce
- 1/2 cup ketchup
- 1/3 cup honey
- 2 cups carrots or choice of veggie
Instructions
- Place all ingredients in gallon size zip-lock. Seal bag and place in freezer. Thaw overnight in fridge. Empty contents into slow cooker and cook on low for 6-7 hours or high 3-4.
Shop our favorite Crockpot Products:
Crock-Pot Beef Stroganoff
Crock-Pot Beef Stroganoff
8.76 from 81 votes
Print
Pin
Ingredients
- 2 pounds of cubed beef stew meat or 4 cups of cooked ground beef
- 2 cans of cream of mushroom soup
- 1 cup chopped onion
- 2 Tbsp. Worcestershire sauce
- 1/2 cup water
- 1 cup sour cream
- 2 Tbsp. minced garlic
- packet of onion soup mix
- chopped mushrooms optional
- egg noodles to serve over the day you cook
Instructions
- Cook beef in skillet over med heat until no longer pink, set aside and let it cool. Once cooled, add all ingredients to a gallon size freezer bag except egg noodles. Seal bag and place in freezer. When ready to use thaw in fridge overnight. Empty the contents out of the bag and into crock pot. Cook on low for 4-6 hours. Serve over egg noodles.
Chicken Sweet Potatoes:
Crockpot Sweet Potatoes and Chicken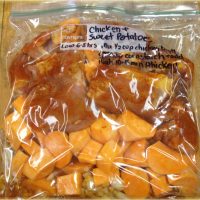
4.76 from 81 votes
Print
Pin
Ingredients
- 8 boneless skinless chicken thighs
- 1 tsp. salt
- 1/8 tsp. cayenne pepper
- 1 tsp. paprika
- 1 tsp. curry powder
- 1/2 tsp. ground ginger
- 3 sweet potatoes peeled and cubed
- 1 onion chopped
- 1 cup peach preserves OR apricot preserves
- 3 tsp. apple cider vinegar
- 1 Tbsp. soy sauce
- 1/2 cup chicken broth or water
- 2 Tbsp. cornstarch
Instructions
- Coat chicken with salt, cayenne pepper, paprika, curry powder, and ginger. Add peach preserves, vinegar, and soy sauce to gallon freezer bag. Add in sweet potatoes and onion, and top with chicken. Seal bag and place in freezer. When ready to use thaw in fridge overnight. Empty the contents out of the bag and into crock pot. Cover and cook on low for 6-8 hours until chicken is thoroughly cooked and sweet potatoes are tender when pierced with fork.
- Combine chicken broth and cornstarch and mix well. Add to slow cooker. Cover and cook on high 10-15 minutes until sauce is thickened.
Crock-Pot Pulled Pork
Pulled Pork
This pork is slow cooked to perfection with a homemade spice blend. Add in your favorite BBQ sauce for delicious sandwiches, nachos and more!
5 from 3 votes
Print
Pin
Course: Appetizer, Main Course
Cuisine: American
Keyword: BBQ, Crockpot, Pork
Prep Time: 10minutes minutes
Cook Time: 8hours hours
Servings: 8
Calories: 328kcal
Ingredients
- 4-5 lbs pork butt/shoulder
- 1 tablespoon ground black pepper
- 1-2 teaspoons cayenne pepper
- 2 tablespoons chili powder
- 2 tablespoons ground cumin
- 2 tablespoons brown sugar
- 1 tablespoon dried oregano
- 4 tablespoons paprika
- 2 tablespoons salt
- 1 tablespoon granulated sugar
- 1 large onion - sliced thin
- BBQ Sauce
Instructions
- Combine all dry ingredients except onion in bowl.
- Rub the spice blend onto pork butt, covering all sides.
- Place onions and pork in the slow cooker.
- Cover and cook on low 8-10 hours.
Sponsored By Advertising Partner
Sponsored Video
Watch to learn more
- Shred pork with 2 forks.
- Add BBQ sauce if preferred.
Notes
This is an estimate. I am not a health professional. For complete accuracy you should calculate the nutritional information with the actual ingredients used in your recipe using your preferred nutrition calculator.
Nutrition
Serving: 8g | Calories: 328kcal | Carbohydrates: 69g | Protein: 9g | Fat: 9g | Saturated Fat: 1g | Sodium: 14263mg | Potassium: 1285mg | Fiber: 19g | Sugar: 40g | Vitamin A: 19520IU | Vitamin C: 2mg | Calcium: 275mg | Iron: 17mg
I dont have the estimated cost for all of these crockpot freezer meals as I stock up on meats and canned food when on sale. You can always add in extra ingredients/change the recipe to your familys liking, these are meals and ingredients that our family enjoys.
With our work schedule, the 4-6 hour slow cooking time works best which is why most of the recipes are not for 8-10 hour days. I also always have never placed the ingredients in frozen always thawed, so Im not sure the cooking time if frozen.
More Crockpot to Freezer Meals That You May Enjoy:


 Crockpot Freezer Recipes originally found at Orange Chicken, BBQ Spareribs, Honey Garlic Chicken, Cheesy Chicken and Potato, Nacho Chicken, Chicken Sweet Potatoes, Pulled Pork and Beef Stroganoff.
Related Posts
- Crock-Pot Orange ChickenOrange Chicken 2 cups carrots2 cups bell pepper1 lb chicken breast3 cloves garlic1 tsp salt1/2
- Crock-Pot BBQ SpareribsCrock-Pot BBQ Spareribs The BEST BBQ spareribs made in the crockpot. 2 lbs of pork
Crock-Pot Pulled PorkThis easy pulled pork crockpot recipe is perfect for summer barbecues, game day, potlucks and
Previous Post:« Brueggers Bagels Introduces New Summer Menu
8 Easy Crockpot Freezer Meals - Mommy's Fabulous FindsIf you're gonna fight, fight like you're the third monkey on the ramp to Noah's Ark... and brother its starting to rain. Join our efforts to Secure America's Borders and End Illegal Immigration by Joining ALIPAC's E-Mail Alerts network (CLICK HERE)
-
06-02-2025, 03:39 AM #9745Senior Member
- Join Date
- Aug 2018
- Posts
- 93,823
25 Skills Every Man & Woman Should Know
25 Life Skills Every Man Should Know
If you're gonna fight, fight like you're the third monkey on the ramp to Noah's Ark... and brother its starting to rain. Join our efforts to Secure America's Borders and End Illegal Immigration by Joining ALIPAC's E-Mail Alerts network (CLICK HERE)
-
06-02-2025, 03:47 AM #9746Senior Member
- Join Date
- Aug 2018
- Posts
- 93,823
Cherry Jam Recipe
Updated: October 7, 2023
By: Author Tracy R.
Home » Recipes » Cherry Jam Recipe
Cherry jam is classic for a reason. Simple, sweet, and delicious on everything from a toasted muffin to ice cream!
Jump to Recipe
Print Recipe

(Tracy R.)
Are you as thrilled about the royal baby news as we are?
As with the royal wedding a couple years back, we just cant seem to hide our excitement for everything William & Kate. So, with cherries in season right now and a reason to celebrate, I decided to head to the kitchen and whip up a jam fit for royalty.

Want more great recipes?
Make life easier and tastier by having delicious recipes and smart cooking tips delivered to your inbox!
Based on cherries jubilee, the popular dessert made for one of Queen Victorias Jubilee celebrations, this jam also contains sweet cherries, citrus, and cherry brandy. Since some recipes call for currant jam as a thickener, I added in some red currants to help cut some of the sweetness from the cherries and sugar so that the resulting jam isnt too cloying.
Perfect on a biscuit with your afternoon cup of tea!
If raspberries are still in season where you are, we bet youd enjoy Tracys Raspberry Jam Recipe too!
Are you tired of the dinner routine?
Stuck in a rut or looking for fun new recipes to try?
Our Facebook group is growing every day! If you havent joined yet, we invite you to come check it out and join the fun.

You can ask for recipe ideas, talk about cooking techniques, or get help figuring out the right new pan set for you. If youve already joined, invite a friend along!
Recommended

What to Serve with Carne Asada

How to Cook Frozen Chicken in a Crock Pot or Slow Cooker

How to Parboil Ribs


Cherry Jam Recipe
Tracy R.
Cherry jam is classic for a reason. Simple, sweet, and delicious on everything from a toasted muffin to ice cream!
4 from 27 votes
Print Recipe
Pin Recipe
Prep Time 15minutes mins
Cook Time 15minutes mins
Total Time 30minutes mins
Servings 80
Calories 47 kcal
Ingredients
1x2x3x
- 3 cups Fresh Cherries red
- 2 cups Red Currants
- 2 tablespoons Lemon Juice
- 1/4 cup Kirsch Brandy
- 1 3/4 ounces Powdered Pectin (one package)
- 4 cups Granulated Sugar
Instructions
- In a large sauce pan, combine the cherries, currants, lemon juice, and kirsch. Crush the fruit and then bring the mixture to a boil.
- Prepare your canning supplies. Bring the temperature of the glass jars up by processing them in hot water for several minutes, and heat a few cups of water in a small saucepan for the lids. Stir in the pectin until dissolved. Bring back to a boil, and then add in the sugar all at once. Boil hard for a minute longer.
- Skim off any foam and ladle the hot jam into the hot jars, leaving 1/4″ headspace. Place the lids and bands on top, screwing on the bands just until fingertip-tight.
- Place the full jars back into the boiling water and process 10 minutes.
- Remove from the water and place the jars on a towel. Let the jars cool. The seals should suck down (youll hear a popping noise as they do).
Nutrition
Calories: 47kcalCarbohydrates: 12gSugar: 11g
Keyword Canning, Cherries, Jams, Preserving, Summer
Tried this recipe? Let us know how it was!
Posted on Published: July 26, 2013
By Author Tracy R. Tracy's blog, Sugarcrafter, is a baking, canning, and occasional cooking blog that features from-scratch recipes using seasonal and local ingredients. Tracy also has her own side business, Sugar crafter Sweets, making handcrafted confitures and selling them ...more
Categories Berries, Breakfast + Brunch, Canning + Preserving, Cooking Method, Fruit, Jam + Preserves, Seasonal Recipes, Summer
Home » Recipes » Cherry Jam Recipe
Cherry Jam Recipe - Food Fanatic
If you're gonna fight, fight like you're the third monkey on the ramp to Noah's Ark... and brother its starting to rain. Join our efforts to Secure America's Borders and End Illegal Immigration by Joining ALIPAC's E-Mail Alerts network (CLICK HERE)
-
06-02-2025, 03:54 AM #9747Senior Member
- Join Date
- Aug 2018
- Posts
- 93,823
Homesteading · Make
How to Make Dandelion Salve and Dandelion Infused Oil
June 1, 2014152 Comments
Disclosure: This post may contain affiliate links. Please see our Privacy Policy and Disclosure Statement.
Learning how to make dandelion infused oil and dandelion salve is so easy!
Were only about a month into our gardening season here in Montana and already my hands are dry and chapped. Ive been using a variety of lotions and skin creams to replenish the moisture in the rough skin on my hands but have had little success in finding a lasting solution.
I decided to create my own skin nourishing dandelion infused oil and salve. This stuff is simply amazing! It is easy to make, low cost and leaves my hands feeling soft and nourished for hours.
Ive also used dandelion salve and infused oil on my achy lower back after a long day of gardening and it helps soothe my sore muscles. The best part? I was able to use a little beeswax from our new honey bees!

Ive read quite a few articles this spring about foraging and eating dandelions. One article I read listed the health benefits from the various parts of a dandelion plant.
I was intrigued that the flowers have pain relieving properties and can also be used as a massage oil. I started making infused oils a few years ago but had never tried dandelion infused oil. We have plenty of dandelions around our property so foraging would be easy.
There are a lot of recipes floating around the internet for homemade balms, salves and lotions. My frustration with a lot of them is that they include a lot of ingredients I dont have on hand.
Ive almost invested in some of these products but couldnt ever bite the bullet and do it. Often these products can be expensive and not something Ill use often enough to make the investment.
What I love about this recipe I created is that it includes some pretty simple ingredients that most people already have at home or can purchase for a low cost.
Making and using all natural skin care products doesnt have to be expensive!
Jump to:
Making Dandelion Infused Oil
Making infused oils is fairly simple. To make dandelion infused oil, you need to harvest a bunch of dandelion flower heads.
I cut them off the stem as high as I could to minimize the amount of green foliage being harvested. I wasnt quite sure how many to harvest, so I filled a large bowl.
This ended up being about four cups of fresh dandelion heads.
I read several different articles about making dandelion infused oil and one thing everyone mentioned was being mindful of the high water content in dandelion flowers.
To minimize getting a bunch of icky sludge in your infused oil, dry the flower heads out for a day or two. I spread them out on a cloth inside a cardboard box lid and sat them on top of our chest freezer for two days.
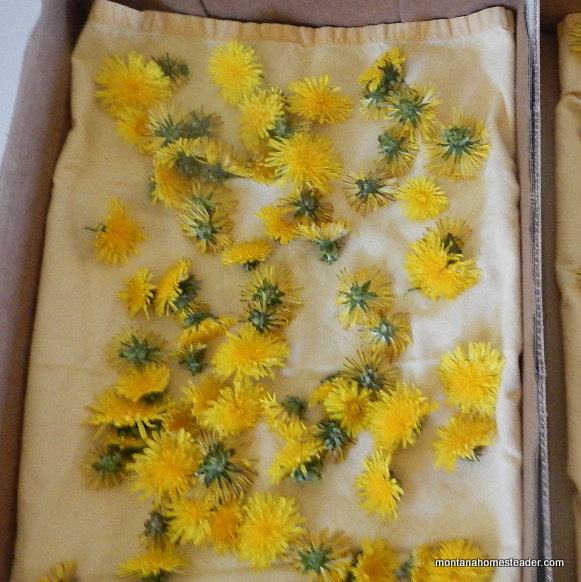
Once the dandelion flowers have dried a bit, pack them into a glass jar. I used a pint size canning jar and had just enough space for all the flowers. Next pour olive oil into the jar.
Make sure the dandelion flowers are all completely covered with oil. Place a lid on the jar.
There are two ways to infuse oil. The way I first learned several years ago was the slow infusion method that I learned from this amazing book.
This method requires sitting the jar of oil out of direct sunlight for four to six weeks. If you want a speedier process, you can heat the oil in a jar on the stove.
I opted for this method since I was anxious to make some salve and heal my dried out skin.
I put a small pot on the stove with a few inches of water in the bottom. Then I sat the glass jar of oil and flower heads in the pan and turned it on medium.
Once the water heated up but not boiling, I turned it off and let the jar sit in the pan of water until it all cooled off. Then I put the jar in the cupboard to continue infusing.
My jar infused for well over a week. This was mainly because I was so busy working in the garden I didnt have time to make the salve!
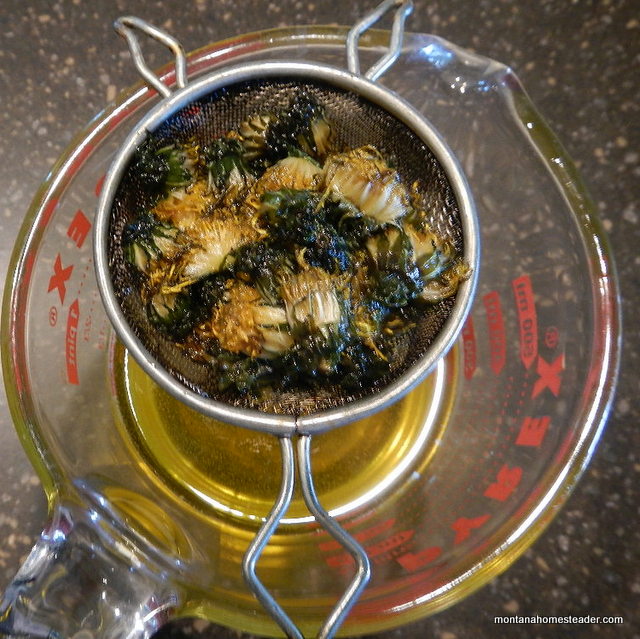
The infused oil could actually be used after two or three days. After it is done infusing, strain the flowers from the oil.
I use a small fine mesh sieve and press the flowers down into the sieve to press out as much oil as I can. Compost your flowers and the infused oil is now ready to use!
Making Dandelion Salve
Making salve is an easy project if you have the supplies handy. I have a lot of the supplies on hand since Ive been making homemade lip balm and selling it in our Etsy shop for the last couple years.
This recipe will make a large batch (a little less than 1.5 cups). If you want a smaller batch, reduce the quantities but keep the proportions the same.
This salve can feel a bit greasy when you first put it on. Ive found that after 15-20 minutes the greasiness goes away and my hands just feel so soft.
I put a generous scoop of dandelion salve on my hands before I go to bed and just love how soft my skin feels when I wake up!
Supplies Needed to Make Dandelion Salve:
-16 oz of infused dandelion oil
-2 oz coconut oil (this is the kind we use)
-2 oz of beeswax (We render our own beeswax to use and sell it in our Etsy shop here)
-OPTIONAL: 10-15 drops of lavender essential oil (or whatever scent you prefer!)
Directions for Making Dandelion Salve
Step 1:
Place the beeswax and coconut oil in a glass jar or measuring cup. Sit a pan on the stove with several inches of water in it. Sit the glass jar down in the pan and heat on low/medium.

Step 2:
Once the beeswax and coconut oil are melted, carefully stir in the infused dandelion oil. Our house was cool when I made this, so when I poured the dandelion oil in some of the wax started hardening up. If this happens for you, keep heating the mixture until it is all melted again.
Step 3:
Add in essential oil if you prefer and stir well. The dandelion oil does have a dandelion scent but I I love the scent of lavender so chose to use this essential oil as an added scent.
Step 4:
Carefully remove the glass jar from the pan. I wanted one big jar of dandelion salve so the jar I mixed it in was the jar I let it cool off in. If you want smaller containers of salve, pour the mixture into smaller containers. Allow the salve to cool.
This dandelion salve has a firm consistency. Since there is coconut oil in it, as soon as you scoop some into your hands it softens and melts.
This creates an easy to spread salve. I started out using this just on my hands but then started using it for rough, cracked skin on my feet. I also use it to nourish dry skin on my arms and legs.
After making a big batch of dandelion salve, I had some dandelion infused oil left over. Since the infused oil is to help with pain relief, I filled an empty amber glass bottle to use for massage oil.
When we have aches and pains in our back or feet, I can use this massage oil to naturally help with pain relief.
After spending the whole day transplanting seedlings from our greenhouse into the garden on Saturday, my lower back was so achy I could hardly walk.
I rubbed dandelion infused oil on my lower back and felt some relief. It didnt make all the aches and pains go away, but it did lessen the pain.
Whoever said dandelions are weeds and should be destroyed must never have tried a dandelion salve or massage oil. This stuff is amazing!
Learn More about Foraging for Dandelions and Wildcrafting
Interested in learning more about foraging for dandelions, other wild edibles and how to use them? I highly recommend the Herbal Academy Botany & Wildcrafting Course.
The course is online and self-paced so you can take it whenever and wherever works for you! Ive taken several courses through the Herbal Academy and love the high quality courses I can learn online from our rural homestead.

Do you love dandelions and want to find more ways to use them? Check out our other dandelion posts:
Heres more dandelion inspiration from the Nerdy Farm Wife with 12+ things to make with Dandelion flowers. Who knew dandelions could be used for so many wonderful things!
What do you like to make with dandelions?
updated March 2023
How to Make Dandelion Salve and Dandelion Infused Oil - Montana Homesteader
If you're gonna fight, fight like you're the third monkey on the ramp to Noah's Ark... and brother its starting to rain. Join our efforts to Secure America's Borders and End Illegal Immigration by Joining ALIPAC's E-Mail Alerts network (CLICK HERE)
-
06-02-2025, 04:00 AM #9748Senior Member
- Join Date
- Aug 2018
- Posts
- 93,823
Hutch Re-purposed to a BAR DIY
By fydaman in Workshop Furniture
88,388
488
18Featured

Save PDF
Introduction: Hutch Re-purposed to a BAR DIY

By fydamanFollow
More by the author:

My mom and I wanted to start a project and we decided to repurpose a hutch into a home bar. Her and I have ZERO wood working skills and made this happen using readily available tools and items from your local hardware store. The only power tools used in this project was a $30 Circular saw from Harbor Freight tools and a $25 Reciprocating saw. We used online videos on youtube to use best practices for straight cuts and examples. As you can see from the steps it was not too difficult and was a pretty fun project. I hope this post inspires your to challenge yourself... Be creative... And do something different... If you have any questions or anything you can comment below and leave a email address and I would be happy to chat.
Thank you for checking it out!
Step 1: Find a Hutch

Step 1: Take a old hutch or find a cheap one on craigslist. Obviously... A two piece hutch is ideal.. I found this one for $100 solid wood (Tips) For sanding purposes... try and find one with fewer grooves..
Step 2: Start Sanding
Step 2: Start sanding... Honestly.. This was my least favorite part... If you plan on staining it... Good luck...If you plan on painting it like I did you can buy finish remover to take the clear varnish off... I quit sanding and went this route..
Step 3: Visualize Your Attack
Step 3: Visualize your attack and figure out how high you want your bar and how wide. Do some math and figure out how much wood you need... How many screws you need... How many angle brackets you need etc.
Step 4: Get Supplies

Step 4: Make a trip to home depot... or your local hardware and wood store. Tip: make sure you have a large enough vehicle.
Step 5: Cut Your Bar Top

Step 5: Cut your bar top using the desired dimensions.. I used 1" thick solid wood sheet.
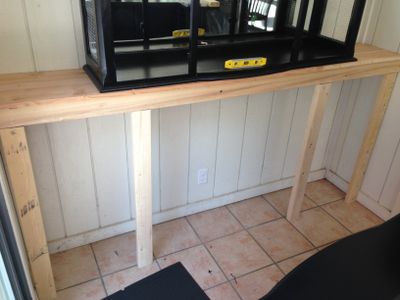
Step 6: Build Your Bar Up


Step 6: Build your bar up. I used six 2x4 12" long to build the bar top up. Used a ton of screws and angle and flat brackets (Found at home depot) until I felt it was sturdy enough to hold the weight of the bar top and two full grown adults standing on it..TESTED
Step 7: Visualize the Front of Your Bar


For the front of the bar I knew I was going to use corrigated roofing sheets (Found at home depot) so I added a thin 1/4 inch thick ply wood to the front before the roofing sheets for added support.
Step 8: Prep the Top of the Hutch


Step 8: Start removing all glass and start sanding the cabinet portion of the hutch to include and drawers or cabinets you plan on using
Step 9: Paint Everything


Step 9: Paint everything
Step 10: Visualize What You Want to Do Under the Top of the Hutch


Step 10: Start visualizing and shelf like system for the caibnet portion and buy wood to fit
Step 11: Add Some Style


I Used chicken wire to replace the glass in the hutch because I was going after a industrial style look (Found at home depot)
Step 12: Get Your Bar Stuff Together!


Step 13: ALL DONE

Finished Prod
Hutch Re-purposed to a BAR DIY : 13 Steps (with Pictures) - Instructables
Last edited by Airbornesapper07; 06-02-2025 at 04:04 AM.
If you're gonna fight, fight like you're the third monkey on the ramp to Noah's Ark... and brother its starting to rain. Join our efforts to Secure America's Borders and End Illegal Immigration by Joining ALIPAC's E-Mail Alerts network (CLICK HERE)
-
06-02-2025, 04:11 AM #9749Senior Member
- Join Date
- Aug 2018
- Posts
- 93,823
Muscadine Wild Food Foraging, Identification & Recipes
Best restaurants near me
- Home
- Recipes WIld Food
- Muscadine Wild Food Foraging, Identification & Recipes
Melissa Francis
May 6, 2013
Recipes WIld Food,Wild Food Foraging
Identification,Muscadine
 emergencyoutdoors
Emergency Outdoors blog shares a extremely educational article on a wild foraged food Muscadine . Muscadine (Vitis rotundifolia) is a member of the grape family.
Best restaurants near me
It goes into identification of the berries, leaves and bark, what part of the United States in grows in and recipes how to use it.
Click here to read this wonderful article:
.
.Duck Dynasty
Natures Garden: A Guide to Identifying, Harvesting, and Preparing Edible Wild Plants
The Wild Table: Seasonal Foraged Food and Recipes
Wildcraft! An Herbal Adventure Game
2 year old stock Summit Muscadine Grapes
Best restaurants near me
Post navigation
Wilderness Medic Improvised Leg Splint
Subscribe via email
Click here to subscribe to our news via email.
Recent Posts
- Your Complete Guide to the Different Types of Butter
- 7 Vegetables You Can Buy Once and Regrow Forever
- 4 Essential Pointers to Know When Youre Dealing With Termites
- 5 Benefits of Investing in Photoelectric Smoke Alarms
- 6 Reasons Your Electrician Wants You to Upgrade Your Switchboard
Muscadine - Wild Food Foraging, Identification & Recipes - The Homestead SurvivalIf you're gonna fight, fight like you're the third monkey on the ramp to Noah's Ark... and brother its starting to rain. Join our efforts to Secure America's Borders and End Illegal Immigration by Joining ALIPAC's E-Mail Alerts network (CLICK HERE)
-
06-02-2025, 04:22 AM #9750Senior Member
- Join Date
- Aug 2018
- Posts
- 93,823
Morse Code Alphabet: 4 Tricks for Learning it Quickly
199.7K SHARES
Jump To:
There are plenty of tricks preppers use to learn the Morse code alphabet.
You can use it to communicate secretly with people you trust during emergencies.
Recognizing Morse code the second you hear it allows you to react quickly, which could save you in a SHTF situation.
Morse Code Alphabet Chart Explained

In Morse code, we represent letters through dots, dashes, and empty spaces.
These sounds have a rhythm, allowing others who know the code to interpret the message. It breaks down like this:
- The dot is the standard measurement unit.
- A dash is the length of three dots.
- A space between letters is three dots.
- A space between words is seven dots.
The most popular form of this code is the International Morse Code. Its more straightforward than the original code, so its the version youll need to learn.
The Morse code alphabet isnt as random as you may think. The most used letters have shorter patterns, making spelling common words faster. For example, the most-used letter in the alphabet is E. So, it makes sense that E is a single dot.
T is one of Englishs next most common letters, a single dash in Morse code.
Importance of Morse Code Alphabet for Preppers

Learning the Morse code alphabet is essential for preppers. You can use it in a disaster situation where other modern forms of communication are down. That way, even if your phone or computer loses service, you can still contact others.
Also, Morse code is a more secure communication method. Not many people know this code today, so you dont need to worry as much about someone intercepting your message.
Its a very versatile skill to have, and it can keep your brain in shape by making you think on the fly. Many people think its fun for this reason.
Lastly, youll learn more about our communication history, which can help you better understand modern forms of communication.
Morse Code Tools
Preppers have used Morse code to transmit messages through the radio, flashlights, and even tapping to organize and get help in emergencies.
Knowing how to interpret it could save your life someday, but youll need a way to send and receive messages. Heres what you can do:
- Get a Ham radio and the proper licenses.
- Get a reliable SOS flashlight.
- Find a Morse code tapper for training.
4 Tricks for Learning the Morse Code Alphabet Faster

Morse code can seem intimidating at first, but dont worry. Itll come to you quickly. There are several tricks preppers have used for years to memorize it efficiently and accurately.
These tricks will help you learn the Morse code letters as fast as possible.
1. Use Mnemonics
One of the best ways to learn Morse code is through mnemonics. This strategy can work for all types of learners because it helps you recall the letters quickly.
It lets you associate the letters with different sounds or words so that you can identify them in messages.
Start by breaking words down into syllables, then pair them with different Morse code letters. A good example is using apple for the letter A. Lets look at the syllable breakdown:
- Apple = ap-ple = .- (dot dash)
Another great example would be using eat for the Morse code letter E because it only has one syllable.
- Eat = eat = . (dot)
There are plenty more Morse code mnemonics that you can memorize.
2. Listen More Than Write
Its tempting to practice Morse code by writing. This strategy can work, but you should listen more than you write to learn it quickly.
Morse code is an audible communication form. So, you want to practice recognizing and recreating the sound patterns. The more familiar you are with the sounds, the easier it is to hear and understand the message with little effort.
You can practice by listening to the Morse code alphabet online. Try tapping or speaking along with the video to help you learn faster. You can slow down YouTube videos and then return them to regular speed as you get more comfortable.
3. Learn With Other Preppers
Learning with a loved one is perfect. Youll feel more motivated and have someone to send messages to. Plus, youll know they can reach you in an emergency, no matter the situation outside.
You both must practice sending and receiving codes. That way, you can build your listening and decoding skills at the same rate.
Next, you can provide each other with constructive feedback. You should discuss how well you both stay in rhythm and whether you catch any spelling mistakes.
The feedback can help you learn better. Youll also be less likely to form bad habits and make the same mistakes multiple times.
4. Try Free Online Tools and Apps
You should make use of the free tools available to you. You can check out online videos, borrow audiobooks from your local library, and download apps.
Google even offers a free Morse code trainer that you can use on your smart device.
These free resources are available to everyone with an internet connection. So, you can learn Morse code no matter your finances. It makes this code accessible to more people.
Using free tools also lets you learn at your own pace. If you took a class, youd have to keep up with everyone else. Youre more likely to retain the alphabet if you memorize it at a more comfortable speed. Plus, you can learn from the comfort of your home.
FAQ
How long does it take to master Morse code?
Most people learn the Morse code alphabet in a matter of months. The more you practice, the faster youll memorize. However, you dont want to burn yourself out on it. Most people recommend 20 to 30 minutes a day to practice at most.
Is learning Morse code difficult?
Its not challenging to learn Morse code. Once you have memorized the alphabet, you can quickly send messages because you can already spell in English. The hardest part is committing your time to practicing it consistently.
Wrap Up
In short, preppers should learn the Morse code alphabet.
Knowing it allows you to secretly and reliably communicate with others in emergencies.
Using these four tricks will help you memorize it as quickly as possible.

199.7KSHARES
By Author SHTFPreparedness
Posted on Last updated: September 30, 2024
CategoriesSurvival
Morse Code Alphabet: 4 Tricks for Learning it QuicklyIf you're gonna fight, fight like you're the third monkey on the ramp to Noah's Ark... and brother its starting to rain. Join our efforts to Secure America's Borders and End Illegal Immigration by Joining ALIPAC's E-Mail Alerts network (CLICK HERE)


 FLEX_2.ino


 Reply With Quote


Send Them Back: EU Parliament Passes Major Deportation...
06-18-2026, 05:40 PM in illegal immigration News Stories & Reports