

Results 9,751 to 9,760 of 11177
 226Likes
LinkBacks (?)
-
12-26-2016, 11:32 AM
-
09-02-2016, 05:39 PM
-
whole garden made with pallets!! Love it!! | Pallets | Pinterest | Pallets, Pallets Garden and Wooden Pallets
Refback This thread03-06-2016, 11:30 AM -
10-20-2015, 05:29 PM
-
06-12-2015, 08:00 PM
-
02-26-2015, 01:58 PM
-
01-05-2015, 04:13 PM
-
12-19-2014, 10:19 AM
-
EMERGENCY: HUGE FEMA PANDEMIC EXERCISE IN USA IN NOVEMBER, INTERNET SHUT DOWN PART OF EXERCISE | Prepare4Survival
Refback This thread12-03-2014, 10:39 PM -
Off Grid World ? Ugly Duckling Shipping Container Home Built by Artist Is a Beautiful Swan on the Inside
Refback This thread11-25-2014, 03:10 PM -
11-17-2014, 10:59 PM
-
11-13-2014, 11:18 AM
-
11-09-2014, 02:54 PM
-
10-28-2014, 11:38 PM
-
10-26-2014, 05:54 AM
-
10-16-2014, 11:28 AM
-
10-03-2014, 01:25 PM
-
10-02-2014, 09:16 PM
-
09-26-2014, 07:00 PM
-
09-26-2014, 01:56 PM
-
09-19-2014, 04:46 PM
-
09-13-2014, 05:49 AM
-
09-05-2014, 01:52 PM
-
09-01-2014, 09:39 AM
-
08-30-2014, 06:29 PM
-
08-10-2014, 06:29 AM
-
08-04-2014, 05:07 PM
-
07-23-2014, 11:14 AM
-
New Evidence on Expiration Dates | Medical Preparedness | Doom and Bloom (TM) | Doom and Bloom (TM)
Refback This thread07-22-2014, 10:10 AM -
07-18-2014, 08:37 PM
-
07-15-2014, 04:57 PM
-
07-11-2014, 01:40 AM
-
04-22-2014, 11:14 AM
-
04-18-2014, 12:57 PM
-
04-18-2014, 10:10 AM
-
04-14-2014, 12:18 AM
-
04-12-2014, 02:28 AM
-
03-02-2014, 11:43 PM
-
12-24-2013, 11:59 PM
-
12-07-2013, 11:04 PM
-
kitchen | Cob
Refback This thread11-25-2013, 03:24 PM -
10-22-2013, 10:25 PM
-
Apple Pie Braid | Sweets
Refback This thread09-26-2013, 07:58 AM -
09-02-2013, 04:44 PM
-
5 Reasons Why You May have to Bug Out Even Though You Don’t Want to | The Apartment Prepper's Blog
Refback This thread08-23-2013, 03:20 PM -
06-27-2013, 06:30 AM
-
06-23-2013, 08:11 PM
-
06-17-2013, 11:21 PM
-
05-24-2013, 05:06 PM
-
To Eat / BASIC LIST / SUGGESTED ITEMS FOR LONG TERM SURVIVAL - Page 275 - ALIPAC
Refback This thread05-01-2013, 03:49 AM
Thread Information
Users Browsing this Thread
There are currently 2 users browsing this thread. (1 members and 1 guests)
 LinkBack URL
 About LinkBacks
-
06-02-2025, 04:34 AM #9751Senior Member


- Join Date
- Aug 2018
- Posts
- 87,885
How to Make DIY Cooling: Crafting an Icy Air Conditioner Down to -32°C
By MriPoo in WorkshopScience
7,836
30
6
Cool Down Any Room In Minutes
Save PDF
Introduction: How to Make DIY Cooling: Crafting an Icy Air Conditioner Down to -32°C


 By MriPooFollow
More by the author:


About: Subscribe to Mr iPoo : ---------------------------------------------------------------------------------------- In this captivating video, we present to you the most amazing and useful life hacks that can sign More About MriPoo »
How a DIY air conditioner works and freezes down to -32 degrees Celsius, forming ice.
Supplies
We will need:
- Hermetic water pump
- Silicone tube
- Copper tube
- Fan
- Battery
- Thin copper tube 3 mm in diameter
- Gas for refilling lighters
- Medical needle
Step 1: First, It's Necessary to Straighten the Tube to Make It Easier to Give It the Required Shape Later On.


 2 More Images
Using a copper tube with a diameter of 4.7 mm, similar to the one used by professionals in the installation of commercial or home air conditioners to lay the ducts of air conditioning systems.
Step 2: Placing Several Marks Every 8 Cm to Create Reference Points for Orientation During Bending.


 2 More Images
Using a pipe bender, shaping the evaporator into the desired form for the future mini air conditioner.
The evaporator is used to cool the air inside a room. Hot air entering the air conditioner passes through the evaporator, where the liquid (usually freon) evaporates, absorbing heat from the surrounding air. As a result of the evaporation process, the air is cooled.
Step 3: Moving on to the Creation of the Condenser, Which Will Have a Circular Spiral Shape.


 2 More Images
The condenser is a component where the hot gaseous refrigerant, having passed through the evaporator, condenses back into a liquid. In this process, heat is released, which was absorbed in the evaporator. The condenser is usually located outside a building or a car, and its cooling is facilitated by a fan. After passing through the condenser, the refrigerant is ready for another cycle of cooling the air.
Step 4: Soldering a Connector for Connecting a 9-volt Battery to the Pump and Fan.


 2 More Images
For the proper functioning of the condenser, a fan is needed; I will use a 12-volt fan from an old computer.
Also using a sealed water pump at 6 volts.
Step 5: A Thin Copper Tube With a Diameter of 3 Millimeters Inside Will Serve As a Capillary Tube.


 2 More Images
A capillary tube is a narrow pipeline through which the distribution and regulation of the refrigerant flow (e.g., freon) in the air conditioning system occur. The capillary tube creates the pressure necessary to convert the refrigerant from a liquid phase to a gaseous one, which, in turn, contributes to air cooling.
Step 6: Securing All Components and Placing Them in Their Positions.


 2 More Images
Connecting tubes of suitable diameter, with one of them made of soft silicone to self-seal punctured holes.
Step 7: Refilling the Air Conditioner and Testing


 2 More Images
For filling our air conditioner, instead of freon, I use a gas canister for refilling lighters and a medical needle.
Ensuring the sealing of the hole is a must.
Conducting the first test outdoors to allow the system to circulate the liquid gas through the tubes and capillary system. The excess pressure during the initial pump launch should exit through the membrane (depending on the pump's design).
Step 8: Conclusion


 2 More Images
The process I describe begins with using gas to fill the air conditioner. I apply gas (such as butane or propane) as an energy source to create cooling in the air conditioning system. In this system, copper tubes play a crucial role in ensuring the circulation of gas and heat exchange between the air and the working substance inside the tubes.
My pump is responsible for circulating gas through the air conditioner circuit. By creating pressure, the pump forces the gas to circulate through the copper tubes.
The cooling and freezing process involves the gas changing its temperature as it undergoes compression and expansion in the air conditioning system. During the expansion of gas in the copper tubes, there is a decrease in temperature, and heat is absorbed from the surrounding environment, including the tube walls. This can lead to condensation of moisture on the tube surfaces and even the formation of ice if the air humidity is high enough.
How to Make DIY Cooling: Crafting an Icy Air Conditioner Down to -32°C : 8 Steps - InstructablesIf you're gonna fight, fight like you're the third monkey on the ramp to Noah's Ark... and brother its starting to rain. Join our efforts to Secure America's Borders and End Illegal Immigration by Joining ALIPAC's E-Mail Alerts network (CLICK HERE)
-
06-02-2025, 04:48 AM #9752Senior Member
- Join Date
- Aug 2018
- Posts
- 87,885
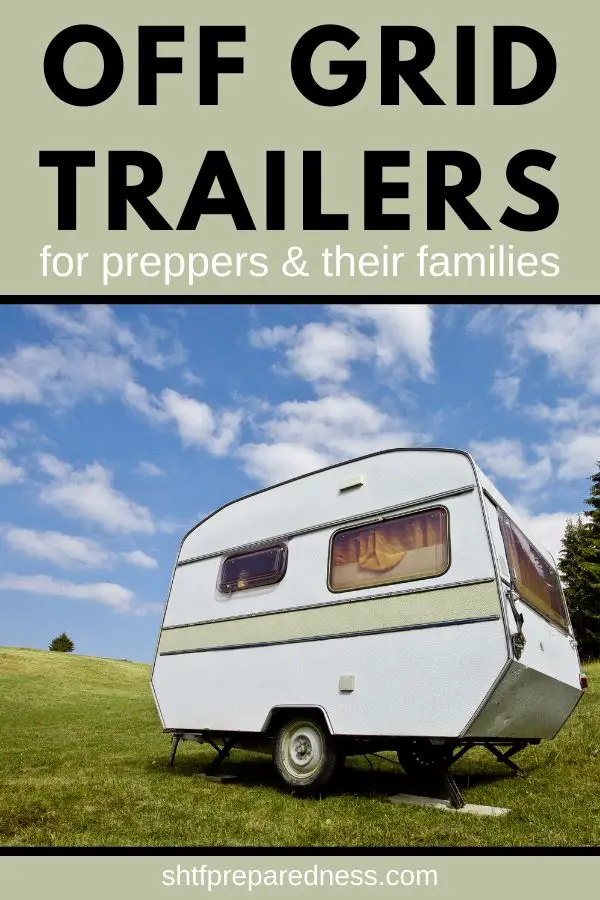
Off Grid Trailers For Preppers And Their Families
Jump To:
Self-sufficient, off-grid housing is a goal for any prepper. Just imagine if it was mobile as well!
With things becoming more unpredictable every day, preppers are getting geared up for when SHTF. Off grid trailers make it easy to hit the road when the time comes.
Learn About Living Off Grid
Here are a couple of my favorite books about living off grid to help you prepare well for such a time.
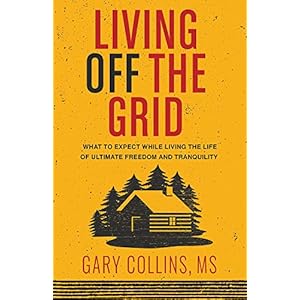
Living Off the Grid: What to Expect While Living the Life of Ultimate Freedom and Tranquility
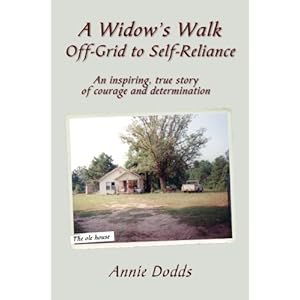
A Widows Walk Off-Grid to Self-Reliance: An inspiring, true story of Courage and Determination
Off Grid Trailers For Survival
It's important to be prepared in case of emergencies. Having an off grid trailer ready to go might save you and your loved ones.
CREATE PINTEREST PIN

PHOTO CREDIT: newatlas.com
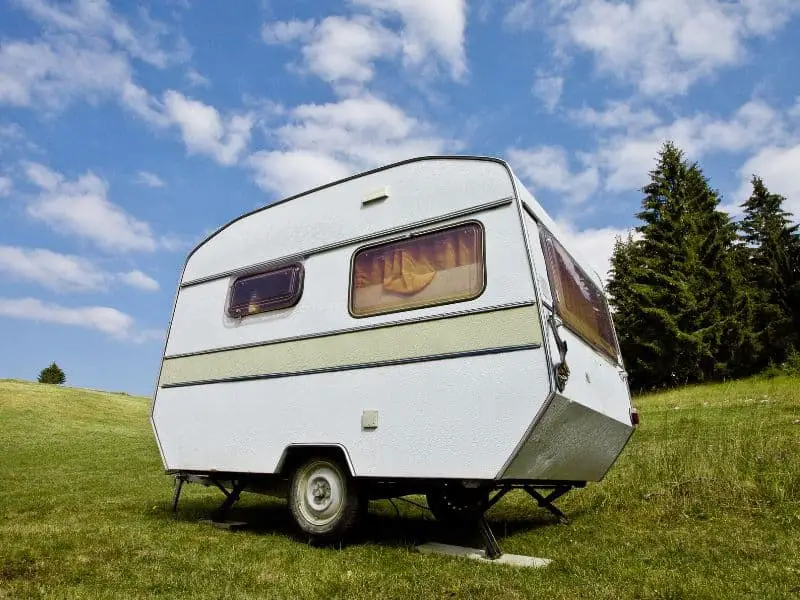
Turtleback Trailer Feeds, Cleans and Shelters You Off Grid
If you have no bug out location or shelter, this turtleback trailer feeds, cleans and shelters you off grid with no problem.
I will start out by saying I never really even considered a trailer like this to bug out with. But the more I look at them and the more I read up on them, the more I am liking them. These trailers are smaller than a caravan, lighter, and easily hidden if you have to.
There is plenty of storage and a few areas you could install solar panels and have a great source of electricity to power your gadgets and cell phones. I would absolutely love to own one of these turtleback trailers.
I really like that the tent is on the top of the trailer, this will keep all the spiders and nasty things away and get you off the cold damp floor. This trailer is a tad expensive, but when you factor in the weight and the convenience of the size over a few years camping and usage, the money would be all worth it. Check out more photos and get more info below 🙂
CREATE PINTEREST PIN
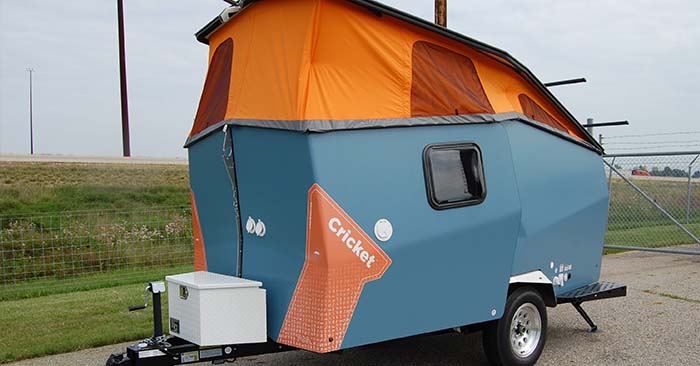
PHOTO CREDIT: taxaoutdoors.com
The Cricket Trailer: RV with Low Costs to Combat High Gas Prices
The Cricket Trailer is a great option for a camping or bug out trailer. Low cost, lots of usable space. This trailer will quite literally rock your world.
If you camp a lot and looking to step up in the world and start glamping, or you are looking for a camper for a bug out shelter, I honestly think this could be for you. The cricket pop up camper is designed by an ex NASA engineer and has some really cool features that will make bugging out or camping that more comfortable.
Standard Features for The Cricket Travel TrailerThe Cricket can sleep two adults but you can also add a sleeping loft for kids. It has a number of configurations for different situations like:
Folding couch
Separate beds
Combined bed
Rotating table
Kitchen counter
Stainless steel sink
Clean and grey water storage
12-volt electrical system
This trailer is lightweight and on the cricket website, they say even a standard-sized car will pull this with ease, making this a fuel saver.
Check out all the specs, photos and videos of the cricket trailer and see if this is something you could have as your next RV / tent substitute.
CREATE PINTEREST PIN
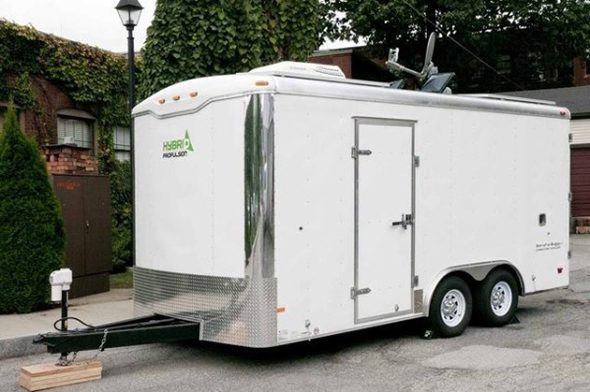
PHOTO CREDIT: thetinylife.com
Cargo Trailers Take Off Grid Off the Radar
There are plenty of mobile homes and RVs on the market, but they sure are expensive gas guzzlers. Luckily, there are options for the adventurous builder like Bill Southworth of Hybrid Propulsion.
In an article on The Tiny Life, we get to see how Bill created the ideal off-grid, road-ready home, out of an 80 sq. ft. cargo trailer.
For energy, the trailer relies on solar and battery power for extended stays off the grid. To make the most use of the units limited space, Bill created interchangeable spaces that allow for bunking, dining, and relaxation for up to four people.
CREATE PINTEREST PIN
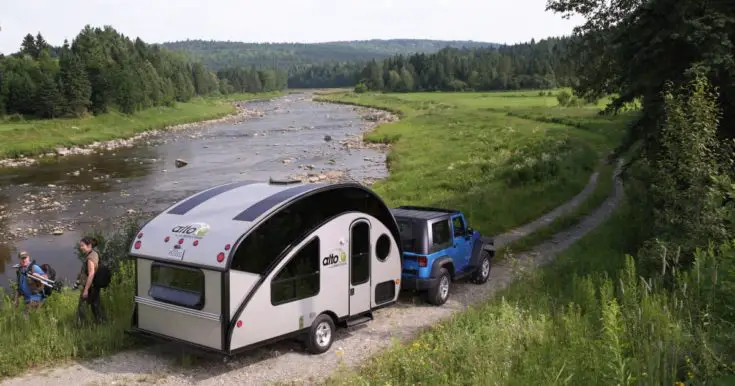
PHOTO CREDIT: newatlas.com
Compact Teardrop Trailer Transforms into a Large Family Off Grid Camper
Teardrop trailers are an American classic camper. They are aerodynamic shaped to give you the most economical travel possible.
The only issue with older teardrop campers is they are very limited when it comes to room.
Canadian company Safari Condo has resigned the classic teardrop and without losing the classic look while towing. You get so much more room than you used to get.
These teardrop campers can hold three to four people comfortably.
The campers are not cheap tho. You are looking at a starting price of around 20k. You have to see this teardrop transform into a pretty decent modern camper in seconds in the link below
CREATE PINTEREST PIN

PHOTO CREDIT: newatlas.com
Camping Trailers Keep You Cozy Off the Grid
I love camping trailers. I especially love this off grid trailer from ADAK because it is just pure awesomeness rolled up in one of the best trailers I have ever seen.
Check out more photos and a few videos in the link below... This is obviously not cheap so be warned. If I had all the money in the world, this would be top on my purchase list.
CREATE PINTEREST PIN

PHOTO CREDIT: newatlas.com
Rugged, Alaska-ready Titan Crew Cab Off Grid Trailers
Nissan has surprised me by bringing out what I think is the best off-road truck on the road.
The military-styled Project Titan truck looks the part and has all the bells and whistles you would need to get out of dodge and with the added bonus of a camper too.
The camper also sports the same wheels and wrap as the truck, it can sleep 2 people comfortably and had room for all your camping/bug out needs. Check it out in the link below.
CREATE PINTEREST PIN

PHOTO CREDIT: newatlas.com
Sealander Amphibious Off Grid Trailers
Not surprisingly, Sealander isn't built for a trans-Atlantic crossing - as a boat, it's designed with very little draft allowing it to be navigated on shallow waters and launched from just a small patch of clear shoreline. This could be a great little bug out trailer and if you have to get away via a river or stream this may be perfect.
Sealander's shell is made of fiberglass reinforced plastic with a double bottom to prevent sinking in case of a leakage.
Power is via a 5 hp electric motor which doubles as a source of energy for on-board devices. See more photos and get more info on their website.
Hopefully, seeing all of these off grid trailers helped inspire you to take action and get one for your family.You might not be able to get one of the fancy ones, but youll know what you want to add to the one you can afford. Stay safe!
2.0KSHARES
By Author SHTFPreparedness
Posted on Last updated: June 28, 2024
Categories Prepping
Search for:
Easy Cellar eBook Guide!
Convert your old root cellar into the backyard bunker!
Click Here To Learn How
© SHTF Preparedness 2025
terms of use | privacy policy | dmca policy
2.0KSHARES
- 242
- 1.7K
Off Grid Trailers For Preppers And Their FamiliesIf you're gonna fight, fight like you're the third monkey on the ramp to Noah's Ark... and brother its starting to rain. Join our efforts to Secure America's Borders and End Illegal Immigration by Joining ALIPAC's E-Mail Alerts network (CLICK HERE)
-
06-02-2025, 05:04 AM #9753Senior Member
- Join Date
- Aug 2018
- Posts
- 87,885
SHTF & Prepping Central
DIY All in One Portable Solar Power Unit: 220V + 12V + 5V + Automatic Battery Charge!
Simple DIY Solar Powered Projects For Preppers
Jump To:
Solar power is getting big these days. It can be pretty expensive, but if you like making stuff yourself, the solar-powered projects below could help you get off the grid quicker than you can say electricity.
Spend a little on materials (nowhere near as much as the solar companies charge), and you could be saving money and living more self-reliant in no time.
All of these simple DIY projects are easy and cheap to build. Most will only take you a few hours, and some will take just a day or two. Why not take advantage of the free energy beaming down on us?
Interesting Books About Solar-Powered Projects
Reading a book or two about DIY solar-powered projects might help you get your mind around how solar power works and spark some unique ideas.

Your Smart Guide to Solar Powered Home and Business

Do-It-Yourself Projects to Make Anything Better

Everything you need to know about going solar
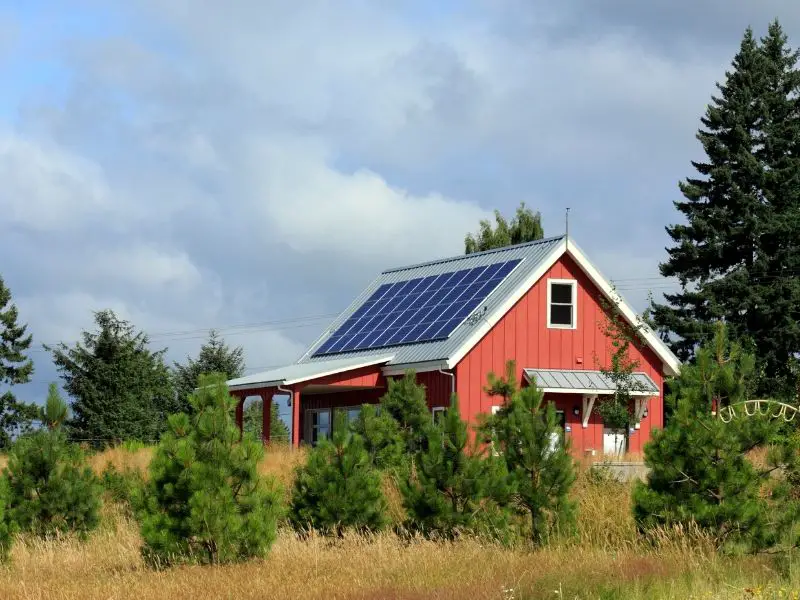
Simple DIY Solar Powered Projects For Preppers
Electricity is a vital part of living today. If you want to be prepared, you need to learn how to survive without it, and these DIY projects for solar powered gadgets will come in handy.
Create Pinterest Pin
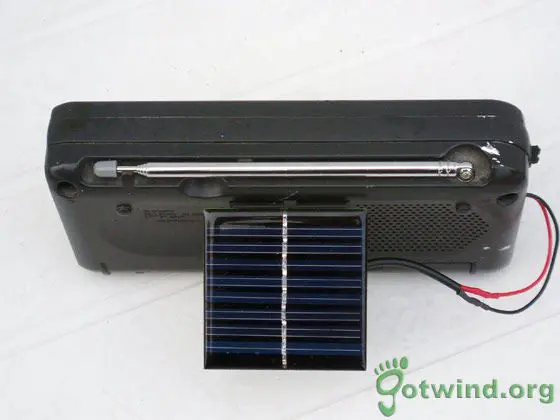
Photo Credit: www.instructables.com
DIY Solar Powered Radio for $5
There are many practical uses for solar power energy that is portable, particularly when SHTF.
Building a DIY solar powered radio is not difficult, and its an extremely useful item to have on hand in the event of a disaster. And no batteries required!
You can buy a new solar radio from Amazon for around $20, which is pretty affordable. But if you like to tinker, have an old radio lying around and you are particularly frugal, this is the DIY project for you.
You could theoretically make the solar powered radio for free if you have the aforementioned radio, and are able to find a discarded solar light.
People toss their faulty solar lights frequently without realizing that its likely the factory battery has died, but the panel still works just fine.
Check out this how to and build one for yourself!
Create Pinterest Pin
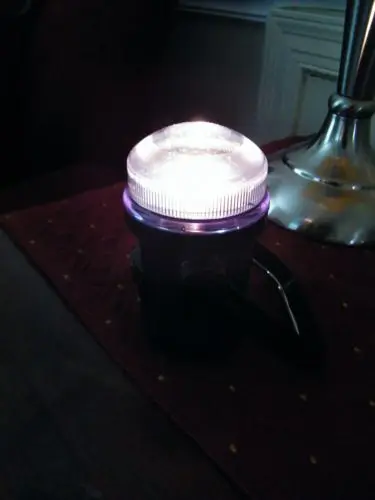
Photo Credit: herbanlifestyle.wordpress.com
How to Make a Solar-Powered Battery Charger
When a big storm (or other natural disasters) blew through my area leaving us without power for days. I was incredibly grateful to have a hand-crank/solar-powered radio.
It kept my family abreast of the news and provided some musical entertainment. It also inspired me to figure out how to make some solar appliances for future power outages.
I heard stories on the radio of people buying up batteries, and it occurred to me that I would prefer not to have to rely on them.
See how to make your own relatively cheap solar battery charger below:
Create Pinterest Pin
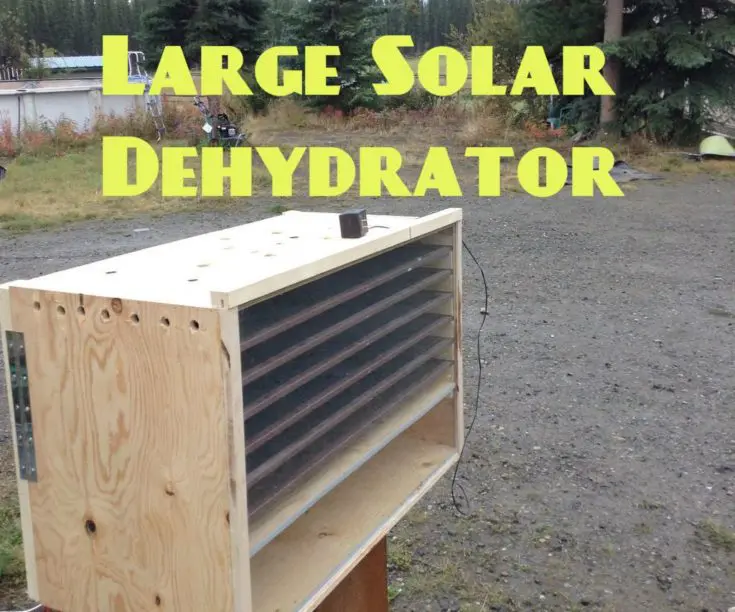
Photo Credit: www.instructables.com
Solar Heated Large Scale Dehydrator
If youre living off the grid or homesteading, you probably already know how challenging it can be to come up with food stores. Preserving food is always an option, but can be time-consuming and labor-intensive, especially if youre off the grid. Luckily, Instructables has a tutorial on how to construct a solar powered dehydrator to solve this very problem.
On top of being energy efficient, this dehydrator is economical because it can be constructed using mostly recycled materials.
It might take a bit of time and resourceful thinking to find the materials. But if you are persistent, you can build this dehydrator for next to nothing. The design does call for a recycled computer fan, which can be easily powered even if youre off the grid.
Big batches of fruit, veggies, and even meals like chili can be easily dried and saved for winter months or camping trips in this dehydrator.
Create Pinterest Pin

Photo Credit: www.youtube.com
Free power- How to convert an old washing machine into a water powered generator
This generator can be a powerful back up to your solar or wind turbine generators. It could even work with a small volume of water if a dam is built.
Here is a great step by step guide showing how to convert a smart drive washing machine into a pelton wheel dc generator making 780 watts enough power to live off the grid. All you need is a head of water.
Create Pinterest Pin
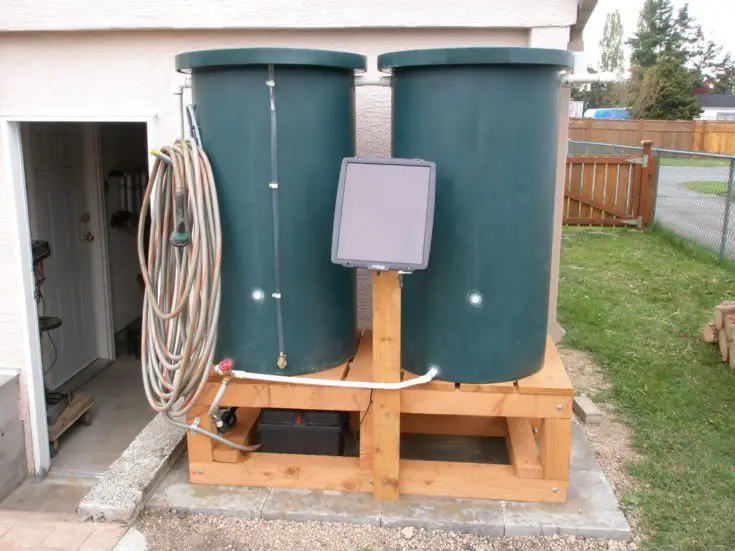
Photo Credit: www.instructables.com
Green Solar Powered Water Barrel
You can buy these from Amazon but why buy one when you can make one ?? This project is pretty easy and a lot of the time more powerful than the store brought ones.
If you have any rain barrels you should consider this project as you can take advantage of all that water and save money on using tap water for your garden.
If SHTF you can rest assured that you still have power to pump out valuable water from your water barrels to irrigate your survival garden. With this pump, you can get a lot more water further away from your barrel. This is Ideal if you want to extend your garden.
Create Pinterest Pin
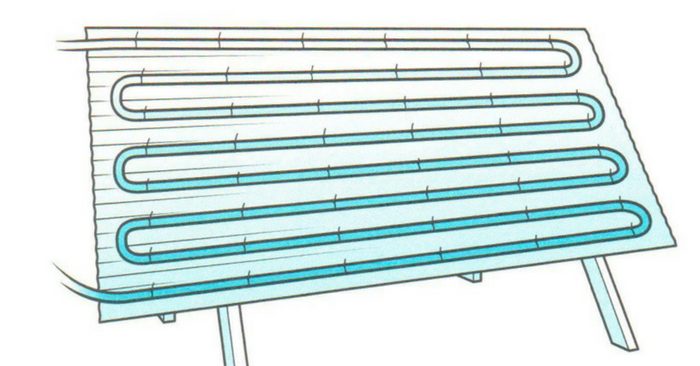
Photo Credit: www.thereadystore.com
Build a Solar Powered Water Heater
If the power goes out there is very little chance that you can produce enough hot water to fill your needs through wood fire alone. There are many methods of warming water with no power.
The easiest and most simple is to just spray paint a 5-gallon water bottle with black paint and leave it in the sun until you get the correct temp but this method is not always the most efficient.
I think this is a great way to save money and if you want to live off the grid this could save you a lot of energy by letting the sun do all of the work.
Create Pinterest Pin
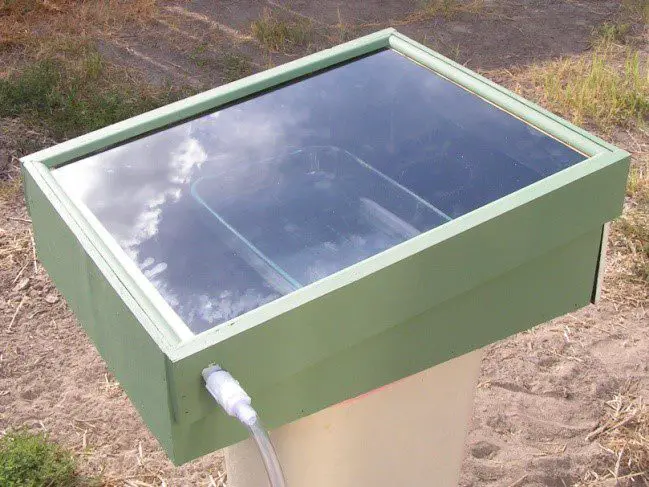
Photo Credit: www.offthegridnews.com
How To Build A Solar-Powered Still To Purify Drinking Water
This is a great project to purify any water to get drinking water. It uses no electricity or man-made heat, just the power of the sun. These stills even work in winter.
This project from offthegridnews.com shows you how to build one. After reading the full article, I would highly recommend reading the comments at the end of the page. They gave me more info on how to adapt and make this work even better.
Solar stills have been used for hundreds of years, obviously not like this still but using simple clear plastic and stones. This still will have you hydrated and feeling good about having a way to purify water in a SHTF situation.
Create Pinterest Pin
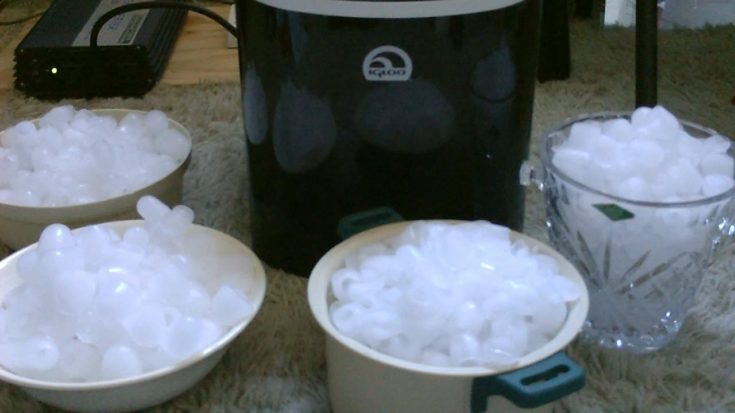
Photo Credit: www.youtube.com
DIY Solar Ice Maker
In the event of a power outage wouldnt it be great to relax and stay cool, knowing you have other options? I found a great YouTube video that shows us a simple solar-powered ice maker setup that will let you keep food and drinks chilled with ice, even without power from the grid!
This solar powered system is fast, easy to set up and reliable. Once you have your ice maker running, youll have a way to stay self-sufficient and save all that money you normally spend for your inefficient freezer to make ice. Grid power isnt getting any cheaper!
Create Pinterest Pin
Photo Credit: www.homesciencetools.com
How To Make a Solar Oven
Have you ever thought about what you would do if you found yourself without electricity indefinitely? Specifically, have you thought about how you would cook and/or heat food?
With no electricity, conventional ovens and stoves would be out of the question. Unless you owned a portable propane-powered stove, there would be no way to cook meals. Technically, you could always build a fire and cook that way, but that requires a lot of work and some knowledge of how to do it.
One option that I recommend is learning how to build a solar oven. The method that youre going to learn about today will teach you how to build a solar oven using a pizza box.
What are the benefits of doing this?
Well, the sun is an example of a renewable resource. Each day when it comes up, we can use the suns energy to power various things (hence why solar panels are so popular).
With a solar oven, youll essentially use the suns energy to cook your food. Pretty simple concept, wouldnt you agree?
Another thing thats great about this method is that you can build it pretty much free since most of the required tools are already most likely in your home.
How hot will a DIY solar oven get? It depends. If you live in a really hot area, like Arizona or Nevada, it might exceed 200-degrees Fahrenheit. On average, though, expect yours to hover between 125- and 185-degrees Fahrenheit depending on the conditions.
With a homemade solar oven, you will be able to cook things like hot dogs, rice, heat soups, and if it gets hot enough, even bake cookies! At the very least, its a fun project to do with the kids on a Saturday afternoon. To learn how to do it, click on the link below.
(4525) How to Turn a Pizza Box into a Solar Oven - YouTube

6.2Kshares
By Author SHTFPreparedness
Posted on Last updated: June 3, 2024
Categories DIY
Simple DIY Solar Powered Projects For PreppersIf you're gonna fight, fight like you're the third monkey on the ramp to Noah's Ark... and brother its starting to rain. Join our efforts to Secure America's Borders and End Illegal Immigration by Joining ALIPAC's E-Mail Alerts network (CLICK HERE)
-
06-02-2025, 07:34 PM #9754Senior Member
- Join Date
- Aug 2018
- Posts
- 87,885
Projects from Make: Magazine
Remote Tripwire Alarm
- Time Required: 38 Hours
- Difficulty: Moderate
- Print this Project
By Jason Poel Smith
September 9th, 2013
A tripwire is one of the most basic ways to set up a simple security system. You run a line across a pathway. Then when someone walks through the line, it activates an alarm. This kind of system is easy to set up and is fairly effective. But there is always room for improvement.
The most inconvenient thing about a classic tripwire alarm is that it requires you to run a physical line from the tripwire to the alarm. This makes it difficult to set up a system where the alarm is far away or inside a building. To get around this problem, I designed a simple remote alarm system that uses a small radio transmitter to activate the alarm wirelessly. So in this project, I am going to show you how to make a simple remote tripwire alarm.
Project Steps
Select a Wireless Transmitter/RecieverAdd Wires to the Switch on the TransmitterCreate a Switch That Will be Activated By the TripwireSetup the TripwireHow the Alarm WorksOptional: Change How the Receiver Alerts YouOptional: Setup Multiple Tripwires and Transmitters
Select a Wireless Transmitter/Reciever
Next


The first thing that you need to do is select a small transmitter to activate the alarm. Just about any radio transmitter can work. I decided to use a wireless doorbell because it was small, battery powered and it is easy to program them so that multiple transmitters can activate one receiver. Some other examples of transmitters that can also work are things like walkie ralkies or garage door openers.
Add Wires to the Switch on the Transmitter
NextPrevious


The only modification that you need to make to the transmitter is to solder some extension wires to the button terminals so that it can be activated by an external switch. In most cases you will need to remove the circuit board from the housing in order to access the button terminals.
Take two small piece of wire (at least three inches long) and strip the insulation off both ends. Then solder one wire to each side of the button. If your button has four terminals, you need to solder the wires to two terminals that are not connected when the button is not being pressed. You should use a multimeter to check which terminals are normally connected and which ones arent.
Create a Switch That Will be Activated By the Tripwire
NextPrevious


In order to activate the transmitter you need an electrical switch that will react to the tripwire being pulled. I decided to make a spring loaded switch from a clothespin and a couple of machine screws.
Start by disassembling the clothespin. Then drill a hole in the end of both wood pieces that is the same diameter as your machine screws. Insert the machine screws through each hole with the head of the screws on the inside of the clothespin. Tighten a nut on the back side of each wood piece to secure it in place. Then add a second nut onto each screw. This will be used to attach the wires from the transmitter. You may also want to drill a small hole in the opposite end of each piece to attach a line when hanging the tripwire. Once you are done modifying both wood pieces, reassemble the clothespin.
Now you need to attach the wires from the transmitter to the clothespin switch. To do this, take the free end of the the wires, and wrap them around the machine screws between the two nuts. Then tighten the outer nuts onto the wire to hold them in place. Now whenever the clothespin switch is closed, it will activate the transmitter.
Setup the Tripwire
NextPrevious


First decide where you want to place the trip wire. Look for a location where traffic is restricted to a narrow path such as a hallway if you are indoors or an opening in thick vegetation if you are outside. Also look for areas where you can easily mount the line on both sides. You want the tripwire to be about one foot off the ground.
First cut of a short piece of line that will support the transmitter. Tie one end to the hole on the back of the clothespin. Then tie the other end to some fixture that is near the pathway.
Cut a second piece of line that is long enough to go across the pathway. Add a little extra length for any knots that you need to make to secure it in place. Tie one end to something on the opposite side of the path from the first piece. Then take the free end over to the clothespin.
You can connect the two pieces by putting the free end of the fishing line between the screws on the clothespin. If the fishing line is too thin to keep the screws separated, then you can add a small piece of plastic onto the end of the line.
How the Alarm Works
NextPrevious


Once your tripwire is in place, your alarm is ready to use. When someone crosses the tripwire, it will pull the line out from between the screws of the clothespin switch. This will connect the terminals of the button on the transmitter and it will send a signal to the receiver. The receiver will then play its tone to alert you that there is an intruder.
Keep in mind that your doorbell has a limited range. You dont want to have the receiver too far away and miss the intruder. You should always test each tripwire with the receiver in its intended location.
Optional: Change How the Receiver Alerts You
NextPrevious


The receiver will normally play its standard ringtone as the alarm. If you would prefer to have a different notification, there are several ways that you can change it.
One option is to simply change the ringtone. You can check out this project where I use a small recording module to make custom ringtone for a doorbell. There is also the option of simply purchasing a wireless doorbell that lets you upload your own MP3s to use as ringtones.
If you want to be more stealthy, you could also have the receiver alert you by turning on a light instead of using sound. The easiest way to do this is to just replace the speaker with an LED. Start by marking each wire to keep track of which one was connected to the positive/negative terminals of the speaker. Then cut the speaker wires at the speaker terminals and remove the speaker from the housing. Now all you have to do is connect the speaker wires to an LED and a series resistor. To find the value of the resistor that you need, do the following. Subtract the LEDs operating voltage from the voltage of the receivers battery pack. Then take the result and divide it by the operating current of the LED. (example: (4.5V-3.0V)/0.020A=75ohm resistor) When connecting the LED and resistor to the speaker wires, be sure to match the polarity of the LED. The longer lead of the LED needs to be connected to the positive speaker wire.
Optional: Setup Multiple Tripwires and Transmitters
Previous


Most wireless doorbells have an array of pins and jumpers that lets you set the frequency or security code for the doorbell. This lets you change the settings if you are getting interference from your neighbors. This also lets you have multiple transmitters or multiple receivers for your house. You can use this feature to setup multiple tripwires.
If you want each tripwire to set off a different alarm, then you need to make sure that each transmitter and receiver pair is set to a different frequency. This kind of system will tell you specifically which tripwire has been set off.
If you want to have multiple tripwires all set off a single master alarm, then you need to make sure that all the transmitter/receiver pairs are all set to the same frequency. This kind of system has the advantage of being easier to monitor. You can have a single receiver that you carry around with you. Or you can have multiple receivers in several places throughout your secret base so that you will always hear one when it goes off.
From the Shed: New Arrivals

Oxocard Pixelmatrix Cartridge

Make: Oxocard Innovator Kit

Oxocard Synthesizer Cartridge

Get Make: Magazine
TaggeddoorbellhackMFsecuritysecurity systemtripwire
Jason Poel Smith
My name is Jason Poel Smith. I have an undergraduate degree in Engineering that is 50% Mechanical Engineering and 50% Electrical Engineering. I have worked in a variety of industries from hydraulic aerial lifts to aircraft tooling. I currently spend most of my time chasing around my new baby. In my spare time I make the how-to series "DIY Hacks and How Tos."
Remote Tripwire Alarm - Make:
If you're gonna fight, fight like you're the third monkey on the ramp to Noah's Ark... and brother its starting to rain. Join our efforts to Secure America's Borders and End Illegal Immigration by Joining ALIPAC's E-Mail Alerts network (CLICK HERE)
-
06-02-2025, 09:10 PM #9755Senior Member
- Join Date
- Aug 2018
- Posts
- 87,885
Micro-housing surges in U.S. cities as housing crisis deepens
06/02/2025 // Laura Harris // 730 Views
Tags: Bubble, Collapse, compact living, economic riot, economics, economy, finance, finance riot, financial crash, housing, housing bomb, housing supply, market crash, micro-housing, money supply, mortgage rates, mortgages
- Micro-units (under 441 sq. ft.) now make up 2.4 percent of new U.S. rentals double the share from the early 2000s driven by affordability and urban density needs.
- West Coast cities like San Francisco (15 percent micro-units) and Seattle (66 percent of new rentals) lead the trend, while Honolulu (27 percent) and Minneapolis (10.4 percent) also embrace tiny units due to land constraints and demand.
- Micro-housing offers steep rent discounts (e.g., Newark: 50 percent cheaper) but raises concerns about cramped living, reduced amenities (e.g., shared kitchens) and potential health/social risks (e.g., claustrophobia, domestic strife).
- Zoning laws (minimum unit sizes, parking mandates) and public stigma hinder micro-housing development, despite its potential as a dignified solution for budget-conscious residents.
- Architects stress the need for compact yet livable spaces with shared amenities (e.g., kitchens, lounges), requiring careful management and resident cooperation to maintain functionality.
The American dream of spacious suburban living is shrinking as micro-housing construction surged by double digits in recent years.
A new report conducted by StorageCafe, an online platform offering nationwide listings for storage units, reveals that 2.4 percent of new rental units built in the 2020s measure under 441 square feet more than double the share seen in the early 2000s. Micro-housing, once a niche solution for factory workers and transient populations, has evolved into a mainstream option for young professionals, downsizing retirees and budget-conscious renters. (Related: Housing costs soar by 5.2% due to rising mortgage rates and low housing supply.)
The West Coast is now into micro-housing, with 15 percent of units in San Francisco under 441 sq. ft. and nearly 30 percent of new developments falling into that category. Seattle follows closely, with 12 percent micro-units and 66 percent of upcoming rentals designed as compact spaces. Honolulu, constrained by limited land, has seen 27 percent of new rentals built as micro-units in the 2020s.
In the Midwest, Minneapolis leads with 10.4 percent micro-housing and projections suggest 20 percent of future rentals will be undersized. Chicago and Cleveland are also embracing tiny units to attract young professionals and maintain affordability in revitalized downtowns.
The Northeast has long relied on micro-housing due to high density and costs. New York City, Philadelphia and Newark feature prominently, with Newark offering the steepest discount micro-units rent for 50 percent less than conventional apartments though new construction remains scarce.
Micro-apartments are no longer just a trend they're a necessity. Whether driven by affordability, sustainability or convenience, compact living is redefining American cities, one tiny unit at a time.
The double-edged sword of micro-housing
However, critics argue that while these compact units offer affordability and density, they also have unintended consequences.
For instance, Brad Hargreaves, founder and editor-in-chief at Thesis Driven, argued that while "micro-housing can and should be a part of the housing market," regulatory barriers often prevent their widespread adoption.
"Regulatory constraints put limits on how affordable they can really be. SRO-style units with shared kitchens are even harder to build, but in many micro-units, the legally required kitchen and appliances which often get very limited use by micro-apartment residents take up a huge percentage of the unit and drive up construction costs," Hargreaves said.
David Neiman, partner at Neiman Taber Architects, echoed a similar stance in a separate statement.
"The biggest challenges are often regulatory. Many zoning codes still assume that 'bigger is better' and impose minimum unit sizes, maximum occupancy limits or onerous parking requirements that make micro-housing infeasible. There can also be public resistance people often associate small units with transience or decline, when in fact micro-housing can be a thoughtful, dignified solution for people who simply need a smaller footprint and a lower rent.
For a designer, the challenge is creating spaces that are compact but still feel livable, with good daylight, sound separation and access to generous shared amenities that supplement the private units. From an operations perspective, there are a lot of common areas to manage and maintain. Keeping common kitchens clean and stocked and in good working order is a challenge for management and requires good citizenship from the residents," Neiman said.
Visit Collapse.news to read more stories related to America's collapsing housing market.
Watch this episode of "Flyover Conservatives" as host Colton Whited interviews financial expert Kirk Elliot about the exploding mortgage rates in the United States.
This video is from the Flyover Conservatives channel on Brighteon.com.
More related stories:
Mortgage rates surge to 20-year high, causing massive drop in home sales.
BAD NEWS for home buyers: U.S. house mortgage rates SKYROCKET to HIGHEST level in two decades.
Interest rate for 30-year fixed mortgage rises to 8.45% the highest it has been since 2000.
Sources include:
YourNews.com
StorageCafe.com
Brighteon.com
Micro-housing surges in U.S. cities as housing crisis deepens NaturalNews.com
If you're gonna fight, fight like you're the third monkey on the ramp to Noah's Ark... and brother its starting to rain. Join our efforts to Secure America's Borders and End Illegal Immigration by Joining ALIPAC's E-Mail Alerts network (CLICK HERE)
-
06-03-2025, 12:48 AM #9756Senior Member
- Join Date
- Aug 2018
- Posts
- 87,885
If you're gonna fight, fight like you're the third monkey on the ramp to Noah's Ark... and brother its starting to rain. Join our efforts to Secure America's Borders and End Illegal Immigration by Joining ALIPAC's E-Mail Alerts network (CLICK HERE)
-
06-03-2025, 12:55 AM #9757Senior Member
- Join Date
- Aug 2018
- Posts
- 87,885

- Homesteading
- Gardening
- Canning
- Chickens
- Recipes
- Food Storage
- Health
- Emergency Preparedness
- Natural Remedies
Make Hurricane Shutters for Windows DIY Project
Home
DIY Projects
Make Hurricane Shutters for Windows DIY Project

Paige Raymond
September 18, 2018
DIY Projects
diy,Glass,hurricane,hurricanes,project,Shutters,storm shutters,tips,tornado,tornadoes,wind,windows,windy,wood
How to Make Hurricane Shutters for Windows DIY Project are actually inexpensive and simple to make to add a layer of protection to your homestead home. It does take some effort and forethought.
Most homesteaders feel responsible to try to protect their family members as much as possible.
Nice tutorial and video on making your own hurricane shutters. If you live in an area that is prone to hurricanes these diy shutters could save your windows and interiors. I think these could even come in handy in areas that get a lot of tornadoes and hurricanes.
Materials:
5/8 inch plywood
4 inch (or longer) barrel bolts
Instructions: …. at least the 1st step.
Measure your window and cut the plywood to a dimension about 1/2 inch smaller. For example, if your window is 30 inches wide and 50 inches tall, your plywood should be cut to 29.5 inches wide and 49.5 inches tall.
They style is nice because they fit inside the window frame and so would be less likely to be torn off by the wind. Mikes Review walks you through how to make your own hurricane shutters and even has a video to make it easier to see how its done.
Make Hurricane Shutters for Windows DIY Project - The Homestead Survival
If you're gonna fight, fight like you're the third monkey on the ramp to Noah's Ark... and brother its starting to rain. Join our efforts to Secure America's Borders and End Illegal Immigration by Joining ALIPAC's E-Mail Alerts network (CLICK HERE)
-
06-03-2025, 01:22 AM #9758Senior Member
- Join Date
- Aug 2018
- Posts
- 87,885
7 Vegetables You Can Buy Once and Regrow Forever
- Home
- Vegetable & Fruit
- 7 Vegetables You Can Buy Once and Regrow Forever

Bryan Thomas
May 19, 2025
Vegetable & Fruit
No Commentson 7 Vegetables You Can Buy Once and Regrow Forever
Save money, reduce waste, and keep fresh food on hand year-round.
One of the most rewarding parts of homesteading or self-reliant living is learning how to stretch what you haveespecially when it comes to food. Did you know that some of the most common
vegetables can regrow themselves with just a bit of water, light, and care?
Whether youre working with a backyard garden or just a sunny windowsill, these 7 vegetables can be grown from kitchen scraps, helping you create a sustainable source of fresh food with almost no cost.
1. 🧅 Green Onions
The easiest vegetable to regrow in a jar of water.
Green onions are practically foolproof. After using the green tops in your recipes, save the white bulbs with roots attached.
How to regrow:
- Place the root ends upright in a glass of water.
- Set on a sunny windowsill.
- Change the water every 23 days.
🌿 Youll see green shoots within a few daysand theyre ready to snip and eat within a week!
2. 🥬 Romaine Lettuce
Dont toss that coreregrow fresh salad leaves instead.
The dense base of a romaine head still holds life, even after youve used the outer leaves.
How to regrow:
- Cut the base (23 inches from the bottom).
- Place it in a shallow dish with ½ inch of water.
- Put it near sunlight and mist the top occasionally.
🥗 In 710 days, new leaves will start to emerge. You can harvest baby greens, or replant in soil for full heads.
3. 🌿 Celery
Another easy windowsill regrower that gives you crunchy stalks and fresh leaves.
Celery follows the same principle as romaine, growing from its bottom stump.
How to regrow:
- Slice 2 inches from the base.
- Place in a shallow bowl with water (cut side up).
- Put in a sunny spot and change water every other day.
🌞 New stalks and leafy growth will emerge in about a week. For longer growth, transfer to soil once roots appear.
4. 🧄 Garlic
Plant a clove, get a bulbor use the greens like scallions.
You can regrow garlic for full bulbs (takes several months) or harvest the green shoots for a mild garlic flavor.
How to regrow:
- Take a large garlic clove (pointed end up) and plant it in moist soil.
- Place in sunlight and water lightly.
- Shoots appear in days; bulbs mature in a few months.
🧪 Dont toss sprouted garlicits perfect for replanting and reproducing.
5. 🧄 Leeks
Regrow this allium just like green onionsfor soup bases and stir-fries.
Leeks are another veggie that loves water propagation.
How to regrow:
- Save the bottom 2 inches of your leek (with roots).
- Set it upright in a glass with just enough water to cover the roots.
- Place in a sunny window and change the water every few days.
🌱 Harvest the new green growth when its a few inches tall. Repeat as needed.
6. 🌿 Basil
Propagate an endless basil patch with just one stem.
Fresh basil doesnt need seeds to grow again. It can root quickly in water and thrive in soil.
How to regrow:
- Take a healthy 4-inch basil stem and strip the lower leaves.
- Place in a jar with water and leave in sunlight.
- In 710 days, roots will sprout.
🌿 Once rooted, transplant to soil and enjoy continuous harvests all summer long.
7. 🥔 Potatoes
Turn your old sprouting potatoes into a new harvest.
Those eyes growing on a potato? Theyre ready to become a new plant.
How to regrow:
- Cut the potato into chunks, making sure each piece has at least one eye.
- Let cut pieces dry for a day to avoid rotting.
- Plant in deep soil or a container with room to spread.
🥔 With sunlight, water, and time, each chunk will produce a brand new potato plant.
Why Regrow Vegetables?
🧺 Save Money
These methods turn food scraps into new producecutting down your grocery bill and waste.
🥕 Grow Anywhere
You dont need a garden. A sunny windowsill and a few mason jars are often all you need to get started.
🌎 Build Self-Reliance
In uncertain times or emergencies, knowing how to regrow your own food gives you a powerful survival advantage.🧤 Plus, its funand a great way to teach kids about gardening and sustainability.
Final Thoughts
You dont have to be a master gardener to start regrowing your own
vegetables. With just a bit of water, patience, and light, these 7 foods will keep on giving. Start with
green onions or basil, and soon youll have a mini indoor garden that feeds your familyagain and again.
🌱 Want more practical homesteading tips like this? Browse our gardening section or sign up for our free newsletter!
7 Vegetables You Can Buy Once and Regrow Forever - The Homestead SurvivalIf you're gonna fight, fight like you're the third monkey on the ramp to Noah's Ark... and brother its starting to rain. Join our efforts to Secure America's Borders and End Illegal Immigration by Joining ALIPAC's E-Mail Alerts network (CLICK HERE)
-
06-03-2025, 02:33 AM #9759Senior Member
- Join Date
- Aug 2018
- Posts
- 87,885
Gypsy Wagon Building
By PaleoPunk in OutsideCamping
354,953
1,627
62Featured
Save PDF
Introduction: Gypsy Wagon Building


 By PaleoPunkUncommonCateFollow
More by the author:


This wagon was built by a collaboration of Paleotool (author of Building a Gypsy Wagon), myself (PaleoPunk), and our friend, AmericanPikey. The AmericanPikey recently retired and wanted a mobile retirement home. The vardo design presented itself as a good option because it is cheaper than a regular house, no land ownership is required (check local regulations for more details), and it's far more cool than an "off the lot" RV. The vardo is also attractive as a retirement home because utilities cost little to nothing depending on how you live. Towable on the highway, this wagon combines the design of centuries past with mobility and economy required for modern life.
The one we built here is two feet longer than Paleotool's to accommodate an indoor kitchen and more storage. The overall length of the wagon is approximately 10 feet long and is 7 feet wide. The floor on the inside is about 5 feet across with one-foot ledges extending over the wheels.
Step 1: Design Planning

In terms of planning, the basic design sketch from Paleotool's vardo was what we started with. The wagon was made as long and as wide as was possible as was safe on the 10 foot trailer. After estimating the basic lumber quantities, a trip to the big box lumber store was made, wood stacked, and allowed to dry for several weeks. Longer would be better for stability, but the new owner was itching to start.
Step 2: Materials

This wagon began with a new 10ft. by 5ft. flatbed utility trailer costing about $1000 (US). Flat bed trailers, while difficult to find cheap, are much easier start with than another kind of trailer that is being re-purposed. Something like an old cargo trailer requires a lot of work to dismantle and prepare for building. Unlike the average re-purposed trailer, the utility trailer's the floor structure already exists and the metal side rails give a strong base to help support the walls.
Pictured in the trailer is a pile of lumber that, from a "big box" store, cost about $1200 (US) including necessary bolts, washers, nuts, screws, wood glue, etc. In the end, we added another couple hundred dollars of screws to the pile. The total for the basic build ended up at about 2400 US dollars (including the trailer).
Step 3: Preparing the Trailer


 3 More Images
The large dual purpose gate/ramp that came with the utility trailer did not fit with the plans for the final wagon and was removed. An angle-grinder was used grind off the hinges. Looking back, I think it would be an interesting thought to consider integrating the ramp either as a ramp or as some kind of folding porch. It would take considerable planning and engineering, but it is interesting to contemplate for future designs.
Next the tail lights were moved to the rear of the frame so that they would be more visible on the road.
Note; it is important to use thread locker when using nuts and bolts wherever possible so that things don't come loose on the highway.
Jacks are important to stabilize the wagon while at rest. To stay more on budget and keep the design simple, we installed spring loaded mechanical jacks. They are not the most high tech, but they do their job. They are permanently attached (welded) to the underside of the wagon. A locking hinge allows them to folded up under the body during travel.
The tongue jack came with the trailer. It is permanently attached and very sturdy. Because the jack did not come with a foot, it had to propped on a board to spread the weight otherwise it would have sunk into the ground like a cookie cutter through dough. A foot was added later.
Step 4: Basic Box


 9 More Images
The base of the wagon is a box that is about a foot deep and heavily reinforced. This holds up the rest of the structure. This step is made much easier by the style of utility trailer because the trailer came with a steel frame already outlining the box. The steel frame means that additional reinforcement is unneeded for the box.
We began by cutting boards from 1" exterior plywood to the length of the trailer (10 ft). Because we were using 8 ft long plywood we had to piece together the boards, so we ended up using an 8 ft and a 2 ft length for each side. The ledge boards (see the next step) are the same length, so those were cut at the same time (which is why four ten foot lengths are pictured).
These boards become part of the undercarriage, getting a lot of wear and tear on the road. They also have great potential for water damage. To protect them, they were painted with high quality oil paint. We chose black as a nice inconspicuous clean color for undersides.
Holes were drilled through the steel trailer frame and the boards were bolted on paint side out. In the corners of the box, notches had to be cut in the corners of the board to accommodate the steel frame (see pictures). The boards were also glued together at the seams (where the two and eight foot boards met) and in the corners. The corners of the boards were screwed together for extra stability. When building something that will taken on the highway, strength is of the utmost importance.
Step 5: Box Ledges


 6 More Images
Ledges serve to extend the space inside by sticking out from the box by a foot on either side. The wall are then built up from the ledges. The ledges can make the sleeping space wider, extending out over the wheels, keeping the seating, benches, and storage above floor level.
Like the box sides, the outsides of the ledges were painted with black oil paint for protection from the elements. To hold up the ledges while they were being attached, a board was clamped across the top of the box and then the ledge boards were clamped to the temporary support board. The ledges were then screwed to the box.
As I mentioned in the previous step, our boards were not long enough to span the length of the trailer. So to strengthen the box as a whole, we put to two foot sections to the rear in the box part and to the front on the ledges, effectively staggering the joints. The joint in the box was also strengthened by a plywood scab.
Step 6: Braces


Much of the weight of the wagon is supported by the ledges so they must be reinforced. Braces were installed under the ledges for this purpose. The braces were painted black to match the undercarriage. This part doesn't look particularly impressive, but it's really important if you don't want your walls to fall over..
Step 7: Front Wall


 9 More Images
In this style construction, the front and rear walls support most of the structure. Everything depends on them being strong and straight.
Two hardwood battens (vertical supports) were the first step in erecting the front wall. They were screwed into the front wall of the box, and another board was attached horizontally across the top of the box flush against the battens, sandwiching them against the front wall to further stabilize them. The wagon began to gain its recognizable profile as the front wall went up. Tongue and groove pine cut to the width of the trailer makes up the front wall. Each board was screwed onto outsides of both battens.
The front window was created by using pieces cut to the length of the side of the trailer to the battens, making the battens the sides of the window.
The curve at the top was marked with string and a pencil (see pictures for clarification of this section). The string was tacked in the horizontal center and far enough down so that it just reached the maximum height of the wall (see the sketch in the first step). The string was about the same length as the width of wall making the diameter of the circle about twice the width of the wall. A pencil was tied to the other end. Pulled taught the pencil moved in a broad circle. With this contraption the top arc was drawn, and was then cut out with a jig saw.
Step 8: Back Wall


The back wall was built in the exact same way as the front, except that the battens were spaced so that they would be against the sides of the door for stability. The door was off-set from the center to create more workable space beside the door inside. Because of this, a third batten was added on the side with a wider wall for strength. The wall was built as solid wall, and the door was sawed out later with a hand saw.
Step 9: Sides


Side walls were also tongue and groove pine screwed to hardwood battens. There were two battens per side. We also added battens to the corners to which both the sides and ends were screwed. The designer recommended more battens at this stage but a compromise was later reached between weight and strength.
Step 10: Purlins (Roof Supports)


 3 More Images
Purlins work as rafters in in this style building. They are stiff hardwood boards that hold up the roof. Notches in the top edges of the end make the purlins part of the main structure tying the front and rear walls solidly together with glue and screws. They are braced with U shaped pieces around the notches on the inside for added strength.
Step 11: Roof


 3 More Images
The inner layer of roofing is quarter inch bead and cove plywood wrapped across the purlins. A strip of wood with the corner cut to match the curve of the roof was attached to the to top side edges of the walls to support a two inch over hang in the roof. The plywood was screwed into each purlin and the sides. This can be difficult because it's a shot in the dark to screw down through plywood and find the center of each purlin, and if the purlin is missed the screw comes straight down through the ceiling.
After the wood was screwed down, a layer of 30# tarred roofing paper was laid over the entirety. Heavy duty painted sheet metal (special order home style, not the cheaper off-the-shelf variety) was then stretched over the plywood and screwed down into the purlins with neoprene washered roof screws . The metal roof is durable and weather resistant and no maintenance.
Step 12: Living


 3 More ImagesNow, for the personal touches...
The first thing added after the body was completed was a dutch door. A dutch door opens in halves and can be closed on the bottom to keep children, pets, pests, etc. in or out, but the top can be open for light and ventilation at the same time. The body and door both received several coats of varnish to protect them from the elements.
For a nautical feel, portholes were chosen for the windows. The side windows are actual old ship portholes, about 20 inches across. A small matching door porthole was also added. The front window remained a rectangle, and was glassed in with heavy-duty Lexan. In a small space with no electricity, windows are vital for ventilation and light. The trade off for using windows for light and ventilation is very good for most people because in exchange there are no real utility costs and the carbon foot print of the house itself is very small.
The bed is about four feet off the floor, with a storage space underneath divided into an open and closed space. The open space is on top directly under the bed. A trap door in the floor of this open space, which is about a foot off the floor proper, opens into an enclosed space underneath. Benches sit slightly less than a foot off the ledges next to the bed. The space between the bench and the ledge is essentially a box for more storage. The benches also serve as steps up to the bed.
In the front between the bench and the door are shelves on the narrow side, and a stove on the wide side. The stove was purchased from marinestove.com. AmericanPikey set off on his travels before the stove was installed. He has no camera or mobile phone with which send pictures, so I don't have any pictures of the stove installed, but I did include a picture of the stove from marinestove.com. In a small space, a small stove provides plenty of heat. A heat shield was installed behind the stove to prevent a fire in the wooden walls.
The wood stove heats the space well and quickly whenever lit, and since this is not convenient in warmer climates, a small portable 2 burner propane stove is stowed under the bed to be brought out for cooking without heating the house.
After several voyages, the wagon is holding up well. A successful retirement home all around.
Thank you Paleotool for helping edit this 'ible!
Gypsy Wagon Building : 12 Steps (with Pictures) - InstructablesIf you're gonna fight, fight like you're the third monkey on the ramp to Noah's Ark... and brother its starting to rain. Join our efforts to Secure America's Borders and End Illegal Immigration by Joining ALIPAC's E-Mail Alerts network (CLICK HERE)
-
06-03-2025, 03:01 AM #9760Senior Member
- Join Date
- Aug 2018
- Posts
- 87,885
If you're gonna fight, fight like you're the third monkey on the ramp to Noah's Ark... and brother its starting to rain. Join our efforts to Secure America's Borders and End Illegal Immigration by Joining ALIPAC's E-Mail Alerts network (CLICK HERE)


 Reply With Quote


Swalwell threatens to revoke driver's licenses of masked ICE...
01-02-2026, 10:34 PM in General Discussion